Search Results
82 results found with an empty search
- Pullover From Dreams. Пуловер из снов
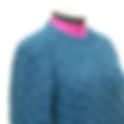
I propose you knit a pullover, the image of which I dreamed. Is it possible to pull a material object out of dreams? It turns out, yes, it is somehow possible. Here, the technique of symmetrical short rows in stripes is used, painting a delicate graphic pattern, and the simple striped Garter Stitch becomes playful. The anatomical dolman sleeve, shoulder darts, bust darts, and a wider front piece at the bust level improves the fit. Both vivid and moderate contrast can be equally successful here – your mood could depend on this. Whether you want to cheer up and express yourself, or to feel melancholy and mysterious, depends on you. You can find a Dream pullover pattern in the shop. *** Предлагаю Вам связать пуловер, образ которого мне приснился. Возможно ли вытащить материальный предмет из снов? Оказывается, да, возможно. Здесь использована техника симметричных укороченных рядов, рисующих тонкий графический рисунок, и обычная полосатая платочная вязка становится игривой. Анатомическая «летучая мышь», плечевые вытачки, вытачки для груди и более широкая передняя деталь на уровне груди корректируют посадку. Как яркий, так и умеренный контраст здесь может быть одинаково удачным – от этого зависит будущее настроение. Захотите ли вы взбодриться и заявить о себе, или же ощутить себя задумчивой и загадочной, зависит только от Вас. Описание пуловера Dream вы найдете в магазине описаний. I would rather be having dreams of new designs more often. Of course, I often see knitting in my dreams, but I rarely manage to grab a clear idea. This time I had a precise vision. Symmetrical short rows running along the sleeve and shoulder, white and dark blue stripes, a boatneck, also shaped with short rows and finished with a standing crew neck. I carried this vision in my memory for probably a year, until I was ready to knit it. It's a pity, but the Dreammaker is not at all familiar with anatomical knitting. Apparently, I should write and think about this even more, so that these principles settle in my brain at the subconscious level. When I started working on the pattern, it turned out to be not so straightforward. First, symmetrical short rows are quite complicated. It turned out to be an impossible task to shape both shoulder slopes and both sides of the boatneck at the same time. Second, in a dream, short rows along the sleeve and shoulder followed the same steps, which turned out to be impossible in the shape of an anatomical dolman sleeve. If you want to have fewer folds and wrinkles in this type of style, you need to insert a particular dart or wedge between the sleeve and armhole (in other words, a triangular sleeve cap), which changes the angle of the sleeve (see the picture below). From it up, the step of short rows turns changes drastically. Further, the shoulder slope requires its individual rhythm of steps. So it turns out that while we are knitting the upper part, we change the step of short rows turns as many as three times. Dreammaker, I hope you've mastered this lesson. I also changed the shape of the neck. I realized that I simply would not master the boatneck (the pattern would turn out way more complicated than it should), and I also received a reminder from somebody that the V-neck in my designs is a rare guest. Now I do not regret it; the V-neck fits here perfectly. *** Я бы хотела, чтобы сны с новыми дизайнами приходили чаще. Я, конечно, часто во снах вижу вязание, но ухватиться за четкую идею удается нечасто. Пуловер Dream во сне увидела очень четко. Симметричные укороченные ряды, идущие вдоль рукава и плеча, белые и темно-синие полосочки, горловина-лодочка, также сформирована укороченными рядами в конце обработана стойкой. Это видение носила в памяти, наверное, год, пока не собралась его связать. Жаль, но Создатель снов совсем не знаком с анатомическим вязанием. Видимо, придется еще больше об этом писать и думать, чтобы эти принципы засели в моем мозгу на уровне подсознания. Когда начала работать над выкройкой, все оказалось не так просто. Первое, симметричные укороченные ряды – штука достаточно сложная, и одновременно выполнить оба скоса плеч и сформировать углубление для горловины-лодочки оказалось невыполнимой задачей. Второе – во сне шаг укороченных рядов по рукаву и плечу шел одинаковыми шагами, что оказалось невозможным в форме анатомической "летучей мыши". Для того, чтобы в этом фасоне было меньше заломов, вставляется такая своеобразная вытачка-клин (другими словами, "окат" рукава), меняющий угол наклона рукава (см. фото ниже). От него вверх шаг поворотов укороченных рядов резко меняется. Далее скос плеча требует своего индивидуального ритма. Вот и получается, что во время вязания верхней части мы меняем шаг поворотов укороченных рядов аж три раза. Создатель снов, надеюсь, ты освоил этот урок. Также поменяла форму горловины. Я поняла, что лодочку я просто не осилю (описание будет слишком сложным), и еще получила от вас напоминание, что V-образная горловина в моих дизайнах – редкий гость. Теперь об этом ни чуть не жалею, V-горловина вписалась тут как нельзя лучше. Knitting was tough. While I calibrated the upper back, I had to re-knit it four times. For the first time, the “sleeve cap” was divided into two rays. When I got to the short rows, I realized that the rhythm of the turns would have to be changed, not three, but four times. The more different steps there are, the more clarity of the graphics is lost, and everything turns into a kind of a mess. Unraveled. The second attempt gave me a lesson in color theory and graphics. If the April coat and the Milky Way top, which use the same symmetrical short rows technique in a striped Garter Stitch pattern, I made right by accident, at random, then I got caught here. I started the short rows with the wrong yarn color and knitted the alignment row with a light color yarn. The expected graphical effect did not happen. Now I have learned for life that in this technique, the main yarn A, with which we knit alignment rows, should be of a darker, brighter, and more vivid color. Unraveled for the second time. *** Вязание далось сложно. Пока откалибровала верхнюю часть спинки, пришлось ее перевязать четыре раза. Первый раз "окат рукава" разделила на два луча. Когда дошла до укороченных рядов, поняла, что ритм поворотов придется менять не три, а четыре раза. Чем больше разных шагов, тем визуально теряется четкость графики и все превращается в некое месиво. Распустила. Вторая попытка преподнесла мне урок из теории цвета и графики. Если пальто April и топ Milky Way, в которых используется та же самая техника симметричных укороченных рядов в полосатом узоре платочки, я связала правильно нечаянно, наугад, то здесь я попалась. Я начала укороченные ряды не с той нити, и провязала сглаживающий ряд светлой нитью. Ожидаемый графический эффект не случился. Теперь я уже выучила на всю жизнь, что в этой технике главная нить А, которой мы вяжем сглаживающие ряды, должна быть более темного, яркого и более выразительного цвета. Распустила второй раз. It's very much OK if your selected colors differ in brightness, saturation, and you can determine which of them is darker. But what to do when the colors are equally bright? Here, a lesson that I learned from a photographer can come to the rescue. Take a color photo of your swatch, and then, in any, even the most straightforward post-production software, turn it into black and white. In it, you immediately determine which of the colors is darker, and it becomes your yarn A. In the picture below, both colors seem to be equally bright, but the color test revealed that yarn A here could be a pink yarn (Elena, thanks for the photo). *** Хорошо, если вами выбранные цвета четко отличаются по яркости, насыщенности, и можно определить, который из них более темный. А что делать, когда цвета одинаково яркие? Здесь в помощь может прийти урок, которому я научилась у одного фотографа. Сделайте цветную фотографию вашего образца и потом в любой, даже самой простой программе, которая обрабатывает фотографии, превратите ее в черно-белую. В ней вы сразу определите, который из цветов более темный, и он станет вашей нитью А. В фотографии ниже оба цвета кажутся одинаково яркими, но цветовой тест показал, что нитью А здесь может стать розовая нить (Елена, спасибо за фотографию). The third attempt was again a surprise. The steps of the short row turns got too long. I have already finished everything completely, including the front; sewn, made the neckline band, put on. Everything was fine. And then a thought struck on me. For smaller sizes, the step of the short rows is going to be even longer. The width of the sleeve increases with sizes. If we are working on a regular sleeve from top to bottom, starting from the wrist, which differs little among sizes, then the rhythm of the increases among sizes is significantly different. Here, the sleeve expands by the number of short rows turns, and the smaller the size, the lower the number of turns, and we distribute them more sparsely. And if for my size L, the graphics were still noticeable, for the XS size, it would already be lost. I had to unravel the whole upper part, including the back and front, and reduce the step length from 6 sts to 5 sts. The fourth attempt was already final. As you can see, it is not enough to see a vision in a dream. You also need to try very hard to materialize it. *** Третья попытка опять преподнесла сюрприз. Шаги, которые я выбрала для поворотов укороченных рядов, оказались слишком длинными. Я уже связала все полностью, включая перед, сшила, отделала горловину, примерила. Все было хорошо. И потом меня посетила мысль. Для более маленьких размеров шаг укороченных рядов должен быть еще более длинным. Ширина рукава, увеличиваясь размеру, увеличивается, и если бы мы вязали обычный рукав сверху вниз, начиная от запястья, которое мало отличается между размерами, то далее ритм прибавлений для расширения между размерами очень значимо отличается. Здесь рукав расширяется количеством точек поворотов укороченных рядов, и чем размер меньше, тем точек поворотов меньше, и они распределяются более длинными шагами. И если для моего размера L графический рисунок еще просматривался, для размера XS он уже был бы потерян. Пришлось распустить всю верхнюю часть, включая спинку и перед, и участить шаги от 6-и петель до 5-и. Четвертая попытка уже оказалась конечной. Как видите, мало увидеть образ во сне. Еще нужно очень постараться его материализовать. I would also like to advise those who are going to knit this pullover. Our most distinctive feature is the length of our arms. It depends more on height, and only to a small extent on the size. For this reason, it is impossible to write a pattern with the ideal sleeve length, and individual adjustment is always necessary. There are no problems in the usual "bottom-up" or "top-down" sleeve. Here it is quite another case. You need to cast on a certain number of stitches for the sleeve, and I do not recommend to change it. The sleeve length contains a certain amount of short row turns in equal steps to the very top of the sleeve cap. Any deviation in step length or number of turns is going to bend the straight line or affect the sleeve width. The only adjustment you can make is to "cut out" one pattern repeat from the bottom of the sleeves, which includes four rows and two turns. The step of the turns is different for each size; the beginning point of the first turn is also different. All these numbers can be found in the pattern. Then you start the sequence of the short rows with the third turn. To keep the neckline depth and sleeve width unchanged, you have to knit four more rows before you start. I think the scheme below explains everything in more detail. *** Хочу еще предостеречь тех, кто будет вязать этот пуловер. Самая отличительная наша особенность – это длина рук. Она больше зависит от роста, и только в малой степени от размера. По этой причине в описании невозможно попасть с идеальной длиной рукавов, и всегда нужна индивидуальная корректировка. В обычном рукаве "снизу вверх" или "сверху вниз" проблем не возникает. Здесь же укоротить рукав сложнее. Дается определенное количество петель для набора, и менять его не рекомендуется – в нем должно поместиться определенное количество поворотов укороченных рядов равномерным шагом до самой верхушки оката. Любое изменение в длине шага или количестве поворотов искривит прямую линию или окажет воздействие на ширину рукава. Единственная возможная корректировка – это "отрезать" один раппорт с низа рукавов, в котором включены 4 ряда и два поворота. Шаг поворотов у каждого размера разный, также отличается начало первого поворота. Все эти цифры вы найдете в описании. Укороченные ряды вы начнете с третьего поворота, а для того, чтобы высота горловины и ширина рукава остались неизменными, вам придется провязать на 4 ряда больше до вашего начала. Думаю, схема ниже вам объяснит все более подробно. The testing of the Dream pullover has been numerous. Even my favorite old-timers have returned, and I am incredibly happy about that. Testing went very well. I can't say that like clockwork, but without large disappointments. As always, I left a fair amount of the errors (and how without them), and the Early Birds successfully found and corrected them. Here I show you just a few finished projects to help you with the choice of colors, the amount of positive ease, the length. All other finished projects you find on Ravelry (scroll with arrow). *** Тестирование пуловера Dream было многочисленным. Вернулись даже мои любимые старожилы, и этому я несказанно рада. Тестирование прошло очень хорошо, не могу сказать, что как по маслу, но и без больших разочарований. Как всегда, я оставляю порцию ошибок (а как без них), а ласточки их успешно находят и исправляют. Я покажу лишь несколько завершенных проектов, чтобы помочь вам с выбором цветов, свободы облегания, длины, а все остальные воплощения вы найдете на Ravelry (прокрутите стрелкой). I would like to single out one Early Bird who managed to knit two "Dreams" during the testing, one of which was with short sleeveс. You all know her well, and this is our beloved Larissa. "Dream" as a stripy Sailor's top – why not? *** Хочу выделить одну ласточку, которая сумела в сроки тестирования связать два "Сна", один из которых - с короткими рукавами. Вы все ее хорошо знаете, это наша любимая Лариса. Dream как тельняшка – а почему бы и нет? As always, at the end of every testing, I choose the winner. She receives a symbolic prize – one pattern to choose from as a gift. This time the winner was Tatyana, who charmed us with her smile, and who said with her project everything that I wanted to tell myself. Word-for-word, if I may say so. Tatyana, thank you very much! *** Как всегда, после окончания тестирования я выбираю победительницу, которая получает символический приз – одно описание на выбор в подарок. В этот раз ей стала Татьяна, очаровавшая нас своей улыбкой, и сказавшая своей работой все то, что я сама хотела сказать этим дизайном. Слово в слово, если так можно выразиться. Татьяна, спасибо огромное!
- Electra and Plaid. "Электра" и клетка
Jumper Electra will delight those who like to engage not only in knitting but also in needlework. Here, the finishing takes almost the same amount of time as the knitting itself. But in the end, the garment you are going to hang in your closet will be trendy as long as a plaid pattern exists in the fashion world. Let your imagination run wild when picking up color combinations – from classic Scottish tartan to wholly unexpected and out of the box. The Electra jumper is designed according to the principles of anatomical knitting using the technology of asymmetrical armholes and sleeve caps, bust darts, and others. The Electra jumper pattern can be found here. *** Джемпер Electra порадует тех, кто любит заниматься не только вязанием, но и рукоделием. Здесь финальная отделка займет почти такое же количество времени, как, скажем, вязание той же детали. Но в итоге в вашем шкафу поселится предмет гардероба, который будет актуальным до тех пор, пока в мире моды будет существовать клетка. Дайте проявиться своей фантазии при выборе цветовых сочетаний – от классических шотландских до совершенно неожиданных и ультрамодных. Джемпер Electra сконструирован по принципам анатомического вязания с применением технологий несимметричных пройм и окатов, вытачек для груди и других. Описание джемпера Electra найдете здесь. Perhaps you will agree that plaid (or tartan plaid) in hand knitting is very rare. The most common and understandable method of knitting plaid is the Intarsia method, where a separate skein of yarn is used for each block. The smaller the block, the more separate skeins you need. But if you think outside the box? What else can draw multi-colored vertical lines that, in an intersection with horizontal stripes, will give us tartan plaid? Of course, this is a chain stitch. The idea of how to get plaid in knitting did not come from anywhere. It was developed in practice, and I can add, quite by accident. Remember the Dandelion dress? At first, I just painted zigzags, and in the alteration of the skirt, I used the chain stitch only to get the pleated effect. As a result (quite unexpectedly), it turned out to plaid, hard to distinguish, but still plaid. *** Наверное, вы согласитесь с тем, что клетка в ручном вязании встречается очень редко. Самый распространенный и понятный метод вязания клетки – это метод интарсии, где для каждой клетки используется отдельный моток пряжи. Чем мельче клетка, тем больше отдельных мотков. Но если выйти за рамки общепринятого? Чем еще в вязании можно нарисовать цветные вертикальные линии, которые в пересечении с горизонтальными полосками дадут нам клетку? Конечно, это тамбурный шов. Идея, как получить клетку в вязании, пришла не сразу и только на практике; можно добавить – совсем случайно. Помните платье-пальто Dandelion? Сначала я просто нарисовала зигзаги, а в переделке юбки использовала тамбурный шов лишь для того, чтобы получить эффект плиссе. В итоге (совсем неожиданно) получилась трудно рассматриваемая, но все же – клетка. I realized that this idea can and should be developed. A year later, the chain stitch again appeared in another almost checkered design – the "Fall" jumper. But I acknowledge that plaid here is not quite real, and I needed to research further. *** Здесь я поняла, что эту идею можно и нужно развивать. Через год тамбурный шов опять нашел применение в другом почти клетчатом дизайне – джемпере "Fall". Но я понимала, что клетка здесь не совсем полноценная, и надо думать дальше. In real plaid, the horizontal and vertical lines must certainly be the same size, the same width. If the vertical line is one stitch wide, what is the closest in horizontal? Of course, this is one row. But how to knit one row with a different color of yarn, if the thinnest possible stripe in hand knitting is two rows? Then I remembered that once somewhere, I learned to knit one-row stripes. Eureka! Plaid is possible! How do we knit ordinary thin stripes in two rows? Work the RS row with yarn A, turn, work a WS row with the same yarn A, turn. Change the working yarn and work the following two rows in another color (yarn B). Repeat. If you work one row of a stripe with yarn A (say, RS), the yarn of the other color we need (yarn B) remains on the other side of the work. Seem, we reached a dead end. And here circular needles come in handy. We return to the beginning of the row, where the needed yarn B is, and we knit another RS row with it. There we already have the necessary yarn A waiting, and we work a WS row with it as usual. Having worked a WS row, we again return to the beginning of the same WS row and work the next (again, a WS) row with yarn B. Both yarns returned to the usual right side of the piece. Repeat the desired number of times. Stripes of three colors are somewhat more complicated to knit, but, I think, you've got the idea. *** В настоящей клетке горизонтали и вертикали непременно должны быть одного размера, одной ширины. Если вертикаль у нас может быть только в одну петлю, что наиболее близко по ширине в горизонталях? Конечно, это один ряд. Но как провязать один ряд другим цветом нити, если самая узкая возможная полоска в ручном вязании – это два ряда? И тут я вспомнила, что когда-то где-то научилась вязать полоски в один ряд. Эврика! Клетка возможна! Как мы вяжем обычные тонкие полоски в два ряда? Провязали лицевой ряд нитью А, повернули работу, провязали изнаночный ряд той же самой нитью А, повернули работу. Поменяли рабочую нить и далее другим цветом (нитью Б) вяжем следующие два ряда. И повторяем. Если провязать полоску в один ряд нитью А (скажем, лицевой), нужная нам нить другого цвета (нить Б) остается на другой стороне работы. Кажется, мы зашли в тупик. И тут нам в помощь приходят круговые спицы. Мы возвращаемся в начало ряда, где висит нужная нить Б, и вяжем ей еще один лицевой ряд. Там уже висит нужная нам нить А, и изнаночный ряд вяжем ей, как обычно. Провязав изнаночный ряд, опять возвращаемся в начало ряда, и следующий (опять изнаночный) ряд вяжем нитью Б. Обе нити вернулись на привычную правую сторону детали. Повторяем нужное количество раз. Полоски из трех цветов вязать несколько сложнее, но, думаю, принцип понятен. I agree that geometric accuracy is not achievable. The height of the stitch is only 3/4 of its width, and the width of the vertical columns is larger than the width of the horizontal ones. But this is the closest thing that can be achieved in knitting. The chain stitch, if embroidered on a Stockinette Stitch, is convex. We don’t need relief in plaid; we just need a flat and smooth surface. To deepen it (to place it below the surface), it is necessary to prepare vertical tracks of purl stitches in advance – such peculiar ditches, in which chain stitch is going to be laid further. That was a play not only with the plane but also with the depth. I admittedly will pamper myself and you with plaid in the future. At the end of this year, I am planning to return to the winter collection made of bulky yarn. In my mind, I have an idea of a warm and thick Glacier cardigan with a large collar and belt. I would like to have the feeling that the cardigan is sewn from a checkered wool blanket. It may turn out that the blocks here will be a little different than in a swatch; there are already some ideas. Also, now I am working on another design of an Almanac shortigan. Here plaid is going to be textured, convex, and made in one color. The challenge here was to get convex horizontal lines. You will find out soon if I succeeded in it or not. *** Я соглашусь, что геометрической точности здесь нет. Высота петли составляет лишь 3/4 ее ширины, и ширина вертикальных столбиков больше, чем ширина горизонтальных. Но это самое близкое, чего можно достичь в вязании. Тамбурный шов, если его прокладывать по лицевой глади, будет выпуклым. В клетке нам выпуклость не нужна, нужен лишь плоский и гладкий рисунок. Для того, чтобы его углубить (посадить ниже поверхности), перед этим нужно было подготовить вертикальные дорожки изнаночных петель – такие своеобразные канавы, в которые далее легли цепочки тамбурного шва. Получилась игра не только с плоскостью, но и с глубиной. Клеткой буду баловать себя и вас и дальше. В конце этого года вернусь к зимней коллекции из толстой пряжи. В голове вынашиваю идею толстого кардигана Glacier ("Ледник") с большим воротником и поясом. Хочется, чтобы было ощущение, что кардиган пошит из клетчатого пледа. Может быть, что клетка здесь будет немного другая, чем в образце, уже есть мысли. Кроме того, сейчас я работаю над другим дизайном шортигана "Альманах". Здесь клетка будет фактурная, выпуклая, но одноцветная. Задача здесь состояла в том, чтобы получить выпуклые горизонтальные линии. Вы скоро увидите, удалось мне это, или нет. If we take a plaid woven fabric, and cut out, say, a back piece using a pattern, smaller sizes get fewer blocks, large sizes – more. And in a small size, the same block visually looks larger, in a large one – smaller. We have more opportunities in knitting. Here we can expand each block to any size. In Electra, each size has the same number of blocks, since, with each size, the dimensions of a single block expand. And increasing in size, blocks in all sizes visually appear the same. Look at three different sizes, and you will notice that, even though in each separate project, the blocks are different in volume, each size has the same number of blocks. *** Если взять клетчатую ткань, и вырезать из нее, скажем, деталь спинки по выкройке, маленькие размеры получать меньше клеток, большие размеры – больше. И в маленьком размере та же самая клетка визуально будет выглядеть крупнее, в большом – мельче. В вязании у нас больше возможностей. Здесь мы можем "вырастить" клетку до любого размера. В "Электре" каждый размер имеет то же самое количество клеток, так как с каждым размером величина отдельно взятой клетки растет. И увеличиваясь или уменьшаясь размеру, клетки во всех размерах визуально кажутся одинаковыми. Посмотрите три разных размера, и увидите, что, не смотря на то, что в каждом отдельно взятом размере клетки по величине отличаются, у каждого размера их одинаковое количество. As always, all possible anatomical features are designed in the Electra jumper to improve the fit. Horizontal and vertical bust darts placed in the empty areas of the blocks; elongated upper back; asymmetrical sleeve caps and armholes. To ensure that the jumper does not get stuck on the hips, a slightly noticeable A-shape is added. The pattern is quite complicated. The difficulty here lies in the fact that colored horizontal stripes consist of an odd number of rows. While knitting, we sometimes find ourselves in an unusual position to take the next step – on the wrong side. Binding off for the underarms, decreasing, increasing, shaping the neck we have to make from WS as if we are expected to make them from RS. And, it would seem, the boring Stockinette Stitch here throws at us all sorts of unexpected surprises. I can assure you that knitting is not boring at all, and you won’t have the possibility to nap while knitting. *** Как всегда, в джемпере Electra применены все возможные анатомические штучки для улучшения посадки. Горизонтальные и вертикальные вытачки, размещены в пустотах клеток; удлиненная верхняя часть спинки; несимметричные окаты и проймы. Для того, чтобы джемпер не застревал на бедрах, добавлен легкий, лишь слегка заметный силуэт А. Описание достаточно сложное. Сложность здесь заключается в том, что блок горизонтальных полосок состоит из нечетного количества рядов, и по ходу вязания мы находим себя на непривычной для выполнения очередного вязального приема изнаночной стороне. Закрытие пройм, убавления, прибавления, формирование горловины нам местами приходится выполнять с изнаночной стороны, как бы мы выполняли их с лицевой стороны. И, казалось бы, обычная лицевая гладь здесь преподносит нам всякие неожиданные сюрпризы. Могу уверить вас, что вязание совсем нескучное – задремать не получится. The first time the pattern is designed to even for 9 sizes: XXS size for teenage girls without bust darts; 4XL size is also added. After all, everyone deserves to have a classic tartan jumper. Meet charming Sophie! *** Первый раз описание расчитано даже на 9 размеров: размер XXS для девочек подростков без вытачек для груди; также добавлен размер 4XL. Ведь все заслужили иметь классический клетчатый джемпер. Встречайте очаровательную Софию! Any color combinations are possible here, but there is one critical warning. It is recommended to use the yarn of one brand for all three colors. If this is not possible, the thickness and weight of the different yarns should be identical and similar in composition. Thicker or thinner yarn for the stripes causes your blocks to bend, and the right angles and lines here should be as accurate as possible. Are you stuck when picking up color combinations? Can't decide? First, think about what you are going to wear this jumper with, let your bottom suggest to you. Or just review the finished projects of the Early Birds team: there are a lot of them, and maybe something will appeal to you. I selected a few ( see below and scroll with the arrow), and you can find all of them on Ravelry. Taking this opportunity, I also wanted to thank all the Early Birds team members for the final reports during this difficult time, that they still found the opportunity to take pictures, observing all the safety rules. I understand that it was not easy. For me, this has been the most challenging testing so far. I have not had so many errors and oversights in the beginning. In testing, we usually have 2-3 versions of the same pattern; here, it reached six. Quarantine influenced my preparation for testing, together with other important things coincided. Also, a lot had been done for the first time, and everything was impossible to predict. Each separate size, it can be said, was examined step by step under a magnifying glass. *** Здесь возможны любые цветовые сочетания, но есть одно очень важное предупреждение. Рекомендуется использовать пряжу одного артикула для всех цветов. Если это сделать невозможно, толщина разных нитей должна быть идентична и близка по составу. Более толстая или более тонкая пряжа для полосок заставит ваши клетки изгибаться, а прямые углы и линии здесь должны быть как можно более точные. Застряли при выборе цветовых сочетаний? Не можете определиться? Первое, подумайте, с чем будете этот джемпер носить, пусть ваш низ вам подскажет. Или просто пересмотрите воплощения первых ласточек: их много, и может быть вам что-то приглянется. Я отобрала несколько (прокрутите стрелкой), а все воплощения команды Первых Ласточек найдете на Ravelry. Пользуясь случаем, я хотела поблагодарить всех ласточек за отчеты в это сложное время, за то, что они все же нашли возможность сфотографироваться, соблюдая все правила сохранности. Я понимаю, что это было нелегко. Для меня это было самое сложное тестирование до сих пор. Столько ошибок и недосмотров в начале у меня еще не было. В тестированиях нам обычно хватает по 2-3 версий того же самого описания; здесь же дошло до шести. Карантин повлиял на мою подготовку к тестированию, вместе совпали другие важные дела. Также очень много делалось впервые, и все предугадать было невозможно. Каждый размер, можно сказать, разбирали по косточкам. The winner of this testing once again was Elena, who conveyed this idea of clarity, geometricity, and graphicality in every sense. I can say that her project came off from the drawing board of an engineer. Elena, many thanks, and sincere congratulations! *** Победительницей этого тестирования снова стала Елена, которая передала эту идею четкости, геометричности и графичности во всех смыслах. Можно сказать, что ее работа сошла с чертежной доски инженера. Елена, огромное спасибо и от души поздравляю!
- Part 1. Where does the collection begin? Часть 1. Где начинается коллекция?
I want to start a new series of articles that will tell you how I design the collections of knitting patterns. I started working on the seventh collection (four are published, the fifth will be released in early autumn, the sixth is waiting for the next winter). That was not an easy task. That choice determined on what I would be working the whole next year, and I did not want to make a mistake. I had several strong ideas. "Tweed and Melange. Autumn Equinox", "Knitted Capsule. Basic Wardrobe", "For Beginners (with step-by-step tutorials of simple and more complex techniques)" and "Cardigans All Year Round." The choice fell on the latter. Of the four published collections, the last two were dedicated to jumpers and tops; there were very few buttoned designs recently, and the buttons in my box began to cry loudly at night. On the other hand, who refuses to have a comfortable, beautiful, and warm cardigan in the closet, which is unique, easily fits into looks, durable, and made with high-quality yarn? I think no one. *** Хочу начать новый цикл статей, который расскажет, как рождаются коллекции вязальных описаний. Я начала работать уже над седьмой коллекцией (четыре изданы, пятая выйдет ранней осенью, шестая ждет следующей зимы). Перед мной стоял сложный выбор, чем я буду заниматься весь ближайший год, и ошибаться не хотелось. Идей было немало. "Твид и меланж. Осеннее равноденствие", "Вязаная капсула. Базовый гардероб", "Для новичков (с пошаговыми уроками простых и сложных технологий)" и "Кардиганы круглый год". Выбор пал на последнюю. Из 4-ех изданных коллекций две последние были посвящены джемперам и топам; застегиваемых изделий последнее время было очень мало, и пуговицы в моей коробке стали громко плакать по ночам. С другой стороны, кто откажется иметь в своем шкафу удобный, красивый и теплый кардиган, который уникален, легко вписывается в ансамбли, долговечен и связан из качественной пряжи? Таких нет и в помине. Idea How is a cardigan (or a knitted jacket) different from other knitted garments? Firstly, of course, it has buttons. We are going to search for the most suitable buttons so that it seems that the design began from them. Buttonholes also play an essential role. Maybe we come up with something undiscovered. Secondly – the cardigan should not be too artsy and clutter up the rest of the pieces of your look with its exaggerated design. On the contrary, it should be restrained, simpler in design elements, but still set the style or support your thoughtful look. Thirdly, we are going to reinvent the pockets. Fourthly, a cardigan should be comfortable and durable. High-quality yarn, an accurate finishing, the best fit – those are three whales on which your luck in knitting is built. I picked and crystalized the main theme of the collection already. Now it remains to choose a creative direction, and this time we will travel to imaginary worlds riding knitting needles: seas, lands, nature. And I wouldn’t be myself if not to come up with yet another challenge. The quarantine and #stayathome offered another condition, namely, to use everything that is at home at the moment, without going to the stores, including knitting needles, yarn, buttons, as well as the clothing for final looks. I don’t know if I will succeed, but I will try. I love challenges. Cardigans are going to be very various. From summer yarn – cotton to winter yarn with alpaca. Long to the ground to cropped, with a V-neck to the crew neck. Set-in sleeves, a drop shoulder, raglan yokes, and a dolman sleeve. The usual "bottom to top" and sideways knitting. And a lot of different pockets. Идея Чем кардиган (или вязаный жакет) отличается от других вязаных изделий? Первое – он, конечно, застегиваемый. Будем искать самые подходящие пуговицы, чтобы казалось, что дизайн начался с них. Также немаловажную роль сыграют петли для пуговиц. Может быть, придумается что-нибудь интересное. Второе – кардиган не должен быть вычурным и загромождать своим дизайном остальных участников вашего ансамбля. Наоборот, он должен быть сдержанным, более простым в элементах дизайна, но все же задавать стиль или поддерживать вами придуманный образ. Третье – мы будем заново изобретать карманы. Четвертое – кардиган должен быть удобным и долговечным. Качественная пряжа, аккуратная отделка, хорошая посадка – три кита, на которых строится удача в вязании. С главной темой коллекции определились. Теперь осталось выбрать творческое направление, и в этот раз будем путешествовать в воображаемые миры верхом на вязальных спицах: моря, страны, природа. И я не была бы я, если бы не придумала себе еще одно усложнение. Карантин и #сидидома сами подиктовали еще одно условие, а именно, использовать все, что есть, не выходя в магазины, включая спицы, пряжу, пуговицы, а также содержание шкафа для создания образов. Не знаю, получится ли у меня это, но я постараюсь. Люблю вызовы. Кардиганы будут самыми разными. От летней пряжи – хлопка, до зимней с альпака. Длинные до пола и сильно укороченные, с горловиной "V" и с обычной, круглой. Втачные рукава, спущенное плечо, регланные кокетки и "летучая мышь". Обычное "снизу вверх" и поперечное вязание. И много много разных карманов. Sketches A sketch of the knit garment is a two-dimensional drawing of a future three-dimensional knitted project. In order not to forget what I saw in my mind (I mean the idea that came to me), I sketch. A few strokes with a ballpoint pen and the idea will never be forgotten. These sketches are accumulated, then selected, and here the collections begin. I will show you the sketches of the last two to three years, but I warn the faint-hearted not to look at them. By showing this sketched horror, I can say, I pulled the skeleton from the closet. But if you still dare to look at, I think you can find something familiar in those doodles. Эскизы Эскиз в вязании – это двухмерный рисунок будущего трехмерного вязаного изделия. Чтобы не забыть увиденное (я имею в виду в голову пришедшую идею), я делаю наброски. Несколько штрихов шариковой ручкой, и идея никогда не потеряется. Наброски накапливаются, отбираются и уже на их основе создаются коллекции. Я вам покажу наброски последних двух трех лет, но предупреждаю – слабонервным не смотреть. Показом этого нарисованного ужаса, я, можно сказать, вытащила скелет из шкафа. Но если вы все же осмелились на это смотреть, я думаю, вы сможете отыскать в этих каракулях что-то знакомое. These doodles then turn into sketches in which it is already possible to apply color and texture, develop details, adjust the proportions. It’s difficult for me to sketch. I draw so-so and do not invest myself in this field at all. On the other hand, a sketch is an integral part of my entire creative process. Sketch highly helps in designing. It allows you to anticipate all the obstacles, see the proportions. And even if the finished design differs from the initial picture, these changes are just repelling from the primary image and do not let you get lost. In the collage below, you can see from the height of the fourth dimension (someone said that the time is the main feature of the fourth dimension) how the initial idea from the first dimension went through two-dimensional sketches and turned into a three-dimensional object – a knit coat. *** Эти наброски далее превращаются в эскизы. Здесь уже можно нанести цвет, фактуру, проявить детали, отрегулировать пропорции. С эскизами у меня складывается сложно. Рисую я так себе, и совершенно не вкладываю себя в это дело. А эскиз – это неотъемлемая часть всего моего творческого процесса. Это серьезная помощь в дальнейшей работе над дизайном. Эскиз позволяет предвидеть все камни, увидеть пропорции, и, даже если готовая моделька будет отличаться от начальной картинки, эти изменения как раз отталкиваются от первичного образа и не позволяют заблудиться. В коллаже ниже вы можете посмотреть с высоты четвертого измерения (некоторые предполагают, что это – время), как начальная идея из первого измерения через двухмерные эскизы превращается в трехмерный объект – вязаное пальто. Drawing sketches is a very time-consuming process, and after the spring collection of knitted outerwear, I quit (see the picture below). Maybe I would continue to do this, but it was necessary to devote time to study since the quality of my drawing wished for the best. And I don’t have spare time at all. Stealing time for anything other than knitting and writing patterns is expensive. But I still managed and what came of it, see further. *** Рисовать эскизы – очень трудоемкий процесс, и в одно время я махнула на них рукой – после весенней коллекции верхней одежды (см. картинку ниже). Может я продолжила бы этим заниматься, но нужно было посвятить время учебе, так как качество моего рисования желало лучшего. А его у меня нет совсем. Выкрасть время для чего-либо другого, чем вязание и составление описаний – это дорогое удовольствие. Но мне все же немножко удалось. А что из этого получилось, увидите позже. Yarn The next step requires to pick-up yarn. And here I will probably surprise you. I rarely buy yarn for a specific design. I buy a large sack of bobbins or skeins I like most, do it once or twice a year, put it on the shelves. Only in this specific environment, the creative juices begin to flow. Without an excess of yarn at home, I could not create. These are the mental processes that occur in my mind: I see an image, and immediately I know which yarn would match. There would be no yarn available, and pictures would not have appeared. You could even say that yarn is the trigger for ideas. Then the rational part of the mind turns on and begins to weigh: whether there is a sufficient amount of yarn, whether the composition is suitable, what the yarn looks like in the swatch, etc. Sometimes the yarn is replaced. Sometimes the image remains in the form of a sketch since the two hemispheres of the brain did not find agreement. That is roughly what happened with the collection of knitted outerwear "Merino Hug. Spring equinox." In the beginning, it was yarn... About a year later, the collection was finished. *** Пряжа Следующим этапом является подбор пряжи. И тут я, наверное, вас удивлю. Я практически никогда не покупаю пряжу для конкретной заранее придуманной модели. Я покупаю мешок хорошей, мне понравившейся пряжи, делаю это один или два раза в год, ставлю на полки и только в такой среде включается творческий процесс. Без избытка пряжи дома я не смогла бы творить. Происходят вот такие мысленные процессы в голове: приходит картинка и сразу предложение, какая пряжа из имеющихся подошла бы. Не было бы пряжи в наличии, картинки не появлялись бы. Можно даже сказать, что триггером идей является пряжа. Далее включается рациональная часть ума, и начинает взвешивать: достаточное ли количество, подходит ли состав, как выглядит пряжа в образце и т. п. Иногда происходит замена пряжи. Иногда картинка остается в виде наброска, так как два полушария мозга не нашли согласия. Так примерно произошло с коллекцией вязаной верхней одежды "В объятиях мериноса. Весеннее равноденствие". В начале была пряжа... Примерно год спустя родилась коллекция. As for the collection of cardigans, I also already prepared yarn. Changes in the future cannot be avoided (this is already obvious), but the color palette should be clear to you. Next spring, we will also compare the pictures. These are cotton, pure wool, wool blends, alpaca, and others. *** Для коллекции кардиганов пряжу я уже приготовила. Замен избежать не удастся (это уже очевидно), но в основном цветовая палитра вам должна быть понятна. Следующей весной также сравним картинки. Здесь отобран хлопок, чистая шерсть, полушерсть, альпака и разные смеси. Swatches Another initial step is knitting swatches. If the collection has already been more or less shaped, I knit swatches for already predetermined designs. If I work on the collection step-by-step, not having a complete vision, as it was with the summer collection, I knit way more swatches, and then selection takes place. For the summer collection, I knitted 23 swatches; only eight designs were born. Now I look at them, and I see that a couple of developments will still be useful in the upcoming cardigan collection. So, not everything is lost. Образцы Еще один начальный этап – это вязание образцов. Если коллекция уже более-менее сформировалась, образцы вяжутся конкретно для придуманных дизайнов. Если коллекция рождается постепенно, как было с летней коллекцией, вяжется, грубо говоря, куча образцов, и далее происходит отбор. Для летней коллекции я связала 23 образца, родились 8 дизайнов. Сейчас смотрю на них, и вижу, что парочка наработок все же будет использована в предстоящей коллекции кардиганов. Значит, не все потеряно. I knit swatches for several reasons. The first, most important, is the finding of the right knitting gauge. When you knit using a pattern, the gauge is already given to you, and your task is to achieve the same. It's different for me. I try to find the most suitable size of knitting needles for a specific yarn, and what gauge is obtained, it is going to be so. Further, washing is critical, and how the yarn changes and behaves after the contact with water. Will it expand, soften, will it flow, or, on the contrary, stays rigid. Sometimes it turns out that the size of the needles or the behavior of the yarn for a particular design is not suitable at all. Then another size of knitting needles or another yarn is selected until you have a strong feeling inside – that is exactly what you need! Sometimes in the swatches, I pick up another size of the knitting needles for ribs and hems, sometimes I even try some knitting techniques, for example, decreases, short rows, or small fragments of design elements. I call such swatches “a designer swatch” because they contain much more information than just determining the gauge. *** Образцы вяжутся по нескольким причинам. Первая, самая важная, это определение плотности. Когда вы вяжете по готовому описанию, плотность вязания вам указана, и ваша задача достичь ее. У меня происходит по-другому. Подбирается самый подходящий размер спиц для конкретной пряжи, и какая плотность получилась, такой она и будет. Далее, очень важен контакт с водой, и как поведет себя пряжа после стирки. Расширится ли, смягчится, будет ли хорошо струиться или, наоборот, держать форму. Иногда оказывается, что размер спиц или поведение пряжи для конкретной модели совсем не подходит. Тогда подбирается другой размер спиц или другая пряжа до тех пор, пока в голове не зазвенит колокольчик – это то, что надо! Иногда в образцах я сразу подбираю другой размер спиц для резинок и планок, иногда даже пробую какие-нибудь вязальные приемы, например, убавления, укороченные ряды или небольшие фрагменты элементов дизайна. Такие образцы я называю "дизайнерскими", потому, что в них заложено гораздо больше информации, чем просто определение плотности вязания. Buttons Buttons are another beloved part of the creative process. I think I could write a separate article about buttons. I have a special love for them. Buttons on a cardigan are a cherry on a cake; they are the last chapter in the novel and the laurel wreath for the winner. I remember, in 2014, I visited my mother and sister in the US. My stepfather gave me a check for $ 200, so I could buy some souvenirs. You should have seen his surprise when I showed my purchase in the form of buttons. And I kept silent that I added another hundred dollars of my own... Buttons may seem like the least of worries. Try to match in color, sew, and you are done. But you aren't done. Buttons have a size. Their hole depends on this, and the width of the button band depends on the size of the buttonholes. A button has a weight. If the buttons are heavy, they cannot be sewn to a very airy and light knit fabric. There are shankless buttons that are more sporty and masculine, and there are artsy buttons that require special design and approach. Finally, when you are collecting buttons, sometimes there is a limited number of them. If there are only five of them, you need to think about a special fastener and length of the upcoming design. And if there are ten of them, then you can knit a long cardigan or coat. See how vital buttons are. It seems that they are no less important than yarn itself. Пуговицы Пуговицы – это еще одна приятная часть творческого процесса. Я думаю, что о пуговицах я могла бы написать отдельную статью. К ним я испытываю особенную любовь. Пуговицы на кардигане – это вишенка на торте, последняя глава в романе и лавровый венок победителя. Помню, когда в 2014 году я навещала маму и сестру в штатах, мамин муж подарил мне чек на 200 долларов, чтобы я купила себе что-то на память. Надо было увидеть его удивление, когда я показала свою покупку в виде пуговиц. И я умолчала, что я добавила еще одну сотку долларов своих... Может показаться, что пуговицы – самая меньшая из забот. Купил в цвет, пришил и готово. Но не тут-то было. У пуговицы есть размер. От этого зависит ее петля, от величины петли зависит ширина планки. У пуговицы есть вес. Если пуговицы тяжелые, они не могут быть пришиты к очень воздушному и легкому изделию. Есть плоские пуговицы, несущие в себе задаток спортивного и мужского, а есть художественные пуговицы, требующие особого дизайна и подхода. Наконец, когда пуговицы коллекционируются, в наличии есть ограниченное их количество. Если их всего пять, нужно подумать про особую застежку и длину. А если их десять – может тогда можно вязать длинный кардиган или пальто? Видите, насколько важны пуговицы. Кажется, что они важны не меньше, чем сам подбор пряжи. It's time to show all the sketches, swatches, and, of course, buttons. I developed nine designs; one will be in reserve. Be sure that much will change; there has not yet been that everything that was invented was embodied. With time better ideas come, and the old ones become morally obsolete. Sometimes it turns out that yarn is not suitable, even if at the beginning it seemed OK. Failures and errors happen. But at the moment the start is taken, already one back piece is finished. Let's take a look at my beginnings. *** Пришло время показать все эскизы, образцы и, конечно, пуговицы. Разработала 9 дизайнов, один со временем отпадет. Будьте уверены, что еще многое изменится, еще не было такого, что все задуманное воплощалось. Приходят лучшие идеи, а старые морально устаревают. Иногда оказывается, что пряжа все же не подходит. Случаются провалы и ошибки. Но на сегодняшний момент старт взят, уже одна спинка готова. А вы можете посмотреть мои начинания. The "Cardigans All Year Round" collection has been thought over for a very long time. I believe fragments of it I have been gathering for the past two years. Swatches and sketches took approximately five days. I am going to knit the collection, if everything succeeds, for half a year. Then follows pattern writing (each takes about three full days to a week), then testings step into. I think that in a year the collection will be ready. During this time, I will return to the sixth collection, namely, “Dream Big. Winter Solstice,” which is dedicated to knitting with bulky yarn. Now you see how many tiny particles you need to assemble the collection. And this is just a preparation. I will continue to tell how the collection is progressing, I will share my victories and disappointments here, on the blog, and the forum. If you are interested, keep an eye out. *** Коллекция "Кардиганы круглый год" придумывалась очень долго. Я думаю, крупинки собирались последние 2 года. Образцы и эскизы заняли примерно 5 дней. Вязать буду, если все удастся, пол года. Потом буду писать описания (каждый занимает примерно от 3 дней до недели), потом нужно будет провести тестирования. Я думаю, через год с лишним коллекция будет готова. За это время я еще вернусь к шестой по счету коллекции, а именно к "Мечтай по-крупному. Зимнее солнцестояние", которая посвящена вязанию из толстой пряжи. Теперь вы видите, из скольких маленьких частиц собирается коллекция. А ведь это – всего лишь подготовка. Я продолжу рассказывать, как продвигается коллекция, буду делиться своими победами и разочарованиями как здесь, в блоге, так и на форуме. Если вам интересно, продолжайте следить.
- Made by Vilnonis
A bit of history. Before I started working on my knitting patterns, I knitted for many years using patterns of other designers. You can see for yourself by looking at my project page on Ravelry, where the earliest one was made in 1997. Of course, I knitted much earlier, using Verena, Vogue Knitting, and Sandra knitting magazines, but these projects did not survive. Only the magazines of those distant 1983-1994 are still on my shelves. In a word, before starting to work on my designs, I finished about 150 projects using different knitting patterns. I think that during this time, I have already gained sufficient experience, and was able to draw conclusions, what I most lacked in these patterns, what I would like to see in them, and what I would have done differently. Here I am not talking about the overall experience in knitting, but only the impressions of using knitting patterns. Their common feature, if you rely on my opinion, is their content is too short and simplified, leaving a lot of unresolved issues, gaps, oversights, and allowing the knitter to stumble and deviate from the picture and image that they presented. It is clear why this happened. A long and multi-paged pattern seems too complicated and scares. And it's true. Imagine the situation. You saw the design, and you like it. Open the page with a pattern. Scrolling, flipping, but it does not end. Will you knit? No way. You'd better knit the one next to it. Here is only half a page. And in the end, the pattern from "a half a page" crawls up on your needles, you knit it, finish it, try it on, be sure to go out once, return with a bad mood, fold it and load it in the closet. Forever. You can't unravel it; so many hours have been spent. Precisely, for this reason, there was a long pause in my knitting life, which lasted for several years – I was frustrated. It seems that not everything is so wrong. Every fifth or tenth project still succeeded, but was all the efforts worth such modest results? Below I will show a few of my projects, which I never put on. There was not even a first going out wearing them. I put it on just to take pictures as proof that I put some effort (you can scroll through using the arrow). Something in them was fundamentally wrong. *** Немного истории. Перед тем, как заняться созданием своих вязальных описаний, я много лет вязала по вязальным описаниям других авторов. Вы можете в этом убедиться сами, взглянув на мою страничку проектов на Ravelry, где самый ранний связан в 1997. Конечно, я вязала и гораздо раньше, пользуясь журналами Verena, Vogue Knitting и Sandra, но эти вязалки уже не дожили. Только журналы тех далеких 1983-1994 годов eще сохранились. Одним словом, перед тем, как начать работать над своими дизайнами, я связала примерно 150 изделий по разным вязальным описаниям. Думаю, что за это время я уже приобрела достаточный опыт, и смогла сделать выводы, чего мне больше всего не хватало в этих описаниях, что я хотела бы в них видеть, и что я бы сделала иначе. Здесь я не говорю про общий опыт в вязании, а акцентирую только впечатления от пользования вязальными описаниями. Их общая черта, если опираться лично на мое мнение, это слишком короткое и упрощенное их содержание, оставляющее много нерешенных вопросов, пробелов, недосмотров и позволяющее вязальщице оступиться и отклониться от той картинки и образа, которое в них представлялось. Понятно, почему такое происходило. Слишком длинное описание кажется слишком сложным, и отпугивает. По сути, так оно и есть. Представьте ситуацию. Вы увидели модельку, она вам нравится. Открываете страничку с описанием. Листаете, листаете, а оно не заканчивается. Будете ли вы вязать? Никоим образом. Лучше будете вязать ту, что рядом. Здесь только пол страницы. И в итоге описание "на пол страницы" забирается на ваши спицы, вы ее вяжете, заканчиваете, примеряете, обязательно один раз выходите в люди, возвращаетесь с испорченным настроением, складываете и грузите в шкаф. Навеки. Распустить ведь жалко, столько часов потрачено. Именно по этой причине в моей вязальной жизни произошла длинная пауза, длившаяся несколько лет. Я разочаровалась. Вроде, не все так плохо. Каждая пятая или десятая вязалка все же удавалась, но стоили ли все усилия таких скромных результатов? Здесь я покажу несколько своих работ, которые я не носила никогда. Даже не было первого выхода в люди. Надела лишь для того, чтобы сделать фотографии, как доказательство, что я стучала спицами (можете пролистать, следуя стрелке). Что-то в них было основополагательно не так. Later I grew up to size L. Nothing made by using these simplified and “flat” patterns did not fit on me. And I began to rework the patterns for myself. I added bust darts, lengthened the upper back, worked on the shapes of armholes and sleeve caps. Everything has become much better. Then I realized one thing: if more than half of the knitting techniques in the project are my own, why do I need those patterns? In the summer of 2016 (I remember that I was ill) from nothing to do, I began to come up with my designs. And a little later, I decided that I need to make patterns on them, and received great support from the members of the forum on Osinka. So I published a series of free patterns, and I practiced and learned on them. If you look at what I’ve done there, I would rather be horrified – a lot of mistakes, not the best technical solutions, written descriptions at a deficient level. But you had to practice on something. So I apologize to those who knitted using these patterns and, how gentler to say, struggled. *** Позже я выросла до размера L. Ничто, связанное по упрощенным и "плоским" описаниям на меня не садилось. И я начала переделывать описания под себя. Добавляла вытачки для груди, удлиняла спинку, работала над формами пройм и окатов. Все стало гораздо лучше. Потом поняла одну вещь. Если больше половины вязальных приемов в одной вещи – мои собственные, зачем мне нужны описания? И летом 2016 года (помню, что я болела) от нечего делать начала придумывать свои дизайны. А еще чуть позже решила, что мне нужно сделать по ним описания, и получила огромную поддержку от форумчанок на Осинке. Так у меня появилась серия бесплатных описаний, работая над которыми, я училась. Если посмотреть, что я там наделала, сегодня можно ужаснуться. Масса ошибок, не самых лучших решений, текст описаний на очень низком уровне. Но на чем то ведь надо было учиться. Так что я прошу прощения тех, кто вязал по этим описаниям и, как тут мягче сказать, страдал. The patterns "Made by Vilnonis" seem very complicated to many. Speed, simplicity is, of course, an advantage when they appear on a solid foundation. But when there are no foundation, structure, fundamental rules, knitting can be used only for meditative relaxation, but not to obtain a satisfying and wearable result. It turns out that a terrible mystical creature lives in our house, each month requiring a sacrifice in the form of non-wearable knitwear, and the name of this monster is a closet. Starting to write patterns, I decided that I want to see them in my way. What did not satisfy me in the existing patterns should change; what was missing should be added. I understood that a tough job awaited me. The experience was already sufficient, and not only in knitting. It seems that everything I did in my life before that was just preparation for this job. In my youth, I had my own publishing house of needlework and culinary magazines, and a few years ago, I wrote and published a cookbook; I love mathematics, geometry, exactly how I love to create and write. I have been fond of photography for many years; however, I had to change direction. I am a finance manager by profession and a perfectionist by nature. I created websites, and I have been good with computers since 1991. At an early age, I was fond of sewing: until 16 years old, I sewed for my dolls, later – for myself. I write and speak a little two more languages, besides my own. All this was useful to me, no less than just experience in knitting. And what you now see in the patterns is the outcome of all these things brought together. Next, we go directly to the topic of this article. I will try to list what I added or what changed in the established canons of knitting patterns. And you decide whether you need all this or not, whether your knitting experience enriches by such kind of patterns or vice versa, takes away all the joy of knitting. *** Описания "Made by Vilnonis" многим кажутся очень сложными. Быстрота, простота это, конечно, преимущество, когда они проявляются на прочном фундаменте. Но когда нет основы, структуры, основополагающих правил, вязание можно использовать лишь для медитативного отдыха, но не для получения удовлетворяющего результата. Получается, что в нашем доме живет страшное мистическое существо, каждый месяц требующее приношения жертвы в виде неносибельного вязаного изделия, и имя этому чудовищу – шкаф. Начав писать описания, я решила, что хочу их видеть по-своему. То, что меня не удовлетворяло в описаниях, должна изменить; то, чего не хватало, должна добавить. Я понимала, что меня ожидает очень сложная работа. Опыт уже был достаточный, и не только в вязании. Кажется, что все, чем я занималась в жизни до этого, было только подготовкой к этому занятию. В молодости у меня было свое издательство как раз женских рукодельных и кулинарных журналов, а несколько лет назад я написала и издала кулинарную книгу; я люблю математику, геометрию, ровно, как я обожаю творить и писать. Я много лет увлекаюсь фотографией, правда, пришлось поменять направление. По профессии я менеджер-финансист, а по характеру – перфекционист. Я создавала веб-сайты, а с компьютером я дружу с 1991-ого года. В раннем возрасте я увлекалась шитьем: до 16 лет шила куклам, позже – для себя. Я немного пишу и говорю еще на двух языках, кроме родного. Все это пригодилось мне не меньше, чем просто опыт в вязании. И то, что вы сейчас видите в описаниях, это совокупность всех этих вещей. Далее перейдём непосредственно к теме этой статьи. Я попробую перечислить, что я добавила или что изменила в устоявшихся канонах вязальных описаний. А вы сами определите, нужно ли все это вам или нет, обогащают ли такие описания ваш вязальный опыт, или наоборот, отнимают всю радость в вязании. 1. Anatomical knitting The most challenging thing I encountered in my work is how to incorporate anatomical techniques into the design. What is anatomical knitting, I have already written before, and you can read by yourself. Knitwear equipped with different techniques that reflect the anatomical shape of our body fits well. There is a high probability that it will be comfortable, will flatter you regardless of your size and age, and will become your favorite. But all the anatomical thingies are precisely the thing, which makes the pattern complicated on all levels: designing, writing, calculating, and knitting after all. There are entirely new topics in each pattern, such as bust darts, expansion of the front armhole, asymmetrical armholes, and sleeve caps, and more. And still, not everything is as smooth. Patterns are written and based on standard measurements, and any of us rarely falls under these standards. It's like sewing with Burda's pre-made sewing patterns or buying a piece of clothing in a store. The Burda's patterns need to be adjusted by our individual features, and the tailor sometimes should fix the purchased clothing. On the other hand, adjusting such an "anatomical" pattern to your individual deviations from standard measurements is more accessible than if the pattern lacks those techniques initially. Also, far from all imagined or somewhere spotted designs can be turned into patterns containing anatomical features. There are some shapes, technologies, cuts, and stitch patterns in which a Vilnonis's "anatomical" foot has not yet stepped. And it's unlikely to happen. 1. Анатомическое вязание Самая сложная вещь, с которой я столкнулась в своей работе – это то, как внедрить в дизайн анатомические принципы. Что такое анатомическое вязание, я уже рассказывала раньше, и вы можете ознакомиться сами. Вязаная вещь, оснащенная разными приемами, отображающими форму нашего тела, хорошо садится. Велика вероятность, что она будет удобная, будет вас украшать в независимости от размера и возраста и станет любимой. Но все анатомические штучки как раз являются той вещью, которая в разы усложняет описание. Как его создание, описание всех процессов, так и вязание по нему. Появляются такие совершенно новые разделы в описании, как вытачки для груди, расширение передней проймы, зеркальные несимметричные проймы, окаты и другое. И все равно не все так гладко. Описания готовятся по стандартным измерениям, а редко кто из нас под эти стандарты попадает. Это как шить по выкройкам Бурды или покупать в магазине готовый предмет одежды. Для своих особенностей выкройку Бурды нужно подкорректировать, а купленную одежду нести к портному, чтобы он ее подогнал. С другой стороны подогнать такое "анатомическое" описание под свои личные отклонения проще, чем если бы в описании таких приемов не было заложено изначально. Также далеко не все придуманные или увиденные дизайны возможно превратить в описания, содержащие анатомические принципы. Есть некоторые формы, технологии, силуэты и узоры, в которые еще не ступала "анатомическая" нога Vilnonis'a. И вряд ли вступит. 2. The exact number of rows I began to give the exact number of rows in the patterns. At least when I used to knit by other patterns, I never met the given exact number of rows. Knitting lengthwise was provided only in centimeters or inches. And I still cannot understand this phenomenon. If the pattern provides the knitting gauge in stitches and rows, why then is the height further measured in centimeters (inches), and only the width in stitches? If you adhere to the unification of writing style, giving instructions "knit until the sleeve is 43 cm in height", you need to give the same instructions "cast on 50 cm in width". Someone thought before that the piece, which hung on the knitting needles at the moment we should measure it, was not yet washed and blocked. How can one get the correct length of such an unprepared piece? Or, take a calculator and calculate the length in rows by the swatch gauge? So why then you need such a pattern if the designer did not make these calculations for you? How without the exact number of selvage stitches to sew sleeve cap into the armhole? It is not only enormous difficult but also impossible. The rhetorical questions go on and on. So the exact number of rows appeared in my patterns. You do not have to do any calculations yourself; everything has been already calculated for you. Pieces are seamed based on the number of selvage stitches, and they always match. I now understand why, for many of us, final sewing and finishing equaled torture. How many projects have remained in the state of "unfinished" for only one reason – the seaming, which is based on the anecdote of "Two crocodiles fly. One is green, the other heads to the north". When each stitch or row on one piece has its pair on another, seaming and finishing from torment turns into pleasure, like playing a puzzle game. Also, changing the length of the pieces (I mean the length of the body and sleeves), depending on height and preferences, does not cause any problems. You have all the raw data for this. On the other hand, in other parts of the pattern, in which the exact number of rows is indicated, it is challenging to change the length. Say, if you changed the height of the armhole, you have to recalculate the height of the sleeve cap by yourself. And if you consider that the cap shape is anatomical, and everything is calculated down to the single stitch, the work awaits you is very problematic. 2. Точное количество рядов Я начала давать в описаниях точное количество рядов. По крайней мере, когда я вязала по другим описаниям, точное количество рядов мне никогда не встречалось. Вязание в высоту или в длину давалось только в сантиметрах. И этого феномена до сих пор не могу понять. Если в описании дается плотность вязания в петлях и рядах, почему тогда высота далее измеряется сантиметрами, и только ширина – петлями? Если придерживаться единства стиля, давая указания "вязать, пока длина рукава не достигнет 43 см", нужно давать указания "набрать в ширину 50 см". Кто-нибудь раньше подумал, что то, что у нас висит на спицах, и то, что мы должны измерить, пока еще не стирано и не отпарено. Как можно по такой недоработанной детали ориентироваться на правильность длины? Или же, брать калькулятор и по плотности образца рассчитывать длину в рядах самим? Так зачем тогда такое описание, если автор не сделал за вас эти расчеты? Как без указания рядов вшить окат в пройму? Это не только очень сложно, но и невозможно в принципе. Риторические вопросы продолжаются и продолжаются. Так у меня в описаниях появилось точное количество рядов. Вам не надо делать никаких расчетов самим, все за вас уже посчитали. Детали сшиваются, опираясь на количество кромочных петель и они всегда совпадают. Я теперь понимаю, почему для многих из нас сшивание и финальная сборка ровнялась пытке. Сколько проектов так и остались в виде недовязов лишь по одной причине – сшивание по принципу "летят два крокодила. Один зеленый, другой - на север". Когда каждая петелька или ряд на одной детали имеет свою пару на другой детали, сборка и отделка из мучения превращается в удовольствие, примерно, как игра в пазлы. Также изменение длины деталей (я имею в виду длину корпуса и рукавов), в зависимости от роста и предпочтений, не доставляет никаких сложностей. У вас есть все исходные данные для этого. С другой стороны, в других частях выкройки, в которых указано точное количество рядов, менять длину очень сложно. Скажем, если вы изменили высоту проймы, вам придется самим пересчитать высоту оката. А если учесть, что окат анатомический, и все рассчитано с точностью до петельки, работа вас ожидает очень сложная. 3. Technical pictures I began to add technical photos to the patterns, which I so missed in my knitting past. What is that? Technical pictures are shot placing the garment on a mannequin, on a flat surface, close-up of elements, technologies, and processes. A photo on a living model is designed to hook you with mood and decorations, and it can be deceiving. You cannot be sure what the presented prototype looks like in reality. The whole truth is revealed only by technical photos, which, if you are diligently and honestly developing a design, shooting and adding such photos is not a difficult thing. In them, you see a design, as it is. The pattern is an instruction, not fiction or glamorous reading, and any technical picture helps you with the assigned tasks. On the other hand, adding technical photos does not make the pattern layout fancier, and turns glamorous reading about the beauty of knitwear fashion into instructions on how to assemble a piece of furniture. It depends on what do you prefer more. 3. Технические фото Я начала добавлять в описания технические фотографии, которых мне так сильно не хватало в моем вязальном прошлом. Что это такое? Технические фото – это фото на манекене, расклады, фотографии элементов крупным планом, фотографии технологий и процессов. Фотография на живой модели предназначена для того, чтобы поймать вас на крючок своим настроением и обстановкой, и она может быть обманчива. Вы не можете быть уверены, как выглядит вязаный прототип на самом деле. Всю правду раскрывают только технические фото, которые, по сути, если ты действительно усердно и честно разрабатываешь дизайн, сделать и добавить не так уж сложно. В них вы видите вязаную вещь, как она есть на самом деле. Описание – это инструкция, а не художественная литература и не гламурное чтиво, и любая техническая фотография помогает вам в выполнении поставленных задач. С другой стороны, добавление технических фотографий не украшает само описание, и превращает гламурное чтиво о красоте вязаной моды в инструкцию "как собрать мебель". Тут уже что кому больше нравится. 4. Errata Every effort has been made to ensure the accuracy and completeness of the instructions contained in the Vilnonis' knitting patterns. However, mistakes do occur, how hard I try. If possible, I send newly edited versions to pattern owners. But since I do not have the entire database and contacts (contacts are available only from the pattern stores in vilnonis.net and Ravelry), I collect all errata and corrections in one place. I recommend that before knitting, make sure that no errors and their corrections are found in your version of the pattern. If you find a mistake in the pattern, please let me know. In general, the number of errors in the patterns makes me happy. There are very few of them thanks to the talented Early Birds team members, who are trying with all their hearts and sincerely root for those who will knit in the future. 4. Ошибки в описаниях Прикладываются все усилия для обеспечения точности и полноты инструкций, содержащихся в вязальных описаниях. Однако ошибки случаются, как не старайся. Если есть возможность, я рассылаю купившим описания новые версии с правками. Но так как у меня нет всей базы данных и контактов (контакты имеются лишь с магазинов описаний в vilnonis.net и Ravelry), я собираю правки в одном месте. Я рекомендую перед тем, как вязать, удостовериться, не найдены ли ошибки и их правки в вашей версии описания. Если вы нашли ошибку в описании, будьте добры, напишите мне. В общем, количество ошибок в описаниях меня радует – их сравнительно мало. Это уже заслуга талантливых Первых Ласточек, которые стараются от всей души и искренне болеют за тех, кто будет вязать в будущем. 5. Forum Everything comes to life, becoming interactive. There is a forum on the Vilnonis website with special threads where you can ask questions about specific patterns if you encounter difficulties: something is going wrong, something you do not understand. Other forum members and I will always come to the rescue. Do not be shy or passive – just write. Moreover, you will help others very well with this – you never know who will have similar questions. For this reason, I do not answer questions regarding knitting personally by mail, and on Instagram, I want to collect a database of your questions and answers in one place. So everyone will be more comfortable. 5. Форум Все оживает, становясь интерактивным. На сайте Vilnonis есть форум со специальным разделом, где вы можете задавать вопросы по конкретным описаниям, если столкнулись со сложностями: что-то не удается, что-то не поняли. Я и другие участники форума всегда придем на помощь. Не бойтесь, не ленитесь и просто напишите. Тем более, вы этим очень здорово поможете другим – мало ли у кого возникнут похожие вопросы. По этой причине я не отвечаю на вязальные вопросы лично по почте и в Инстаграмме, хочется собрать базу ваших вопросов и ответов в одном месте. Так всем будет удобнее. 6. Detailed schematics At the very beginning, I faced a dilemma – how accurate should be the measurements next to the pattern schematics. The width and length of the pieces should be given inevitable. But is it necessary to provide measurements of the height of the inclination of the shoulder slopes, the amount of expansion of the front armhole, the depth of the waist darts? Schematics would be very informative; you could transfer them to a chalk paper, maybe make your changes based on. Then I realized that if you liked the design, you've got the right gauge, and thoroughly follow the pattern instructions, these small measures will get right on their own. It will still be challenging to make major design changes – adjusting one place will ruin another. I do not recommend knitting a project if you have not fundamentally got into a given gauge, and, using the measurements in the schematics, you will try to re-calculate everything. In this regard, I limited the number of measurements, and the schematics now have only two tasks: to help choose the right size and to check whether the measurements coincided when you knitted, washed, and blocked the pieces. 6. Детальные выкройки В самом начале я столкнулась с дилеммой – насколько точными должны быть измерения рядом с рисунками выкроек. Понятно, что ширина и длина деталей должна быть. Но нужно ли давать измерения высоты наклона скоса плеч, величину расширения передней проймы, глубину талиевых вытачек? Выкройки были бы очень информативными, вы смогли бы перенести их на бумагу, может быть, вносить свои изменения на основе. Потом я поняла, что, если вам понравилась моделька, вы подобрали подходящую плотность, и придерживаетесь того, что указано в описании, эти мелкие мерки получатся сами собой. Вносить крупные дизайнерские изменения все равно будет сложно – корректировка одного места развалит другое. Я не рекомендую вязать изделие, если вы кардинально не попали в заданную плотность, и, пользуясь измерениями выкройки, будете пробовать все пересчитать. В связи с этим я ограничила количество измерений, и у выкроек сейчас стоит только две задачи: помочь правильно выбрать размер и проверить, совпали ли измерения, когда вы связали и постирали отдельную деталь. 7. Emphasis on the selvage stitch In my patterns, a lot of attention is devoted to selvage stitches. They are always included in the total number of stitches. You will always find how to work them, how to use them when seaming. In schematics, selvage stitches are excluded, since, in the end, they do not add width and hide in the seam. When measuring the blocked piece, do not measure the selvage stitches. 7. Акцент на кромочную петлю В моих описаниях много внимания посвящено кромочным петлям. Они всегда включены в общее количество петель. Вы всегда найдете, как их вязать, как использовать при сшивании. В измерениях выкроек кромочные петли исключены, так как в конечном итоге они не добавляют ширину и прячутся в шве. Измеряя постиранную деталь, кромочные петли не измеряйте. 8. Number of pages Each of the patterns resembles a mini-magazine or a mini-book, consisting of an average of 12-15 pages in relatively small print. I still can’t understand how knitting magazines manage to place two patterns on one page? Yes, the model photo is separate. Yes, there are no technical pictures and step-by-step tutorials. Yes, a schematics have a minimum number of measurements. Yes, there are no anatomical thingies included. And still strange. Of course, I strive for this, and I am continually looking for ways to compress my patterns because to say a lot with a few words would be an achievement. And, probably, the first thing that says 15 pages to a knitter is “caught, dear. You will knit this for ages”. I’m still waiting for some enlightenment in search of a new pattern style, but, probably, successful knitting of comfortable “anatomical” garments will never be able to fit on half a page. And you also need to understand that "long" is not necessarily "complicated". As I said in my earlier articles, the most difficult things in knitting are done only by increasing, decreasing, short rows, and their combination. If you've already learned them, then a large number of pages should not bother you. It should just hint that knitting is going to be easy and straightforward with all the small steps described. 8. Количество страниц Каждое описание – это мини-журнал или мини-книга, состоящая в среднем из 12-15 страниц достаточно мелким шрифтом. Я до сих пор не могу понять, как вязальные журналы умудряются разместить по 2 описания в одну страницу? Да, фотография модели – отдельно. Да, нет технических фото и фото-уроков. Да, выкройка с минимальным количеством измерений. Да, нет анатомических штучек. И все равно странно. Я, конечно, стремлюсь к этому, и постоянно ищу пути, как сжать свои описания, потому, что сказать многое малым, было бы достижением. И, наверное, первое, что говорит 15 страниц вязальщице, так это "попалась, дорогая. Ты будешь вязать это целую вечность". Я пока жду какого-то просветления в поисках новой системы описаний, но, наверное, удачное вязание удобных "анатомических" вещей все равно никогда не сможет разместиться на половине страницы. И еще нужно понять, что длинное – это необязательно сложное. Как я уже говорила в своих ранних статьях, самые сложные вещи в вязании выполняются лишь прибавлениями, убавлениями, укороченными рядами и их комбинацией. Если вы это умеете, тогда большое количество страниц не должно вас беспокоить. Это как раз должно намекать о том, что вязать будет легко и просто – ведь все шаги описаны. 9. There are no restrictions on the choice of yarn I am a designer independent of yarn manufacturers, and there are no restrictions on the choice of yarn. Moreover, I mainly knit from stock coned yarn, (it is way cheaper and not cut into hanks – fewer tails and knots) which is produced in limited quantities, and it is almost impossible to buy the original one. You will be able to knit what is offered from nearly any yarn. The composition, weight, yardage in the pattern is given for reference only. The only requirement is getting into a given gauge. Of course, you need to understand that with thin mohair, you won’t knit a coat, or a loose see-through swatch is not suitable for a densely knitted jacket, but you can replace merino with cotton, alpaca with cashmere, wool with some kind of mix. You must understand that the use of original yarn only at a small part contributes to a successful outcome. It all depends on entirely different things. The following Merle project (see below) is knitted from the original Loft yarn. The original yarn did not save from the folds at the bust and a shortened front because of the absence of bust darts in the pattern. 9. Нет ограничений в выборе пряжи Я являюсь независимым от производителей пряжи дизайнером, и в выборе пряжи никаких ограничений нет. Более того, я в основном вяжу из стоковой пряжи (она гораздо дешевле и неразрезана на моточки – меньше концов и узлов), которая выпускается ограниченными партиями, и достать такую же практически невозможно. Вам удастся связать то, что предложено, практически из любой пряжи. Состав, вес, метраж в описаниях дается только для ориентировки. Единственное требование – попадание в заданную плотность. Конечно, надо иметь понимание, что тонким мохером вы не свяжете зимнего пальто, или рыхлый просвечиваемый образец не подойдет для плотного жакета, но заменить меринос хлопком, альпака кашемиром, а шерсть каким-нибудь миксом вы всегда сможете. Надо понимать, что использование оригинальной пряжи только от малой части способствует удачному исходу. Все кроется в совершенно других вещах. Ниже представленный проект Merle связан из оригинальной пряжи Loft. Оригинальная пряжа не спасла от заломов и укоротившегося переда от отсутствия в описании вытачек для груди. 10. Patterns' style When I came up with the style of my patterns, I wanted you to feel that you are not knitting alone. To make it seem that there is a mentor next to you or a friend who knits with you. The main goal was that you can find as many tips and hints in the pattern as possible. How to reduce the number of yarn tails so that the reverse side is as tidy as possible? Where can you leave an uncut ball of yarn for further finishing or seams? How is it better to knit – tight or loose? How to change the length so that the stitch pattern does not shift? How to sew in a sleeve cap so that it fits in? How to carry a non-working yarn in a stripy design? What is the best color arrangement? How to precisely position buttonholes so that they are symmetrical to the edges and the same distances from each other? Why sew if you can knit to? What is the most reasonable order of knitting all pieces? And much more. Precisely what I lacked for many years of knitting. 10. Стиль описаний Когда я придумывала стиль своих описаний, я хотела, чтобы вы чувствовали, что вы вяжете не в одиночестве. Чтобы казалось, что рядом с вами находится советчик, друг, который вяжет вместе с вами, чтобы как можно больше подсказок и советов вы находили в самом описании. Как уменьшить количество концов пряжи, чтобы изнанка была как можно более чистая? Где оставить необорванный моточек для дальнейшей отделки или швов? Как здесь лучше вязать – туго или расслабленно? Как изменить длину, чтобы не сбился узор? Как попетельно вшить окат, чтобы он сел на свое место? Как в полосатом изделии переносить нерабочую нить? Как лучше расположить цвета? Как точно расположить петли для пуговиц, чтобы они были симметричны краям и одинаковыми расстояниями друг от друга? Зачем сшивать, если можно привязать? Какая очередность вязания деталей самая разумная? И многое другое. Именно то, чего не хватало мне долгие годы вязания.
- Canyon and Eyelets in Rocks. "Каньон" и ажурные скалы
The canyon is a deep valley with very steep, often hanging slopes and a narrow bottom. Often in canyons, you can find unique geological structures called hoodoos, carved by erosion as a result of exposure to wind, water, and ice. Nature is also able to create eyelets from solid matter for millennia. For a cardigan "Canyon", millennia and forces of nature are not needed. The eyelets between the winding cables can be easily done only with knitting needles and yarn. The cardigan is worked from bottom to top by separate pieces, which are further joined in a round yoke. The "cliffs" in the yoke upward become narrower using some intricate decreases. Side horizontal bust darts and the back neck shaping are added. The belt here does not play any practical function but is just an accessory for styling the looks. It has been a long time since the testing of this long cardigan has been over, and I could not get together to summarize. I like writing, and it does not bother me at all. But there are times when I cannot let go of the needles, and there are times when I prefer writing because, sometimes, I can barely even look at the needles. Now I have a "knitting period." I want to finish the spring collection, but to postpone summarizing is already merely unforgivable. The canyon was born for almost six years. That is the most extended designing process of anything in my practice, so I cherish it very much. It all started with a trip to the United States in 2014 with my husband in western and central America, including the Grand Canyon. The journey was breathtaking, which happens once in a lifetime. During testing on the forum, I talked more extensively, showing pictures. Here I am going to show only a few so that you can create an impression for yourself, what it was about, and what was the source of inspiration. The Grand Canyon itself is represented here, including Zion, Bryce, Sedona, Arches, Goblin Valley, and others. *** Каньон — глубокая долина с очень крутыми, нередко отвесными склонами и узким дном. Часто в каньонах можно встретить уникальные геологические структуры, называемые худу, выточенные эрозией в результате воздействия ветра, воды и льда. Природа также способна создавать ажуры из твердой материи за тысячелетия. Для кардигана "Каньон" тысячелетия и стихии не понадобятся, а ажур между извилистыми аранами легко выполнить лишь спицами и пряжей. Кардиган связан снизу вверх отдельными деталями, которые далее соединены в круглую кокетку. "Скалы" в кокетке с помощью замысловатых убавлений по направлению вверх становятся более узкими. Добавлены боковые горизонтальные вытачки для груди и удлинение задней части спинки (росток). Поясок здесь не играет какой-либо практичной функции, а является всего лишь аксессуаром для игры с образами. Прошло уже много времени после окончания тестирования этого длинного кардигана, а я никак не соберусь подвести итоги. Я очень люблю писать, и это меня никак не отягощает. Но бывают периоды, когда я не могу отпустить спиц из рук, а бывает, что хочется писать, так как временами я даже не могу посмотреть на спицы. Вот теперь у меня период вязания, хочется завершить весеннюю коллекцию, но оттягивать подведение итогов уже просто некультурно. Canyon у меня рождался почти шесть лет. Это самый долгий временной промежуток рождения чего-либо в моей практике, поэтому я им очень дорожу. Все началось с путешествия в Соединенные Штаты в 2014 году с мужем по западной и центральной Америке, включая массив Гранд Каньона. Путешествие было умопомрачительным, и такое случается раз в жизни. Во время тестирования на форуме я рассказывала более обширно, показывая фото, здесь покажу лишь несколько, чтобы вы могли создать себе впечатление, о чем речь, и в чем тут источник вдохновения. Здесь представлен сам Гранд Каньон, включая Зайон, Брайс, Седону, Арчес, долину Гоблинов и другие. Impressions live in a person for a long time; they are somehow imprinted in the brain, digested, and eventually produce all sorts of unexpected results. Here I'm not going to talk that this journey made me radically change my life, here I'm eager to talk about the stitch pattern, which was born precisely under the influence of the possibilities of nature to create eyelets in the rocks. I knitted this swatch shortly after I returned, and it lay in the box with the other samples for a very long time. And I already knew what would be the name of it... *** Впечатления живут в человеке долго, они каким-то образом откладываются, перевариваются и со временем выдают всякие неожидаемые результаты. Здесь не буду говорить, что это путешествие сподвигло меня кардинально изменить жизнь, здесь будем говорить об узоре, который родился именно под впечатлением от возможностей природы творить ажур в скалах. Именно этот кусочек я связала незадолго после того, как вернулась, и он пролежал в коробке с образцами очень долго. И я уже знала, как он будет называться... I have already represented the Canyon stitch pattern in a Morning sweater. Here it acted as a middle insert and was well-received by those who already made this sweater. But I had to give a chance to the Canyon pattern to flourish and sing in solo. *** Узор "Каньон" я уже использовала в свитере Morning. Здесь он шел как средняя вставка, и был хорошо принят теми, кто этот свитер вязал. Но я должна была дать шанс узору Canyon расцвести и запеть в соло. When I worked on the design, I knew one thing – square-chess type stitch patterns are incredibly complicated to model and shape. The stitch pattern Canyon exactly belongs to this type. I agreed on the short rows in the bust dart, which ruins the stitch pattern, preferring to better fit. But how to shape everything else – had no idea. Imagine a set-in sleeve and broken pattern repeats at the seams of armholes and sleeve caps. That is a joke, but Mother Nature, who has created the beauty from the rocks for thousands of years, would undoubtedly be offended by me. Here, my favorite technique, called "whole motif decrease," came to the rescue. What is it? Now I'm going to tell you. Decreases in pieces appear with making single or double decreases in the indicated places every other or more row. The piece gradually becomes smaller, and this moment is clear to everyone. It suits for Stockinette and simple stitch patterns. But what to do when the pattern repeat is slightly larger than two stitches? By decreasing it by one stitch at a time, we ruin the motif, and it seems to be bitten, defective, and upset with life. No one says that this is bad, and there are cases when it is impossible to do otherwise. But if there is an opportunity to choose another technology, then why not? Say, in the Yeti cardigan with a set-in sleeve (see below), where the precise shape of the armhole and sleeve cap is critical, the preference is given to it, sacrificing other possibilities to present the stitch pattern more engagingly. *** Когда работала над дизайном, я знала одно – узоры с квадратно-шахматным характером очень сложно моделировать. Узор "Каньон" как раз принадлежит такому типу. На укороченные ряды в вытачке для груди, ломающие узор, я согласилась, отдав предпочтение посадке. Но как сформировать все остальное – не имела ни малейшего представления. Представьте втачной рукав и обрезанные раппорты узоров у швов пройм и окатов. Это, конечно, шутка, но матушка Природа, тысячелетиями создававшая красоту из скал, на меня бы точно обиделась. Здесь на помощь пришла любимая техника, которую я назвала "убавление раппортов". Что это такое, сейчас расскажу. Убавления в деталях мы можем выполнять по одной или две петли одинарными или двойными убавлениями в указанных местах через установленное количество рядов. Деталь постепенно становится более узкой, и этот момент всем понятен, подходит для глади и несложных мелких узоров. Но что делать, когда узор чуть крупнее, чем две петли? Убавляя по одной петле мы испортим вид; раппорты узора будут казаться обкусанными, неполноценными и обиженными на жизнь. Никто не говорит, что это плохо, и есть случаи, когда по-другому поступить нельзя. Но если есть возможность выбрать другую технологию, так почему бы и нет? Скажем, в кардигане Yeti – втачной рукав, где очень важна точная форма проймы и оката, и предпочтение отдано именно ей, жертвуя другие возможности интереснее обыграть узор. The whole motif decrease is a simultaneous or gradual decrease of all stitches contained in one single pattern repeat. Let's look at some examples below. Here, the motif disappears entirely in an instant, the neighboring motifs merge or converge, continuing the stitch pattern. The repeat of the Mini-Cables pattern consists of 3 stitches; all three stitches decrease simultaneously. The repeat of the Rain pattern consists of 5 stitches; five stitches decrease in two rows. The repeat of the "Figures Eight" pattern consists of 6 stitches; five of them decrease at the same time. *** Убавление раппорта – это одновременное или постепенное убавление всех петель, входящих в один раппорт узора. Давайте разберем на примерах. Здесь раппорт узора как бы исчезает в одно мгновение полностью. Соседние раппорты сливаются или сближаются, продолжая рисунок узора. Раппорт узора Mini-Cables состоит из 3 петель, все 3 петли убавляются одновременно. Раппорт узора Rain состоит из 5 петель, 5 петель убавляются за два ряда. Раппорт узора "Восьмерки" состоит из 6 петель; 5 петель раппорта убавляются одновременно. Canyon cardigan was a little more complicated. The stitch pattern repeat here consists of 8 stitches, and it was almost impossible to decrease so many stitches at the same time without the appearance of folds and bumps. But extending the process of decreasing by as much as five rows salvaged the situation. It may seem that decreases here occur randomly, planting some impenetrable jungle of cables. But believe me, all the decreases are located precisely and mathematically, shaping an anatomical yoke. For the first time in the pattern, knitting yoke is presented separately for each of 6 sizes, making the knitting process more comfortable, and the size range captures even sizes such as XXS and 4XL. *** В кардигане Canyon дело обстояло немного сложнее. Раппорт узора здесь состоит из 8 петель и убавить столько петель одновременно показалось невозможным без появления складок и бугорков. Но растягивание процесса убавления раппорта аж на 5 рядов спасло ситуацию. Может показаться, что убавления здесь происходят хаотично, образовывая какие-то непроходимые джунгли из переплетений. Но поверьте, все убавления расположены четко и математически, формируя анатомическую кокетку. В описании впервые вязание кокетки подготовлено отдельно для каждого из 6-и размеров, облегчая процесс вязания, а размерный ряд захватывает даже такие размеры, как XXS и 4XL. Another little surprise awaits you in the cardigan, which, just by throwing an eye, may not be noticed. That is a decorative transition from the rib to the main pattern. Once I posted an article in the Knit-Tech section about what you should always think when making the transition from the rib to the main stitch pattern. We often forget such moments. We chose a rib pattern, the main pattern, and we begin to knit. And the moment how to arrange a "smart" transition from one pattern to another is often forgotten. And this is an exciting and addictive puzzle game that can make your creative process even more captivating. Here the transition is highlighted by small cables, where each column of the rib turns into such peculiar "roots" for the main stitch pattern motifs. *** В кардигане вас ожидает еще один маленький сюрприз, который, так просто кинув глаз, можно и не заметить. Это декоративный переход от резинки к основному узору. Я в разделе Knit-Tech когда-то разместила статью о том, что всегда надо подумать, как обыграть переход от резинки к узору. Такие моменты мы часто забываем. Выбрали узор резинки, основной узор, и начинаем вязать. А момент, как оформить "умный" переход от одного узора к другому, часто забываем. А это очень интересная и захватывающая головоломка, которая может добавить вашему творческому процессу еще больше интереса. Здесь переход оформлен маленькими перехлестами, где каждый столбик резинки становится такими своеобразными корнями для мотивов основного узора. "Canyon" has a belt, but this is purely your preference. The belt here is just an accessory for playing with looks. You are also free to change the length of the cardigan, from the calves to the hips. Find out what it looks like next. "Canyon" is a very complex design. I already understood this from your questions and letters. But if you read it carefully, be attentive, try to understand the essence, and break everything down into smaller steps, everything becomes not so difficult. Moreover, there is always an opportunity to get an advice on the forum. *** "Каньон" предлагается вязать с пояском, но это сугубо ваше предпочтение. Поясок здесь является всего лишь аксессуаром для игры с образами. Также вы вольны менять длину кардигана, начиная от середины голени, заканчивая бедрами. Как это выглядит, узнаете далее. "Каньон" – очень сложный проект. Я уже это поняла по вашим вопросам и письмам. Но если вчитаться, быть внимательными, понять суть и разбить все на составляющие части, все становится не так уж сложно. Тем более, что всегда есть прекрасная возможность посоветоваться на форуме. I must say that I knitted my prototype almost in one take. Without re-knitting and any preliminary calculations, blueprints, and sketches. Without torment and disappointment. Probably six years was enough for the project to have time to mature. *** Должна сказать, что я свой прототип связала почти за один присест. Без перевязов и каких-либо предварительных расчетов, схем и чертежей. Без мучений и разочарований. Наверное, шести лет хватило, чтобы проект имел время созреть. Testing the "Canyon" cardigan went very well. There were a lot of us, there were some setbacks, but on the whole, everything worked out. I want you to see how multifaceted the finished projects of the Early Birds team can be in such, say, limited in variability design. As always, here I'm going to show only a few projects, all the rest you find on Ravelry. *** Тестирование "Каньона" прошло очень хорошо. Нас было немало, случались некоторые неудачи, но в целом все удалось. Я хочу, чтобы вы посмотрели, какими многогранными могут быть воплощения первых ласточек в таком, скажем, ограниченном в вариативности дизайне. Как всегда, здесь покажу всего лишь несколько воплощений, все остальные вы найдете на Ravelry. And the winner of our testing was Irina, my long-standing member of Early Birds team ever since the Osinka forum. When she returned again, I was thrilled, and I would not be able to forget her piece of art for a long time. Irina, I hope that I have no more opportunity to miss you so much in the future. Thank you so much! *** А победительницей нашего тестирования стала Ирина, моя давнейшая первая ласточка еще со времен Осинки. Когда она снова вернулась, я была безумно рада, а ее произведения искусства не смогу забыть еще долго. Ирина, очень надеюсь, что наши разлуки впредь будут не такими длинными. Спасибо Тебе огромное! @alexira2005alex As a symbolic prize – one pattern to choose from as a gift. В качестве символического приза – одно описание на выбор в подарок.
- Dictator of All Designs and a "Waterfall"
When I begin to work on the next design, the first thing I do, I pick up the stitch pattern. Then I always ask myself a question of what opportunities or obstacles for performing design tasks this stitch pattern brings and how best to reveal its capabilities. Designing never happens in such order: choosing the shape and the purpose, picking-up the yarn and trying after all to impose a stitch pattern. In my personal opinion and relying on my experience, the sequence of steps should be quite the opposite. First, we pick up a stitch pattern. The next step is to find the yarn, which unveils the stitch pattern the best way possible, and only then the shape and the purpose follow, relying on the possibilities and limitations that the selected stitch pattern brings us. And often we encounter the fact that not all stitch patterns are suitable for the chosen design (style, type, purpose). Here we can conclude – the stitch pattern dictates the design. What do we need from a stitch pattern when we are working on the design so that it allows a flat two-dimensional piece to turn into a three-dimensional figure? Here the simplest knitting techniques come in handy: decreases and increases for changing the width and short rows for adjusting the length (in sideways knitting – vice versa). Next, we can analyze whether the chosen stitch pattern allows us to implement these techniques or not. The simpler the stitch pattern, the more flexible it is, the more complicated it is, the more resistant it is to shaping and modeling. As for me, I identified four groups of stitch patterns. *** Когда я начинаю работать над очередным дизайном, первое, что я делаю – я выбираю узор. Потом спрашиваю себя, какие возможности или преграды для выполнения конструктивных задач приподносит выбранный узор и как наилучшим образом раскрыть его возможности. Работа над дизайном никогда не происходит таким чередом: выбор формы и предназначения, выбор пряжи и пробование после всего наложить узор. По моему личному убеждению и опыту, ход мыслей должен быть противоположным. Сначала выбирается узор, для него подбирается пряжа, наилучшим образом раскрывающая узор, и только потом подбирается форма, полагаясь на возможности и ограничения, которые нам приподносит понравившийся узор. И часто сталкиваемся с тем, что далеко не все узоры подходят для выбранной формы (фасона, типа, предназначения). Вывод один – узор диктует дизайн. Что нам нужно от узора, когда мы работаем над дизайном? Чтобы он позволял плоское двухмерное полотно превратить в трехмерную фигуру. Для этого в вязании используются самые простые приемы: убавления и прибавления для изменения ширины и укороченные ряды для изменения длины (если изделие связано поперек – наоборот). Далее происходит анализ, позволяет ли выбранный нами узор или рисунок внедрить эти приемы. Чем узор проще, тем он гибче, чем он сложнее, тем он более стойкий моделированию. Для себя я определила четыре группы узоров. 1. Simple stitch patterns. Простые узоры Simple stitch patterns do not limit the flight of imagination. They allow you to translate all the designed shapes and styles, no matter how intricate they would be. That is the Stockinette and the reverse Stockinette stitch, moss stitch pattern, seed stitch pattern, garter stitch, patterns with short repeats (no more than four stitches and rows), or stitch patterns where the Stockinette stitch is prevalent. Some moments need to be taken into account, say, double decreases/increases in a seed or a moss pattern, as well as a shift by one row in short rows, but in general, these patterns do not become design dictators. We can say that you have a piece of fabric; all you need to do is to cut out a certain desired shape according to a pre-drawn and a pre-calculated blueprint. *** Простые узоры не ограничивают полет фантазии. Они позволяют воплотить все задуманные формы и фасоны, какими сложными они бы не были. Это лицевая или изнаночная гладь, жемчужный узор, рис, платочная вязка, узоры с мелким раппортом (не больше 4 петель и рядов) или узоры, где гладь доминирует. Есть некоторые моменты, которые нужно учесть, скажем, двойные убавления/прибавления в рисовом или в жемчужном узоре, также смещение на один ряд в укороченных рядах в мелких узорах, но в целом эти узоры не становятся диктаторами дизайна. Можно сказать, что у вас есть отрезок ткани. Остается вырезать из нее некую желаемую форму по заранее начерченной и рассчитанной выкройке. 2. Horizontal and striped stitch patterns. Горизонтальные узоры и полосатые рисунки In striped and horizontal patterns, there are no problems when it comes to changing the width of the piece with increases and decreases. The main challenge here arises with the lengthening the piece with short rows. If the stripes of the pattern are thin, the short rows absorb several pattern repeats. If the stripes are wide, the short rows should be placed in one repeat of the stitch pattern or repeatedly in several. It is clear that the flight of imagination here is already limited, and it takes a lot of effort to find a way out. Examples of such situations could be scattered bust darts, symmetrical short rows in a striped garter stitch, placement of a bust dart in the underarms, the fully-fashioned shoulder, interruption of stripes on shoulders, changing the width of some stripes. For all this complexity, I like stripes and horizontal stitch patterns a lot, but each case needs an individual approach, and there are no general rules. *** В полосатых и горизонтальных узорах нет никаких проблем с изменением ширины полотна убавлениями и прибавлениями. Основной вызов здесь возникает с изменением длины деталей укороченными рядами. Если полосатость узора мелкая, укороченные ряды поглощают несколько раппортов узора. Если полосатость узора крупная, укороченные ряды должны разместиться в одном раппорте узора или же повторно в нескольких. Понятно, что полет фантазии здесь уже ограничен, и нужно немало усилий, чтобы найти выход. Примерами таких обыгранных ситуаций могут быть разбросанные вытачки, симметричные укороченные ряды в полосатой платочной вязке, размещение вытачки для груди в подмышечный подрез, "японское" плечо, прервание полосатого узора на плечах, изменение ширины полосок. При всей этой сложности, я очень люблю полоски и горизонтальные узоры, но в каждом отдельном дизайне нужен индивидуальный подход, и здесь нет никаких общих правил. 3. Vertical stitch patterns. Вертикальные узоры It is easy and exciting to work with this type of stitch pattern. Here, sewing techniques play a little, and everything relies on knitting techniques. The verticality of the pattern relies on a rapport, separated by ordinary purl stitch or eyelets, which are the perfect spot to place a short row turn and thus change the length of the pieces. But here, another challenge arises, namely, decreases and increases, which meant to change the width of the pieces. In vertical stitch patterns, you can do ordinary single decreases and increases, gradually absorbing the stitch pattern repeats. In the intervals between vertically located single decreases or increases, the pattern repeat becomes unfinished, because it missing stitches to complete all the required manipulations. The incomplete stitch pattern repeat turns into longitudinal tracks of stitches that have nothing to do with the main pattern. I call this case a lost opportunity that the vertical stitch patterns give us. When working with a vertical pattern, always look for opportunities to increase or decrease the whole stitch pattern repeat in one take – this is where all the magic and beauty of vertical patterns hide. The picture below shows a sample in which the decreases (the yoke) and increases (the sleeve) are made decreasing and increasing the entire stitch pattern repeat in one take. *** С этим типом узоров работать очень легко и крайне интересно. Здесь мало играют швейные приемы, и все полагается на вязальную технику. Вертикальность узора основана на раппортах, отделенных обычными изнаночными петлями или дырочками ажура, которые можно использовать для поворотов укороченных рядов и так менять длину деталей. Но здесь возникает другая сложность, а именно – убавления и прибавления, меняющие ширину деталей. В вертикальных узорах можно делать обычные убавления и прибавления, частично поглощающие раппорты узора. В промежутках между вертикально расположенными убавлениями или прибавлениями раппорт узора становится неполным, и на нем начинает не хватать петель для завершения всех требуемых манипуляций. Тогда раппорт становится частичным и превращается в продольные дорожки петель, не имеющих ничего общего с основным узором. Я называю такое явление потерянной возможностью, которую нам дарят вертикальные узоры. Работая с вертикальным узором, всегда ищите возможности прибавить или убавить весь раппорт узора одновременно – именно в этом скрыта вся магия и красота вертикальных узоров. В картинке ниже представлен образец, в котором убавления (кокетка) и прибавления (рукав) выполнены убавляя и прибавляя весь раппорт узора целиком. The shoulder darts and vertical bust darts do not need to be hidden here; they eager to be emphasized and exposed, and technical elements here become the main embellishment of the design, not to mention the raglan lines. That is the reason why vertical patterns are most suitable for raglans and round yokes, and less suitable for those designs where the opposite stretching occurs. For example, in designs with a drop shoulder, the vertical pattern is stretched widthwise on shoulders under the weight of sleeves. For these designs is better to choose another type of the stitch pattern. See how the stitch pattern tries to dictate the design again? *** Формирование плечевых или вертикальных вытачек для груди здесь не нужно прятать, их хочется подчеркнуть и проявить, и технические элементы становятся главным украшением дизайна, не говоря уже о красоте самих регланных линий. Вот почему вертикальные узоры наиболее подходят для регланов и круглых кокеток, и меньше подходят для тех фасонов, где встречается противоположное растяжение. Скажем, в фасонах со спущенным плечом, вертикальный узор некрасиво растянется на плечах под воздействием веса рукавов. Для этого фасона лучше подобрать другой тип узоров. Видите, как узор опять пытается диктовать ваш дизайн? 4. Checkerboard stitch patterns. Шахматные узоры Checkerboard stitch patterns practically cannot be shaped or modeled. These are the most complex patterns, and to work with them, you always need a plan B. In such types of patterns, it is either impossible to fulfill the shaping techniques, or it is necessary to agree that the stitch pattern repeat is going to be interrupted somewhere. I honestly do not really like working with such patterns, but I like challenges, and from time to time, I take them. Taming tricks that conquer the obstinacy of these patterns can be placed in added patches of a simple stitch pattern, in tiny islands of a simple pattern in a more complex one, changing (simplifying) the stitch pattern, or accepting that the stitch pattern breaks somewhere. Then try to place as many types of shaping as possible in that one fracture line: narrowing/extension and elongation (for example, diagonal armhole dart for the bust). *** Шахматные узоры практически не поддаются моделированию. Это самые сложные узоры, и для работы с ними всегда нужен запасной план Б. В них или невозможно выполнить деталь формирующие приемы, или тогда уже нужно согласиться с тем, что раппорт узора будет сломан. Мне, честно, не очень нравится работать с такими узорами, но я люблю вызовы, и время от времени я за них берусь. Укрощающими приемами, которые позволяют обойти строптивость этих узоров, могут быть размещение их в добавленные простые узоры, в островки простого узора в сложном раппорте, изменение (упрощение) узора, или же, соглашение с тем, что узор где-то будет сломан. Тогда в линии переломанужно постараться разместить оба типа моделирования: сужение/расширение и удлинение (например, диагональная вытачка для груди, направленная в пройму). Sweater "Waterfall". Свитер "Водопад" As you probably already understood, the most recently published pattern of the “Waterfall” sweater of the upcoming collection of bulky yarn is a design which stitch pattern belongs to the vertical ones. The “Figure Eights” pattern is picked up from an old Lithuanian knitting book (published in 1968). Interestingly, the photograph of the stitch pattern in the book is printed upside down. *** Как вы, наверное, уже поняли, совсем недавно опубликованное описание свитера "Водопад" из будущей коллекции из толстой пряжи представляет дизайн, узор которого принадлежит типу вертикальных. Узор "Восьмерки" позаимствован из старой литовской вязальной книги (1968 г.) Интересно, что фотография узора в книге отпечатана вверх ногами. For a long time, I held this stitch pattern in my head, but for some reason, it seemed to me being more suitable in sideways knitting, until the vision of the whole rapport decrease appeared in my head, and the best medium for this experiment, of course, is a round yoke. *** Долго я носила в голове этот узор, но мне почему-то он представлялся в поперечном вязании, пока в голове не возник образ убавленных полных раппортов, и наилучшей средой для этого, конечно, является круглая кокетка. For the side horizontal bust darts, short row turns used the purl stitches, which appeared between the “eights.” Sleeve increases find itself at the edges, as usual, only including them into the “eights” pattern earlier than it would be enough for a complete rapport. Also, to avoid the long tracks of the knit stitches waiting for its right number. Two problems have been resolved. Then the yoke remains, in which the signature technique of vertical stitch patterns – decreases of the whole rapports in one take – was used. Here, in one take, five stitches simultaneously decrease. The last thing to do is to arrange these decreases correctly to maintain the principle of the anatomical yoke. A pleasant surprise was the moment that sleeves here seem to remind set-in sleeves. Such surprises in knitting that it’s impossible to foresee are not so rare, and it is a pity that more often, they are not so pleasant. *** Для прибавления длины в боковой вытачке для груди повороты укороченных рядов были размещены на изнаночных петлях узора между восьмерками. Прибавления для расширения рукавов были выполнены у краев деталей, как обычно, только включая их в узор "Восьмерок" раньше, чем их хватило бы для полного раппорта. Таким образом, можно избежать продолговатых дорожек лицевых петель, ожидающих необходимого числа для полного рапорта. Две проблемы решены. Осталась кокетка, в которой был использован коронный прием вертикальных узоров – убавление целых раппортов. Здесь в одном приеме одновременно убавлялось 5 петель. Осталось только грамотно расположить эти убавления, чтобы сохранить принцип анатомической кокетки. Приятным и незапланированным сюрпризом стал тот момент, что рукав здесь кажется втачным. Такие сюрпризы в вязании, которые невозможно предвидеть, случаются не так уж редко, жаль, что чаще они не столь приятные. Testing the Waterfall sweater was extremely diverse. In testing, it was allowed to change the length of the sweater and add a high collar. “Waterfall” has become a jumper, a tunic, a dress, a spring version, and even ... a hat! You will find more finished projects on Ravelry. *** Тестирование свитера "Водопад" было на редкость разнообразным. В тестировании разрешалось менять длину изделия, добавить высокий ворот. "Водопад" стал и джемпером, и туникой, и платьем, и весенним вариантом, и даже... шапкой! Остальные воплощения найдете на Ravelry. The winner of this testing was Inna, whose reveal made us all drop our jaws in wonder for a second. Initially, “Waterfall” was made for mom, but then presented to the daughter. It’s hard to say who of them is prettier... Inna, thank you very much for the beauty and congratulations from the bottom of my heart! *** Победительницей этого тестирования стала Инна, показ которой заставил нас всех на секунду застыть от восхищения. "Водопад" был связан для мамы, но подарен дочери. Трудно сказать, которая из них красивее... Инна, спасибо большое за красоту и от души поздравляю! As a symbolic prize – one pattern to choose from as a gift. В качестве символического приза – одно описание на выбор в подарок.
- Density Is the Key to Success. Плотность – залог успеха
This time I want to talk about the density of hand-knitted projects. That is very important for the successful outcome of your project. Even if you have learned how to achieve the best fit possible, picked up the high-quality yarn, chosen the right size, improper knit density can ruin your project. The definition of "density" in this article, I am going to use not as a gauge (or tension), but how much yarn it takes to fill or stuff one square inch or 1 cm of knit fabric, or "dense" as the opposite of the words "loose" and "sparse." No need to argue that someone knits tightly, and someone knits loosely. There is a universal combination of three factors: the weight of the yarn, the size of knitting needles, and the style of your knitting. Our task is to find it. You probably all know that knitting, accurate and neat finishing, competent blocking is not a guarantee of a successful outcome. We evaluate a favorite knitted garment only when we begin to wear it. At this time, the knitwear recognizes its owner; we test the fit and the comfort, the knitwear finally stretches to its actual size and reaches its limits of elasticity. The least anticipated change is an increase in the dimensions, both in width and length. If the pieces increase, it is clear that your pattern is losing its dimensions, and there can be no talk of any good fit. There are also some cases when the swatch shows one gauge, and after the blocking, the piece (or the finished project) unrecognizably expands. The gauge here is significantly different from the initial swatch gauge. *** В этот раз хочу поговорить про плотность ручного трикотажа, которая очень важна для удачного исхода вашей работы. Даже если вы выучили, как посадить вязаную вещь, подобрали качественную пряжу, правильный размер, неправильно подобранная плотность вязания может все испортить. Определение "плотность" в этой статье я буду использовать в другом понимании: не как петельную пробу, а как утрамбованность пряжи, а слово "плотный" как антоним словам "рыхлый" и "редкий". Здесь не будем спорить о том, что кто-то вяжет плотно, а кто-то – свободно. Существует универсальная комбинация трех факторов: толщины пряжи, номера спиц и особенности вашего вязания. Наша задача ее найти. Вы, наверное, все знаете, что связать вещь, собрать ее, грамотно провести ВТО – это еще не гарантия удачной работы. Тест на частоту выбора полюбившегося изделия мы проводим лишь тогда, когда начинаем его носить. Со временем изделие притирается к телу, испытывается посадка, степень удобства, трикотаж вытягивается до реальных размеров и достигает свою предельную степень растяжимости. Самое нежелательное изменение – это увеличение размеров деталей, как в ширину, так и в длину. Если полотна (детали) увеличиваются, становится понятно, что ваша выкройка потеряла свои первоначальные измерения и о какой-нибудь хорошей посадке речи быть не может. Бывают случаи, когда образец показывает одну петельную пробу, а после ВТО деталь (или уже готовое изделие) неузнаваемо увеличивается, и плотность вязания здесь в очень значимой степени отличается от начальной плотности образца. Why Does It Happen? Почему так происходит? Each yarn has its level of elasticity. For example, tighter twisted merino, ribbon yarn is more elastic; on the contrary, cashmere, natural linen, cotton – nearly inelastic. But there is some elasticity in every yarn. To do an experiment, take 1 m of tighter twisted merino wool, measure without stretching. And now stretch it to the limit. You will have 1,15 m of thread. So, merino can grow up to 15 percent. Imagine a shoulder line of 36 cm. Add 15%, and you will get 41,5 cm. The difference is 5,5 cm. And this is just a stretch of the thread. And where else is the elasticity of the knit fabric itself? Where are the tops of your sleeve caps going to find themselves? Or, a horizontal bust dart can very quickly become an abdomen dart, the waistline drops to the hips. So literally, of course, it doesn’t happen. Seams prevent stretchability, and stretching also splits into length and width, but it is clear that deviations can be decisive whether you wear your project or not. The denser your knitwear, the less stretchable it is and becomes more predictable in the future. Imagine a stitch is a small rectangle that is somewhat filled with yarn. The less space in each rectangle, and the more it is filled (stuffed) with yarn, the more its density, the higher shape stability and predictability, and the less extensibility and possibility of deformation. That is because the stitch uses less yarn itself, it has shorter legs, and the “shoulders” of adjacent stitches are also tightly supporting it. In loosely knit fabric, nothing supports the stitch nearby; it has nothing to lean on, its legs are long, there is a lot of room, and the stitch has all the possibilities to stretch in all directions. What is the reason when the finished product stretches out and loses its shape, and everything seemed to be OK with the swatch? The answer is simple: you do not wear a swatch, all the weight of the garment does not hang on it, and it is not affected by body movements regularly stretching the knitwear. The upper stitch of the 12x12 cm swatch on itself holds a maximum of 20-40 stitches below, which has almost no weight. In the garment, each upper stitch already has to carry 150-250 similar ones on itself, and this is already significant weight for the stitch. The loose stitch, living in a spacious apartment, begins to stretch and succumb to any impact: under the weight of the sleeves and body movements – widthwise. Under the weight of the garment itself – lengthwise. Now imagine stitches that live tightly. They are snugly pressed together. They are small; their legs are short, no extra length for stretching is allowed. Knitwear withstands initial measurements under any exposure. In the two lower images, the difference between loose and dense knitwear is shown. In the first image of loose knitwear, the stitches are long and have a lot of space amongst each other. In the second image, the stitches are tight, close to each other, the stitches themselves, and their legs are short, although the weight of the yarn is the same. *** Каждая пряжа имеет свою степень упругости. Например, сильно крученый меринос, ленточная пряжа очень упругие, наоборот, кашемир, мало обработанный лен, хлопок – почти неупругие. Но какая-то упругость есть в каждой пряже. Для эксперимента возьмите 1 м сильно крученого мериноса, отмеряйте не вытягивая. И теперь вытяните. У вас будет 1,15 м нити. Значит, конкретно этот меринос может вырасти до 15 процентов. Представьте линию плеч, которая у вас, например, сейчас 36 см. Добавьте 15% и вы получите 41,5 см. Разница составляет 5,5 см. И это только растяжение нити. А где еще само свойство трикотажа растягиваться? Где могут оказаться верхушки окатов ваших рукавов? Или же горизонтальная вытачка для груди очень легко может стать вытачкой для живота, линия талии опуститься до бедер. Так буквально, конечно, не происходит, есть швы, препятствующие растяжимости, также растяжение делится на длину и ширину, но понятно, что отклонения могут быть решающими, будете ли вы носить вещь, или нет. Чем плотнее ваш трикотаж, тем степень растяжимости трикотажа уменьшается и становится более предсказуемой в будущем. Представьте, что петля – это маленький прямоугольник, который до какой-то степени заполнен нитью. Чем меньше пустого пространства в каждом прямоугольнике и чем больше он заполнен нитью, тем его плотность, формоустойчивость и предсказуемость больше, а растяжимость и возможность деформации – меньше. Это происходит потому, что сама петля употребляет меньшую длину пряжи, ее ножки короче, также ее плотно поддерживают "плечики" рядом находящихся петель. В рыхлом трикотаже петлю рядом почти ничто не поддерживает, ей не на что опереться, ножки длинные, пространства много, и растянуться во все стороны такая петля имеет все возможности. В чем причина, когда готовое изделие расплывается и теряет форму, а с образцом, вроде, было все в порядке. Ответ прост: образца вы не носите, на нем не висит вес изделия и он не подвергается движениям телом, растягивающим трикотаж. Верхняя петля образца, скажем, 12х12 см, на себе держит максимум 20-40 петель внизу, что почти не имеет веса, а в готовом изделии каждая верхняя петля держит на себе уже 150-250 себе подобных, а это уже значимый для петли вес. Свободная петля, живущая в просторной квартире, начинает вытягиваться и поддаваться любому воздействию: под весом рукавов и движений – в ширину, под весом самого изделия – в длину. А теперь представьте петли, которые живут плотненько. Они уютно прижимаются друг к другу, они маленькие, их ножки – короткие, лишней длины для растяжения не выделено. Такой трикотаж выдержит первичные измерения при любом воздействии. В двух нижних образцах как раз и показана разница рыхлого и плотного трикотажа. В первом образце рыхлого трикотажа петли длинные и имеют много пространства между собой, во втором образце петли плотные, прижатые друг к другу, сами петли и их ножки короткие. Хотя толщина пряжи одинаковая. There are two ways to make the swatch denser: either we pick smaller knitting needles for the same yarn (we reduce the stitch’ rectangle with the same yarn), or we leave the same size of knitting needles, but we thicken the yarn by adding something to it (stuffing more yarn in the same rectangle). Or simply pick up the thicker yarn. The third factor, namely, your style of knitting (tight or loose), plays only a background role here. Each style can be adjusted choosing a different size of knitting needles. I am often asked why my designs are so heavy, why does it take so much yarn? The answer here is obvious – I use more yarn in the same square area for the higher density. If you look historically, in the first half of the last century, maybe even until the seventies, there was no talk of loose knitting. Knitting took place mainly with 2 mm knitting needles, less often 3 mm, the knitwear was very dense, who does not remember felted armpits? The first and the most important purpose of knitwear was to warm the body, and only then – for the look. The second goal was the durability of knitwear. And dense knitwear was a matter of course. But already from the eighties and especially in the nineties, when simplified shapes came into fashion, also Novelty yarn together with intarsia (paintings on spacious canvases), fitting, density, intricate shapes, and patterns hid deeply in the closets of our grandmothers or were trampled under the tractor caterpillar of a grunge fashion in nineties. The concept came into fashion that the quicker, the better. And a densely knitted fabric, supporting the shape of intricate design, gave way to the lushness and extravaganza of Novelty yarn (you can’t tightly knit it) and colourfull intarsia. The fashion of the late eighties and nineties cheapened the art of hand knitting. At that time, glamour knitting magazines began to flourish, and they became easily accessible to the masses. Who will publish the magazines with patterns if one project takes two months to be finished? Knit in a week: four rectangles of loose knitwear with large knitting needles. There was an exposition of “fancy” novelty yarn and the knitted museum paintings, not techniques: they, as such, generally were absent. And for many of us, on such a knitting pitch, an understanding has developed that “loose” is equal to “quick.” Many have grown up on this, including me. *** Существует два способа уплотнения трикотажа: или мы берем более тонкие спицы для той же пряжи (уменьшаем сам прямоугольник петли с той же нитью), или мы оставляем тот же размер спиц, но утолщаем нить, добавляя к ней что-нибудь (в том же прямоугольнике утрамбовываем больше нити) или же просто выбираем более толстую пряжу. Третий фактор, а именно ваш стиль вязания (плотно или свободно) здесь играет меньшую роль. Каждый стиль может быть подкорректирован другим размером спиц. Меня часто спрашивают, почему мои дизайны такие тяжелые, почему требуется так много пряжи? Ответ, думаю, теперь понятен – я использую больше пряжи в ту же самую квадратную площадь. Если смотреть исторически, в первой половине прошлого столетия, может даже до семидесятых, о рыхлом вязании речь не шла. Вязание происходило в основном спицами 2 мм, реже 3 мм, трикотаж был очень плотным, аж сваливался в подмышках. Первой и самой важной целью вязаных изделий было утеплять тело, и только потом – украшать. Второй целью была долговечность трикотажа. И плотный трикотаж был само собой разумеющееся. Но уже начиная с восьмидесятых и особенно в девяностых, когда в моду пришли упрощенные фасоны, также Novelty пряжа вместе с интарсией (картины на огромных полотнах), посадка, плотность, сложные фасоны и выкройки спрятались в шкафах наших бабушек или были затоптаны под гусеницами трактора grunge моды девяностых. В моду пришло понятие, что, чем быстрее, тем лучше. И плотное вязаное полотно, держащее форму сложного фасона уступило место пышной и экстравагантной пряжи Novelty (ее плотно не свяжешь) и многоцветной интарсии. Мода конца восьмидесятых и девяностых упростила искусство ручного вязания. В то время начали расцветать гламурные журналы по вязанию, и они стали легко доступными для широких масс. Кто будет издавать журналы с описаниями, если один проект займет два месяца работы? Свяжите за неделю: четыре прямоугольника рыхлого трикотажа огромными спицами. Бытовала экспозиция "навороченной" пряжи и вязаных музейных картин, не фасона или вязальных технологий: они, как такие, вообще отсутствовали. И у многих из нас на такой подаче вязания сформировалось понимание, что "рыхло" равно "быстро". Многие на этом выросли, включая меня. Standing Swatch. Стоящий образец Let's go back to our time. Airy and loose knitwear has its place in knitting, for example, for shawls and scarves, for large falling collars, knitted blouses, tops, some yokes, projects made of light mohair. For those designs where the structure is not needed, or the structure is created using other additional techniques. Knitted cardigans, jackets, coats, knit dresses, vests, designs with set-in sleeves and the shoulder line – these are more tailored shapes for which a properly selected density is of vital importance. These designs must have almost the same density in all parts, and basically, they retain themselves. They may have hems, trims, and tighter edges, but they do not have a decisive effect on the dimensional stability of the project. Knitwear here should not be affected by the weight of the product itself and regular body movements. For such designs, even special stitch patterns with slipped or crossed stitches are picked-up. Then the initial measurements of the pattern are maintained; the project fits right and does not deform over time. To make the right swatch for such projects, and to achieve the specified density, we choose a thicker yarn. We rather compress it with smaller knitting needles than "inflate" the thinner yarn with larger knitting needles. How to understand if the density is sufficient for knitted jackets and other designs of a more tailored shape? For this, we can use the method of "standing swatch." If your swatch with measurements of 12x12 cm stands still, raised vertically, at least for a while, and it does not bend – density (and yarn) is suitable. If not, we must either make it denser with smaller needles or pick up another, thicker yarn. *** Вернемся в наше время. Свободно вязаный трикотаж имеет свое место в вязании, например, для шалей и шарфов, для больших падающих воротников, кофточек, топов, изделий из тонкого мохера. Для тех изделий, где не нужен каркас или этот каркас будет создан другими дополнительными приемами. Вязаные жакеты, куртки, пальто, плотные платья, жилеты (в основном плечевые изделия) – это те изделия строгой формы, для которых правильно подобранная плотность имеет жизненную важность. Эти изделия должны иметь практически одинаковую плотность во всех частях изделия и в основном они держат сами себя. У них могут быть укрепленные края, планки и бейки, но они не имеют решающего воздействия на формоустойчивость изделия. Вес самого изделия и движения тела не должны влиять на растяжение. Для таких изделий часто подбирается специальные узоры со снятыми или перекрещенными петлями. Таким образом сохраняется первичные измерения выкройки, изделие будет сидеть правильно и со временем не изменится. При подготовке образца для таких изделий и для достижения заданной плотности мы будем выбирать более толстую пряжу и уплотнять ее до нужной плотности более тонкими спицами, чем будем "раздувать" тонкую пряжу более толстыми спицами. Как понять, достаточная ли плотность для вязаных жакетов и других изделий более строгой формы? Для этого мы можем использовать метод "стоящего образца". Если ваш образец с измерениями 12х12 см, поднят вертикально, хоть какой-нибудь промежуток времени стоит, не гнется – плотность (и пряжа) подходит. Если нет, мы должны или уплотнить его, или подобрать другую пряжу. Cardigans, tops, pullovers, designs with round yokes, and other soft-shaped designs can be different: both dense and moderately loose, squishy, translucent, draping, etc. I didn’t just single out “moderately.” Too sparse and loose knitwear even in soft-shaped products can nullify your painstaking efforts, under the influence of the above factors: weight, moisture, and body movements. Here, the importance of hems, ribs, trims, tight edged, and seams increases – they frame, restrain, and carry this “knitted air.” The edges and elastic bands should be tight, elastic, restraining and, together with the seams, create the frame of the project. The knitwear durability relies on them only. If the project trims, hems, planks and ribs are also loose – we can say goodbye to the spent 100 hours of our life. Hello closet, here’s another dead load. *** Кардиганы, кофточки, топы, изделия с круглыми кокетками, то есть, изделия более мягкой формы, могут быть разные: как плотные, так и в меру рыхлые, редкие, прозрачные, падающие и т. д. Я не просто так выделила "в меру". Слишком рыхлый трикотаж даже в изделиях мягкой формы может свести на нет вашу кропотливую работу под воздействием вышеуказанных факторов: веса, влаги и движений. Тут увеличивается значимость планок, резинок, кантиков, бортиков и швов – они обрамляют, сдерживают и несут на себе этот "вязаный воздух". Края и резинки должны быть достаточно плотными, стягивающими, сдерживающими и, вместе со швами, создавать каркас и обеспечить долговечность изделия. Если в изделии с рыхлым трикотажем планки, края и резинки тоже рыхлые – можем попрощаться с потраченными 100 часами жизни. Здравствуй шкаф, вот тебе еще один мертвый груз. Signs of Loose Knit Fabric. Признаки рыхлого полотна Each yarn has its own boundaries of being dense and loose: natural linen will always be translucent, even if it is knitted tightly, and cottage wool, even in a loose state, is quite dense. Still, the problem arises when we cross those boundaries. In loose knitting, droopy and uneven stitches appear, and stripy rows effect occurs when you are rowing out. The garment hangs, soon begins to resemble a rag, and after wearing for some time, it finally loses its shape. After all, even lace look more expressively against a solid background than against a sparse one, when it is impossible to distinguish or highlight a lace pattern on the fishnet. Dense knitwear is durable and maintains its shape with any number of washings. And of course, there are several more criteria, such as the characteristics of the yarn to swell, stretch, settle, there is also someone who knits tightly, there is someone who knits loosely, but the general idea, I think, is understandable. In cases of knitting failures, the design, the pattern, or the yarn is far from always to blame. Knit the same project more tightly – and you hit the jackpot. The project would fit and not “hang down” and would not lose its original shape over time. In the two samples shown below – two back pieces knitted with the same yarn (Garnstudio DROPS Baby Merino with Rowan Kidsilk Haze). This pairing was very uncomfortable for knitting. Merino is strongly twisted, very elastic, and stretchy; on the contrary, mohair is nearly inelastic. Due to the difference in the elasticity of the yarn, it was almost impossible to achieve smooth stitches. Both samples were washed under the same conditions: once, without detergents, only with lukewarm water. The first sample used US2,5 (3,0 mm) knitting needles for the rib, the main piece – US5 (3,75 mm) needles. The second sample is worked much more tightly: rib uses US1,5 (2,5 mm) needles, the main piece – US4 (3,5 mm). The difference is obvious; the second sample has the potential after the second washing with detergent and a softener, pressing, become almost perfectly smooth, also to maintain the stretchiness of the rib. The first sample, of course, must be unraveled, as it is too bumpy and does not have hope for a satisfactory level of quality. *** Каждая пряжа имеет свои грани плотности и рыхлости: натуральный лен всегда будет просвечиваемый, даже если его вязать плотно, а деревенская шерсть даже в рыхлом состоянии достаточно плотная, но вся проблема возникает тогда, когда мы выпадаем из этих граней. Самый верный признак слишком рыхлого полотна – неровные петли и ощущаемая рядность. Изделие свисает, деформируется, а после ношения и стирки окончательно теряет форму. Плотный трикотаж долговечен и выдерживает форму при любом количестве стирок. Ведь даже ажур вырисовывается и смотрится более выразительно на плотном фоне, чем на рыхлом, когда на "сетке" невозможно различить или выделить ажурный узор. И конечно, есть еще несколько критерий, таких как свойство пряжи разбухать, вытягиваться, оседать, ваш стиль вязания (плотно или свободно), но общая идея, думаю, понятная. В случаях вязальных неудач далеко не всегда виноват дизайн, описание или пряжа. Связали бы то же самое изделие плотнее – выиграли бы джекпот. Изделие бы "село", а не "свисло" и со временем не теряло бы первичную форму. В двух ниже показанных образцах – спинки, связанные той же самой пряжей (Garnstudio DROPS Baby Merino вместе с Rowan Kidsilk Haze). Эта пара оказалась очень неудобной для вязания. Меринос сильно крученый, очень упругий, мохер эластичен в гораздо меньшей степени. Из-за разницы в упругости пряжи достичь ровных петелек было почти невозможно. Обе резинки связаны классическим вязанием. Оба образца постираны в одинаковых условиях: один раз, без средств, только водой. Первый образец связан: резинка – спицами 3 мм, основное полотно – 3,75 мм. Второй образец связан гораздо плотнее: резинка – спицами 2,5 мм, основное полотно – 3,5 мм. Разница очевидна; второй образец имеет потенциал после окончательной стирки со средствами и смягчителем, также после отпаривания, стать почти идеально ровным, сохранить упругость резинки. Первый образец, конечно, подлежит распусканию, как слишком рыхлый и не имеющий надежды на удовлетворяющую степень качества. I want to share the signs of poorly achieved density (loose, sparse knit) so that you can evaluate your work and find your proper personal density in the future. 1. After washing and/or wearing the finished project has expanded, stretched out, and lost the initial dimensions of the pattern. 2. The lower hems, ribs stretched out and did not fulfill their function of tightening or restraining. 3. The sleeve elbow is extended and does not come back when the arm is straightened. 4. The button band is stretched out. 5. The neckline expands and increases; the garment does not hold on to it; it slips down the shoulders. 6. Under the weight of the sleeves, the shoulder points slide down; chest width, back width, and shoulder line length measurements increase. 7. Some part of the body falls out (lengthens, hangs). As a result, an uneven, wavy bottom is obtained; it is sometimes uneven in length. 8. The side seams tighten the garment; that does not happen during seaming, but after wearing, when the stable seams remain at the initial length, but the body parts stretch out, fall out. 9. Uneven wonky stitches, stripy rows. 10. A lace pattern is not detectable; it merges with the "fishnet." 11. The finished project gauge is different from the swatch gauge in length, width, or both. 12. The look of the worn-out garment. 13. Knitted the right size, but it turned out a size larger. 14. A sweater or a pullover turned into a tunic or a dress. If you buy yarn in skeins, on each label, you find the recommendation of the manufacturer or distributor regarding the size of the needles. They base their recommendations on knitting size and density on the average test knitters or the average knitting size commonly used by their in-house designers. It is unlikely that such garments or designs have been tested by time. Analyze the table below with a few examples of popular manufacturers, what size of knitting needles manufacturers recommend, and what size of needles for a particular yarn I would recommend. (I knitted all the samples of yarn below, I even wore some). My style of knitting is medium, I knit not tightly and not loose, depending on your style, the size of the knitting needles, of course, would be different. But some discrepancies are impressive. All manufacturers, for some reason, offer too large knitting needles. *** Хочу поделиться признаками неправильно подобранной плотности (рыхлое, недостаточно плотное полотно), чтобы вы могли оценить свои работы и в будущем найти свою плотность. 1. После стирки и/или использования изделие выросло, вытянулось и потеряло первичные измерения выкройки. 2. Нижние планки, резинки растянулись и больше не выполняют свою функцию стягивания или сдерживания. 3. Вытягивается локоть и не возвращается назад, когда рука выпрямлена. 4. Фалдит планка застежки. 5. Расплывается и увеличивается горловина, на ней изделие не держится, сползает с плеч. 6. Под весом рукавов уезжают точки плеч вниз; увеличивается измерения ширины груди, ширины спинки и линии плеч. 7. Выпадает (удлиняется, свисает) какая нибудь часть корпуса, в итоге получается неровный, волнистый низ, он местами неодинаковой длины. 8. Стягивают боковые швы и это происходит не во время сшивания, а после надевания, когда стабильные швы остаются, какими должны быть, а полотна, растянувшись, выпадают. 9. Неровные, "прыгающие" петли, заметная рядность. 10. Не вырисовывается ажурный узор, он сливается со "сеткой". 11. Плотность вязания изделия отличается от плотности образца в длину, в ширину, или оба случая. 12. Вид поношенного изделия. 13. Вязали свой размер, а получилось на размер больше. 14. Свитер или пуловер превратился в тунику, платье. Если вы покупаете моточную пряжу, на каждой этикетке вы увидите рекомендацию производителя или дистрибьютора насчет размера спиц. Они основывают свои рекомендации насчет размера спиц и плотности на среднем образце тестирующих вязальщиц или на среднем размере спиц, обычно используемым их наемными дизайнерами. Вряд ли такие изделия или дизайны испытывались временем. Проанализируйте табличку ниже с несколькими примерами популярных производителей, какой размер спиц рекомендуют производители, и какой размер для конкретной пряжи рекомендовала бы я. (Все ниже представленные образцы пряжи я вязала (или пробовала вязать), некоторые носила). Мой стиль вязания – средний, я вяжу не плотно и не свободно, в зависимости от вашего стиля, размер спиц, конечно, же будет другой. Но некоторые несовпадения впечатляют. Все производители почему-то предлагают слишком большой размер спиц. No need to overdo it. Перестараться не нужно Having read about tight knitting, no one has to go to extremes. The stitch should slide freely along the needle, hands and fingers should not hurt; the swatch should not be stiff or rigid, resembling felt or cardboard. To finalize everything, knit the same yarn with three different neighboring sizes of knitting needles. The one that is a see-through, most likely, will not work. One that was painful to knit, too. And the one in which the stitches are even, nicely and comfortably snuggle against each other, and no stripy rows spotted, will be the right one. Good luck with knitting! *** Начитавшись о плотном вязании, не надо впадать в крайности. Петля должна свободно скользить по спице, руки и пальцы не должны болеть, образец не должен стоять колом и не гнуться, напоминая войлок или картон. Чтобы окончательно почувствовать и определиться, провяжите ту же самую нить тремя разными размерами спиц. Тот вариант с неровными петлями, который просвечивается, скорее всего, не подойдет. Тот, который было больно вязать, также. А тот, в котором петельки ровные, красиво и уютно лежат прижавшись друг к другу, а рядность не наблюдается, будет ваш, тот самый правильный. Удачи в вязании!
- Anatomical knitting. Анатомическое вязание
Intro It is a long and boring reading. Maybe only fans of knitting find this something fascinating. But to understand a little more in any field, a tedious study is inevitable. In order not to torture you completely and discourage the desire to do what you love, I try, where possible, to avoid the numbers, and provide everything more visually. In our times, this way of studying is perceived most successfully. Make yourself tea or coffee, sit comfortably, and begin. If it seems too boring, break this post into several parts. If you feel that with each line, the desire to knit decreases, quickly close this post, and do not come back to it ever again. Often, when you read my knitting lessons, blog articles, Instagram posts, or if you knit my patterns, you come across a strange word like “anatomical.” What does this mean? And what does biology have to do with it, if we are talking exclusively about knitting? “Anatomical” in knitting means that the knitted garment follows or reflects the shape of your body. It is not flat, but three-dimensional, and roundness, protrusions, and features of the human body are taken into account in it. The more anatomical “thingies” are implemented in the design, the garment is more comfortable to wear. It fits well and does not remind of itself, requiring non-stop pull-ups and corrections. Moreover, it flatters you, regardless of your size, height, or age, as a made-by-order tailored suit flatters you. On the Internet or television, you can hear that for a grown-up or bigger size women for different and understandable reasons, wearing knitwear is contraindicated. And they are right. If you put a flat sweater on such a lady, which was modeled for size XXS, and you just increased it without making any other adjustments, of course, this lady does not look nice. All knitwear in clothing stores is produced that way; in that way, sizes are calculated in the vast majority of knitting patterns. Sadly, even not-knit clothing in mass production is similarly increasing in size. And if you say that you do not need any beauty to gather mushrooms, the comfort of wearing a “Mushroom sweater” has not yet been canceled. But these television hosts and authors do not know that knitwear can be adjusted for bigger sizes in the same way as a tailor does when he works on an individual order because nothing fits in the stores. I want to go through these anatomical “thingies” so that you know what techniques I use in my patterns, what you need to consider if you knit your design, and what you need to apply if you want to correct a simplified pattern. Предисловие Это будет длинное и занудное чтиво. Может только фанатам вязания это покажется чем-то увлекательным. Но для того, чтобы понять чуть больше в любом поприще, занудное изучение чего-либо неизбежно. Чтобы не замучить вас окончательно и отбить желание заниматься любимым делом, постараюсь, где возможно, избежать цифр, и предоставлю все более визуально. Говорят, что в нынешнее время такой способ изучения воспринимается успешнее всего. Сделайте себе кофе или чай, удобно расположитесь и начнем. Если покажется слишком занудно, разбейте этот пост на несколько частей. Если почувствуете, что с каждой строкой желание вязать уменьшается, быстро закройте эту статью и больше к ней не возвращайтесь. Часто, читая мои уроки по вязанию, статьи в блоге, заметки в Инстаграме, или если вяжете по моим описаниям, вы сталкиваетесь с таким странным словом, как "анатомический". Что это значит и причем тут биология, если речь везде идет исключительно о вязании. "Анатомический" в вязании означает то, что вязаное изделие повторяет или отображает форму вашего тела. Оно не плоское, а трехмерное, и в нем соблюдены округлости, выступы и особенности человеческого тела. Чем больше анатомических "штучек" в конструкции дизайна, тем изделие более удобное; оно хорошо сидит и не напоминает о себе, требуя подтягиваний и поправок. И оно украшает вас, в не зависимости от вашего размера, роста или возраста, как украшает вас по индивидуальному заказу пошитый костюм. В просторах интернета или на телевидении можно услышать, что более возрастным или более пышным дамам по разным и понятным причинам носить трикотаж противопоказано. И они в чем-то правы. Если на такую даму надеть плоский свитер, который моделировался для размера XXS, и его просто увеличили, не внося никаких корректив, конечно, эта дама будет выглядеть не очень. Только таким образом производятся весь трикотаж в магазинах одежды, только так рассчитываются размеры в подавляющем большинстве вязальных описаний. Печально, но, даже шитая одежда в массовом производстве увеличивается в размерах похожим образом. И даже если вы скажете, что для похода за грибами вам красота не нужна, удобство грибного свитера еще никто не отменял. Но эти ведущие программ и авторы статей просто не знают, что вязаное можно подогнать для округлых форм также, как это делает портной, когда мы обращаемся с индивидуальным заказом по причине того, что в магазинах ничто не садится. Хочу пройтись по этим анатомическим "штучкам", чтобы вы знали, какие приемы применяются в моих описаниях, что нужно учесть, если вяжете свой дизайн, и что можно применить, если хотите исправить упрощенное описание. 1. Taking care of the bust I often have a question. Why do we knit hats round, and do not pull a flat knitted pancake on our heads? That, like, is understandable to everyone, because the head is ball-shaped. Then why do we pull on a flat front of the sweater onto the ball-shaped bust? For the bust, you need to create additional space in the knit project. It consists of the added width, which is later decreased by darts, and the added length. The starting point here can be the back piece. The front piece is going to be modeled, making some changes that are based on the difference of measurements. Let’s say, my personal half front measurement at the bust level is 5 cm wider than the back. The length of the front is 4 cm larger than the back. If I don’t change the dimensions of the front and knit it equal to the back, the bust still requires its own space, stretching widthwise and shortening lengthwise, forcing the garment to slip back and creating all sorts of ugly creases and wrinkles around the bust. 1. Позаботиться о груди У меня часто возникает вопрос: почему шапки мы вяжем круглыми, а не натягиваем на голову плоский вязаный блин? Это, вроде, всем понятно, потому, что голова шарообразная. Тогда почему мы на шарообразные груди натягиваем плоскую деталь переда? Для груди в вязаном изделии нужно создать дополнительное пространство. Оно состоит из добавленной ширины, которая потом убирается посредством вытачек, и добавленной длины. Точкой отсчета нам может послужить деталь спинки, а перед моделируется, основываясь на разнице измерений. Скажем, лично у меня перед на уровне груди шире спинки на 5 см, а длиннее на 4 см. Если я не изменю измерения переда, а свяжу его ровным спинке, грудь все равно потребует свое, растягивая и укорачивая перед, заставляя изделие сползать назад и создавая всякие некрасивые заломы вокруг себя. Let's begin with a simpler one. The width of the front piece (or the total width of two fastened fronts) should be wider than the back based on your measurements and balance between 2 cm for a cup 0-A to 10 cm for a cup E. How to add the width to the front piece? Below are the most common cases, and you, of course, are free to come up with your solution – because each design is individual. In the samples below, the back is drawn in blue; the front part is in black to make it easier to track the difference. 1. The front piece is wider than the back over the entire height – from the bottom to the armholes. It suits best for fastened garments. 2. The front piece at the bottom is equal to the back; the front piece up to the armholes gradually expands. 3. In designs with a waistline, add the width under the bust and/or at the side seams. Begin from the waistline and continue up to the bust. 4. In A-line designs, we can make fewer decreases in the front piece than in the back piece at the side seams. *** Начнем с более простого. Ширина детали переда (или суммарная ширина застегнутых полочек) должна быть шире, основываясь на ваши индивидуальные измерения и балансировать между 2 см с чашкой 0-A до 10 см с чашкой E. Как добавить эту ширину в деталь переда? Ниже представлены самые частые случаи, а вы, конечно, вольны придумать свои – ведь каждый дизайн индивидуален. В ниже представленном образце спинка отображена голубым контуром, деталь переда – черным, чтобы было легче отследить разницу. 1. Деталь переда шире детали спинки по всей высоте – от низа до пройм. Лучше подходит для застегиваемых изделий. 2. Деталь переда внизу ровна по ширине детали спинки, перед до пройм постепенно расширяется. 3. В приталенных изделиях добавляем ширину под грудью вытачками и/или у бокового шва от линии талии вверх до груди. 4. В изделиях А-Силуэта делаем меньше убавлений в детали переда, чем на спинке у бокового шва. Next, go directly to the bust darts. Understanding darts in knitting is the opposite of sewing. We already have everything in the cut piece of fabric, including space for the bust and everything else. It is only necessary to suture and trim, in other words, reduce. In the beginning, we have nothing in knitting, which means we need to knit and create the space for the bust; in other words, increase it. When there is such a fundamental difference, some sewing techniques are not suitable for knitting and do not work. Even if you look at the diagram below, it is drawn according to the principles of sewing. A piece for the front is cut out of the fabric, which is larger than necessary in its measurements. Then it is sutured, trimmed at the marked points, reducing it to the desired dimensions and creating a specific relief and three-dimensional surface. In knitting, we don't have to knit too large piece to trim or suture it later, we immediately create a three-dimensional space, repeating the effect that would have been obtained by suturing a piece of fabric. And for this to happen, we need entirely different initial data in knitting than in sewing, although one did not run far from the other. Darts in knitting are shaped using the basic knitting techniques – increases, decreases, short rows, or a combination thereof. I want to show you how bust darts can be placed in a knitted project, and their examples "live" – in already finished designs. Some of them realize the above-parsed function – adds width; in this case, the process of adding width to the front can be skipped. *** Далее переходим непосредственно к вытачкам для груди. Понимание вытачек в вязании противоположно шитью. В шитье в готовом отрезке ткани у нас уже все есть, включая нужное пространство для груди и для других частей тела. Нужно только ушить и урезать, то есть, уменьшить. В вязании у нас в начале нет ничего, значит, нам нужно это пространство для груди довязать, создать, другими словами, увеличить. Когда существует такая принципиальная разница, некоторые методики шитья вязанию просто не подходит и не действует. Даже если посмотреть на картинку ниже, она нарисована по принципам шитья. Из ткани вырезается кусок для переда, который является по своим измерениям больше, чем нужно, и потом в отмеченных местах вытачек ушивается, урезается, уменьшая его до нужных измерений и создавая некую рельефную и трехмерную поверхность. В вязании нам ненужно вязать слишком большой кусок для того, чтобы его потом урезать или ушить, мы сразу создаем трехмерное пространство, повторяя тот эффект, который получился бы, ушивая отрезок ткани. И для того, чтобы так получилось, в вязании нам нужны совершенно другие исходные данные, чем в шитье, хотя один от другого далеко не убежал. Вытачки в вязании формируются самыми простыми вязальными приемами – прибавлениями, убавлениями, укороченными рядами или их комбинацией. Хочу показать, как могут быть размещены вытачки для груди в вязаном изделии, и их примеры уже в готовых изделиях "вживую". Некоторые из них выполняют выше разобранную функцию – добавление ширины, тогда процесс расширения переда можно пропустить. 1. The waistline dart adds width from the waistline to the protrusion of the bust and is made with increases. 1. Талиевая вытачка добавляет ширины от линии талии до выступа груди и выполняется прибавлениями. 2. The French diagonal dart adds width and length at the same time, combining short rows and increases at the same turning point. 2. Французская диагональная вытачка добавляет ширины и длины одновременно, комбинируя укороченные ряды и прибавления в одной точке поворота. 3. Horizontal dart in the side seam. It is made with short rows and adds length. 3. Горизонтальная вытачка в боковом шве. Выполняется укороченными рядами и добавляет длины. 4. The diagonal armhole dart decreases the added width to the bust and adds length at the same time, combining short rows and decreases at the same turning point. 4. Диагональная вытачка в пройму убирает заранее заложенную ширину и добавляет длину одновременно, комбинируя укороченные ряды и убавления в одной точке. 5-6. Vertical neckline and shoulder darts. The added width to the bust is eliminated with decreases. 5-6. Вертикальные вытачки в плечо и в горловину. Убирают заранее заложенную ширину и выполняются убавлениями. 7. Dart in the V-neckline. It is made with short rows and helps the deep decollete fit to the neckline. 7. Вытачка в декольте выполняется укороченными рядами. Помогает глубокому вырезу прилегать к декольте. 2. Taking care of the buttocks Just like the bust, our buttocks require some additional width in longer garments. Your half of the hips at the back is significantly wider than the front half at the same level. I have my hips 6 cm wider at the back. That is considerable value, and you need to pay attention to it. But before you start to change anything, pay attention to the given positive ease; maybe it is enough to cover the difference. But when it comes to more fitted clothing, it is necessary to expand the lower back of the garment. That is especially important in knitted skirts, dresses, and long sweaters or cardigans. If in the pattern at hips level the front is equal to the back, be sure to make changes to the back, adding some width that you later eliminate with the buttock (rear waist) darts or additional decreases at the side seam. Otherwise, a familiar picture awaits you all: from the lack of the width at the buttocks level, knit fabric stretches; it is getting sparse, thins out, and gets baggy. If you want your buttocks in knitted look like in fitted jeans – add width for them! In knitted skirts, even extra length for buttocks is provided. In the diagram below, the back is drawn with a blue line, and the front is black. 2. Позаботиться о ягодицах Ровно, как и грудь, наши ягодицы требуют ширины в более длинных изделиях. Ваша половина обхвата бедер в задней части будет значительно шире, чем передняя половина на том же уровне. У меня задняя часть бедер шире на 6 см. Это немалое значение, и на нее нужно обращать внимание. Но перед тем, как начать что-либо изменять, обратите внимание на заложенную свободу облегания, может ее хватит для того, чтобы эту разницу скрыть. Но когда речь идет о более прилегающих вещах, расширить нижнюю заднюю часть изделия все-таки нужно. Это особенно важно в вязаных юбках, платьях и в длинных свитерах или кардиганах. Если в описании на уровне бедер деталь переда ровна детали спинки, обязательно делайте изменения в детали спинки, добавляя ширину, которую потом компенсируете ягодичными (задними талиевыми) вытачками или дополнительными убавлениями у бокового шва. Иначе вас ожидает всем знакомая картина: от нехватки ширины ягодицы растягивают вязаное полотно, оно разжижается, утончается и виснет мешком. Хотите чтобы ваша задняя красота в вязаном выглядела как в обтянутых джинсах – добавляйте для нее ширину! В вязаных юбках для ягодиц даже закладывается и дополнительная длина. В чертеже ниже спинка отображена голубой линией, перед – черной. As you can see, the back of the pattern, which is down from the waistline, is wider than the front at the hips level. Although the back here is narrower up from the waistline to the armhole than the front. These adjustments allow your side seam to remain straight and not bend, borrowing a little back to the front for the bust, or a little front to the back for the buttocks. *** Как видите, задняя часть изделия, которая находится вниз от линии талии, на уровне бедер шире детали переда, хотя вверх от линии талии до пройм она более узкая, чем деталь переда. Такие изменения позволяют вашему боковому шву оставаться прямым и не изгибаться, одалживая немного спинки переду для груди, или немного переда спинке для ягодиц. 3. Taking care of the shoulders Here we are talking more about raglans and round yokes. In designs with a set-in sleeve, designers take care of shoulders even in the most simplified patterns. Our shoulders, as well as the head, as well as the bust, are partly ball-shaped. That means a “hat” is also necessary for them. Or if we try to display everything geometrically as two-dimensional shapes, we try to squeeze a rectangle (upper body) into a triangle (raglan or yoke shape). 3. Позаботиться о плечах Здесь речь пойдет о регланах и круглых кокетках. В изделиях с втачным рукавом о плечах подумали даже в самых упрощенных описаниях, и недаром они называются плечевыми изделиями. Наши плечи также, как и голова, как и грудь, являются от части шарообразными, и "шапочка" для них также необходима. Или если уж попробовать отобразить все геометрически в двухмерной плоскости, мы пытаемся прямоугольник (верхнее тело) втиснуть в треугольник (форма реглана, круглых кокеток). It’s a no-brainer to work on the raglan or round yoke design when decreases are distributed in equal steps to the designated height. We get a truncated cone that has nothing to do with the anatomical shape of the body. If there is no space for shoulders in raglans and round yokes, we get wrinkles around underarms, along the sleeve, and in some other places. I am convinced that every knitter who knitted such designs at least once stood by the mirror and asked herself, what did I've just done? It is a pity, but I did not find pictures of such projects depicting a poorly fitting raglan. To upload the finished projects, I always pick-up the best pictures (of course! Who likes the ugly ones), and the bad ones are deleted, which I now sincerely regret. But even in the best pictures of poorly fitting raglans, try to notice how the shoulders suffer from a lack of space, how they pull on themselves the upper part of the back and the front from the lack of width, how they stretch out the neckline from lack of length. Even in the “best” pictures, you can see how the shoulders struggle, begging to provide them a little more room. *** Работать над дизайном реглана или круглой кокетки очень просто, когда в отведенную высоту равномерными шагами распределяются убавления. Мы получаем усеченный конус, не имеющий ничего общего с анатомической формой тела. Если в регланах и круглых кокетках нет пространства для плеч, мы получаем заломы в подмышках, вдоль по рукаву и в других местах. Я убеждена, что каждая вязальщица, хоть раз вязавшая такие изделия, стояла у зеркала и спрашивала себя, цитируя знаменитого комика: "ну шо у меня там такое?" Жаль, но фотографий таких изделий, изображающих плохо сидящий реглан у меня не нашлось. Для показа работ я всегда отбираю лучшие фото (конечно! Кому нравится уродливые), а плохие удаляются, о чем я сейчас безумно жалею. Но даже в самых лучших фотографиях плохо сидящих регланов попробуйте увидеть, как страдают плечи от нехватки пространства, как они затягивают на себя верхнюю часть спинки и переда от недостачи ширины, как они растягивают полотно и оттягивают горловину от недостачи длины. Даже в "лучших" фото видно, как страдают плечи, умоляя выделить им немного пространства. When considering a design you liked with a raglan or round yoke, do not fall for the emotional component of the created scene or mood, do not get fooled by а beautiful stitch pattern. See the folds, wrinkles, analyze where they came from and how long it takes to redo everything. Think of how far or close your size is from the size the model wears. nd what to do if you still decide to work on the chosen project? How to provide your shoulders with some space? Below there are some examples of the seamed raglan; exactly the same rules can be applied to round yoke – it is also possible to distinguish sleeves area in them and implement the changes presented below. For further study, we introduce such a concept as a shoulder dart. Let's start with the middle sample (see below). The gray line shows the sleeve of a standard non-anatomical raglan. Here, decreases along the edge of the raglan seam are placed at the same steps, and we end up with a flat piece for the ball-shaped shoulder (remember the knitted pancake?). To create a three-dimensional sleeve and provide the shoulder with extra width, we place the raglan decreases with sparser steps. Those that remain unused, we put on the imaginary shoulder seam in the form of a shoulder dart (blue lines). The first sample is similar in meaning, and the shoulder dart here is transferred to the raglan seam (raglan line). Here, the same unused decreases below the dashed shoulder line are now placed between the earlier established decreases above the shoulder line. In other words, those decreases that you use to shape a raglan are placed by more rare steps before the dashed line and more frequent steps after. When sewing the raglan, the seam line is straightened, creating 3D space for the shoulders. The first and second cases add width. The third case adds shoulder length. Here the shoulder darts are made with short rows. All three of these options are mutually exclusive, and you do not need to combine them. The first and second options are most suitable for round yokes, the third option is the easiest to use in seamed raglan. When placing decreases on an imaginary shoulder seam (middle sample) or distributing the turns of the short rows in the third sample, do not forget that the back should be longer than the front (see the next chapter). For this reason, the center of the sleeve should shift towards the front. If the shoulder darts are oriented to the center of the sleeve; as a result, putting on the finished project, it turns out that your shoulder line has shifted back. *** Когда рассматриваете понравившуюся вам модель с регланом или круглой кокеткой, не западайте на эмоциональную составляющую построенной сцены или настроения, не ведитесь на красивый узор. Увидьте складки, заломы, проанализируйте от чего они возникли и сколько займет труда все переделать. Подумайте, как далеко или близко находится ваш размер от размера, одетого на модели. И что делать, если вы все же решили довести выкройку до ума и обеспечить своим плечам пространство. Здесь мы рассмотрим рукава сшиваемого реглана; ровно такие же правила можно применять для круглых кокеток – в них также возможно выделить рукава и в них внедрить ниже представленные изменения. Для дальнейшего разбора мы введем такое понятие, как плечевая вытачка. Начнем со среднего образца (см. ниже). Серая линия показывает рукав стандартного неанатомического реглана. Здесь убавления по краю детали у регланного шва идут одинаковым ритмом и мы в итоге получаем плоскую деталь для шарообразного плеча (помните вязаный блин?). Чтобы создать трехмерную деталь и обеспечить плечо дополнительной шириной, мы размещаем убавления для реглана более редким ритмом, а те, что остались неиспользованными, размещаем на воображаемом плечевом шве в виде плечевой вытачки (голубые линии). Первый образец по смыслу похож, и плечевая вытачка здесь перенесена в регланный шов (регланную линию). Здесь те же самые неиспользованные убавления до пунктирной плечевой линии размещаются между установленными убавлениями поверх плечевой линии. Другими словами, те убавления, которые вы должны выполнить дабы сформировать реглан, выполняются более редким ритмом до пунктирной линии и более частым ритмом – после. При сшивании реглана линия шва выпрямляется, создавая пространство для плеч. Первый и второй образец добавляет ширину. Третий образец добавляет длину для плеча. Здесь вытачки для плеч выполняются укороченными рядами. Все эти три варианта взаимоисключающие и совмещать их не требуется. Первый и второй вариант наиболее подходит для круглых кокеток, третий вариант будет проще всего использовать для сшивного реглана. Размещая убавления на воображаемый плечевой шов (средний образец) или распределяя повороты укороченных рядов в третьем образце, нужно не забывать о том, что спинка должна быть длиннее переда (см. следующую часть). По этой причине середина рукава должна сместиться в сторону переда. Если плечевые вытачки будут ориентированы в центр рукава, в итоге, надев готовое изделие, окажется, что ваша плечевая линия сместилась назад. Shoulder darts not only fulfill their function, but each time they become a design embellishment! *** Плечевые вытачки не только выполняют свою функцию, но каждый раз становятся украшением дизайна! 4. Anatomical back Geometrically straight people do not exist; we all have a certain level of a leaning forward posture. Because our shoulders and neck lean forward, the upper back piece should be 1,5-2,5 cm longer than the front to compensate it (the second diagram, see below). With a larger level of leaning forward posture (or increasing in size along with fat deposits at the back neck), the shoulder slopes also become steeper than the slope of the shoulders in the front, and the difference grows to 3,5 cm or more. If we knit according to the standard and simple pattern (the first diagram), the height of the upper back is equal to the front. The result of such a simplified pattern is a naked back neck and a crawling back shoulder seam. There is another little snag. If you knit the upper back, which is equal to the front in height, your back becomes even shorter over time. From constant and repetitive hand movements towards the front or just being lent forward, your upper back stretches widthwise. In knitting, nothing is lost anywhere. If the piece stretches widthwise, it loses lengthwise. As a consequence, over time, the back gets shorter, the neck gets more and more exposed, the shoulder seam slides back, pulling the whole garment backward. It may turn out that lengthening the back by 2,5 cm only compensates for this shortening. It isn't very easy to predict, but here you can rely on lessons learned. See how your finished projects behaved before and find your extra back height. We are all different, and standard centimeters sometimes do not work. Measure your back length, your shoulder slope, consider possible deformation and make the correct adjustments. 4. Анатомическая спинка Геометрически прямых людей не бывает, у всех нас присутствуетнекая сутулость. Чаще всего наши плечи и шея подвернуты вперед, и деталь спинки в верхней части должна быть на 1,5-2,5 см длиннее переда для компенсации (вторая картинка). При большей сутулости (или увеличиваясь размеру вместе с жировыми отложениями) плечевой скос спинки также становится круче, чем наклон плеч на детали переда, и разница вырастает до 3,5 см и больше. Если мы вяжем по стандартному и простому описанию (первая картинка), высота верхней части спинки будет одинакова переду. Результат такой упрощенной выкройки – оголенная задняя шея и уползший назад плечевой шов. Есть еще одна маленькая загвоздка. Если вы свяжете верхнюю часть спинки, которая по высоте ровна переду, со временем ваша спинка станет еще короче. От постоянных и повторяющихся движений рук в перед или при обычной сутулости, ваша деталь спинки растягивается вширь. В вязании ничто никуда не теряется. Если деталь растянулась вширь, она потеряла в длине. Как последствие, со временем спинка укорачивается, шея все больше оголяется, плечевой шов сползает назад, подтягивая за собой все изделие. Может оказаться, что удлинение спинки на 2,5 см лишь компенсирует это укорачивание. Предугадать сложно, но здесь можно опереться уже на существующий опыт. Посмотрите, как вели себя до этого вами связанные изделия и найдите свою добавочную высоту спинки. Мы все разные, и ингода стандартные сантиметры не работают. Измерьте свою длину спинки, свой родной наклон плеч, учтите возможную деформацию, и вносите правильные коррекции. The correction here is straightforward, on the one hand. Knit 4-8 additional rows for the back armhole, make a steeper shoulder slope. But such an adjustment entails a change in the shape of the sleeve cap (asymmetrical sleeve cap, read the penultimate chapter). And this is no less than “The Forsyte Saga” (I read as a child a novel per day and managed to read all the libraries of my relatives and family friends. But I never managed to finish the “The Forsyte Saga”). In the first two pictures below, the backs are clearly too short. In the last two, the situation is slightly better. If I knitted exceptionally for myself and did not create prototypes for the patterns, based on some standard dimensions, I would lengthen the back even more since my hunched back is at a very high degree. *** Коррекция здесь с одной стороны несложная – взяли и довязали 4-8 рядов проймы спинки, сделали более крутой скос плеч. Но такая корректировка влечет за собой изменение формы оката (асимметричный окат). А это уже "Сага о Форсайтах" (я в детстве читала проглатывая по роману за день и прочитала все библиотеки родных и близких. "Сагу о Форсайтах" я так и не осилила). На первых двух фотографиях спинкам явно не хватает длины. На двух последних ситуация немного лучше. Если бы я вязала лично для себя, а не создавала бы прототипы для описаний, основанные на некие стандартные измерения, спинку я удлинила бы для себя еще больше, так как у меня сутулость очень ярко выраженная. How to lengthen the upper back in round yokes and raglans, read here. Как удлинить верхнюю часть спинки в круглых кокетках и регланах, читайте тут. 5. Anatomical dolman sleeve This shape is the least suitable for the human body and is very suitable for a scarecrow because only it walks (or rather, stands) with its arms raised all the time horizontally without respite. 99% of the time, we walk with our hands down. Please, do not misunderstand me. I adore the dolman sleeve, especially when its accompanying folds are exaggerated and pronounced. But only when they are created with silk or some other flowing or with delicate knit fabric. Remember the eighties, when these styles flourished in all possible manifestations. But when you have many folds of thick knit fabric in your underarms, and when such a garment cannot be worn under a coat, all the excitement immediately vanishes. 5. Анатомическая "летучая мышь" Этот фасон наименее соответствует человеческому телу и очень подходит для огородного пугало, потому, что только оно ходит (точнее, стоит) с горизонтально поднятыми руками все время без передышки. 99% времени мы ходим с опущенными руками. Не поймите меня неправильно. Мне очень нравится фасон "летучая мышь", и его сопровождающие складки, особенно преувеличены и ярко выраженные. Но только когда они создаются шелком или какой-либо другой струящейся тканью, тонким трикотажем. Вспомните восьмидесятые, когда эти фасоны процветали во всех возможных проявлениях. Но когда у вас в подмышках множество складок из толстого вязаного полотна, и когда такой джемпер невозможно надеть под пальто, весь восторг сразу испаряется. It is impossible to get rid of folds in this style completely, as well as in its cousin – the drop shoulder. Neither the first nor the second is clearly reflecting the anatomy of the body, like, say, a set-in sleeve style garments, do. All we can do is lower the horizontally raised hand at a certain angle, fitting, say, not a scarecrow, at least a paper doll. To do so, we need to knit in such a kind of a wedge. On the one hand, it drops the shoulder; on the other hand, it shapes a triangular sleeve cap. The wider the wedge is, the lower the sleeve. And in addition, you need to shape an anatomical shoulder slope. The wedge in sideways knitting is shaped with short rows, in bottom-to-top knitting – with increases, in top-to-bottom knitting – with decreases. *** Полностью избавиться от складок в этом фасоне невозможно. Как и в его двоюродном брате – в фасоне со спущенным плечом. Ни первый, ни второй не является четко отображающим анатомию тела, как, скажем, плечевое изделие. Все, что мы можем сделать – это опустить горизонтально поднятый рукав под неким углом, отображая, ну, скажем, не пугало, так хотя бы бумажную куклу. Для этого нам понадобится добавить такой своеобразный клин с одной стороны опускающий плечо, с другой стороны формирующий треугольный окат рукава. Чем шире клин, тем рукав опустится ниже. И в добавок сформировать анатомический скос плеч. Клин в поперечном вязании формируется укороченными рядами, в вязании снизу вверх – прибавлениями, в вязании сверху вниз – убавлениями. The folds in the anatomical dolman sleeve are much smaller and less noticeable. Складок в анатомической "летучей мыши" значительно меньше и они менее заметны. 6. Taking care of the belly Even if you have a model size and figure, half of the waistline at the front is a few cms wider than measuring half of the waistline at the back. In straight shapes, where positive ease is given, no adjustments are needed. You need to pay attention to this point in fitted garments or garments with a waistline, especially if they are fastened. The modification of the pattern may look something like this (see the picture below. The blue line represents the back, the black line – the front). 6. Позаботиться о животе Даже если у вас фигура модели, передняя половина объема талии будет на несколько см шире, чем измерение половины талии в задней части. В прямых силуэтах, где заложена свобода облегания, никаких корректировок делать не нужно. На эту особенность нужно обратить внимание в приталенных или в прилегающих изделиях, особенно, если они застегиваемые. Корректировка выкройки может выглядеть примерно так (см. картинку ниже. Голубая линия – спинка, черная линия – перед). As you can see, the waistline in the front piece is not so sharp as in the back. This technique is also needed to mask the belly (if you have one). Nothing better emphasizes the belly than the lack of width at the waistline, where the stitch pattern or buttons stretch out. And vice versa, such modification allows wearing fitted style to those who afraid even to dream about that. Below I provide some examples of fitted designs where I used this technique. *** Как видите, приталивание на детали переда не так ярко выражено, как на спинке. Этот прием также нужен для того, чтобы скрыть живот (если такой имеется). Ничто лучше не подчеркивает живот, чем от нехватки ширины растянувшийся на нем узор или пуговицы кофточки. И наоборот, такая корректировка позволит носить приталенное и прилегающее даже тем, кто об этом и мечтать боялся. Ниже представлю несколько примеров приталенных дизайнов, где был использован этот прием. 7. Anatomical sleeve caps Probably those who have come across sewing know that the higher and narrower the sleeve cap is, the better it fits. But in sewing, there is a restriction on the maximum height and minimum width of the sleeve cap for a specific armhole, which is calculated by different methods, and all the restrictions come from the fact that we need to raise a hand in a fitted tailored jacket. The narrower and higher the sleeve cap, the more difficult it is to raise a hand to the extent that it cannot be raised at all. In knitting, these boundaries can shift because we work with knit fabric, a material that tends to stretch. I am often asked why you have higher sleeve caps than in sewing patterns. The answer is simple – a taller and narrower cap fits better, and hand movements in knitwear are practically not constrained. Here we are only talking about the difference in the height of 1-2 cm, but even such small centimeters affect the fit in a better way. A short (low) sleeve cap pulls the shoulder seam down, which, by all rules, should not be elastic. Then the neckline stretches out. The upper parts of the back and front between the armholes are stretchable, elastic, and pliable. In all this environment, the upper horizontal part of the sleeve cap deforms to the upside-down "V" letter in the middle. If such a "V" appears in your set-in sleeve cap, this is a certain sign that the sleeve cap is too short. In sewing, unelastic woven fabrics are mainly used, and this effect does not occur, even if the caps there are slightly shorter. That is the whole difference. Look at a few examples of such low-lying sleeve caps that pulled down the armholes of the front and the back. 7. Анатомический окат рукава Наверное, те, кто сталкивался с шитьем, знает, что, чем выше и уже окат, тем он садится лучше. Но в шитье есть ограничение максимальной высоты и минимальной ширины оката для конкретной проймы, которая рассчитывается по разным методикам, и все ограничения происходят от того, что нам нужно в строгом и приталенном шитом жакете поднять руку. Чем уже и выше окат, тем руку поднять становится сложнее до той степени, что она не сможет подняться совсем. В вязании эти границы могут сдвигаться, потому что мы работаем с трикотажем – материалом, которому свойственно растягиваться. Меня часто спрашивают, почему у тебя окаты выше, чем в выкройках шитья. Ответ прост – более высокий и узкий окат садится лучше, а движения рук в трикотаже практически не сковываются. Тут речь идет лишь о разнице высоты в 1-2 см, но даже такие маленькие сантиметры влияют на посадку. Коротковатый (недостаточно высокий) окат подтягивает за собой плечевой шов вниз, который по всем правилам не должен быть эластичен. Тогда вытягивается горловина. Верхние части спинки и переда между проймами растяжимые, трикотажные, податливые. Во всей этой обстановке верхняя горизонтальная часть оката деформируется, и по середине образуется галочка. Если такая галочка образовалась в вашем окате втачного рукава, это верный признак, что окат слишком короткий. В шитье в основном используются нерастяжимые ткани, и такой эффект не происходит, даже если окаты там немного короче. В этом и кроется вся разница. Посмотрите несколько примеров таких невысоких окатов, потянувших за собой проймы переда и спинки. And now a few examples of higher sleeve caps, which, I think, can rightly be titled as anatomical. А теперь несколько примеров более высоких окатов, которые, думаю, справедливо назвать анатомическими. 8. Asymmetric sleeve cap Asymmetric sleeve cap in knitting is a very complicated thing. In this short chapter in the post, which tries with just a corner of the eye to cover the main principles of anatomical knitting, it is impossible to reveal all secrets. You can look at how an asymmetric sleeve cap fits in the designs presented in the previous chapter. Its shape differs from the simplified ones, which are given in the majority knitting patterns (see below. The black line – simplified symmetric sleeve cap, blue line – asymmetric sleeve cap). 8. Асимметричный окат Асимметричный окат в вязании – очень сложная штука, и одной лишь короткой частью в статье, которая пытается лишь краешком глаза охватить анатомическое вязание, описать, конечно, невозможно. Как сидит асимметричный окат, вы можете посмотреть в образцах втачного рукава, представленных чуть выше в предыдущей части, а его форма от той, что дается в упрощенных описаниях отличается таким образом (черная линия – упрощенная выкройка, голубая линия – асимметричный окат): Why is this form of sleeve cap more organic? Because the movements of the hands are directed forward, and the humerus (the round shoulder bone) is also leaning forward. The symmetric sleeve cap does not correspond to the anatomy of the human body. In simplified patterns, we knit two identical sleeves, but I suggest knitting two mirrored ones. The asymmetry here is performed by different steps of decreases on different sides of the piece, shaping a rounded beveled shape. More frequent decreases shape the back side (sewn to the back), more rare decreases shape the front side (sewn to the front). In rare cases, symmetrical sleeve caps are acceptable. These are puff sleeves, or there is a compensating shape of armholes. The ideal asymmetric cap makes your sleeve hang at a slight angle – exactly like a properly made jacket or blazer. But do not knit an asymmetric sleeve cap if you knit the identical armholes for the front and the back. In such an armhole, an asymmetric cap does not fit, and it makes no sense. For identical armholes, only a simplified symmetrical sleeve cap is suitable. For an asymmetric anatomical cap, the shape of the armholes should also be different. And a little about it – in the next chapter. *** Почему такая форма оката более органичная? Потому, что движения рук направлены вперед, и плечевая кость (большой и малый бугорки) также подвернута вперед. Симметричный окат не соответствует анатомии тела человека. В упрощенных описаниях мы вяжем два одинаковых рукава, я же предлагаю вязать два зеркальных. Асимметрия здесь выполняется разным ритмом убавлений на разных сторонах оката, формирующими округлую скошенную форму. Более частые убавления формируют заднюю часть (пришивается к спинке), более редкие убавления – переднюю часть оката (пришивается к переду). В редких случаях симметричный окат допустим. Это рукава-фонарики или же присутствует компенсирующая форма пройм. Идеальный асимметричный окат заставляет ваш рукав висеть немножко под углом – ровно, как у правильно пошитого жакета или пиджака. Но не вяжите асимметричный окат, если вы вяжете одинаковые проймы переда и спинки. В такую пройму асимметричный окат не сядет, и смысла ему нет. Для одинаковых пройм подойдет только упрощенный симметричный окат. Для анатомического асимметричного оката форма пройм также должны быть другая. И немного об этом – в следующей части. 9. Anatomical front armholes Are you still reading? Then I applaud you. I promise this chapter is already the last. In simplified knitting patterns, the armhole of the front coincides with the armhole of the back (first picture). I suggest changing the shape of the armhole, and here it resembles the sewing patterns (second picture). 9. Анатомическая передняя пройма Вы еще читаете? Тогда вы достойны восхищения. Обещаю, эта часть уже последняя. В упрощенных вязальных выкройках пройма переда совпадает с проймой спинки (первая картинка). Я же предлагаю изменить форму проймы, и здесь она приближена к швейной (вторая картинка). I want to show you how the garments look when the front width and the back width between the armholes are the same. Pay attention to where the armhole line ended up. *** Хочу вам показать, как выглядят изделия, когда ширина переда и ширина спинки между проймами одинаковая. Обратите внимание, где в итоге оказалась линия проймы. If you put together the side seams of the front and back, the deepening of the front armhole looks something like this: Если сложить боковые швы переда и спинки, углубление проймы выглядит как-то так: The deepening of the front armholes consists of: 1. Differences in measurements of the back and front width between the armholes (here 3 cm). 2. Half the difference between the width of the front and back at the bust level. As I already wrote in the first chapter about bust darts, personally, my difference in these measurements is 5 cm, and the half is 2,5 cm. In other words, you need to take half of the total width of both vertical bust darts, which eliminate the difference between the width of the front and back at the bust level, and these are the same 5 cm, divided in half. *** Углубление передних пройм состоит из: 1. Разницы измерений ширины спинки и переда между проймами (здесь 3 см). 2. Половины значения разницы ширины переда и спинки на уровне груди. Как я уже писала в первой части о вытачках, лично моя разница этих измерений составляет 5 см; нужно брать половину, а это 2,5 см. Другими словами, используем половину суммарного раствора вертикальных вытачек, убирающих разницу ширины переда и спинки на уровне груди, а это те же самые 5 см, разделены пополам. We sum the gotten data, which is 5,5 cm, and divide it into two armholes. That is 2,75 cm, which then is recalculated according to the knitting gauge, and we find that the difference in depth in each armhole of the front is 6-8 stitches. Your value of front armholes deepening may differ, and you must calculate it yourself. That is how the deepened front armhole looks, where the seam of the armhole and sleeve cap is in the right place. *** Имеющиеся данные складываем, у нас получается 5,5 см, которых делим на две проймы. Это по 2,75 см, которые пересчитываем по плотности вязания, и получаем, что разница глубины в каждой пройме переда составляет 5-8 петель. Ваша величина углубления проймы может отличаться и ее расчитать вы должны сами. Так выглядит углубленная пройма переда, где шов проймы и оката находится на своем месте. The difference in depth in the last third upper part of the armhole is compensated by some increases, which equalize the number of stitches at the shoulder line with the back. This part already covers the shoulder, and the horizontal bound-off top of the sleeve cap is sewn to it. *** Разница в глубине в последней третьей верхней части проймы компенсируется прибавлениями. Эти прибавления выравнивают количество петель в плечевой линии со спинкой. Эта часть уже ложится на округление плеча и к ней пришивается горизонтально закрытая часть оката рукава. This method is used not only in set-in sleeve designs but also in raglan and round yoke. These styles also have their front and back widths, and, accordingly, raglan lines, which identifying armholes. For this reason, the yoke shaping decreases are located differently on the front and back. Pay attention (see below) to the different steps, and different height of the motifs decreases in the front and back. They narrow the yoke at different speeds. The back in the middle of the armholes is wider than in the front; the front side narrows faster than the back. And in such a straightforward way, we fulfill the requirements for deepening the front armhole, which seemed to be suitable only for set-in sleeves. The comfort of movements and the absence of folds and wrinkles are ensured! *** Этот метод применяется не только в плечевых изделиях, но и в регланах и в круглых кокетках. Там также есть своя ширина переда и спинки, и соответственно, проймы выделяющие линии реглана. По этой причине кокетку формирующие убавления располагаются по-разному на переде и на спинке. Обратите внимание на разный ритм и высоту убавления мотивов на переде и на спинке, которые сужают кокетку. Спинка в середине высоты пройм получается шире, чем перед; передняя часть сужается быстрее, чем спинка. И таким незамысловатым способом мы выполняем требования углубления передней проймы, которое, казалось, подходит только для плечевых изделий. Удобство движений и отсутствие заломов обеспечено! Summary 1. Provide space for the bust with expanding and lengthening the front piece and using different bust darts. 2. In long knitwear, dresses, skirts, do not forget about the extra width for the buttocks. 3. In raglan designs and round yokes, do not forget about the shoulder darts, providing shoulders with space. 4. Lengthen the upper back in all shapes and styles without exception. 5. The dolman sleeve can also be anatomical, just change the angle of the sleeves! 6. In fitted projects, do not forget about the belly. 7. Do not forget that in knitting, the sleeve caps may be higher than in sewing. 8. The anatomical sleeve cap is asymmetric. 9. Deepen the front armhole, not only in the set-in sleeve designs. Thank you all for reading! You can ask questions here in the comments or on the forum. You can also share your experience on whether you managed to conquer the anatomy on the needles. Итоги 1. Обеспечивайте пространство для груди расширением и удлинением детали переда с помощью разных вытачек. 2. В длинных вязаных изделиях, платьях, юбках не забывайте о дополнительной ширине для ягодиц. 3. В регланных изделиях и в круглых кокетках не забывайте про плечевые вытачки, обеспечивая плечам пространство. 4. Удлиняйте верхнюю часть спинки во всех без исключения фасонах. 5. "Летучая мышь" также может быть анатомическая, просто измените угол наклона рукавов! 6. В приталенных изделиях не забывайте про живот. 7. Не забывайте, что в вязании окат рукава может быть более высокий, чем в шитье. 8. Анатомический окат – это асимметричный окат. 9. Углубляйте переднюю пройму не только в плечевых изделиях. Всем спасибо, кто читал! Можете задавать вопросы здесь, в комментариях или на форуме. Также можете поделиться опытом, удалось ли вам покорить анатомию на спицах.
- Icicle
I want to introduce the first design of the upcoming winter collection made using bulky yarn "Dream big. Winter solstice" – the long sweater "Icicle" made of bulky yarn. What do I like about knitting with bulky yarn? First – such designs knit very quickly. Second, they are very warm. Third, any stitch pattern on such a yarn looks very expressive and textured. And the Icicle sweater proves it. Bulky, soft, loose, long. The one in which you can wrap yourself, like in a blanket. A wintery Icicle sweater will gift you many unforgettable moments in the coldest time of the year. After all, there is no severe weather; there are too light sweaters. Icicle is worked from bottom to top in separate pieces, which further are joined into a round yoke. The upper back is longer than the front part, shaping a back neck that comfortably covers the neck. The design of the sweater is based on the characteristics of the stitch pattern, in which, by skipping or adding lace motifs, you can naturally expand or shrink the knit fabric. Trendy lush sleeves, a textured stitch pattern, and graphic lines – even in the winter, you can become a queen and catch admiring glances! *** Хочу представить первый дизайн будущей зимней коллекции из толстой пряжи "Мечтай по-крупному. Зимнее солнцестояние" – длинный свитер из толстой пряжи Icicle ("Сосулька"). Чем мне нравится вязание из толстой пряжи? Первое – такие изделия вяжутся очень быстро. Второе – они очень теплые. Третье – любой узор на такой пряже смотрится очень выразительно и фактурно. И свитер Icicle ("Сосулька") это доказывает. Толстый, мягкий, свободный, длинный. Такой, в который можно укутаться как в одеяло. Настоящий зимний свитер Icicle ("Сосулька") подарит вам много незабываемых минут в самое холодное время года – ведь не бывает холодной погоды, бывают слишком тонкие свитера. Icicle связан снизу вверх отдельными деталями, которые далее соединены в круглую кокетку. В верхней задней части кокетка удлиняется, формируя росток, который комфортно прикрывает шею. Конструкция свитера основана на свойствах узора, где, пропуская или добавляя его мотивы, можно расширить или сузить вязаное полотно. Модные пышные рукава, фактурный узор и графические линии – зимой также можно стать королевой и ловить восхищенные взгляды! The yarn that I picked up for “Icicle” lay for a couple of years awaiting just the right time, but it was intended for a completely different project, namely, for a knitted fur coat (spoiler). But intuition whispered that yarn would not be enough. And already, when I knitted this fur coat from another yarn of the same brand, I realized that I was right. And everything worked out perfectly. Now I can’t even imagine if it was possible to choose something better. And after the picture of our Larisa @lama, I realized that the yarn, the pattern, and the name hit the bull’s eye. Larisa, thank you so much for the picture of this giant icicle. *** Пряжа, которую я подобрала для Icicle, пару лет лежала и ждала своего часа, но была предназначена для совсем другого проекта, а именно, для вязаной шубы (спойлер). Но интуиция шептала, что пряжи будет маловато. И уже когда я эту шубу связала из другой пряжи того же сорта, я поняла, что я была права. И все сложилось как нельзя лучше. Я теперь даже не представляю, можно ли было подобрать что-то лучше. А после фотографии нашей Ларисы @lama, я поняла, что и пряжа, и узор, и название выстрелили в десяточку. Спасибо, Лариса, огромное, за фотографию этой гигантской сосульки. Playing with different widths of the pieces, when the “balls” of the pattern are removed or added, worked. The bottom rib tightens out by itself if you just do not add “balls.” Precisely the same principle shapes the round yoke. Gradually removing the “balls,” we get a gradual narrowing. A few additional decreases in the rib pattern and we get stalactites of icicles gathering at the neck. Here the stitches are divided into two parts and the neckline is made with double knitting. Bind off it with a Kitchener stitch. This stitch pattern is almost entirely not amenable to modeling and allows you to change its parameters only by removing or adding “balls.” The design does not allow you to add width by increases and to shape it by short rows. For this reason, lush sleeves appeared here, and there are no side horizontal bust darts. The back neck shaping here was carried out already on the rib pattern, and it became possible. *** Игра с разной шириной полотна, когда убираются или добавляются "шарики" узора сработала. Стягивающая нижняя резинка получается сама собой, если просто не добавлять "шарики". Ровно таким же принципом формируется верхняя кокетка. Постепенно убирая "шарики", получаем постепенное сужение. Несколько дополнительных убавлений в узоре резинки, и мы получаем сталактиты сосулек, собирающиеся у горловины. Здесь петли делятся на две части и бейка горловины вяжется двойным вязанием. Закрываем ее трикотажным швом. Так как этот узор практически совсем не поддается моделированию, и позволяет изменять его параметры, лишь убирая или добавляя шарики, в изделии отсутствует расширение полотна и укороченные ряды. По этой причине здесь оказались пышные рукава, и нет боковой горизонтальной вытачки для груди. Удлинение задней части спинки (росток) выполнялся уже на узоре резинки, и оно стало возможным. Not everything went as it wanted. I knitted the first Icicle in 6 days. I would knit it even faster, but the first sample failed. For a long time, I thought to leave it as it is or to re-knit it, and shortly before the beginning of the testing, I unravel it. The reason was I knitted it too large. The desire to have a large warm oversized sweater that you can wrap yourself like in a blanket made me go too far. A few nights, and now the Icicle sweater has become my favorite one. I even sit and write now wearing it. From the first version, there were only sleeves left. *** Не все складывалось так, как хотелось. Я связала первый Icicle за 6 дней. Связала бы еще быстрее, но первая проба не удалась. Долго я думала, оставить как есть, или перевязать, и уже незадолго до начала тестирования я его распустила. Причина – я связала слишком большой размер. Желание иметь огромный теплый свитер "оверсайз", в который ты можешь укутаться как в одеяло, заставило меня переборщить. Несколько ночей, и теперь свитер Icicle стал моим любимчиком. Даже сижу и пишу, сейчас надев его. От первой версии остались лишь рукава. I am sure that those knitters who like to collect yarn will surely find a bobbin or a pack with bulky yarn (150 m/100 g), which for several years, gather dust on shelves. Why not use it, starting one weekend and ending the next? In my opinion, it sounds tempting. Moreover, even if you do not get into the specified gauge, you can easily correct the measurements by choosing the neighboring size. Sweater "Icicle" is a soft-shaped design, which allows to some extent when playing with the dimensions. *** Я уверена, что у тех вязальщиц, которые любят коллекционировать пряжу, обязательно найдется бобинка или пакетик с толстой пряжей (150 м в 100 г), которую вот уже несколько лет некуда пристроить. Почему же не использовать ее, начав в одни выходные, и закончив на следующие? По моему, звучит заманчиво. Тем более, даже, если вы не попадете в заданную плотность, легко можете подкорректировать измерения, выбрав соседний размер. Свитер "Сосулька" – изделие мягкой формы, позволяющее в некоторой степени играть с размерами. Testing this time was not numerous, but surprisingly, very various. Design, which, on the one hand, is very difficult to model, on the other hand, makes it easy to change the length and get completely different styles and looks. Find more photos here. *** Тестирование в этот раз было немногочисленным, но на удивление, очень разнообразным. Дизайн, который с одной стороны, очень сложно поддается моделированию, с другой стороны позволяет легко менять длину и получать совершенно разные фасоны. Больше фото найдете здесь. The winner of this testing was Galina @emelinka, who had a completely crazy idea – to test the smallest size for a teenage daughter and give me the same crazy idea to add another XXS size to the size range for very young fashionistas without bust darts. When you don’t feel like wearing kids' clothes, but it’s too early to enter the adults' wardrobe. I’m seriously thinking about this, and perhaps at the end of this year, when I start working on a new and very interesting collection, this size will be added. In the meantime, rejoice for the winner. Galina, congratulations! *** Победительницей этого тестирования стала Галина @emelinka, у которой возникла совершенно безумная идея – протестировать самый маленький размер для дочки подростка, и подать мне такую же безумную идею добавить в размерный ряд еще один размер XXS для юных модниц без вытачек для груди. Когда детское носить уже не хочется, а взрослое носить еще рано. Я уже серьезно над этим думаю, и возможно, в конце этого года, когда я начну работать над новой и очень интересной коллекцией, этот размер будет добавлен. А пока порадуемся за победительницу. Галина, поздравляю! As a symbolic prize – one pattern to choose from as a gift. В качестве символического приза – одно описание на выбор в подарок.
- My Yokes. Мои кокетки
At the very beginning of this post, we need to agree on one important topic. Yokes and raglans can be knitted both from bottom to top and from top to bottom. Only the first case is discussed in this article. You can turn everything upside down in your mind if you prefer the "top to bottom" knitting. Also, decreases and reduction, in this case, turn into increases and expansion for you. The knitting itself starts from the neckline band, and then the back neck shaping immediately follows. Have you ever experienced such a thing, as the feeling of chill down the back neck because the back neckline is too low? And there wasn't such a thing that the front neckline cuts into the throat, creating unpleasant sensations and forcing to pull the garment continually? And the ugly crease under the high collar? If this happened, it means that the neck is shaped in the wrong place. It shifted a little backward: the back of the garment is too short, the front – too high. And this is most often found in garments with yoke or raglan. You are now thinking: "but everything is simple, several rows of the back neck shaping may be added, and there everything is OK." But the "OK" does not appear. See the pictures below. That is how the back looks like with the "several rows added" – they are included here and are about 2-3 cm high. As you can see, this changes nothing. *** В самом начале этой статьи нам нужно договориться об одной важной вещи. Кокетки и регланы можно вязать как снизу вверх, так и сверху вниз. В этой статье будет разобран первый случай. Вы же можете мысленно все перевернуть, если вы предпочитаете обратное вязание. Также убавления, сужение для вас станут прибавлениями, расширением, а само вязание начнется с бейки, а потом сразу последует удлинение задней части спинки (далее – росток). Не случалось ли с вами такое явление, как ощущение пробежавшего холодка по спине из-за того, что вырез горловины на спинке слишком низкий? А не было такого, что горловина переда врезается в горло, создавая неприятные ощущения и заставляя постоянно подтягивать вязаное изделие? А некрасивая складка под высоким воротом? Если такое случалось, это значит, что горловина сформирована не на месте. Она ушла немного назад: спинка изделия слишком короткая, перед – слишком высокий. И такое чаще всего встречается в изделиях с кокеткой или с регланом. Вы сейчас думаете: "да ведь все понятно, надо надвязать несколько рядов ростка, и будет порядок". Но порядок не появляется. Вот как выглядят спинки с "надвязыванием этих нескольких рядов" – они здесь есть и составляют примерно 2-3 см (см. фото ниже). Как видите, это очень мало. How do you know how much you need to lengthen the back before you start the neckline, and how much you need to shorten the front in the yoke-type designs, so that the throat breathes freely and the chill is looking for other targets? Yokes and seamless raglan are not far from the basic pattern of set-in sleeve designs, and here we need to borrow two measurements. The sewing says that the front neckline should be at least 7-8 cm deeper than the back neckline, and the upper part of the back is 2-3,5 cm higher than the same part of the front. All that remains is to sum these two numbers. So, we've got the magic number of 10 cm, and this is the height of the shaped back neck. Now you see why knitting just a few rows cannot help. When the owner of the knit garment is younger, slimmer, and has a straight posture, this number can decrease to 8-9 cm. The older the owner is (slightly hunched back appears), the bigger the size is (fat deposits on the back neck), the magic number can grow up to 11-12 cm. But with 10 cm, you almost never lose. Where do this 10 cm in the yoke and seamless raglans, that is made without a back neck shaping go? Everything is straightforward; they divide in half: the back neck exposes by 5 cm, the front neck climbs the throat by 5 cm. *** Как узнать, насколько нужно удлинить спинку перед тем, как начать горловину, и насколько нужно укоротить переднюю часть, чтобы в кокеточном изделии горло свободно дышало, а холодок поискал других мишеней? Кокеточные вязаные изделия и изделия с бесшовным регланом недалеко ушли от базовой выкройки плечевых изделий, и именно от них нам нужно позаимствовать два измерения. В шитье говорится, что горловина переда должна быть как минимум на 7-8 см глубже горловины спинки, а верхняя часть спинки на 2-3,5 см выше, чем та же часть переда. Все, осталось сложить эти 2 цифры. Значит, мы получаем магическое число 10 см, а это и есть высота ростка. Теперь вы видите, почему надвязывание всего лишь нескольких рядов помочь не может. Чем обладатель вязаного изделия моложе, стройнее и с более прямой осанкой, это число может уменьшиться до 8-9 см. Чем он старше (появляется сутулость), полнее (жировые отложения на задней шее), магическое число может вырасти до 11-12 см. Но с 10 см вы почти никогда не прогадаете. Куда деваются эти 10 см в кокетках и бесшовных регланах без ростка? Все очень просто, они делятся пополам: на 5 см оголяется задняя шея, на 5 см горловина переда залезает на горло. So what changes need to be introduced into a standard, round, and to hell uncomfortable yoke? Let's look at the layout of the yoke (see the diagram below), where the black lines represent the yoke without any changes – the neck is in the center, the length of the front and back are the same. In the modified and comfortable yoke, the neck is shifted towards the front (white circle with a blue outline) until the difference in the length of the back and front to the neck is 10 cm. We knit the yoke in the old fashioned way to the dashed line (or the bottom of the front neck). When its height reaches the desired height from the beginning of the armholes to the beginning of the front neck, we stop knitting a round yoke in a circle and switch to the back neck shaping in short rows until its height reaches 10 cm (in the diagram there is a light-blue half-moon). The main thing that can not be forgotten during the back neck shaping is to continue to make yoke decreases. And it is unlikely that the same step or rhythm of decreases (that was before in the white "doughnut" of the diagram) is suitable for you. But that is another topic. *** Так какие же изменения нужно ввести в стандартную, круглую и до чертиков неудобную кокетку? Посмотрим расклад кокетки (см. схему ниже), где черные линии отображают кокетку без каких-либо изменений – горловина находится в центре, длина переда и спинки одинаковые. В измененной и в удобной кокетке горловина сдвигается в сторону переда (белый кружочек с голубым контуром) до тех пор, пока разница длины спинки и переда до горловины не составит 10 см. До пунктирной линии (или начала передней горловины) кокетку мы вяжем по-старому. Когда ее высота достигает нам нужной высоты от начала пройм до начала горловины переда, мы перестаем вязать круглую кокетку по кругу, и переходим на вязание ростка поворотными укороченными рядами, пока его высота не достигнет 10 см (на схеме – голубой полумесяц). Главное, чего нельзя забыть во время вязания ростка – это продолжить сужение кокетки убавлениями. И вряд ли здесь вам подойдет тот же ритм убавлений, который был до этого в белом "бублике" схемы. Но это – уже другая тема. Stitch Patterns in the Back Neck Shaping. Узоры в ростке Everything works fine while you knit the yoke using a Stockinette Stitch or similar simple patterns. When the yoke is equipped with intricate patterns or large motifs, the symmetry of the pattern on the back and front falls apart. If the cable motifs in the yoke suggest beautifully and rhythmically tapering to the end, you lose some of the decreases by cutting them off earlier at the front neck. So, you have to recalculate the stitch pattern and squeeze all the front decreases into a shorter section. Or re-arrange them in another way. Another story is jacquard. You have to interrupt the jacquard circles at the beginning of the back neck shaping, knit the jacquard in the back neck with turning rows (flat knitting), where you need to take care of the accuracy of the edges. Or maybe even redraw the edge "roses" so that they do not seem like bitten by a worm. *** Все это прекрасно работает, пока вы вяжете кокетку гладью и простыми узорами. Когда кокетка оснащена сложными узорами или большими мотивами, симметрия узора на спинке и переде разваливается. Если мотивы Аранов в кокетке предполагают красиво и ритмично сужаться до конца, некоторую часть сужения вы потеряете, отрезав их горловиной переда раньше. Значит, вам придется пересчитать узор и сжать все убавления, предназначенные для переда, в более короткий промежуток или перестроить их другим способом. Другая история – жаккард. Вы должны будете в начале вязания ростка прервать жаккардовые круги, жаккард в ростке вязать поворотными рядами, где нужно будет очень сильно позаботиться об аккуратности краев. А может даже перерисовать крайние "розочки", чтобы не казалось, что их покусал червь. Everything is very much complicated but, at the same time, insanely engaging. For me, the most exciting part is to find those stitch patterns for the yoke that work in our favor and look just as spectacular as what yokes should be. Not all stitch patterns are suitable for me for an anatomical yoke. With some of them, you can go into the wilds, from which you can not get out. Below I uploaded a few examples so that the shaped back neck is visible. Also, check its interaction with the stitch pattern from the beginning. It coincides with the very bottom of the front neck. You can draw а horizontal line mentally or find the row in which the front neck begins (below the neckband) and draw it horizontally. You see how rapidly this 10 cm of the shaped back neck appears and grows, and that it is quite huge if compared with a complete absence or with those “several added rows.” It even almost wholly covers the shoulder darts, if we assume that the shoulder length is nearly the same 10-12 cm. *** Все это сложно, но безумно интересно. Лично для меня самой интересной частью является найти те узоры для круглых кокеток, которые работают нам на руку и выглядят также эффектно, какими кокетки и должны быть. Не все узоры лично для меня подходят для анатомических кокеток. С некоторыми их типами можно зайти в дебри, из которых не выбраться. Здесь я выложу несколько примеров, чтобы был виден именно росток, его взаимодействие с узорами, а также его начало в самом низу передней горловины. Вы можете сами провести мысленно линию или найти тот ряд, которым начинается горловина переда (до бейки) и провести ее или его по горизонтали. Вы увидите, как стремительно появляются и вырастают эти 10 см ростка, и что он огромный, если сравнивать его с полным отсутствием или с теми "несколькими рядами". В нем даже почти полностью помещаются плечевые вытачки, если предположить, что длина плеча – это почти те же 10-12 см. Work the RS from WS? Вязать лицевую сторону с изнанки? In this section, I want to introduce you to one technique that I use in my designs and which helps to lessen the number of yarn tails, also weaving them in a very noticeable spot. This technique does not apply to buttoned yokes, where the pivot point is on the edges of both fronts; in other words, on the fastening edge. We further discuss pullover-type designs only. How would the course of shaping the back neck in yokes be located (see the diagram below): 1. A round yoke would be worked up to the front neck. The last circular row would most likely be completed at the M1 marker, which separates the back and the left sleeve. Break yarn (1). 2. Attach the yarn at the beginning of the back neck shaping (2), shape the back neck, and break yarn at the same spot (3). 3. Then a neckband or collar would be made. Attach the yarn (4) somewhere in the back of the yoke, most likely, at the same marker M1. Work the neckband, break yarn. (5). You would not want to continue knitting the neckband with the same yarn used for the back neck shaping since the connection point, and the ending yarn would be in the most noticeable spot of the front neck. We have five yarn ends; 2 of them have to be weaved in a most visible place (2, 3), and there are three more, one of which (1) does not even have a seam or border with another pattern nearby for reliable shelter. *** В этом разделе хочу вас познакомить с одной техникой, которую я применяю в своих дизайнах и которая помогает избавиться от нескольких отрываний нити и вплетания их концов на самом заметном месте. Эта техника не касается застегиваемых кокеток, где точка разворота – это края полочек, другими словами – застежка. Речь далее пойдет только об одеваемых через голову вязаных изделиях. Как расположился бы ход вязания ростка в кокеточных изделиях (см. схему ниже): 1. Провязали бы круглую кокетку до начала горловины переда. Последний круговой ряд, скорее всего, закончили бы у маркера М1, который разделяет спинку и левый рукав. Оторвали бы нить (1). 2. Присоединили бы нить у начала вязания ростка (2), провязали росток, и оторвали бы нить в том же самом месте (3). 3. Далее вязали бы бейку или воротник. Присоединили бы нить (4) где-то в задней части кокетки, скорее всего, у того же маркера М1, связали бы бейку, оторвали нить (5). Скорее всего вы не захотели бы продолжить вязать бейку той же самой нитью ростка, так как точка соединения и последняя нить оказалась бы на самом видном месте горловины переда. У нас есть 5 концов нитей, 2 из них придется прятать на самом видном месте (2, 3), и еще три, один из которых (1) даже не имеет рядом шва или границы с другим узором для надежного укрытия. Next, I want to share the idea of how to make everything with a single and continuous yarn. In order not to break the yarn several times in the back neck shaping in round yokes, the RS (right side) of the stitch pattern in one small yoke section must be worked from the WS (wrong side) and vice versa. That is not the WS row of the stitch pattern – this is the RS of the pattern, which must be displayed and executed from the WS. And vice versa, the WS of the stitch pattern has to be done on the RS. Finish knitting a round yoke before the marker M1 (see the diagram below) with an odd number of the row. In a knitting pattern, this would be an RS row. The definition of the RS row is necessary since turning rows (flat knitting) are used for further shaping of the back neck, hence the WS. Further, from the same point, the back neck shaping begins. Work the first row of the back neck (first pink arrow) from M1 to the first turn of the short row (point A). Work a WS row of the stitch pattern from the RS of the garment. The RS row was already worked in the last round of the yoke. Make a short row turn at point A. Work an RS row of the stitch pattern from the WS of the garment to the marker M1. In my patterns you find such a definition for this: "In thе section between М1 and point A read and work the stitch pattern from WS," which means that you need to get the same look of the stitch pattern from the RS, working on it from the WS. Now we have two more rows between point A and marker M1 than in the remaining yoke. From marker M1 to point B, work an ordinary WS row of the stitch pattern, finding yourself on the wrong side of the garment. One row of the back neck shaping is completed (between M1 and point A, there are two rows). Make a short row turn at point B, and work an ordinary RS row of the stitch pattern while being on the RS of the garment; finish before M1. The first two turns are completed; the height of the back neck is two rows. Repeat the required number of times until the height of the shaped back neck reaches 10 cm. The gap between point A and marker M1 always is one row ahead of the rest of the gap. And it is the section where we knit the RS rows from the reverse side and the WS rows from the right side. There may be doubt: the back neck shaping ends with an odd RS row of the stitch pattern. Basically, the pattern repeat consists of an even number of rows and ends with the WS. Does the pattern repeat remain incomplete? Do not forget that we work another alignment row from M1 down to M1, working over all wrapped stitches at the short rows turns. That is the last lost WS row of the pattern repeat, although it was worked from the RS. After we have completed the back neck shaping and finished at the M1 marker, we then work on a neckband or a collar with the same continuous yarn. Finish before M1, break the yarn. In this case, we have only one yarn end, not five, as presented above. *** Дальше поделюсь идеей, как выполнить все одной непрерывной нитью. Для того, чтобы в вязании ростка в круглой кокетке не отрывать нить несколько раз, лицевую сторону узора в одном небольшом участке кокетки нужно вязать с изнанки и наоборот. Это не изнаночная сторона узора – это лицевая сторона узора, которую нужно отобразить и выполнить с изнаночной стороны. И наоборот, изнаночную сторону узора придется выполнить с лицевой стороны. Закончили вязание круглой кокетки у маркера М1 (см. схему ниже) нечетным рядом узора. В схеме поворотного вязания это был бы лицевой ряд. Определение лицевого ряда обязательно, так как далее вязание ростка будет выполняться поворотными рядами, следовательно – изнаночным рядом. Далее с той же точки начинается вязание ростка. Вяжем первый ряд ростка (первая розовая стрелка) от М1 до первого поворота укороченного ряда (точка А). Вяжем изнаночный ряд узора с лица (лицевой ряд у нас уже был провязан в последнем круге кокетки). Делаем поворот укороченного ряда у точки А. Вяжем лицевой ряд с изнанки до маркера М1. В моих описаниях вы найдете такое определение этому: "В промежутке между М1 и точкой А узор читать и вязать с изнаночной стороны", что означает как раз то, что вам надо получить такой же вид узора с лица, выполняя его с изнанки. Теперь у нас между точкой А и маркером М1 на два ряда больше, чем во всем остальном промежутке. От маркера М1 до точки B вяжем обыкновенный изнаночный ряд узора, находясь на изнаночной стороне. Провязан один ряд ростка (между М1 и А – два ряда). Выполняем поворот укороченного ряда у точки B, вяжем обыкновенный лицевой ряд узора, находясь на лице, заканчиваем у маркера М1. Первые повороты выполнены, высота ростка – 2 ряда. Повторяем нужное количество раз, пока высота ростка не достигнет наших 10 см. Промежуток между точкой А и маркером М1 всегда будет опережать остальной промежуток на один ряд. И именно в нем мы вяжем лицо с изнанки, а изнанку с лица. Может возникнуть сомнение: вязание ростка заканчивается лицевым рядом узора. В основном раппорты узора состоят из четного количества рядов, и заканчиваются изнаночным рядом. Разве раппорт узора останется незавершенным? Не забудьте, что мы провяжем еще один сглаживающий круг от М1 до М1, ввязывая все обернутые петли в точках укороченных рядов. Это и будет тот потерянный последний изнаночный ряд ряппорта, хотя и выполнен с лица. После того, как мы завершили росток и закончили у маркера М1, вяжем бейку или воротник той же самой непрерывной нитью. Закончили у М1, оторвали нить. У нас остался всего лишь один конец нити, а не пять, как было показано выше. Working on the anatomical yoke also includes techniques such as shoulder darts, deeper front armholes, vertical bust darts, and methods for combining them, as well as the correct location of the short rows turning points for the back neck shaping. But more on that later. I tried to put everything as clear as possible. Those who have already knitted my yokes immediately understand what I wrote here. If it seems to you that you did not get the idea, try to knit some of my designs with circular yokes. Hands do not lie; in practice, everything becomes obvious. Thanks for reading! *** В вязание анатомической кокетки еще входят такие технологии, как плечевые вытачки, углубленные проймы переда, вертикальные вытачки для груди и методы их совмещения, а также правильное расположение точек поворотов укороченных рядов для ростка. Но об этом позже. Я постаралась выложить все как можно более понятно. Кто уже вязал мои кокетки, сразу поймет, о чем тут говорилось. Если вам кажется, что вы не поняли, просто попробуйте связать некоторые мои дизайны с круглыми кокетками. Руки не обманут, а на практике все станет очевидно. Спасибо, что читали!
- Foam. The Shortigan
I'm happy to announce that the next pattern of the new spring knits collection is already published. You can find it here. Bubbles of foam in any form contain droplets of air. Each thrown yarn over in the pattern is a framed drop of air that provides softness and airiness to the knitted fabric. The experimental sleeve cap and the shape of the armhole, in which the principles of the set-in sleeve, raglan, and drop-shoulder are combined, are designed without underarms. Tight ribs gather remarkable positive ease. The design of the cardigan also includes horizontal bust darts, and the elongated upper back comfortably covers the back neck. How to wear the Foam – left open or buttoned – depends on how airy your mood is today. *** Рада сообщить, что следующее описание предстоящей весенней коллекции уже опубликовано. Описание можете найти здесь. Пузырьки пены в любом своем проявлении содержат капельки воздуха. Каждая перекинутая петля узора – это обрамленная капля воздуха, придающая вязаному полотну мягкость и воздушность. Экспериментальный рукав и форма проймы, в которых объединены принципы втачного рукава, реглана и спущенного плеча, выполнены без подмышечных подрезов. Заметный объем собран стягивающими резинками. В конструкцию кардигана включены также горизонтальные боковые вытачки для груди, а удлиненная верхняя часть спинки комфортно прикрывает шею. Как носить Foam – распахнутым или застёгнутым – зависит от того, насколько воздушное сегодня ваше настроение. The pattern is likely to please patient knitters. That is a slow pace stitch pattern that takes a lot of time. But think, would any other match here? Maybe not. Air bubbles framed in yarn loops create a rhythmic and meditative effect that allows you to pay attention to the extraordinary cut, and it is а good fellow to the 2x1 rib. An experimental sleeve and armhole shape are designed here. Three types of classic sleeves' cuts are combined: a drop-shoulder, a regular set-in sleeve, and a raglan since the decreases of the armhole continue almost along its entire length. I want to add to the same photo of the armhole. Decreases here are double (only such was possible in this stitch pattern) and distant from the very edge by a selvage stitch (you get a nice rib). It is very important to maintain the elasticity of armholes and sleeve caps edges, allowing the extreme diagonal stitches to not tighten the edges, but to remain at a similar level of elasticity as of the entire piece. All you need to do is work the edge stitches a little looser. *** Описание, скорее всего, понравится терпеливым. Это медленный узор, который потребует немало времени. Но подумав, подошел бы здесь какой-либо другой? Точно нет. Пузырьки воздуха, обрамленные нитью, создают ритмичный и успокаивающий эффект, который позволяет обратить внимание на неординарность фасона, и хорошо дружит с резинкой 2х1. В кардигане сконструирован экспериментальный рукав и форма проймы. Здесь сочетаются три вида классических рукавов и кроя: спущенное плечо, обычный втачной рукав и реглан, так как убавления проймы присутствуют почти по всей ее длине. К той же самой фотографии проймы хочется добавить. Убавления здесь двойные (только такие потребовал узор) и отдаленные от края (формируется красивое ребрышко). Очень важно сохранить эластичность краев, позволяя крайним петлям, идущим по диагонали, не стягивать края, а остаться на уровне упругости всего полотна. Все, что нужно сделать – это вязать крайние петли чуть слабее. Another worth attention element in the design – considerable positive ease – allows you to avoid axillary undercuts. You may ask, "why?" Now I show you everything. The wider the knitted garment, the farther away from the body is the lower connection point of the sleeve to the armhole. Look at the black lines of the pattern layout. At about this area, the borders of an ordinary set-in sleeve cut or a not-so-wide raglan pattern would appear. The design here is fitter, and axillary undercuts are needed to get around the side. The larger the positive ease and the more extensive the sleeves, also, the lower the armhole, the need for axillary undercuts gradually vanishes, which we find in designs with a drop-shoulder (red line) or in wide raglans (blue line). *** Еще один интересный элемент в конструкции – очень большая свобода облегания – позволяет избежать подмышечных подрезов. Вы можете спросить, "a почему?" Сейчас все покажу. Чем шире вязаная вещь, тем нижняя точка соединения рукава с проймой отдаляется от тела и понижается. Посмотрите на черными линиями обозначенную часть выкройки. Примерно в этом месте появились бы границы выкройки с втачным рукавом или нешироким регланом. Изделие здесь более узкое, и подрезы для подмышек необходимы, чтобы обойти бок. Чем изделие и рукава шире, а пройма ниже, потребность в подмышечном подрезе постепенно исчезает, что мы можем наблюдать в фасонах со спущенным плечом (красная линия) или в широких регланах (голубая линия). A "Foam" cropped cardigan is the second design in this style. We recently knitted a very similar one, titled "Cirrus." I liked my found designation of a cropped cardigan – "shortigan," which essentially means precisely that. Such cardigans are necessary for full skirts or pleated pants. It is challenging to choose a long cardigan for such "bottoms." When buttoned, the folds of a skirt or trousers inflate the fronts of a long cardi right about the belly, adding extra pounds and making us look heavier. By the way, a perfect time to start this project. As soon as you finish, the season of full skirts will immediately begin. *** Укороченный кардиган Foam – это второй дизайн в таком стиле. Недавно мы вязали очень похожий, под названием Cirrus. Мне очень понравилось мною найденное обозначение укороченного кардигана на английском "shortigan", что по сути именно то и означает. Такие кардиганы просто необходимы к пышным юбкам или брюкам со складками. Подобрать длинный кардиган к таким "низам" сложно. В застегнутом виде складки юбки или брюк раздувают подолы длинного кардигана в области живота, прибавляя лишних килограммов и отяжеляя нас. Кстати, очень хорошее время начать его вязать. Как только закончите, сразу наступит сезон пышных юбок. Testing this time was numerous. With some delays, but all the Early Birds finished their projects (and all did very well!). I selected several pictures only (click the arrow); all other finished projects are posted on Ravelry. Enjoy your viewing, and get inspired! *** Тестирование в этот раз было многочисленным. С некоторыми опозданиями, но отчитались все до единой ласточки (потому, что они все – молодцы!). Я отобрала несколько отчетных фото (пролистать со стрелкой), все остальные воплощения размещены на Ravelry. Приятного просмотра и вдохновения! As always, we have a testing winner. She knits around the world, as she works and travels a lot. Her knitting has seen different continents, oceans and even poles. How she does it (and she always does it at the highest level) is still unclear to me, being a hopeless homebody myself. Ekaterina, I sincerely congratulate you! *** Как, всегда, у нас есть победительница тестирования. Она вяжет по всему миру, так как ее обязанности подразумевают многочисленные командировки. Вязание повидало разные континенты, океаны и даже полюса. Как она это делает (а делает всегда на высшем уровне) мне, любительнице сидеть дома и взращивать корни, до сих пор непонятно. Екатерина, от всей души поздравляю! As a symbolic prize – one pattern to choose from as a gift. В качестве символического приза – одно описание на выбор в подарок.
- How to choose the right size. Как правильно выбрать размер
One of the most frequently asked questions I get is, "what size do I need to knit?" My patterns use a wide range of sizes, and most often, these are seven sizes: Size: XS (S, M, L, XL, XXL, XXXL) Bust circumference: 82-86 (88-92, 94-98, 100-104, 106-110, 112-116, 118-122) cm Hip circumference: 86-90 (92-96, 98-102, 104-108, 110-114, 116-120, 122-126) cm Bust cup size: 0-A (A, B, C, C-D, D, D-E) The step between the sizes is about 6 cm in both circumferences. If a design uses complex stitch pattern; the pattern repeat of which consists of a large number of stitches; the stitch pattern requires some symmetry; also, if some modeling techniques cannot be implemented in sufficiently small steps – the size range remains the same, but the combined sizes appear. For example: Size: XXS-XS (S-M, L-XL, XXL-XXXL) Bust circumference: 78-88 (90-100, 102-112, 114-124) cm Hip circumference: 84-94 (96-106, 108-118, 120-130) cm Bust cup size: 0-A (A-B, C-D, D-E) If your bust and hip circumference match a specific size range, your knitting gauge in a swatch matches the recommended, you are also comfortable with the given positive ease – it’s no brainer to choose the right size. But what if: 1. Your size is between two sizes or sits on the edge of a particular size. 2. The circumference of your bust (BC) is OK, but the hip circumference is significantly larger. 3. Your bust is larger or smaller than indicated in the pattern, and it may be that the bust circumference does not reflect your actual size. 4. The proposed positive ease does not suit you. 5. You are not getting the recommended knitting gauge. I am going to figure out all these problems more closely. *** Один из наиболее часто задаваемых вопросов, которые я получаю, это "какой размер вязать?" В моих описаниях используется длинный размерный ряд, и чаще всего это семь размеров: Размер: XS (S, M, L, XL, XXL, XXXL) Обхват груди: 82-86 (88-92, 94-98, 100-104, 106-110, 112-116, 118-122) см Обхват бедер: 86-90 (92-96, 98-102, 104-108, 110-114, 116-120, 122-126) см Размер чашки: 0-A (A, B, C, C-D, D, D-E) Шаг между размерами состоит из 6 см по окружности груди и бедер. Если в дизайне используется какой-либо более сложный узор, раппорт которого состоит из большого количества петель, узор требует симметрии, или какие-то конструктивные приемы не могут быть выполнены достаточно мелким шагом, длина размерного ряда остается той же, но появляются объединенные размеры, например, такие: Размер: XХS-XS (S-M, L-XL, XXL-XXXL) Обхват груди: 78-88 (90-100, 102-112, 114-124) см Обхват бедер: 84-94 (96-106, 108-118, 120-130) см Размер чашки: 0-A (A-B, C-D, D-E) Если ваша окружность груди и бедер попадает в промежуток конкретного размера, ваша вязальная плотность в образце совпадает с рекомендованной, также вас устраивает предлагаемая свобода облегания, выбрать размер несложно. Но что делать, если: 1. Ваш размер находится между двумя размерами или на границе какого-либо размера. 2. Обхват вашей груди (ОГ) совпадает, но обхват бедер больше, чем указано в том же размере. 3. Ваша грудь больше или меньше, чем указано в описании, и есть подозрение, что обхват груди не отображает вашего реального размера. 4. Вас не устраивает предлагаемая свобода облегания. 5. Вы не попадаете в рекомендованную плотность вязания. Предлагаю разобрать все эти проблемы более тщательно. 1. My size is "between" or "on the edge". Мой размер "между" или "на границе" In this case, you need to pay attention to several things. The first thing you need to pay attention to in the pattern is the dimensions of the finished project at the bust and the recommended positive ease. Say, you find this in the beginning of each pattern: Finished dimensions (circumference at bust): 118,5 (122,5, 125, 131, 137, 141,5, 148,5) cm Intended ease at bust: on average 23-30 cm. The sample shown on a model is size L with 26 cm of positive ease. From the finished dimensions (the circumference at bust of the finished garment), which is given at the beginning of each pattern, you subtract your bust circumference; the difference obtained is the positive ease. If it is more or less similar to the recommended one, and it suits your preferences, you choose to knit that size. If not, try count the neighboring sizes. Positive ease (PE) is the difference between measuring the circumference of the body and measuring the finished garment at the same level. *** В этом случае вам обязательно нужно обратить внимание на несколько вещей. Первое, на что нужно обратить внимание, это указанный в описании окончательный размер изделия на уровне груди и предлагаемую в описании свободу облегания. Скажем, в описании вы встретите такое: Окончательный размер изделия на уровне груди: 118,5 (122,5, 125, 131, 137, 141,5, 148,5) см Предлагаемый припуск на свободу облегания на уровне груди: в среднем 23-30 см. Образец на модели связан по описанию размера L со свободой облегания 26 см. Из окончательного размера изделия на уровне груди, которое указано в начале каждого описания, вы отнимаете свой обхват груди; полученная разница и будет свободой облегания. Если она более-менее похожа на рекоменованную, и она вас устраивает, вы выбираете тот конкретный размер. Если нет, попробуйте посчитать соседние размеры. Свобода облегания (СО) – это разница между измерением обхвата тела и измерением готового изделия на том же уровне. Positive ease (with rare exceptions) is included in every design. The larger its value, the looser and wider the sweater is. Conversely, the smaller the value, the fitter the sweater is. Several pictures below show the differences in the positive ease; you can visualize what that means. 1. Stratus, PE 2 cm. 2. Twilight, PE 4 cm. 3. Smoky, PE 9 cm. 4. Strobile, PE 13 cm. 5. Foam, PE 26 cm. 6. Dahlia, PE 30 cm. Conclusion: if you are between sizes or on the edge of a particular size, sacrificing a few centimeters of the positive ease, or, conversely, adding a few centimeters to it, you decide which size is more suitable for you. *** Свобода облегания (с редкими исключениями) закладывается в каждый дизайн. Чем больше его значение, тем свободнее и шире свитер. И наоборот, чем меньше значение, тем изделие больше прилегает к телу. В ниже представленных фотографиях показана разная свобода облегания; вы можете четко представить, что это значит. 1. Stratus, СО 2 см. 2. Twilight, СО 4 см. 3. Smoky, СО 9 см. 4. Strobile, СО 13 см. 5. Foam, СО 26 см. 6. Dahlia, СО 30 см. Вывод: если вы находитесь между размерами или на границе какого-либо размера, жертвуя несколькими сантиметрами свободы облегания, или, наоборот, накладывая несколько см, вы определяетесь, какой размер вам больше подойдет. The second thing you need to pay attention to is the knitting gauge, which is recommended in the pattern and the gauge of your swatch. It is clear to everyone that if these data coincide, in the end, you get the right dimensions and the right size - the one that is given in the pattern. But sometimes happens, that the gauge is a little off. What does "a little" or "a lot" mean? Let’s take an example. Say, your BC is 100 cm, the finished dimensions at the bust are 110 cm, the recommended positive ease is 10 cm, the knitting gauge is 20 stitches in 10 cm. The mismatch in the number of rows in the swatch affects the length of the sweater; if you get more rows in your swatch, you get a shorter sweater. If less – longer. Sometimes, if you are shorter, or you are taller than the pattern recommends, this can come in handy, without changing anything or recalculating. The number of rows in a swatch is easiest to adjust by changing the size of the knitting needles, thereby lengthening or shortening the stitch. But in this topic, we are going deep into choosing the right size. We do not return to the rows gauge and the length of the sweater. You can calculate that in your size, the bust circumference consists of 220 stitches (110 cm multiplied by 20 sts/10 cm). If you get 20,5 sts in 10 cm in your swatch, you divide 220 sts by 2,05, and you get that the finished dimensions in the garment at the bust is going to be 107 cm. That means that the positive ease shrinks to 7 cm. If this number suits you, the difference is insignificant; you can safely knit the chosen size. If you get 19 sts in 10 cm in your swatch, you divide 220 sts by 1,9, and you get that the finished dimensions in the garment at the bust is going to be 116 cm. That means that the positive ease increases to 16 cm. If this suits you, or you like loose sweaters, the difference is bearable; you can safely knit the chosen size. Now let's look if you got a more radical gauge mismatch. If you got 22 sts in 10 cm in your swatch, you divide 220 sts by 2,2, and you get that the finished dimensions in the garment at the bust is going to be 100 cm. It means that the positive ease vanishes, and you get a sweater with no ease. According to unwritten rules, at least minimal PE is required in any knitted garment (except for those where elasticity is at a high level, for example, all kinds of ribs). In this case, you better look at the neighboring size in the direction of larger sizes or choose another, thicker yarn. Too narrow armholes, too short shoulder line may also occur to you. If you got 18 sts in 10 cm in your swatch, you divide 220 sts by 1,8, and you get that the finished dimensions in the garment at the bust is going to be 122 cm. It means that the positive ease increases to 22 cm. You might think, "I love loose oversize sweaters, and such positive ease fits me." Here, keep in mind that if the designer did not initially design the oversize shape, you are going to look like wearing the wrong size. The shoulder line drops, also, the sleeve caps; bust darts remain dangling in the armpits and, probably, you gather too much knitted fabric over the bust. So, we can conclude that the difference in the knitting gauge in one direction or another by 0,5-1 stitch can be considered "a little", 1,5 or more stitches off already significantly affect the size of the garment. But there is one addition. The bulkier the yarn, the larger knitting needles and the thicker the gauge, say, 15 sts in 10 cm, even half the stitch can significantly affect the initial dimensions. The finer the yarn and the thinner the knitting needles, the finer the gauge, say, 30 sts in 10 cm, even a difference of 2 stitches do not make very significant deviation. Important! You cannot change the size of the garment and its positive ease, choosing farther than the neighboring size in one direction or another. If you choose a size that differs from yours by two or three sizes, do not expect a good fit. The increasing sizes differ from flatter to more round, as well as the width and depth of the armholes, sleeve caps, upper back height, and how the bust darts are modeled. If the garment has a waistline, the shape of its lower part can also be different. Now back to the main question of this chapter. Namely, how to intentionally use the mismatched knitting gauge and adjust the size if you are "between" or "on the edge." Let's say that for L size, the BC fits between 100-104 cm; for XL size, it is between 106-110 cm. Suppose your BC is 105 cm. The finished dimensions at the bust of the garment are 110 cm (220 sts) in size L and 116 cm (232 sts) in size XL. The knitting gauge remains the same as we agreed, 20 sts in 10 cm. To withstand the recommended positive ease, you are most likely want your garment to have 113 cm at BC. Your swatch gauge then should be 220/113*10 = 19,5 sts if you choose to knit size L, or 232/113*10 = 20,5 sts if you choose to knit size XL. *** Второе, на что вам нужно обратить внимание, это плотность вязания, которая указана в описании и плотность вашего образца. Всем понятно, что, если эти данные совпадают, в итоге вы получите те измерения и размер, которые указаны в описании. Но часто бывает так, что плотность вязания немного отличается. Что значит "немного" или "много"? Разберем пример. Скажем, ваш ОГ – 100 см, окончательный размер изделия на уровне груди – 110 см, предлагаемая свобода облегания – 10 см, плотность вязания – 20 п. в 10 см. Несовпадание количества рядов в образце влияет на длину изделия; если у вас рядов больше, вы получите более короткое изделие. Если меньше – более длинное. Иногда, если ваш рост меньше, или вы выше, чем указано в описании, вам это может сыграть на руку, ничего больше не меняя и не пересчитывая. Количество рядов в образце легче всего изменить, меняя размер спиц, тем удлиняя или укорачивая петлю. Но в этой теме мы касаемся размера, и к количеству рядов и длине изделия больше возвращаться не будем. Можно посчитать, что в описании в вашем размере по окружности груди будет всего 220 петель (110 см умножить на 20 п./10 см). Если у вас в образце получилось 20,5 п. в 10 см, 220 петель вы делите на 2,05 и получаете, что окончательный размер в готовом изделии на уровне груди будет 107 см. Значит, свобода облегания уменьшится до 7 см. Если вас это устраивает, разница небольшая, вы можете спокойно вязать тот же размер. Если у вас в образце получилось 19 п. в 10 см, 220 петель вы делите на 1,9 и получаете, что окончательный размер в готовом изделии на уровне груди будет 116 см. Значит, свобода облегания увеличится до 16 см. Если вас это устраивает, вы любите более свободные изделия, разница терпимая, вы можете спокойно вязать тот же размер. Теперь посмотрим на более радикальную разницу. Если у вас в образце получилось 22 п. в 10 см, 220 петель вы делите на 2,2 и получаете, что окончательный размер в готовом изделии на уровне груди будет 100 см. Значит, свобода облегания исчезает и у вас получится облегаемое изделие. По неписаным правилам, хотя бы минимальная СО обязательна в любом вязаном изделии (кроме тех, где заложена увеличенная растяжимость, например, резиночные узоры), и здесь вам лучше посмотреть соседний размер в сторону больших размеров, или выбрать другую, более толстую пряжу. Также вам могут стать слишком узкие проймы, слишком короткая плечевая линия. Если у вас в образце получилось 18 п. в 10 см, 220 петель вы делите на 1,8 и получаете, что окончательный размер в готовом изделии на уровне груди будет 122 см. Значит, свобода облегания увеличится до 22 см. Вы можете подумать, "я люблю свободные "оверсайз" изделия, и меня такая свобода облегания устроит". Здесь имейте в виду, что, если "оверсайз" дизайн изначально не задуман дизайнером-конструктором, вы будете выглядеть, как надевшая не свой размер. Опустится плечевая линия, верхушки окатов; вытачки для груди начнут болтаться в подмышках и, наверное, у вас соберется слишком много вязаного полотна над грудью. Значит, можно сделать вывод, что отличие в плотности вязания в ту или иную сторону на 0,5-1 п. можно считать "немного", 1,5 и больше петель уже существенно влияет на размер изделия. Но и тут можно найти одно примечание. Чем толще пряжа, спицы и крупнее плотность, скажем, 15 п. в 10 см, даже половина петли может более значимо повлиять на первоначальные измерения. Чем тоньше пряжа и спицы, чем мельче плотность, скажем 30 п. в 10 см, даже разница в 2 петли не сделает уж очень значимых отличий. Важно! Вы не можете заменить размер изделия и его свободу облегания, выбирая более далекий, чем соседний размер в ту или другую сторону. Если вы выбрали размер, отличающийся от вашего на два или три размера, не надейтесь на хорошую посадку. Размеры по нарастанию отличаются от более плоского до более круглого, также шириной и глубиной пройм, окатов, высотой ростка и построением вытачек для груди. Если изделие приталенное, также формой его нижней части. Теперь вернемся к главному вопросу этого раздела, а именно, как с помощью намеренно измененной плотности вязания можно подкорректировать размер, если вы находитесь "между" или "на грани". Скажем, у размера L ОГ попадает между 100-104 см, у размера XL – 106-110 см. Предположим, что ваш ОГ – 105 см. Окончательный размер изделия на уровне груди составляет 110 см (220 петель) в размере L и 116 см (232 петли) в размере XL. Плотность вязания пусть остается та же – 20 п. в 10 см. Чтобы выдержать предлагаемую свободу облегания, вам, скорее всего лучше подойдет окончательный размер изделия с ОГ 113 см. Ваша плотность образца должна составить 220/113*10=19,5 п., если будете вязать размер L, или 232/113*10=20,5 п., если будете вязать размер XL. 2. I have fuller hips than my size. Мой обхват бедер больше, чем указано в моем размере Never choose the next size if your hip circumference (HC) is larger than the pattern. Hip circumference can never be a measure of the size. Your hips in the larger size will certainly fit, but you will look like wearing the wrong size (see above). What to do in this case? First, pay attention to the allowed positive ease. It may be enough to cover the difference between the HC in the pattern and the HC of your hips. In this case, nothing needs to be changed, knit your real size. Second, if the shape of the design allows, cast on more stitches at the beginning. After that, depending on the design, gradually decrease added stitches to the waist or the armholes. But, still, knit your size, which you determined by the bust circumference. Third, if the design is cropped, the hip circumference has no influence. If the garment ends at the hip level, cast on more stitches for the lower rib or hope that it stretches enough; if it is not, follow the advice in the second paragraph – make a slightly noticeable A-line shape. *** Никогда не выбирайте следующий размер, если обхват ваших бедер (ОБ) больше, чем указано в описании. Обхват бедер никогда не может быть определителем размера. Ваши бедра в большем размере обязательно поместятся, но вы будете выглядеть, как одевшая не свой размер (см. выше). Что делать в этом случае? Первое, обратите внимание на заложенную свободу облегания. Может ее хватит, чтобы покрыть разницу между ОБ в описании и ОБ ваших бедер. В этом случае ничего делать не надо, вяжите свой настоящий размер. Второе, если крой изделия позволяет, наберите в нижней части изделия больше петель, которые, в зависимости от дизайна, постепенно убавите до талии или до пройм. Но, по-прежнему, вяжите свой размер, который вы определили по ОГ. Третье, если изделие короткое, окружность ваших бедер не делает никакого влияния. Если изделие заканчивается на уровне бедер, наберите больше петель на нижнюю резинку или надейтесь, что ее растяжения хватит. Если ее нет, руководствуйтесь советам во втором пункте – сделайте слегка заметный силуэт А. 3. My bust is larger/smaller than standard measurements. Моя грудь больше/меньше стандартных измерений Over the 3,5 years that I have been involved in the design and writing of knitting patterns, I had met several cases when the size was incorrectly chosen by measuring the bust. If you have fuller bust than is accepted by standards, the bust circumference, being the only measurement, which determines the size, can not do. You may have a cup E, which rather belongs to size XXXL, but your real size is L or XL. You may have a cup C, which rather belongs to size L, but your real size may be XXXL. With a large bust, your bust circumference is larger, with a smaller bust, the bust circumference is smaller one. It is clear that if you rely only on the bust circumference, you may choose the wrong size. There is another essential dimension by which you can determine your size with even greater accuracy than the BC. That is the length of the shoulder line or the back width. In knitting, these measurements most often coincide. *** В протяжении 3,5 лет, сколько я занимаюсь дизайном и составлением вязальных описаний, несколько раз встречалась со случаями, когда по измерению груди ошибочно определялся размер. Если у вас грудь больше, чем принято стандартами, только обхватом груди, определяя размер, не обойтись. У вас может быть чашка E, подразумевающая размер XXXL, но вы сами являетесь представительницей размера L или XL. У вас может быть чашка груди C, подразумевающая размер L, но вы можете быть представительницей размера XXXL. С большим бюстом ваш ОГ будет больше, с меньшей грудью ОГ будет меньше. Тут понятно, что если опираться только на обхват груди, вы можете выбрать не тот размер. Есть еще одно важное измерение, по которому вы можете определить свой размер с даже большей точностью, чем обхват груди. Это длина линии плеч или ширина спинки. В вязании эти измерения чаше всего совпадают. In my patterns, I use such measurements of the back width or the shoulder line (see the table below). If you doubt about the reliability of your bust circumference, also check these measurements. And if your bust circumference tells you, say, you need to knit size XXL, but the back width (shoulder line length) means that you fit size L, most likely you are size L. The one thing you need to do is to enhance bust darts. It can be the opposite when you need to downsize bust darts. Other measurements that I use in the patterns, and may be useful to you, can be found here. *** В своих описаниях я использую такие мерки ширины спинки/линии плеч (см. табличку ниже). Если вы сомневаетесь насчет достоверности измерений обхвата груди, опирайтесь еще и на эти мерки. И если ваш обхват груди подсказывает вам, скажем, что вам нужно вязать размер XXL, но ширина спинки (длина линии плеч) говорит, что вы попадаете под размер L, у вас, скорее всего, размер L, только вам надо будет увеличить растворы вытачек для груди. Может быть и наоборот, когда вам придется уменьшить вытачки. Другие измерения, которые используются мною в вязальных описаниях, и могут быть вам полезны, можете найти здесь. 4. I am not comfortable with the given positive ease. Меня не устраивает предлагаемая свобода облегания If the designer originally designs the garment with significant positive ease, it is a big mistake to try to get rid of it by choosing knitting two or three sizes smaller pattern. And vice versa, if the positive ease in the design is minimal, you cannot make it “oversize” by choosing a pattern three sizes larger. Below I list the differences of separate sizes, going from the smaller ones to the larger ones, and I think you get why this is not recommended. 1. Small sizes are flatter than larger ones; with increasing size, the garment becomes more round. “Flatness” or “roundness” find their place in the design as the width (deepness) of the armholes. Also, and the additional width of the front piece for the abdomen and bust. 2. In large sizes, the upper part of the back (back neck shaping) is higher. That applies not only to the more extreme shoulder slopes but also to the height of the back side of the armholes. 3. Larger sizes have deeper armholes and less inclined sleeve caps (the angle of inclination in raglans and circular yokes is also different). 4. With each size, the height and width of the bust darts increases. 5. The perimeter of the neckline and neck circumference increases with size. Nevertheless, you can regulate the positive ease, but only to a moderate extent. Your tools here are little deviations in the knitting gauge (see above) or the choice to knit the neighboring size, if, say, you are on the edge of a particular size. I am size L. Below are some examples when I did not knit my exact size L, but, say, I made neighboring, or combined size, when there was no specific size L in the pattern. The first two (Ozone, Icicle) are size ML-L, the last two (Cirrus, Drop) – size L-XL. Conclusion. If you do not like the given positive ease, which the designer allowed in a particular design, do not try to get rid of it or add it by choosing distant sizes. Just choose a different design. *** Если большая свобода облегания заложена в дизайн дизайнером-конструктором, будет большой ошибкой попытаться от нее избавиться, выбрав для себя вязание по описанию двумя или тремя размерами меньше. И наоборот, если свобода облегания в дизайне минимальная, вы не сможете сделать из нее "оверсайз", выбрав описание на три размера больше. Ниже я перечислю отличия конструкции в разных размерах, и, я думаю, вы сами поймете, почему так делать не рекомендуется. 1. Маленькие размеры более плоские; с увеличением размера изделие становится более круглым. "Плоскость" или "круглость" находят свое место в дизайне как ширина пройм, заложенная дополнительная ширина на детали переда для живота и груди. 2. В больших размерах верхняя часть спинки (росток) выше. Это касается не только уровня наклона плеч, но и высоты задних частей пройм на спинке. 3. В больших размерах более глубокие проймы и более наклонные окаты рукавов (отличается и угол наклона в регланах и круглых кокетках). 4. С каждым размером раствор (высота и ширина) вытачек для груди увеличивается. 5. Периметр горловины и обхват шеи с увеличением размеров увеличивается. Все же свободу облегания вы можете регулировать, но только в умеренной степени. Вашими инструментами здесь станут небольшие отклонения плотности вязания (см. выше) или выбор соседнего размера, если, скажем, вы находитесь на границе размеров. Я сама являюсь представителем размера L. Ниже показано несколько примеров, когда я вязала не свой размер L, а, скажем соседний, или объединенный, когда конкретного размера L в описании не было. Первые два (Ozone, Icicle) – размер ML-L, последние два (Cirrus, Drop) – размер L-XL. Вывод. Если вам не нравится дизайнером заложенная свобода облегания, не пытайтесь ее избежать или прибавить путем выбора отдаленных размеров. Просто выберите другой дизайн. 5. My gauge is off. Я не попадаю в предлагаемую плотность вязания The most certain and quickest answer to such a problem would be this: change the yarn and/or the size of knitting needles. The main condition for a good outcome and the best fit is an exact match to the recommended gauge. But in life, this does not always happen. Some knit tightly, others – relaxed. Finding original yarn can be difficult, expensive, or with so much yarn at home, there’s always nothing to knit with, but decency does not allow buying new yarn. No need to worry. If your knitting gauge differs "a little," as already discussed earlier in this article, go and knit. Knitting has a magic wand called positive ease. It gives us some space for errors and freedom to move in one or another direction. Also, remember that you can always knit a neighboring size if you were not lucky to conquer the recommended gauge. The outcome will be equally good. Look at the photos below; they are Larissa and me. I am size L that is close to size XL (BC 104 cm). Larissa is size M, which is close to size L (BC 98 cm). We knitted the same size sweater (ML-L), the knitting gauge was the same. It is probably hard to say that for any of us, the sweater is small or large. *** Самый верный и быстрый ответ на такую проблему будет такой: меняйте пряжу и/или номер спиц. Главное условие удачи и хорошей посадки – точное попадание в предлагаемую плотность. Но в жизни не всегда так получается. Одни вяжут плотно, другие – расслабленно. Найти оригинальную пряжу бывает сложно, дорого, или дома столько пряжи, вязать не из чего, а покупать новую пряжу не позволяют нормы приличия. Волноваться не надо. Если ваша плотность вязания отличается "немного", как уже разбиралось ранее в этой статье, вяжите спокойно. Вязание имеет волшебную палочку, которая называется свободой облегания. Она дает нам некоторые врата погрешности и свободу движения в том или ином направлении. Также помните, что всегда можно вязать соседний размер, если плотность так и не удалось победить. Результат будет одинаково хорош. Посмотрите на фотографии ниже, на них я и Лариса. У меня размер L, который граничит с размером XL (ОГ 104 см). Лариса является представительницей размера M, который граничит с размером L (ОГ 98 см). Мы вязали один и тот же размер (ML-L), плотность вязания совпала. Наверное, сложно сказать, что кому-то из нас свитер мал или велик. Everything is fine when it comes to soft-shaped designs. These are circular yokes, relaxed raglans, garments with a drop-shoulder. They can be moderately larger or smaller; there are no clear visible points or lines that quickly help determine if you wear the right size. You need to be way more attentive to the recommended gauge and the choice of size when it comes to garments with set-in sleeves and some types of raglans with shoulder darts. Here it is essential to find a middle ground between deviations from your gauge and recommended gauge, bust circumference, and length of the shoulder line (back width), which were already explained above. You can compare yourself how looks "a littile bit too small (1),” “right size (2),” and a “slightly large (3)”. Set-in sleeve garments are presented below, and you can navigate along the armhole line, where the shoulder line ends, as well as the width of sleeve caps and the entire body. *** Все в порядке, когда речь идет об изделиях мягкой формы. Это круглые кокетки, отчасти регланы, изделия со спущенным плечом. Они могут быть умеренно больше или меньше, нет четких точек и линий, быстро помогающих определить, одеты ли вы в свой размер. Нужно быть более внимательным к требуемой плотности и к выбору размера, когда речь идет о плечевых изделиях, включая регланы с плечевыми вытачками. Здесь очень важно найти золотую середину между отклонениями от вашей и рекомендованной плотности, обхватом груди и длиной линии плеч (шириной спинки), о которых уже рассказывалось выше. Можете сами сравнить, как выглядит "слишком маленький размер (1)", "изделие по размеру (2)" и "немного великий размер (3)". Здесь представлены плечевые изделия, а ориентироваться можно по линии пройм, где заканчивается линия плеч, а также по ширине окатов рукавов и всего корпуса. And, probably, there is the last pep talk about choosing the right size. Even if you get an ideal knitting gauge, depending on the yarn blends and the chosen size of needles, the finished project after washing or being worn a lot may lose its initial measurements. The swatch never tells you this, even if you test it heavily with water, temperature, pressure, friction, and weight. It is too small for this; it is not affected by the weight of the entire garment, repeated body movements, and the ability to stretch from too relaxed knitting – the abundance of air between the stitches. Silk, rayon, cashmere tend to grow; cotton, linen shrinks over time. If your sample is moderately dense, inelastic, resistant, the loss of the initial measurements is much less likely than a super-elastic, stretchy, loose and airy swatch. If you knit a lot, you have the long developed intuition of a knitter. Listen to it. If you knit time to time or are the beginner, this article was written primarily for you. Good luck! *** И, наверное, последнее напутствие о том, как же в итоге выбрать правильный размер. Даже если вы попали в плотность вязания идеально, в зависимости от состава пряжи и размера спиц, готовое изделие после стирки или в использовании может потерять свои первоначальные измерения. Образец вам никогда этого не подскажет, даже если вы его подвергнете испытаниям влагой, температурой, прессом, трением и весом. Он слишком маленький для этого, на него не действует вес всего изделия, повторяющиеся движения тела и возможность растянуться от слишком рыхлого вязания – обилия воздуха между петлями. Шелк, вискоза, кашемир склонны расти; хлопок, лен со временем сжимается. Если ваш образец умеренно плотный, не податливый, формоустойчивый, потеря первоначальных измерений грозит в гораздо меньшей степени, чем растяжимый, податливый, рыхлый и воздушный образец. Если вы много вяжете, у вас уже давно развита интуиция вязальщицы. Прислушайтесь к ней. Если вы вяжете редко или являетесь новичком в вязании, как раз для вас и была написана эта статья. Удачи!
- Light as Smoke. Легкий как дым
The third pattern of light as smoke Smoky jumper, from the upcoming collection "Tender Graphics. Spring Equinox" can be found here. Light and transparent as smoke, a Smoky jumper will become one of the favorites in your wardrobe. Subtle positive ease, shallow armholes, and thin knitted fabric will make you feel comfortable wearing it under a jacket, а raincoat, or а blazer. The cropped fit suits full skirts or high-waisted pants. A simple at first glance jumper is pampered with interesting details: the fully-fashioned shoulders, the play of vertical and horizontal ribs, and a barely noticeable translucency. The jumper has two types of bust darts. The vertical ones gather the previously added width, and the darts that add length this time find their place in sloped underarms of the front armholes. The inspiration for the Smoky jumper was a transparent jacket, made from organza, framed by dense edges. Immediately in my head, an image was drawn of the same one but knitted using a lace weight mohair with dense ribs, made of heavier yarn. I made a swatch. Of course, everything looked unpromising in the knitted piece. Knowing my love for structure and construction techniques, I realized that my vision would not work. But the image did not leave me. As a result, I decided to strengthen the mohair with stripes of denser yarn, the jacket turned into a jumper, but the idea of lightness and transparency remained. Smoky turned out to be the lightest one by weight. However, it became among my favorites and is worn very often. What else is Smoky good for? Maybe you have yarn, the amount of which is not enough for a complete project? Buy a couple of hanks of thin mohair, and that yarn is most likely enough for you. *** Третье описание легкого как дым джемпера Smoky из будущей коллекции "Нежная графика. Весеннее равноденствие" можете найти здесь. Легкий и прозрачный, как дым, джемпер Smoky станет одним из фаворитов в вашем гардеробе. Небольшая свобода облегания, неглубокие проймы и тонкое вязаное полотно позволят чувствовать себя удобно, надев его под жакет, плащ или демисезонное пальто. Короткость подойдет к пышным юбкам или к брюкам с высокой талией. На первый взгляд простой джемпер украшен интересными деталями: «японское» плечо, игра вертикальных и горизонтальных резинок, чуть заметная просвечиваемость. В джемпере есть два вида вытачек для груди. Вертикальные забирают предварительно добавленную ширину, а вытачки, добавляющие длину, в этот раз сконструированы в наклонных подрезах пройм переда. Вдохновением для джемпера Smoky послужил один прозрачный жакетик, пошитый из органзы, обрамленный твердыми краями. Сразу в голове нарисовался образ такого же вязаного, из тонкого мохера с плотными резинками. Попробовала связать образец. Конечно, в вязаном кусочке все выглядело грустнее. Зная свою любовь к структуре и конструктиву, поняла, что задуманное не получится. Но мысль меня не покидала. В итоге решила укрепить мохер полосками плотной пряжи, жакет превратился в джемпер, а сама идея легкости и прозрачности осталась. Smoky оказался по весу самым легким из тех, что я вязала. При этом он оказался посреди моих любимчиков и носится очень часто. Чем еще хорош Smoky? Может у вас есть пряжа, количество которой недостаточно для полного изделия? Докупите пару-тройку моточков тонкого мохера, и той пряжи вам, скорее всего, хватит. Stripes are still the worst design enemy. Short rows in the striped design are impossible without breaking yarn and transferring them over long distances. It messes up the reverse side and mood from unclean work. Before always tackling the next striped design, I always have to come up with a lot of tricks and techniques to make the stripes work for me, and not vice versa. I wrote earlier that the fully-fashioned shoulder is salvation from gentle sloping shoulders. And my collection of designs with such a shoulder got another item. When there is a good solution, you need to use it. *** Полоски до сих пор остаются самым вредным врагом моделирования. Укороченные ряды в полосатике без отрыва и переноса нитей на дальние расстояния невозможны. Это портит изнанку и настроение от неопрятной работы. Я всегда, перед тем, как взяться за очередной полосатик, должна придумать массу уловок и хитростей, как заставить полоски работать на благо мне, а не наоборот. Я уже ранее писала, что, так называемое "японское плечо" – это спасение от пологих скосов плеч. И моя коллекция дизайнов с таким плечом пополнилась еще одним экземпляром. Когда есть хорошее решение, нужно им пользоваться. When it came time for the bust darts, the design process got stuck in a dead-end. First, short rows are not possible here, not only because they are challenging to implement, but the translucent material would open all the transferred and broken yarn ends. They have nowhere to hide. In extreme cases, side bust darts can be escaped. In striped designs, it is very simple to make vertical bust darts that eliminate the width added earlier to the bust. They can partially compensate for the lack of room at the bust. But here a cropped design came across, and the bust fuller than cup B, requires additional length, raising the bottom of an already shortened design. Side bust darts were needed here as air, and there was no possibility to make them. That is what I faced this summer. When I encounter a problem that I don’t have a solution, I always take a break and send a request to the universe. The universe this time did not make me wait long. This summer, I started writing a book about bust darts in knitting. Only this is not necessary to rejoice. The term that I want to meet is at least five years, and it is not even clear if I succeed. The further you get, the harder the going. In some places, I came across questions for which answers probably do not exist. For example, in sewing, we can rotate a piece of fabric at an angle, opening or closing the dart. In knitting, we knit straight. From here, there are differences, opportunities, and limitations. But back to the Smoky jumper. When I closed and opened the bust darts for the hundredth time in a paper blueprint, trying to understand how any knitted pattern would behave in a moving area, my eyes caught the changes in an angle of armhole underarm. Eureka! The bust darts in Smoky needs to be placed in an underarm! And no ugly short rows distorting the striped and transparent fabric. Of course, you can’t place a large bust dart into a tiny underarm area, but along with vertical darts, this is already something. That was the first time I used such a construction technique; it completely paid off, and, of course, in the future, I will use these ideas more than once. In the images below, it is noticeable that the underarm of the front piece is not horizontal, but with a gentle slope. The slope height is equal to the bust dart height. Together with the vertical darts, pushing the armhole and shoulder section to slightly change the angle, the underarm gets geometrically aligned. *** Когда пришло время вытачек для груди, работа над дизайном застряла в тупике. Первое, укороченные ряды здесь невозможны не только по причине, что их сложно воплотить, но полупрозрачный материал приоткрыл бы все перетягиваемые и оторванные нити. Их просто будет негде прятать. В крайних случаях боковых вытачек для груди можно совсем не делать. В полосатике очень просто сделать вертикальные вытачки, которые собирают ширину и частично компенсируют нехватку пространства для груди. Но тут попался укороченный вариант, и грудь пышнее, чем чашка B, потребует дополнительной длины, приподнимая низ и так уже недлинного изделия. Боковые вытачки для груди здесь были нужны как воздух, а оказалось, что сделать их совершенно невозможно. Вот с какой проблемой я столкнулась летом этого года. Когда я сталкиваюсь с задачей, решения которой у меня нет, я всегда беру паузу и отсылаю запрос во вселенную. Вселенная в этот раз не заставила меня долго ждать. Летом этого года я начала писать книгу о вытачках в вязании. Только этому радоваться не надо. Срок, в который я хочу уложиться – минимум пять лет, и даже неясно, получится ли у меня это. Чем глубже в лес, тем больше дров. Я местами сталкивалась с вопросами, на которые ответов, наверное не существует. Например, в шитье мы можем повернуть участок ткани под углом, открывая или закрывая вытачку. В вязании мы вяжем прямо. Отсюда появляются различия, возможности и преграды. Но вернемся к Smoky. Когда я уже сотый раз закрывала и открывала вытачки для груди в бумажном макете полочки, стараясь понимать, как вел бы себя любой вязаный узор в движущемся участке, в мои глаза бросился момент, как меняется угол подреза подмышки. Eureka! Вытачку для груди в Smoky нужно разместить в подрез! И никаких вам укороченных рядов, уродующих полосатое прозрачное полотно. Конечно, вытачку с большим раствором в подрез не поместишь, но вместе с вертикальными вытачками это уже кое-что. Такой конструктив я делала впервые, он полностью себя оправдал, и, конечно, в будущем я обязательно воспользуюсь этими наработками еще не раз. На картинках ниже заметно, что подрез детали переда не горизонтальный, а с плавным скосом. Высота скоса ровна раствору вытачки. Вместе с вертикальными вытачками, заставляющими участок пройма-плечи немного изменить угол, подрез геометрически выравнивается. Smoky testing was numerous. When I try any new knitting technique, a larger number of Early Birds are necessary. You need to make sure that this technique works. Moreover, the experience of the Early Birds team is so professional that they already scan the descriptions like an X-ray and foresee all the stumbling blocks. Testing was a success; the finished projects were one better than the other. Scroll and see for yourself. Find more photos of the Early Birds here. *** Тестирование Smoky было многочисленным. Когда я пробую в вязании какой-либо новый прием, большое количество Первых Ласточек необходимо. Нужно удостовериться, работает ли этот прием. Тем более, что опыт команды настолько велик, что они уже как рентген сканируют описания и предвидят все камни. Тестирование удалось на славу, воплощения были один лучше другого. Пролистайте и сами убедитесь. Больше фотографий Первых Ласточек найдете здесь. The winner of the testing was tough to choose. All projects are worthy of victory. But one of them had stick deep in my mind, even from showing just a swatch. It is mysterious and multi-layered at the same time. She finished among the first, thus raising the spirit of the rest team. And this picture on the eve of the New Year is somehow symbolic. Oksana, I congratulate you from the bottom of my heart! *** Победительницу тестирования выбрать было очень сложно. Все воплощения достойны победы. Но один из них засел у меня глубоко в памяти даже с показа всего лишь образца. Он какой-то загадочный и многослойный. Закончила она из самых первых, тем поддержав дух остальным. Да и эта фотография накануне Нового Года какая-то символическая. Оксана, я от души вас поздравляю! As a symbolic prize – one pattern to choose from as a gift. В качестве символического приза – одно описание на выбор в подарок. Dear Early Birds, readers of the blog, and all those who support me in every way. I want to wish you a Happy New Year, much joy in the coming year, more free time for knitting, and creative inspiration. Thank you for everything. For me, this year has been eventful and productive. In the new year, I'm not going to give a descent. When we get enough sleep after the New Year’s night, I’m waiting for you all immediately! *** Дорогие Ласточки, читательницы блога и все те, кто меня всячески поддерживают. Хочу поздравить вас с Новым Годом, пожелать много радостей в будущем году, больше свободного времени для вязания и творческого вдохновения. Спасибо вам за все. Для меня этот год был насыщенным и продуктивным. В новом году спуску дать не собираюсь. Когда выспимся после новогодней ночи, жду вас всех незамедлительно!
- Cirrus. Knit the Clouds
Even in the early spring of this year, when the summer collection still was on needles, three designs were to become stylized clouds, and their shape and essence were to convey the features of these clouds. Stratus, Cumulus, and Cirrus. Stratus and Cumulus had been designed in the summer; we tested and knitted them. Stratus even became the most popular design of the summer collection. With Cirrus, then it did not work out, but I could not let myself not to complete the cloud triad. Cirrus moved into the next spring knitwear collection (Tender Graphics. Spring Equinox). And I’m even glad of that. The cardigan turned out to be most similar to cirrus clouds, far more than his unfulfilled predecessor. *** Еще ранней весной этого года, когда создавалась летняя коллекция, три модели должны были стать стилизованными облаками, а их форма и суть должна была передать свойства этих облаков. Stratus, Cumulus и Cirrus – слоистые, кучевые и перистые облака. Stratus и Cumulus летом сложились, мы их вязали, Stratus даже стал самым популярным дизайном летней коллекции. С Cirrus тогда не сложилось, но не завершить облачную триаду я не могла себе позволить. Cirrus перешел в следующую коллекцию весенней вязаной одежды (Tender Graphics. Spring Equinox/Нежная графика. Весеннее равноденствие). И я даже этому рада. Кардиган получился наиболее похож на перистые облака; гораздо в большей степени, чем его незавершившийся предшественник. Cumulus Stratus Cirrus Cirrus clouds – scattered, thin, filamentous clouds in the form of thin white fibers or slightly grayish elongated ridges and shreds, often in the shape of a feather. The cardigan stitch pattern resembles cirrus clouds meeting and diverging high in the blue sky: lightness, airiness, translucency. A lose cropped cardigan with tight ribs, and a drop shoulder is a trendy shape of the upcoming seasons. The extra length for the bust, the shoulder slopes, and the sleeve caps are shaped using small scattered darts between the decorative stripes of stylized cirrus clouds. Cirrus – a cropped cardigan, or the so-called shortigan, takes its roots in the early nineties. I then had a similar one – with a tight rib at the lower waist, oversized, with an open V-neck, with drop-shoulders and full sleeves gathered on tight cuffs. The nineties are back in fashion, and this look, equipped with various modern knitting technologies, has come to revive. By the way, another similar design of the Foam shortigan will be released in mid-January. *** Перистые облака — раздельные, тонкие, нитеобразные облака в виде белых тонких волокон или чуть сероватых вытянутых гряд и клочьев, часто имеющие вид бородки пера. Узор кардигана действительно напоминает перистые облака, встречающиеся и расходящиеся высоко в голубом небе: легкость, воздушность, просвечиваемость. Широкий укороченный кардиган со стягивающей резинкой и спущенным плечом — модный силуэт предстоящих сезонов. Дополнительная длина для груди, скосы плеч и окаты рукавов сформированы мелкими разбросанными вытачками между полосками стилизованных перистых облаков. Cirrus – укороченный кардиган, или так называемый шортиган, берет свои корни в ранних девяностых. У меня тогда был похожий – со стягивающей резинкой на нижней талии, широкий, с открытой V-образной горловиной, со спущенными плечами и широкими рукавами, собранными на тугих манжетах. Девяностые возвращаются в моду, и этому образу, оснащенному разными современными вязальными технологиями, пришло время возродиться. Кстати, еще один похожий дизайн шортигана Foam выйдет в свет в середине января. The Cirrus stitch pattern is the successor of the Dahlia stitch pattern; here, it is diluted with wide stripes of Stockinette stitch, and bobbles are more massive and fuller (stitch patterns can be found here). Just in these stripes of the Stockinette, or, say, in the “clear sky” between the strips of “clouds,” all the constructional techniques are implemented: bust darts, shoulder slopes, and the triangular sleeve caps. Earlier, I wrote that the Dahlia stitch pattern could not be shaped in any way. There is a changing number of stitches, and each bobble is made, turning the knitting piece several times. In Cirrus, everything has become much simpler, but no less interesting. The shoulder slopes and the extra fronts length for the bust are shaped using small scattered darts; the short rows for bust darts smoothly flow into the shoulder slopes. Sleeve caps are shaped by analogy. Such "eureka!" decisions happen infrequently, and one of them made it into Cirrus. Often you need to puzzle your brain how to implement or hide constructional techniques nicely. Here they became a highlight and decoration of the design. *** Узор Cirrus – это детище узора Dahlia; тут он разряжен широкими полосами глади, а пупырышки здесь выше и пышнее (узоры можете найти здесь). Как раз в этих полосах глади, или, скажем, в "чистом небе" между полосками "облаков" размещены все конструктивные решения: вытачки для груди, скосы плеч и формирование треугольных окатов на рукавах. Ранее я писала, что узор Dahlia совсем не поддается моделированию. Тут и меняющееся количество петель, и каждый горошек вяжется, поворачивая вязание несколько раз. В Cirrus все стало гораздо проще, но не менее интересно. Скосы плеч и дополнительная длина для груди на полочках сформированы маленькими разбросанными вытачками, а укороченные ряды для вытачек плавно перетекают в формирование скоса плеч. Окаты рукавов сформированы по аналогии. Такие "еврика!" решения случаются нечасто, и одно из таких попало именно в Cirrus. Часто нужно ломать голову, как обыграть или скрыть конструктивные приемы. Здесь они стали изюминкой и украшением дизайна. It is difficult to judge whether this model fits for you or not, looking at only one sample of the designer. But one of the purposes of testing is to show the same design on different body types, at different ages, looks, and also what other color combinations are possible. Scroll through the finished projects of the Early Birds. My eyes аre fairly dazzled by variety. And yours? More pictures of Early Birds find here. *** Сложно судить, подойдет ли вам эта модель, или нет, глядя лишь на одно воплощение автора. Но одним из назначений тестирований является показ той же самой модели на разных типах фигур, в разных возрастах, образах, а также какие еще возможны цветовые сочетания. Полистайте воплощения первых ласточек. У меня разбегаются глаза. А у вас? Больше фото ласточек - здесь. Another aspect of the Cirrus cardigan, namely his masculine note, was caught by the winner of this testing, Julia. As soon as I saw her progress, it immediately became clear to me who was seriously claiming victory this time. That is the dimension of the design that I wanted to realize, but I couldn’t transmit it myself, apparently because of the delicate pastel colors. And my dream came true. Julia, I sincerely congratulate you! More pictures of Julia can be found here. *** Еще один аспект кардигана Cirrus, а именно его мужскую нотку, словила победительница этого тестирования – Юля. Я как только увидела ее прогресс, мне сразу стало понятно, кто в этот раз серьезно претендует на победу. Это та сторона дизайна, которую я мечтала воплотить, но самой передать не удалось, видимо, из-за нежных пастельных оттенков. И моя мечта осуществилась. Юля, от души поздравляю! Больше фотографий Юли найдете здесь.
- Ozone and Openwork
I finished an Ozone jumper almost a year ago, and it should be one of the designs of the summer collection. But it so happened that the summer collection turned toward summer tops, and Ozone had to wait for another occasion. Let me introduce the first pattern of future collection. Ozone pattern can be found here. Ozone is a modification of oxygen with much higher activity. It is very captivating, trying to design features of something, which cannot be touched and seen. How to convey the smell of the air after thunderstorms and lightning with knitting needles? Jumper Ozone is designed to wear in spring, summer, or early autumn. Eyelet stripes are made with larger knitting needles, dramatically decreasing the number of stitches. Scattered bust darts in the shape of waves embellish the jumper. The front is wider at the bust. The elongated backside of the yoke comfortably covers the neck. The jumper is knitted from the bottom to top in separate pieces. Further, the pieces join in a yoke, decreases in which tracks the raglan lines. *** Джемпер Ozone я связала почти год назад, и он должен быть стать одним из дизайнов летней коллекции. Но, так сложилось, что летняя коллекция повернула в сторону летних топов и "Озону" пришлось ждать другого случая. Разрешите представить первое описание следующей коллекции. Описание джемпера Ozone можете найти здесь. Озон – модификация кислорода, обладающая значительно большей активностью. Свойства того, чего нельзя потрогать и увидеть, воплощать в вязаное изделие очень интересно. Как передать спицами запах воздуха после грозы и молнии? Джемпер «Озон» предназначен для весны, лета или ранней осени. Ажурные полоски выполнены более толстыми спицами, резко меняя количество петель. В джемпере сконструированы разбросанные вытачки для груди в виде волн, также добавлена ширина в передней части. Удлиненная задняя часть кокетки комфортно прикрывает шею. Джемпер связан снизу вверх отдельными деталями; далее детали соединены в круглую кокетку, убавления в которой следуют линиям реглана. It all started a long time ago, with the Radiance stitch pattern, in which I tried to reproduce slipped or open work machine-knit stitches with knitting needles. A wide pallet of stitch patterns was born in which the openwork is not done by yarn overs and knitting two stitches together, but by a dramatic change in the size of the knitting needles. Accordingly, so that the knitted fabric does not expand infinitely, before that, you need to reduce the number of stitches drastically. Radiance, Ozone, Underwater, Fog. *** Все началось давным-давно, с узора Radiance, в котором я попробовала спицами воспроизвести снятые или спущенные петли машинной вязки. Родилась целая паллета узоров, в которых ажур выполняется не накидами и провязыванием двух петель вместе, а резким изменением размера спиц. Соответственно, для того чтобы вязаное полотно безгранично не расширялось, перед тем нужно резко убавить количество петель. Radiance, Ozone, Underwater, Fog. The most beautiful of them, the Radiance pattern, has already tried to get alive, but only as a project. The second attempt to become a design and the pattern was unsuccessful. The stitch pattern is virtually impossible to shape. If I could knit a summer coat, which was intended, for my size, I would hardly be able to calculate the pattern for other sizes. *** Самый красивый из них, узор Radiance, уже попробовал пробраться в жизнь, но только лишь в качестве проекта. Вторая попытка стать дизайном для описания была неудачна. Узор практически совсем не поддается моделированию. Если я бы смогла связать летнее пальто, что было задумано, для своего размера, вряд ли я бы смогла составить описания для других размеров. Further, this type of stitch pattern with a change in needle sizes went even further. I remember a question, which I had in my mind, what if I stuff an openwork with a yarn? And then, I got the idea of how to combine two completely different yarn weights in one knitted fabric. Two main tricks, such as a dramatic decrease and increase in the number of stitches and a switch of the size of the needles, made it possible in knitting. And the third stage in the development of the same type of stitch patterns was the Smoky pattern, which returned to the openwork again, only this time, the number of stitches remained the same, only changing the yarn weight and the knitting needles size. The Rye pattern has already become a pattern; you can find it here. Rye, Cyclone, Smoky. *** Далее этот тип узоров со сменой размеров спиц пошел еще дальше. Помню, как у меня возник вопрос, а если ажур заполнить нитью? И тогда родилась идея, как в одном вязаном полотне совместить две совершенно разные толщины нитей. Без двух главных приемов, таких, как резкое убавление и прибавление количества петель и смена размеров спиц, такое в вязаном сделать невозможно. И третьим этапом развития одного и того типа узоров стал узор Smoky, который вернулся к ажуру, но уже без изменения количества петель, лишь меняя толщину спиц и пряжи. Узор Rye уже стал дизайном и описанием, его можете найти здесь. Rye, Cyclone, Smoky. Each stitch pattern or type of stitch pattern has its character. Something it allows, something forbids. The technology of the scattered bust darts, which so successfully found it's way into the Rye jumper, could not go into oblivion. Ozone borrowed the same technology, and as it turned out, the bust darts here became the embellishment of the design, especially in sizes where darts height is slightly larger. *** Каждый узор или тип узоров имеет свой характер. Что-то он позволяет, что-то запрещает. Технология разбросанных вытачек для груди, так удачно вписавшаяся в джемпер Rye, не могла уйти в забытье. Озон позаимствовал ту же самую технологию, и, как оказалось, вытачки для груди здесь стали украшением дизайна. Особенно в размерах, где раствор вытачек чуть больше. Jumper Ozone is suitable for any season. For summer, you can knit it using cotton and linen, for autumn and spring – blends with wool. Merino wool or alpaca will allow you to wear Ozone in the winter, and you can also make long sleeves. You can see this by looking at the finished projects of the Early Birds group members, that used a variety of yarn blends. I shall not speak about the beauty of the projects anymore. Sometimes quality and beauty must be taken for granted. To view, click the arrow. *** Джемпер "Озон" подойдет для любого сезона. Для лета можете его вязать из хлопка и льна, для осени и весны – из смесей с шерстью. Шерсть мериноса или альпака позволят носить "Озон" зимой, а также можно удлинить рукава. В этом можете убедиться, посмотрев воплощения первых ласточек, использовавших самые разные составы пряжи. О красоте воплощений я уже больше говорить не буду. Иногда качество исполнений и красоту надо просто принять за должное. Для просмотра нажмите стрелку. The winner of this testing was the newcomer in our group – Elena (echervi on Ravelry). I don’t remember if it happened so far. She came, looked around, and made us feel like she had been here for a long time. Active participation, speedy knitting, and breathtaking results. Elena, my congratulations. As a symbolic prize, you can request one pattern as a gift. *** Победительницей этого тестирования стала новичок в нашей группе – Елена (echervi на Ravelry). Не помню, чтобы так до сих пор случалось. Пришла, осмотрелась, и дала нам почувствовать, что вроде она уже здесь давно. Активное участие, скоростное воплощение и дух захватывающий результат. Елена, мои поздравления. В качестве символического приза можете запросить одно описание в подарок.
- Best Sellers vs My Personal Favorites
Four seasonal collections were published, with the summer one being the last. I think it could be interesting for you to find out which designs you've liked the most and if your preferences matched with my personal favorites. It must be told in advance that I am trying not to wear my designs, I rather keep them as samples or prototypes, but sometimes I can not resist and move them from my studio to my wardrobe. The arrangement of pictures reflects the most popular being the first in descending order. *** Изданы четыре сезонные коллекции, из них летняя была последней. Я думаю, вам было бы интересно узнать, какие дизайны вам понравились больше всего и совпали ли ваши предпочтения с моими личными фаворитами. Нужно заранее сказать, что я стараюсь не носить свои дизайны, я храню их в качестве образцов или прототипов, но иногда я не могу удержаться и перемещаю их из моей студии в мой гардероб. Расположение фотографий отражает первый дизайн, как наиболее популярный, далее в порядке убывания. 1. Merino Hug. Winter Solstice. Your choice is Cherrish, Naklin, and Yeti. Вашим выбором стали Cherrish, Naklin и Yeti. My top three are... Blue Blues, Naklin, and Freon. Hoоray! We have a match! Моя тройка фаворитов – это Blue Blues, Naklin и Freon. Ура! У нас есть совпадение! 2. Merino Hug. Spring Equinox. Your top three are April, Catkin, and Drop. В ваш топ-3 вошли April, Catkin и Drop. My favorites are Drop and Lilac. I almost wore Drop to the holes, and the Lilac jacket became my mom's favorite. And we have a match! Моими фаворитами является Drop и Lilac. Drop я уже почти износила до дыр, а жакет Lilac стал любимцем моей мамы. И у нас есть совпадение! 3. Alpaca Riddles. Fall Equinox. Your favorites are Strobile, Rain, and Fall. Вашими фаворитами стали Strobile, Rain и Fall. The most loved ones by me were Rain, Rye and Strobile. We have two matches! Моими любимцами оказались Rain, Rye и Strobile. У нас два совпадения! 4. Tops! Summer Solstice. Your top choices are Stratus, Solaris, and Milky Way. Ваши предпочтения отданы Stratus, Solaris и Milky Way. Most often this summer I put on Solaris, Cumulus, and Airy. We have a match again! Чаще всего этим летом я надевала Solaris, Cumulus и Airy. У нас еще одно совпадение! The story would be incomplete without one tiny design piece, which was not included in the collections, but ended up among the top sellers, and this is a shortigan Voyage. Thanks to everyone who supports me! *** Рассказ был бы неполным без одного маленького дизайна, который не вошел в коллекции, но оказался посреди топов, и это – укороченный кардиганчик Voyage. Спасибо всем, кто меня поддерживает!
- My DIY Photo Studio
Recently you were visiting me at my studio at home; this time I invite you to my backyard. Today I decided to hold a photo shoot of the new collection. To be more precise, to make technical photos of my latest designs, and at the same time, show you my DIY photo studio. That is probably the simplest photo studio you can imagine. Nevertheless, in my design process, the main emphasis is knitting and pattern writing, photography already go as an auxiliary hobby. But it is evident that without beautiful and “tasty” artistic and technical photos, no one will want to knit my designs. I think I managed to find a middle ground without investing too much in equipment, and as a result, I get quite tolerable photos. And the most interesting thing is that too hard attempts to create an ideal creative and working atmosphere, as well as the environment, often alienate a person from the process of creativity. If you can achieve the maximum result that suits you with minimum conditions and investments, then more is not necessary. The main thing is to love, feel, and know very well the object you are shooting. The basic items are a camera (Nikon D300), a tripod, a dressed mannequin, an iron, and a white background, which is a white plastic panel from a Home Depot. The white panel has two functions. It serves as the basis for the white background of technical pictures and works as a rear light reflector. The main conditions are natural daylight, which does not distort natural colors. In order not to use photo umbrellas, reflectors, and special lighting, you need to wait for very light, but overcast weather. In cloudy weather, the light does not have a directional source, and, most importantly, no shadows appear. And if they appear, they are very soft and can be easily corrected in post-production. The clouds scatter light, and the lighting becomes much more even. Complicating factors in such conditions are the sun, unexpectedly breaking through the clouds, the wind blowing off sleeves and flattening volumes of the garment, and, of course, rain. Today there was no rain, the wind was moderate, and the sun practically did not come out. I consider that the photo shoot was a success. The photo session of the three designs took 2 hours, about 6-8 hours will take post-production. *** Недавно вы были у меня в гостях, в моей студии дома; на этот раз приглашаю вас в свой дворик. Сегодня решила провести фотосессию новой коллекции, если быть точнее, сделать технические фото, и заодно показать вам свою "сделай сам" фотостудию. Это, наверное, самая простая фотостудия, какую можно себе представить. Все же в моей творческой деятельности основным акцентом является вязание и составление описаний, фотографии уже идут как вспомогательное увлечение. Но очевидно, что без красивых и "вкусных" художественно-технических фото никто не захочет вязать себе подобное. Я думаю, мне удалось найти золотую середину, не инвестируя в дорогостоящее оборудование, и в итоге получать вполне терпимые фотографии. И самое интересное, что слишком усердные попытки создать идеальную творческую и рабочую атмосферу, а также окружение, часто отдаляет человека от самого процесса творчества. Если можно достичь максимального тебя устраивающего результата минимальными условиями и затратами, значит, большего и не нужно. Главное, любить, чувствовать и хорошо знать то, что снимаешь. Самые основные предметы – это фотоаппарат (Nikon D300), штатив, одетый манекен, утюг и белый фон, которым послужила белая пластиковая панель из магазина стройматериалов. Белая панель выполняет две функции. Она служит основой белого фона технических фотографий и задним отражателем света. Основные условия – натуральный дневной свет, который меньше всего искажает цвета, а для того, чтобы не понадобились фотозонты, отражатели и специальное освещение, нужно просто дождаться очень светлой, но пасмурной погоды. При пасмурной погоде свет не имеет точечного источника, а также, самое главное, не появляются тени, и, если они есть, они очень мягкие и легко корректируются в дальнейшей обработке. Облака рассеивают свет, и освещение становится практически одинаковым со всех сторон. Усложняющими факторами в таких условиях являются солнце, нежданно пробивающееся сквозь облака, ветер, сдувающий рукава и сплющивающий объемы изделия, и, конечно, дождь. Сегодня дождя не было, ветер был умеренным, а солнце практически не вылезало. Можно сказать, фотосессия прошла успешно. Фотосессия трех моделей заняло 2 часа, около 6-8 часов займет дальнейшая обработка фотографий (постпродакшн). We live on the first floor of a four-story building, and we have direct access to a small backyard. I hold most of my photo shoots in it for six years already. You probably remember this photo when I was preparing to knit the fall collection. *** Мы живем на первом этаже четырехэтажного дома, и у нас есть прямой выход в маленький дворик. Именно в нем я провожу большинство своих фотосессий уже шестой год. Вы, наверное, помните эту фотографию, когда я готовилась к вязанию осенней коллекции. During the photo shoot, you still need to pay attention to the white balance and adjust the settings of the camera. Today, white light had a pink hue. But in every season it is different. I love bluish-white in winter and summer, it is more challenging to work with orange white in fall and with yellowness of spring. In the winter, my photo studio achieves perfection. Snow works as a reflector of light from all sides, and working with such photographs is a pleasure. It’s just that it’s harder to move in a winter coat and the coffee gets cold too quickly... The photo below on the left was taken in the winter, and it is unprocessed: the colors are bright, the lighting is adequate, and it can be used right away. Nearby is already a cropped picture, where the main focus is the shoulders of garments, as well as snow stains are erased in the background. The changes are minimal. *** Во время фотосессии еще нужно обратить внимание на баланс белого и скорректировать настройки фотоаппарата. Сегодня белый свет имел розовый оттенок. Но в в каждом сезоне он разный. Очень люблю синеватый белый зимой и летом, сложнее работать с оранжевым белым осени и с желтизной весны. Именно зимой моя студия достигает совершенства. Снег работает отражателем света со всех сторон, и работа с такими фотографиями – одно удовольствие. Вот только в зимнем пальто двигаться сложнее и кофе быстро остывает... Фотография ниже слева как раз делалась зимой, и она совершенно необработанная: цвета яркие, освещение достаточное, и ее совершенно спокойно можно использовать сразу. Рядом вариант уже обрезанной фотографии, где акцент ставился на плечики вязаных изделий, а также стерты пятна снега на фоне. Изменения минимальные. For me, technical photos have always been and remain the main ones in the presentation of the design. When I knitted using patterns of other designers, I trusted only those photos that were taken on a hanger, on a mannequin or laying flat. For some reason, these were rare. But only in such photographs, the design is “naked” and accurate. It is not enhanced with the beauty of the model, fancy ambiance and mood, and does not cause unnecessary emotions when choosing what to knit. In addition to the above, the design presented on the body gives information only about the length and proportions. But since our height, body shape and size are very different, such information loses its significance. When pictures are taken on a posing model, there is a possibility that some correcting pins will appear on the back or invisible side. Also, the assistant may adjust the garment for the photo as needed. On the mannequin, I take photos from all sides, but since the mannequin is voluminous, in other words, round, the volume is lost on a photo. A photo of a garment laying flat helps to judge the real width, shape, and other proportions. That is why the photo shoot of technical photos for me personally is the main and the most indicative. Further artistic photos, which are shoot wearing on myself, on the body – are only entertainment and play with style, and they are also intended for commerce. Any photos go under post-production. I think you will be interested in what the photo on the mannequin looks like before and after post-production. The main techniques are highlighting the background, adjusting brightness, cropping the edges, cleaning unnecessary fibers and specks, smoothing shadow contrasts, and recreating the most real color of the yarn. But since today the white light had a pinkish tint, it was easy to recreate the dusty pink color. Before and after. *** Лично для меня технические фото всегда были и остаются главными в демонстрации дизайна. Когда я сама вязала по описаниям, я доверяла только тем фотографиям, которые были сделаны на вешалке, на манекене или в раскладе. Такие почему-то встречались редко. Но лишь на таких фотографиях дизайн является "голым" и точным, он не украшен красотой живой модели, созданной атмосферой, и не вызывает ненужные эмоции при выборе, что вязать. Кроме вышеперечисленного, на теле представленный дизайн дает информацию лишь о длине и пропорциях. Но так как рост, формы тела и размеры у нас очень разные, такая информация теряет значимость. Когда фотографии делаются на недвижущейся живой модели, есть возможность, что на спине или невидимом боку появятся заколки или защипки, а ассистент поправит изделие для фото так, как нужно. На манекене я делаю фото со всех сторон, но так как манекен объемный, то есть, круглый, на плоском фото теряется объем. Судить о реальной ширине, форме и других пропорциях помогает фото плоского расклада. Вот почему фотосессия технических фото лично для меня является основной и показательной. Дальнейшие художественные фотографии, которые снимаю на себе, на теле – это только развлечение и игра со стилем, а также они предназначены для коммерции. Любые фото подвергаются дальнейшей обработке. Я думаю, вам будет интересно, как выглядит фото на манекене до обработки и после. Главными приемами является высветление фона, яркость, обрезание краев, чистка ненужных ворсинок и соринок, сглаживание теневых контрастов и максимальное приближение к настоящему цвету пряжи. Но так как сегодня белый свет имел розоватый оттенок, долго мучиться над пыльно розовым цветом не пришлось. До и после. After the pictures on the mannequin are taken, a white panel and the design is laid on the ground. I take a photo of the garment laying flat, as well as some details in close-up. Before and after. *** После того, как фотографии на манекене сделаны, белая панель кладется на землю, и на ней я делаю фото расклада, а также деталей в крупном плане. До и после. I also want to show how pictures of those "tasty" sweater piles are born, which for many years have become my signature. Half of the new collection is finished, so it's time to celebrate. Before and after. *** Также хочу показать, как рождается фотографии "вкусных" стопочек, которые уже много лет являются моим узнаваемым знаком. Половина новой коллекции связана, значит, пора отпраздновать. До и после.
- Tops! Summer Solstice. E-book
Presenting the last, fourth e-book in a series of knitting books for each season – "Tops! Summer Solstice." In it, you will find eight patterns of summer tops using summer yarn, mainly cotton and linen. You can read about the design process and how testings passed in the blog or the forum. You can also preview it in the lookbook. Many thanks to all Early Birds, who participated in testings of summer designs. Many thanks to all who support me by buying patterns. Without You, nothing would have happened. The main theme of the summer collection is everything above the surface of the earth. That cannot be touched, but only seen, imagined, felt. Understand the essence of substance, its purpose, and what it means to us. Capture the most important message. Lines, movement, light, space, accuracy, variability, transparency, lightness. If that is possible to knit, let's grab the needles and fly together. Publishing a summer collection in the early fall may seem like a strange decision. But, it happened, and if to think deeper, you need to thatch your roof before the rain begins; it means knitting summer tops in the winter is the right time! You need time to pick up the yarn, create looks by finding matching bottoms and accessories, and knit all garments! By doing that, look, summer is just around the corner. Good luck to all of you, and I will look forward to your photos with finished projects. For me, this is the most valuable thing in the whole process. *** Представляю последнюю, четвертую электронную книгу в серии вязальных книг для каждого сезона – "Tops! Летнее солнцестояние". В ней вы найдете восемь описаний летних топов из летней пряжи, в основном из хлопка и льна. Как создавались модели и как проходили тестирования, вы можете почитать в блоге или на форуме. Также вы можете полистать альбом. Огромное спасибо всем первым ласточкам, тестировавшим описания летних дизайнов и всем, кто меня поддерживает, покупая описания. Без вас ничего бы не свершилось. Тема летней коллекции – все, что находится над поверхностью земли. То, что нельзя потрогать, а только увидеть, представить, ощутить. Понять суть той субстанции, какое ее предназначение, и что она для нас означает. Поймать самое главное. Линии, движение, пространство, точность, изменчивость, прозрачность, свет, легкость. Если такое возможно связать, нужно браться за спицы и вместе полететь. Издать летнюю коллекцию ранней осенью может показаться странным решением. Но, так случилось, и, если подумать, сани нужно готовить летом, а летние топы вязать зимой. Это самое правильное время. Пока найдется пряжа, создастся образы, подбирая "низы" и аксессуары, свяжутся изделия, глядишь, и лето не за горами. Удачи вам всем, а я с нетерпением буду ждать ваших фото с завершенными проектами. Для меня это самое ценное во всем процессе. I cast on stitches for the very first Arctic design on October 9th, 2016. Then I could only dream somewhere deep in my brain that I could still complete this long and laborious project. Just imagine, two million stitches, 32 designs, 32 patterns, as well as 32 photoshoots and testings. All designs take into account the anatomical shape of the female body. Most of the patterns are designed for seven sizes (some designs have combined sizes due to the features of the shape or stitch pattern). I hope that representatives of different taste preferences will find something for themselves. Over these three past years, I have gained tremendous experience, learned from mistakes, found various new techniques, and I have launched my website. During this time, I recognized you and your preferences, and it is worth a lot. I have already sketched two new collections, knitted four samples, and in the future, the form will remain almost the same – eight designs in one collection. Only I will try to make my life a little easier – I will no longer become attached to the season. Working on the collection takes almost a year. It’s challenging to shoot seasonal photos, hold seasonal testings, and publish a book for a particular time of year at the same time. What themes will be developed in each future collection, you will learn over time. Thanks a lot, everyone! *** Когда 9-ого октября 2016 года я набрала петли для самой первой модели Arctic, я только в самом глубоком участке мозга могла помечтать о том, что мне все же удастся закончить этот долгий и трудоемкий проект. Два миллиона петель, 32 вязаные изделия и 32 описания, столько же фотосессий и тестирований. Все модели учитывают анатомические формы женского тела, большинство описаний рассчитаны на семь размеров (некоторые дизайны имеют объединенные размеры из-за особенностей кроя или узора). Я очень надеюсь, что представительницы разных вкусовых предпочтений обязательно найдут что-то для себя. В протяжении этих трех лет я приобрела огромный опыт, училась над ошибками, находила разные новые технологические приемы, у меня появился собственный сайт. За это время я узнала вас и ваши предпочтения, и это дорогого стоит. В эскизах у меня уже набросаны две новые коллекции, связаны четыре модели, и в будущем формат останется почти такой же – восемь моделей в одной коллекции. Только я попробую немного облегчить себе жизнь – не буду больше привязываться к сезону. Работа над одной коллекцией занимает почти год, и сделать сезонные фото, провести тестирования по сезону и издать книгу к конкретному времени года очень сложно. Какая тематика будет развиваться в каждой коллекции, узнаете со временем. Всем огромное спасибо!
- Summer Recap and Vacation!
It was the most productive summer of my knitting life. I published six patterns, started working with the new collection, and made many new changes, as well as improvements, in Vilnonis website. Some of them are important enough, and I want to share them with you. *** Это было самое продуктивное лето в моей вязальной жизни. Я опубликовала шесть описаний, начала работать с новой коллекцией, а также внесла огромное количество улучшений и изменений на сайте Vilnonis. Некоторые из них достаточно важны, и я хочу поделиться ими с вами. The Lookbook/Альбом I'm proud to present the lookbook of the new summer collection — "Tops! Summer Solstice". As always, here you will find all designs, technical pictures, some finished projects of Early Birds, links, where to by patterns, etc. But this time you will be surprised by one thing; let me clarify. The theme of the summer collection was air substances, which were not easy to photograph for the lookbook. I found some suitable pictures in my photo archives, taken eight to ten years ago, but that was not enough. Half of the lookbook still remained empty. Now I don’t travel so much, so beautiful landscapes are extremely rare in my sight. I did not want to use pictures from the internet taken by strangers also. The lookbook and e-book should be authentic and contain a knitting spirit in every corner. And then the brilliant idea came to my mind. I know, who lives in one of the most beautiful places on Earth and travels a lot, and photographs nature, and knits. Perfect match! I asked for help, and Larisa @lama agreed with joy. I do not want to write anything more here, open the lookbook, and you will see everything by yourself — the perfect match. The summer collection was the most difficult one. I think I'm fed up with summer yarn. I know for sure that I'm still a wool fan, and the upcoming collections will use wool containing yarn for sure. So if you like my summer designs and patterns, grab them now and knit. I do not know when I will return to summer yarn again. Click on a picture to flip through the lookbook. *** Я с гордостью представляю альбом новой летней коллекции «Tops! Летнее солнцестояние». Как всегда, здесь вы найдете все дизайны, технические фотографии, некоторые завершенные проекты Первых ласточек, ссылки, где купить описания и т. д. Но на этот раз вас ожидает один сюрприз; позвольте мне пояснить. Темой летней коллекции были воздушные субстанции, сфотографировать которые для оформления альбома было непросто. Я нашла несколько подходящих фотографий в своих фотоархивах, снятые восемь-десять лет назад, но этого было недостаточно. Половина альбома все еще оставалась пустой. Сейчас я не так много путешествую, так что красивые пейзажи попадаются крайне редко. Я не хотела использовать фотографии из интернета, сделанные незнакомцами. Альбом и электронная книга должны быть аутентичные и содержать дух вязания в каждом уголке. И тогда мне пришла в голову блестящая идея. Я знаю, кто живет в одном из самых красивых мест на Земле и много путешествует, вяжет и фотографирует. Идеальное совпадение! Я попросила помощи, и Лариса @lama с радостью согласилась. Я не хочу здесь больше не о чем писать, откройте альбом, и вы сами все увидите — идеальное совпадение. Летняя коллекция была самой сложной. Думаю, что я сыта по горло летней пряжей и точно знаю, что я все же больше поклонница шерсти. По крайней мере, в будущих коллекциях будет использоваться пряжа, содержащая шерсть. Так что, если вам нравятся мои летние дизайны и описания, вяжите по ним сейчас. Я не знаю, когда вернусь к летней пряже. Нажмите на картинку, чтобы полистать альбом. New Pattern Shop Interface/Новый интерфейс магазина описаний The next big job I finished this summer was the new pattern shop interface. It is quicker, more convenient and has those magical search filters, which could be more and more useful with every upcoming collection when the number of patterns grows. Still working on updating links scattered throughout. I hope you like it. *** Следующей большой работой, которую я закончила этим летом, является новый интерфейс магазина описаний. Быстрый, удобный и с магическими поисковыми фильтрами, которые со временем станут все более и более полезными с каждой предстоящей коллекцией, когда количество описаний будет расти. До сих пор работаю над обновлением ссылок, разбросанных повсюду. Я надеюсь, что вам понравится. New payment methods/Новые способы оплаты Since July this year, the pattern shop has expanded the list of possible payment methods. The Yandex.Money has joined the usual credit cards and PayPal. I am very glad to provide you with a more diverse and convenient payment system. All possible methods are presented in the picture below. *** С июля этого года магазин описаний расширил список возможных способов оплаты. Система Яндекс.Деньги присоединилась к обычным кредитным картам и PayPal. Я очень рада предоставить вам более разнообразную и удобную платежную систему. Все возможные способы представлены в картинке ниже. New stitch patterns/Новые вязальные узоры This summer, I managed to publish nine new original stitch patterns that had accumulated in my swatch box last year. Some of them are not so interesting and not so new, but may be useful for the upcoming testings or for those who want to try yarn and gauge before buying a pattern. Our Ekaterina @Snegerina tested all the charts. Knowing her as a super-brain in knitting, I'm almost confident in charts accuracy and completeness. But errors occur anyway. In this case, I upload new pdf files with the corrected charts without prior notice. It would be nice to check them for new versions from time to time. Click on the image to go to the page of stitch patterns. *** Этим летом мне удалось опубликовать девять новых вязальных узоров, которые скопились в моей коробке с образцами за прошлый год. Некоторые из них не так интересны и не столь новы, но могут быть полезны для предстоящих тестирований или для тех, кто хочет попробовать пряжу и плотность перед покупкой описания. Наша Екатерина @Snegerina протестировала все узоры. Зная ее как супермозг в вязании, я почти уверена в точности и правильности схем. Но ошибки все равно случаются. В таком случае я загружаю новые pdf файлы с исправленными схемами без предварительного уведомления. Было бы хорошо время от времени проверить их на наличие новых версий. Нажмите на изображение, чтобы перейти на страничку узоров. New Tradition/Новая традиция After every design testing, I do a wrap-up and choose a winner. This time wrap-ups have acquired another packaging in the form of a blog post with luck, failures or funny adventures in the design process or with some useful technical information. Keeping in mind my love of writing, I hope I will be able to keep up with such a scheme, and sometimes lift the backstage curtain. It would be interesting to me myself, and I hope that it will be interesting to you. There are a list and links below to all blog posts telling stories of summer designs, and you will also find out who the winners are! Solaris and Voyage to the Past Stratus and Twisted Stitches Cumulus and Silly Mistake Milky Way Airy and Three Lives Ether and a Clear Voice Saved by my Mom — the Dawn Top Wind and Pattern Evolution После каждого тестирования я подвожу итоги и выбираю победителя. На этот раз подведения итогов приобрели новую упаковку в виде поста в блоге с удачами, невезениями и забавными приключениями в процессе дизайна или с какой-то полезной технической информацией. Учитывая мою любовь к письму, надеюсь, что в будущем смогу не отставать от подобной схемы, и иногда приподнять закулисный занавес. Это было бы интересно мне самой, и я надеюсь, что это будет интересно и вам. Выше приведен список и ссылки на все посты в блоге, рассказывающие о летних дизайнах, а также вы узнаете, кто является победителями! Bilingual Knitting Lessons/Двуязычные вязальные уроки Whoever ever launched a dynamic and content-filled website, knows what a time-consuming job it is. I launched my site almost two years ago, and since then, I continuously work on improvements and content, always keeping in touch with developers. So, in the beginning, I was happy with tiny bits of content to launch the site. Time goes by, and I'm pleased to announce that all knitting lessons from now are fully illustrated and bilingual, as shown below! Knitting lessons are a live creature. I constantly add new illustrations as they appear, correct and improve the texts, so it’s worth checking them from time to time. Now the base is already built. I hope in the future more new lessons and masterclasses will join the existing ones. Click on the picture to go to the Knit-Tech page. *** Кто бы когда-либо ни запускал динамичный и наполненный контентом сайт, знает, какая это трудоемкая работа. Я запустила свой сайт почти два года назад, и с тех пор я постоянно работаю над улучшениями и контентом, всегда поддерживая связь с разработчиками. В начале, я была рада хоть какому-то количеству контента, важно было запустить сайт. Время идет, и я счастлива сообщить, что все уроки вязания теперь полностью иллюстрированы и двуязычны, как показано ниже! Уроки вязания — живое существо. Я постоянно добавляю новые иллюстрации по мере из появления, исправляю и улучшаю тексты, поэтому стоит время от времени перепроверить их. Сейчас уже основа построена. Я надеюсь, что в будущем к уже существующим урокам и мастер-классам присоединятся новые. Нажмите на картинку, чтобы перейти на страницу Knit-Tech. Badges!/Значки! Badges are a newly-baked widget in a forum. If you are a registered site member and actively participate in а forum or in an Early Birds group, don't be surprised that one day you will receive a badge next to your nickname. That is a fun game, and becoming a Knitting Queen or an Early Birds Superstar is not that difficult! A list of all badges and their meanings I've placed in this forum post. *** Значки — это свежеиспеченный виджет на форуме. Если вы являетесь зарегистрированным пользователем и активно участвуете в форуме или группе Первых ласточек, не удивляйтесь, что однажды вы получите значок рядом с вашим ником. Это забавная игра, и стать Королевой вязания или Суперзвездой Первых ласточек совсем не сложно! Список всех значков и их значений я поместила в этом сообщении на форуме. Vacation!/Отпуск! From tomorrow I'm going on vacation. I will lie down and knit all day long, as well as attend a gym every day and exercise more intensively. I need digital detoxification, and I know that only in a well-rested brain, new exciting ideas are born. I'll be back on September 20th straight to the Ozone jumper testing. Thanks a lot, everyone! *** С завтрашнего дня я ухожу в отпуск. Буду лежать и вязать днями напролет, а также более интенсивно заниматься спортом. Мне нужна цифровая детоксикация, и я знаю, что только в отдохнувшем мозгу рождаются новые интересные идеи. Я вернусь 20-ого сентября прямо в тестирование джемпера Ozone. Всем огромное спасибо!
- Wind and Pattern Evolution
Let me introduce the last pattern of the upcoming summer collection. The top Wind pattern can be found here. The wind is the flow of gases on a large scale. On the surface of the Earth, wind consists of the bulk movement of air. In order to catch and capture the wind in knitting, you need to give it an imaginary color and shape, create a direction and the ability to move. Not an easy task for yarn and knitting needles. The wind is often portrayed as sky-blue, and numerous triangles are chosen here for the shape, which symbolizes the ability of the wind to lose or gain strength. The A-line shape, raglan, sleeves as “wings”, and even mirrored side bust darts – all of them are a play of different triangles. The direction here is clearly observed in the form of horizontal ribs gathered at inclined straps, and if the wind blows, you are going to feel its tender movement in the “wings” ruffles. *** Разрешите представить последнее описание летней коллекции. Описание топа Wind можете найти здесь. Ветер – это поток газов в больших масштабах. На поверхности Земли ветер состоит из объемного движения воздуха. Для того, чтобы поймать и запечатлеть в вязании ветер, нужно придать ему воображаемый цвет и форму, создать направление и возможность двигаться. Непростая задача для пряжи и спиц. Ветер часто изображают голубым, а для формы выбраны многочисленные треугольники, которые символизируют свойство ветра терять или приобретать силу. Силуэт «А», реглан, рукава-«крылышки», и даже зеркальные боковые вытачки для груди – это все игра разных треугольников. Направление здесь четко наблюдается в виде горизонтальной резинки, собранной у наклонных бретелек, а если подует ветер, вы почувствуете легкое его движение между складочками «крылышек». Top Wind was knitted, tested, and published last, without waiting for all the finished projects of Early Birds. And even with this review, I'm in a bit of a hurry. I do not want to step into the fall with the summer projects. It was not without some re-knitting – the upper part of the top was not easy. Different cuttings of armholes in the back and front pieces are shaped with varying steps of decreases; the expansion of the “wings” occurs by a smooth curved line, and also numerous short rows form ruffles. And everything is going on at the same time. But the most complicated part is over, the pattern was successfully tested, and knitting of the windy top will not be difficult. It takes only a little attention. *** Топ Wind был связан, протестирован и опубликован последним, не дождавшись показов всех ласточек. И даже с этим обзором я немного спешу. Так не хочется с летним шагнуть в осень. Без перевязов здесь не обошлось – верхняя часть топа далась нелегко. Отличающиеся вырезы пройм на спинке и на детали переда, выполнены разным ритмом убавлений; расширение «крылышек» происходит плавной изогнутой линией, а также многочисленные укороченные ряды формируют рюши. И все это одновременно. Но сложное пройдено, описание успешно протестировано, и вязать этот ветреный топ сложно не будет. Нужно лишь немного внимательности. I have been tormenting the stitch pattern of horizontal rib for a long time. If I like something, and I see potential in something, I keep returning to it. Combination of two colors, expansion of textured stripes, combination of different thicknesses of yarn, vertical and horizontal arrangement, use instead of ordinary elastic, and even ruffles. It seems that these are just front and back loops, and what is the space for rib, each time rising to a new evolutionary step of the stitch pattern. And if you take into account my love for the purity of lines and stripes, I think I will still surf in this stitch pattern for some time. After the first failure with the summer top Cirrus (1) (like there was no failure, rather, I did not believe in luck), Wind (2) was born. After the already obvious failure with the jumper, again, Cirrus (3), the design of the future collection Smoky (4) was born. So, slowly and painfully, as in the whole process of evolution, something less tolerable appears. I often envy tailors and clothing designers. Failed – in half an hour I cut a new piece. Here, failed, you need at least two to three weeks. *** Узор горизонтальной резинки я мучаю уже давно. Если мне что-то нравится, и я вижу в чем-то потенциал, продолжаю возвращаться к этому неоднократно. Совмещение двух цветов, расширение фактурных полос, совмещение разной толщины пряжи, вертикальное и горизонтальное расположение, использование вместо обычной резинки, и даже рюши. Кажется, это всего лишь лицевые и изнаночные петли, а какое пространство для творчества, каждый раз поднимаясь на новую эволюционную ступень узора. А если еще учесть мою любовь к чистоте линий и полоскам, я думаю, еще буду долго в этом узоре купаться. После первой неудачи с летним топом Cirrus (1) (вроде неудачи не было, скорее, в удачу не поверила), родился Wind (2). После уже явной неудачи с джемпером, опять же, Cirrus (3), родился дизайн будущей коллекции Smoky (4). Вот так, медленно и мучительно, как и во всем процессе эволюции, появляется что-то более менее толковое. Я часто завидую портным и дизайнерам шитой одежды. Не удалось – за пол часа вырезал новый кусок. Тут же, не удалось, нужны как минимум две-три недели. In recent testings, the fall was already kicking in. Less and less Early Birds wanted to test summer designs, and I had to compete with harvest and canning. But the group got together anyway, and testing was very successful. There was one point in the pattern that made me sit down again with knitting books, patterns, and look for the difference in determining the location of stitches on the Y and Z axis. The books had not offered me anything. They did not know how to knit an increasing point and the turning point of a short row at the same time, but they brought me an idea. It was a little funny, very interesting, and thanks to Lyudmila for raising this issue. Below there are some finished projects, the rest you will see on Ravelry. *** В последних тестированиях уже чувствовалось приближение осени. Летние модели желали тестировать все меньше и меньше ласточек, а мне пришлось конкурировать с урожаям и зимними заготовками. Но группа все равно собралась, и тестирование прошло очень успешно. Был один момент в описании, заставивший меня опять сесть за вязальные книги, описания и искать различие определения расположения петель по Y и Z оси. Книги ничего конкретного не дали, в них нет описано, как провязать точку расширения и поворот укороченного ряда одновременно, но они просто навели на мысль. Было немного смешно, очень интересно, и спасибо Людмиле, что она этот вопрос подняла. Здесь покажу некоторые завершенные проекты, остальные увидите на Ravelry. The winner of the windy testing was my backstage super-brain, Natalia. She repeatedly took a pattern even before the start of the next testing. She managed to find mathematical errors that helped others to avoid unnecessary re-knitting, even if she did not participate in this particular testing. She finished Wind first and revealed a stunning result. See for yourself. I think that as a symbolic prize I will send Natalia a book of the summer collection when it's ready, and that will be the least I can do. Thank you from the bottom of my heart! @natalja_kovalevskaja *** Победительницей ветреного тестирования стала мой закулисный супермозг Наталия. Эта ласточка неоднократно брала описание еще перед началом очередного тестирования и находила математические ошибки, которые помогали избежать другим ненужных перевязов, даже если она и не участвовала в этом тестировании. Wind она связала первой и показала нам ошеломляющий результат. Посмотрите сами. Я думаю, что в качестве символического приза я подарю Наталье книгу летней коллекции, когда она будет готова, и это будет меньшее, что я могу сделать. Спасибо от всей души! @natalja_kovalevskaja