Search Results
82 results found with an empty search
- Never Say Never. Никогда не говори никогда
I always said that only crazy people knit blankets, and I would never take on something like that in my life. At the end of 2022, I was invited to participate in an invitation-only competition by Brooklyn Tweed (further – BT). It was about being part of a book featuring patterns of knitted blankets and throws, published by Abrams in New York. I submitted six applications, and the BT selected two of my designs. The entire project took about five to six months of my life, but I will be published in New York under the wing of Brooklyn Tweed. There’s a lot to share. For me, this is a major event, one of the most memorable in my life. The book featuring 25 knitted and crochet blanket patterns was released on September 10, 2024. You can order it on the Brooklyn Tweed website . *** Я все время говорила, что пледы вяжут безумные, и я в жизни никогда за такое не возьмусь. В конце 2022 года меня пригласили поучаствовать в закрытом конкурсе Brooklyn Tweed (далее – БТ). Речь шла об участии в альбоме с описаниями вязаных пледов и одеял в издательстве Abrams в Нью-Йорке. Я отправила шесть заявок, и БТ отобрали два моих дизайна. На весь проект ушло примерно пять-шесть месяцев моей жизни, но я буду печататься в Нью-Йорке под крылом Brooklyn Tweed. Есть что рассказать. Для меня это большое событие, одно из самых ярких в моей жизни. Альбом с описаниями 25 вязаных пледов уже вышел в свет 10 сентября 2024 года. Книгу можно заказать на сайте Brooklyn Tweed . To apply for the competition, it was necessary to meet stringent conditions: to fit into one of three given themes – mood, color palette, and degree of expressiveness, which were specified in the provided mood board (I used photos from this mood board in my applications). I needed to knit a big swatch, sketch the design (ranging from baby blankets and throws to king-size bed blankets), choose Brooklyn Tweed yarn, select the color palette, and describe the inspiration behind it. In short, to sell the idea in the best sense of the word. Now, to answer the main question: yes, the blankets are large! And who would have thought, but even two of my six designs were selected for the book. Thank goodness the sizes they requested were not for a king-size bed. Although the blankets were big, their sizes were quite manageable. I knitted the blankets for nearly four months, working 4-6 hours every single day. I calculated how many rows of each blanket I needed to complete daily, and in all that time, I had only two days without knitting. I even knitted on December 31st, Christmas, and Valentine's Day. I had to meet my daily quota; otherwise, I wouldn’t meet the deadlines. Jared took pity on me and gave me an extra three weeks for the two projects. Otherwise, I wouldn’t have finished on time. *** Для того чтобы подать заявки на конкурс, нужно было соблюсти очень строгие условия: попасть в одну из трех заданных тем – настроение, цветовая гамма и степень выразительности, которые были в присланном mood board (фотографии из этого mood board я использовала в своих заявках). Следовало связать образец, нарисовать эскиз изделия (от детских одеял, пледов до одеял для двухспальных кроватей), подобрать бруклинтвидовскую пряжу, цветовую гамму и описать, откуда пришло вдохновение. В общем – продать идею в лучшем смысле этого слова. Отвечаю на самый главный вопрос: да, пледы большие! И кто бы мог подумать, но даже два моих дизайна из шести были отобраны в книгу. Слава Богу, что размеры, которые у меня заказали связать, были не для двухспальной кровати. Хоть пледы и большие, размеры оказались вполне человеческими. Пледы вязала почти 4 месяца, каждый день по 4-6 часов. Я рассчитала, сколько рядов каждого пледа должна связать за день, и за все время у меня было всего лишь два выходных дня. Я вязала даже 31 декабря, на Рождество, в день Святого Валентина. Норму нужно было выполнять, иначе я не укладывалась в сроки. Джаред пожалел меня и выделил на два проекта дополнительные 3 недели. Иначе я бы не успела. The blankets traveled across the Atlantic several times. First, as yarn in several packages. Then, I sent the finished blankets for a photoshoot, and six months later, BT returned them to me. Now, my husband sleeps under the colorful one, and I sleep under the grayish one. The latter is a bit smaller than the first. *** Пледы путешествовали через Атлантику несколько раз. Сначала в виде пряжи несколькими посылками. Потом я отправила готовые пледы на фотосессию, и через полгода мне их вернули. Теперь под цветным спит мой муж, под сероватым – я. Второй чуть меньше первого. Now, I will show you the application of the first contender and winner. I named this blanket Nearly Woven , and why I gave that name, can be read in the application, page 2. Later, the editors changed the name to Warp & Weft, which literally means "warp and weft." Could there be a better name? I doubt it. *** Сейчас покажу вам заявку первого претендента и победителя. Я назвала этот плед Nearly Woven , что означает «почти тканый». Позже редакторы поменяли название на Warp & Weft , что означает «нити долевой и утка». Может ли быть название лучше? Сомневаюсь. Translation of the competition application introduction/Перевод вступления заявки на конкурс. Если вы посмотрите на тканое полотно под микроскопом, вы увидите что-то подобное этому. Тема: минимализм/лаконичность или ностальгия/традиция. Узор "тканое" лучше всего соответствует основной теме книги, посвященной одеялам и пледам. Одеяла могут быть вязаными или ткаными. Это сочетает в себе лучшее из обоих миров: очевидно, что оно связано, но выглядит как тканое, если посмотреть на него под микроскопом. Узор очень простой, быстрый и запоминающийся. Я частично обработала образец бахромой, оставив сам край как есть. Каждая "нитка" "тканого полотна" имеет бахрому на обоих концах. В качестве альтернативы можно набрать петли на круговые спицы после завершения проекта и провязать несколько рядов платочной вязкой. Узор напоминает не только тканое полотно, но и плетение. Корзины, ящики, мебель из ротанга — всё это чаще используется в сельской местности, на дачах и в коттеджах. The yarn for this blanket was the first to arrive, so I started with it. I’m glad it worked out this way. This blanket took only a third of the total knitting time, and if I had started with the other, the wavy one, I don’t know if I would have had the mental strength for the second. This blanket contains 85,200 stitches (that’s about 1.5 sweaters). I’m not going to compete with the professional photographs in the upcoming book. But before sending it off, I tried photographing the blanket at home, and you know what? I liked it! If it weren’t for the competition, I would never have thought I needed a knitted blanket, nor that I would love it so much! *** Первой пришла пряжа именно для этого пледа, с него я и начала. Я очень рада, что все сложилось именно так. Этот плед потребовал лишь треть всего времени, и, если бы я начала с другого, волнистого, я не знаю, хватило бы мне моральных сил для этого. В этом пледе всего 85 200 петель (это примерно 1,5 свитера). Я не буду соревноваться с фотографиями профессионалов в будущей книге. Но перед отправкой я попробовала сфотографировать плед в домашних условиях, и вы знаете, мне очень понравилось! Если бы не конкурс, я бы точно никогда не задумалась, что мне нужен вязаный плед и что я буду так его любить! The finished blanket measures 122 × 154 cm. I used 19 skeins of Loft Woodsmoke yarn held double, with 5,0 mm needles. Many of you guessed correctly: it’s the stitch pattern from the Forest Walk sweater. This was the first stitch pattern that came to mind when I started working on the blanket ideas. The pattern is quite simple and minimalist, and, as I mentioned before, it resembles fabric under a microscope. To enhance this idea, the "threads" of the fabric running lengthwise and crosswise have "frayed and unraveled" ends in the form of fringe. By the way, I knitted the sample using two strands of Loft yarn that I luckily had in my stash. They liked this option so much that they kept not only the yarn type but also the color, Woodsmoke. *** Размеры готового пледа: 122 × 154 см. Использовала 19 мотков пряжи Loft Woodsmoke в два сложения, спицы 5,0 мм. Многие из вас угадали правильно: это узор свитера Forest Walk ("Лесная прогулка"). Именно этот узор первым пришел мне в голову, когда я начала работать над идеями пледов. Узор очень простой, минималистичный и, как я уже говорила, напоминает ткань под микроскопом. Чтобы усилить эту идею, у "нитей" ткани, идущих вдоль и поперек (долевая и уток), есть «обшарпанные и расслоившиеся» концы в виде бахромы. Кстати, образец я вязала из двух сложений пряжи Loft, которая у меня была в наличии. Им так понравился этот вариант, что они оставили не только артикул, но и цвет Woodsmoke. Here is the proposal for the competition for my second blanket – Canyonland (see below). As you can see, even a knitted blanket can become an abstraction and use selected techniques to stylize any environment: an aquarium, Antarctica, canyons, etc. Here you can find fish, penguins, and even a geology textbook. The book will feature three thematic sections, and this one, in my opinion, which combines modern art with ancient quilting and patchwork techniques, seemed quite impossible, but as you can see, I managed. *** Так выглядела заявка на конкурс второго моего пледа – Canyonland (см. ниже). Как видите, даже вязаный плед может стать абстракцией и с помощью выбранных приемов стилизовать любую среду: аквариум, Антарктиду, каньоны и т. п. Здесь есть и рыбки, и пингвины, и даже учебное пособие по геологии. В книге будут три тематических раздела, и этот, на мой взгляд, объединяющий современное искусство и старинные технологии квилтинга и пэчворка, казался мне совсем невозможным, но, как видите, я справилась. Translation of the competition application introduction/Перевод вступления заявки на конкурс. Абстрактные картины известных сред. Тема: Форма/Цвет/Геометрия. (Современное искусство и пэчворк, квилтинг – такое было описание данной темы.) На первый взгляд, тема Форма/Цвет/Геометрия показалась мне немного запутанной: что общего между современным искусством и квилтингом? Выражение мыслей, эмоций и мировоззрения в абстрактной форме против классической, деревенской и старинной технологии, в которой наши предки мудро использовали оставшиеся лоскутки ткани из-за бережливости? Затем методы: швейная машина в отличие от красок, лоскутки ткани против клея или бронзы? Причем здесь пряжа и иглы? Что у них может быть общего? После долгих раздумий я обнаружила, что, возможно, есть некоторые общие черты. Когда вы вяжете, вы можете "рисовать" определенным образом, используя разные цвета пряжи; также можно создать теплую, мягкую ткань, соединяя цвета и узоры кусочек за кусочком, как в пэчворке. Можно даже добиться того же объемного 3D-эффекта, как в квилтинге, и одновременно закодировать некоторые загадки для последующего разгадывания, как в современном искусстве. Кроме того, этот узор не использует технику интарсии; мы достигаем волнистого узора с помощью технологии укороченных рядов. I didn’t think long about this stitch pattern; I knew it would make an impression. It is expressive, has a three-dimensional surface (what is characteristic of quilting), allows for color play, and is memorable. This stitch pattern is my original design, and I created two knitting patterns with it – Ether and Sound. In my patterns, I separated the waves with a contrasting garter stitch stripe, but here I colored the waves in different colors. *** Про этот узор я долго не раздумывала, знала, что он производит впечатление. Он выразительный, имеет трехмерную поверхность (что как раз свойственно квилтингу), можно играть цветом, и он запоминающийся. Этот узор – мой авторский, и с ним я издала два описания – Ether и Sound. Только в своих описаниях я волны разделяла контрастной полоской платочной вязки, а здесь раскрасила сами волны разными цветами. To be completely honest, I wasn’t very keen on having this design chosen. Anyone who has knitted this pattern knows how many times you need to turn the piece to complete one wave – eight. Or learn to knit from left to right, and it’s still a question of which is faster. But, of course, when I received the letter saying that two of my designs had been chosen, I was happy with any of their choices. *** Если быть совсем честной, я не очень хотела, чтобы выбрали именно этот дизайн. Кто вязал этот узор, знает, сколько раз нужно повернуть изделие, чтобы связать одну волну – восемь. Или научиться вязать слева направо, и это еще вопрос, что быстрее. Но, конечно, когда я получила письмо о том, что выбрали два моих дизайна, я была рада любому их выбору. The yarn for this blanket arrived in two separate shipments. Customs was reluctant to release the yarn without me paying duties and VAT, and as you know, BT's yarn is quite expensive. Brooklyn Tweed had to write various letters and prove that this yarn was for knitting a sample for the book, and I didn’t pay for it. Then it turned out that only one skein of the orange yarn was included instead of four. And again, the same old song with customs. The orange yarn arrived exactly on the day I had run out of orange yarn, so there was no delay. I knitted this blanket twice as long as my first one: 151,644 stitches. That’s about 2.5 to 3 sweaters. A large piece for short rows and turning. I knitted it in every way possible: turning and knitting in the opposite direction. I used 4,5 mm needles and 3,5 skeins of each of the eight colors. To be true, there are only four colors, but the Tones yarn comes in two shades for each color – light and dark. The finished dimensions of this blanket are 150 × 175 cm. It was challenging, and by the end, I broke down. The blanket just didn’t want to finish. I remember I had six waves left to knit, and it felt like I was working on those last six waves forever. I kept counting how many were left, and it was still the same six waves. I began to feel like I would never escape from this endless cycle of the six stubborn remaining waves. I had a nervous breakdown and, I think, burnout. Literally. It’s been over a year and a half, and I still can’t seem to climb out of this pit. I tried to rest, and distract myself with sewing, sports, and learning English. I knit with pleasure, create new things, and host pattern testings. But something has changed a lot. There’s no longer the luck and fortune I once had, a lot of failures and re-knitting. Now it takes iron will for what used to come easily. I’ve had something similar in my lifetime when I stepped away from my previous hobby by publishing a recipe book. Were these blankets the same kind of final point? Or is it a test of fate? *** Пряжа для этого пледа пришла в двух разных посылках. Таможня никак не хотела отдавать пряжу без того, чтобы я заплатила пошлину и НДС, а вы сами знаете, какая дорогая пряжа у БТ. БТ пришлось писать разные письма и доказывать, что эта пряжа предназначена для вязания образца для книги, и я за неё не платила. Потом выяснилось, что оранжевой пряжи положили только один моток вместо четырёх. И снова всё то же самое с таможней. Оранжевая пряжа пришла ровно в тот день, когда я уже извязала имеющийся оранжевый моток, и задержки не произошло. Этот плед я вязала ровно в два раза дольше, чем мой первый. 151 644 петли. Это примерно 2,5-3 свитера. Большое полотно для укороченных рядов и поворачивания. Я вязала по-всякому: и поворачивала, и вязала в обратном направлении. Спицы 4,5 мм, использовала по 3,5 мотка каждого цвета из восьми. По правде, это всего лишь четыре цвета, но пряжа Tones имеет по два оттенка для каждого цвета – светлый и тёмный. Конечные размеры этого пледа – 150 × 175 см. Это было сложно, и к концу я сломалась. Плед просто не хотел заканчиваться. Я помню, что осталось связать шесть волн, и казалось, что я работала над этими последними шестью волнами вечность. Я всё время считала, сколько осталось, и оставалось те же самые шесть волн. Мне начало казаться, что я никогда не выберусь из этого бесконечного цикла из шести упрямых оставшихся волн. У меня случился нервный срыв и, думаю, выгорание. В прямом смысле этого слова. Прошло уже больше полутора лет, а я всё никак не могу выбраться из этой ямы. Я вроде отдыхала, отвлекалась на шитьё, спорт и изучение английского. И вяжу, вроде, с удовольствием, создаю новое, и проходят тестирования новых описаний. Но что-то очень изменилось. Нет былого везения и фортуны, очень много неудач и перевязов. Теперь требуется железная воля на то, что раньше давалось с лёгкостью. У меня уже было такое в жизни, когда я поставила точку в своём прежнем хобби, издав книгу рецептов. Разве этот плед был такой же конечной точкой? Или это проверка судьбы? No more on the sad stuff; everything is pretty fine. After all, I was published in New York! Could I have dreamed of this when I started my knitting career in 2016? I finished the blankets nearly three weeks before the deadline, including shipping time, and sent them off the next day. The blankets have already returned – they were part of the reward for knitting them. *** Больше о грустном не буду, всё у меня очень хорошо. Я ведь печаталась в Нью-Йорке! Разве можно было об этом мечтать, когда я начала свою вязальную карьеру в 2016-м? Я закончила пледы примерно за три недели до дедлайна, включая время на пересылку, и на следующий день отправила их почтой. Пледы уже вернулись – они были частью вознаграждения за их вязание. You know what was the toughest part? Keeping everything in secret for exactly two years! I remember I only had posted this collage on our testing forum, and some of my Early Birds members tried to guess. But I held firm. I guess, you can trust me with any secret! *** Знаете, что было сложнее всего? Держать всё в тайне ровно два года! Я только, помню, запостила вот этот коллаж на нашем форуме для тестирований, и некоторые ласточки пытались отгадать. Но я держалась крепко. Мне, наверное, можно доверить любую тайну!
- Neat 1x1 Ribbing. Ровные петельки в резинке 1х1
One of the main problems knitters encounter is uneven stitches in flat 1x1 ribbing. In this article, I will try to share a solution that consists of two important components that do not work separately. I have been knitting for many years and represent the Grandmother's (or "Old Russian") knitting style. In this style, the K stitch is worked through the back loop, and the yarn is pulled through by grabbing it with the tip of the right-hand needle from the top down. The purl stitch is worked through the front loop, and the yarn is pulled through by grabbing it with the tip of the right-hand needle from the top down (see pics below). From my perspective, the Grandmother's style is the fastest, and I am not planning to retrain myself. *** Одной из основных проблем, с которой сталкиваются вязальщицы, является неровные петли в резинке 1х1 в поворотном вязании. В этой статье попробую поделиться ее решением, которое состоит из двух важных компонентов, не работающих по отдельности. Я вяжу уже очень много лет и являюсь представительницей "бабушкиного" стиля вязания. В этом стиле вязания лицевая петля вяжется за заднюю стенку, а нить протягивается, захватывая ее кончиком правой спицы движением сверху вниз. Изнаночная петля здесь вяжется за переднюю стенку петли низлежащего ряда, а нить протягивается, захватывая ее кончиком правой спицы движением сверху вниз (см. фото ниже). Все зависит от привычки, но для меня "бабушкин" стиль является самым быстрым и я не собираюсь переучиваться. On the other hand, although being the fastest knitting method, the Grandmother's style is completely unsuitable for knitting 1x1 ribbing in flat rows. The stitches in 1x1 ribbing turn out incredibly uneven. It's as if some invisible troublemaker sits there, pulling the knit stitch to the right in one row and the left in the next. And he works very diligently, not missing a single stitch. *** С другой стороны, хоть и будучи самым быстрым способом вязания, "бабушкин" стиль совсем не подходит для вязания резинки 1х1 поворотными рядами. Петли в резинке 1х1 получаются неописуемо неровными. Кажется, что какой-то невидимый вредитель сидит и подтягивает лицевую петлю вправо, а в следующем ряду – влево. И работает он очень усердно, не пропускает ни одной петли. Once, I received valuable advice to try knitting 1x1 ribs in the Continental Knitting Style. In this style, the K stitch is worked through the front loop, and the yarn is pulled through just like in the Grandmother's style, by grabbing it with the tip of the right-hand needle from the top down. The P stitch, however, is worked through the front loop, and the yarn is pulled through by grabbing it with the tip of the right needle from the bottom up (see pics below). *** Когда-то я получила дельный совет попробовать вязать резинку 1х1 классическим стилем вязания. Здесь лицевая петля вяжется за переднюю стенку петли, а нить протягивается как в "бабушкином", захватывая ее кончиком правой спицы движением сверху вниз. Изнаночная петля здесь вяжется за переднюю стенку петли, а нить протягивается, захватывая ее кончиком правой спицы движением снизу вверх (см. фото ниже). But tell me, are you always satisfied with the look of a 1x1 rib, even if it is worked in the Continental Knitting Style? I already know the answer: sometimes yes, sometimes no. If the yarn is tightly spun, smooth, and slippery, such as merino, linen, or silk, 1x1 ribbing can turn out uneven and crooked even when worked in the Continental Knitting Style. If the yarn is fluffy, non-slippery, coarse, airy, or textured, the look of a 1x1 rib in the Continental Knitting Style is usually satisfactory. Some knitters avoid 1x1 ribbing altogether. They switch to 2x2 ribbing, twist the knit stitches, or slip them every second row. So what is the reason, and why does store-bought machine-knit ribbing look flawless, while we, who have knitted tens of miles of yarn, cannot achieve even a close result? I believe I have found a partial solution and wrote about it in an earlier article titled "A Secret of Even Stitches." I highly recommend reading it if you haven't already. Even stitches in a 1x1 rib require much finer needles than those used for the main fabric to simulate the tension of yarn in machine knitting. The less we release the yarn for each stitch in the rib, the more even it will be. For this, I recommended selecting needles for 1x1 ribbing that are 0,75-1,0 mm thinner than those you would use for the main fabric. Choosing thinner needles for ribbing mimics the yarn tension in machine knitting. For a while, that's exactly how I knitted so far (the Continental Knitting Style + fine needles), in other words, testing the theory in practice. It worked to some extent. One yarn produced an almost perfect result, while another yarn, even with the Continental Knitting Style and relatively thin needles, in 1x1 ribbing looked almost like in the Grandmother's style. It felt like this was only a partial solution to the problem, and something else was needed. But what? *** Но скажите мне, всегда ли вас устраивает вид резинки 1х1, даже если он связан классическим стилем вязания? Ответ я знаю заранее: иногда – да, иногда – нет. Если пряжа крученная, гладкая и скользкая, например, меринос, лен, шелк, резинка 1х1 может получиться неровной даже если она связана классическим вязанием. Если пряжа пушистая, нескользкая, грубая, воздушная или фасонная, вид резинки 1х1 классическим вязанием чаще всего устраивает. Есть даже такие вязальщицы, которые в принципе не вяжут резинку 1х1: меняют ее на 2х2, лицевые петли скрещивают или в каждом втором ряду снимают. Так в чем же причина и почему резинки покупного машинного трикотажа выглядят безупречно, а нам, извязавшим десятки километров пряжи, так и не удается достичь хотя бы приблизительного результата? Я, кажется, нашла частичное решение и написала об этом в более ранней статье под названием "Секрет ровных петелек", Очень советую почитать, если еще не читали. Ровные петли в резинке 1х1 требует гораздо более тонких спиц, чем для основного полотна для симуляции натяжения нити в машинном вязании. Чем меньше мы отпускаем нити для каждой петли резинки, тем она будет ровнее. Для этого я рекомендовала подбирать спицы для резинки 1х1 на 0,75-1,0 мм тоньше тех, которыми вы вязали бы основное полотно. Выбирая более тонкие спицы для резинки, мы имитируем натяжение нити в машинном вязании. И некоторе время я так и вязала (классическое вязание+тонкие спицы), другими словами, проверяла теорию на практике. Все работало в некоторой степени. Одна пряжа выдавала почти идеальный результат, а другая пряжа даже классическим вязанием и сравнительно тонкими спицами в резинке 1х1 выглядела почти как при "бабушкином" стиле. Было чувство, что это только частичное решение проблемы, и требуется что-то еще. Но что? The answer came after comparing the behavior of different yarns. The less slippery the yarn, the better the 1x1 ribbing looks. The less slippery the yarn, the more it gets stuck when the stitch is pulled out with the needle, the faster the yarn feed is restricted, and ultimately, the stitch becomes smaller. Look at the image below. For knitting the entire swatch, relatively thin 2,5 mm needles and relatively slippery yarn containing merino wool were used. We all know that merino wool is famous for ruining all 1x1 ribs, even machine knitting sometimes fails. For this yarn thickness, 3,25-3,5 mm needles would be suitable for the main fabric. Therefore, for the 1x1 rib knitting, we choose needles 0,75-1,0 mm thinner. The first condition is met – quite thin needles. I worked 16 rows of 1x1 ribbing using each method. The lower section is worked in the Grandmother's style. It is already clear that each K stitch column has too much loose yarn, which forms a bulging loop to the right in the knit row and the left in the purl row. In the Grandmother's knitting style, both the K and P stitches are worked by pulling the yarn with the needle tip from the top down; and the yarn usage for each stitch has no restrictions other than the hand movement. It's clear, that the lower section of the swatch is the widest, and the section, consisting of the same number of stitches and rows, used the most yarn. The middle section is knitted using the Continental Knitting style. The appearance is already more acceptable, and the ribbing is slightly narrower and denser. The reason is that the purl stitches are worked by pulling the yarn from the bottom up, thus partially forming the stitch on the needle before pulling it through. This automatically limits the yarn feed. Some unevenness in the stitches is still observed, because the K stitches are still pulled through without additional restrictions, as in the Grandmother's style. *** Ответ пришел после сравнивания поведения разной пряжи. Чем менее скользкая пряжа, тем вид резинки лучше. Чем менее скользкая пряжа, тем скорее она застревает при вытагивании петли спицей, подача нити быстрее ограничивается и в итоге петля становится меньше в размере. Посмотрите на рисунок ниже. Для вязания всего образца использовались сравнительно тонкие спицы 2,5 мм и сравнительно скользкая пряжа, в составе которой есть меринос. Мы все знаем, что мериносовая шерсть славится тем, что особо не дружит с резинкой 1х1, даже машинное вязание иногда не справляется. Для этой толщины пряжи в основном вязании подошли бы спицы 3,25-3,5 мм. Значит, для вязания резинки мы взяли спицы на 0,75-1 мм тоньше. Первое условие удовлетворено – очень тонкие спицы. Каждым методом провязано по 16 р. резинки. Нижний этаж связан "бабушкиным" стилем вязания. Уже можно понять, что у каждой петли лицевого столбика слишком много свободной нити, которая ложится в виде раздутой дуги направо в лицевом ряду и налево в изнаночном ряду. В "бабушкином" стиле вязания как лицевая, так и изнаночная петля вяжется, протягивая нить кончиком спицы движением сверху вниз; и употребление нити для каждой петли не имеет никаких других ограничений, кроме как остановки движения рукой. Видно, что нижний этаж образца самый широкий, и для кусочка, который состоит из одинакового количества петель и рядов, использовано наибольшее количество пряжи. Второй этаж связан классическим стилем вязания. Вид уже более приемлемый, а сама резинка чуть более узкая и плотная. Причиной улучшения является то, что изнаночные петли мы провязаываем, протягивая нить движением снизу вверх, таким образом частично формируя петлю на спице перед тем, как ее протянуть. Так автоматически ограничивается подача нити. Некоторая неровность петель все же наблюдается по причине того, что лицевые петли все же протягиваем без дополнительных ограничений, как и в "бабушкином" стиле. Such an obvious difference in the quality of ribbing between the lower and middle sections made me think about how to find a similar way to restrict the excessive yarn length in the K stitches of the ribbing since we have managed with the P stitches and the evenness of the ribbing has improved significantly. If in The Continental Knitting style, we grab the yarn from the bottom up, thereby limiting the yarn feed for the P stitch, why not try to do the same for the K stitch? How about knitting a Continental reversed K stitch – grabbing the yarn not from the top down, but from the bottom up, as in crochet (I previously discussed this stitching method in the article "Prepare Carefully".) To limit the yarn feed for the K stitch in 1x1 rib, wrap it around the needle before pulling it through, just as in the Continental P stitch. The third (upper) section of the swatch is worked by combining the Continental P stitch through the back loop and the K stitch, where the yarn is thrown on the top, like in crochet, through the front loop. Let me warn you: this ribbing method is slow, extremely inconvenient to knit, and it twists and hurts your hands. The stitches here sit on the needle in a non-logical way, which is uncomfortable, but perhaps each such inconvenience works as an additional limiter for the yarn feed. It is clear that the third section of the ribbing is the narrowest and densest when compared to the two lower sections (the number of stitches and rows is the same; the needle size and yarn thickness are the same as well), and it becomes apparent that much less yarn is used here than in the previous two sections. The stitches are mostly even and they have no excess loose yarn. *** Такая очевидная разница в качестве резинки в нижнем и в среднем этажах заставила задуматься, как же найти некие тормоза в подаче излишней длины нити и в лицевых петлях резинки, раз уж с изнаночными справились, и вид резинки улучшился в разы. Если в классическом вязании мы захватываем нить снизу вверх, тем самым ограничивая подачу нити для изнаночной петли, не попробовать ли сделать ровно то же самое и для лицевой петли? Как бы связать классическую вывернутую лицевую – подхватить нить не сверху вниз, а снизу вверх, как при вязании крючком (о таком способе провязывания петли я ранее рассказывала в статье "Тщательно подготовиться"). Чтобы лицевая петля в резинке 1х1 была ограничена в подаче нити, накрутите ее на спице перед тем, как протянуть, ровно также, как и в "классической" изнаночной петле. Третий (верхний) этаж образца связан комбинированием классической изнаночной петли за заднюю стенку и лицевой петли, которая вяжется нить забрасывая сверху, как при вязании крючком, за переднюю стенку. Сразу предупреждаю: такая резинка вяжется очень медленно, ее вязать крайне неудобно, руки выворачиваются и болят. Петли тут лежат на спице не по логике вязания, неудобно, но, наверное, каждое такое неудобство работает как дополнительный ограничитель подачи нити. Очень хорошо видно, что третий этаж резинки самый узкий и плотный, если сравнивать с двумя нижними (количество петель и рядов одинаково, номер спиц и толщина нити те же самые), и напрашивается вывод, что тут использовано гораздо меньше пряжи, чем в двух предыдущих. Петли достаточно ровные и в них не наблюдается переизбыток свободной нити. How to purl the stitch of a neat 1x1 ribbing. Как вязать изнаночную петлю ровной резинки 1х1 The purl stitch in the previous row sits in an unusual position. Insert the needle through the back loop of the purl stitch, do not remove the stitch from the needle. With the tip of the right-hand needle, grab the yarn with a bottom-up movement and pull (push) the stitch through. *** Изнаночная петля в низлежащем ряду лежит в непривычном направлении. Ввести спицу за заднюю стенку изнаночной петли, петлю со спицы не снимать. Кончиком правой спицы захватить нить движением снизу вверх и вытянуть (протолкнуть) петлю. How to knit the stitch of a neat 1x1 ribbing. Как вязать лицевую петлю ровной резинки 1х1 Insert the needle through the front loop of the K stitch from left to right, do not remove the stitch from the needle. With the tip of the right-hand needle, grab the yarn from the bottom up, like in a crochet, and pull the stitch. *** Ввести спицу за переднюю стенку лицевой петли слева направо, петлю со спицы не снимать. Кончиком правой спицы подхватить нить движением снизу вверх, как при вязании крючком, и вытянуть петлю. In conclusion, I want to compare the same sample before and after washing. You can see how washing changes all three methods of knitting 1x1 ribs. Washing doesn't help much with crooked stitches, slightly improves the uneven ones, and smooths out the small irregularities of the third method almost to perfection. *** В конце хочу лишь добавить сравнение того же самого образца до и после стирки. Вы можете сами убедиться, как стирка меняет все три способы вязания резинки 1х1. Стирка не очень помогает при "пляшущих бабушкиных" петлях, немного помогает при кривых в классическом вязании, а маленькие неровности третьего способа разглаживает почти до совершенства. There are no universally successful answers for everyone because we all knit differently. The test of this method with my Early Birds in our testings yielded very different results (from "perfection", "this will be my only knitting method in the future," to "too slow", "too tight", and "my hands sore"). Perhaps this method has been familiar to many of you; I do not pretend to have made any discovery. Through persistent and diligent research, I sought a solution to the issue of uneven stitches in 1x1 ribbing and gradually approached a noticeable improvement. Perhaps, on the contrary, this method only suits me, and you may say it doesn't work for you at all, and you're not ready to knit your ribs for eternity. And even if you fail to find thin enough needles for your yarn, it won’t work at all, as it only works in tandem. But I wish you luck and would be glad to hear your feedback. *** Нет каких-либо одинаково удачных решений для всех, по той причине, что мы все вяжем по-разному. И тестирование этого метода Первыми ласточками в наших тестированиях выдали очень разные результаты (от "восторг", "буду в будущем вязать только так" до "слишком долго", "слишком плотно", и что "болят руки"). Этот метод, наверное даже, многим из вас знаком, я не претендую ни на какое-либо открытие. Я просто долго и упорно искала решение проблемы кривых петель в резинке 1х1 и постепенно дошла до очевидного улучшения. А может, наоборот, этот метод подходит лишь для меня одной, а вы скажете, у меня ничего не выходит, и я не готова вязать резинку целую вечность. И даже если вы не сможете подобрать достаточно тонкие спицы для вашей пряжи, он и вовсе не проявит себя, так как работает только в тандеме. Но я желаю вам удачи и буду рада услышать ваши впечатления.
- Drop Shoulder Sleeve. Рукав в спущенном плече
It would seem that nothing could be simpler than a drop-shoulder style. Knit four rectangles, sew them together, and it's done! That's...
- Twining Twinsets. The New Beginning
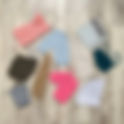
One day, standing by the closet, I realized I had nothing to wear. I will not be original and alone in this. It happens to all of us very often. Probably, this would not have happened if for the last couple of years I had not departed from my principle of knitting only what I would wear. I have been leaving the house almost daily, but most often in sportswear, straight to the gym. So I knitted only for writing patterns and was fond of technical challenges, shapes, stitch patterns, and the search for new knitting technologies. And I'm happy about it – I learned a lot, but it's time to end this period and start knitting to wear it. For example, to make a gray turtleneck "without anything" or an ordinary cardigan without embelishments. Moreover, now I have the opportunity to "hang out" more often – I go to English classes. After returning from the US, where I spent the whole summer, I realized that pauses in the search for an English word occur too often. And in general, a long vacation puts a lot in its place. Something inside has changed, which will inevitably reflect my creativity. In addition, I will work less. I no longer want to work 14 hours a day without days off. Exactly one year ago, I developed a collection of twinsets and presented my idea in the form of swatches and sketches on the forum (here and here). As a rule, I drop everything and start knitting if I have any new cool ideas. But at that time, I patiently and through gritted teeth finished knitting a collection of blouses with a slight deviation for the summer knits at the beginning of this year. The collection of twinsets fermented like wine and cheese, so a whole year passed. Returning with a new outlook on things, I reviewed the sketches and swatches and realized that I wanted to knit this collection more than ever. It almost meets my new requirements for "knitting for myself," only some changes are needed. In general, I reknitted six swatches out of eight, completely re-modeled two designs, changed the yarn and color for four, reduced the weight of the yarn and knitting needles in some, and removed an unnecessary and challenging element in one design. But in general, the spirit of the collection has been preserved. If I have not lost interest in it for a whole year, I think it will be a successful collection. *** Однажды, стоя у шкафа, я поняла, что мне нечего одеть. Не буду оригинальна и одинока в этом. У нас всех такое случается очень часто. Наверное, не было бы такого, если я последние пару лет не отошла бы от своего железного принципа вязать только то, что буду носить. Из дома последнее время выхожу почти каждый день, но чаще всего в спортивной одежде прямиком в спортклуб. Так что вязала лишь для составления описаний и увлекалась техническими сложностями, узорами, выкройками и поисками новых технологий. И очень тому рада – я многому научилась, но этому периоду пора положить конец и начать вязать для того, чтобы носить. Например, связать серую водолазку "без ничего" или обычную кофточку без прикрас. Тем более, что у меня появилась возможность чаще "выходить в люди" – я хожу на курсы английского. После возвращения из Америки, где я провела все лето, я поняла, что паузы в поисках английского слова возникают слишком часто. И вообще, длинный отпуск многое ставит на свои места. Что-то внутри изменилось, и это неизбежно отразится в моем творчестве. Да и работать буду меньше. Больше по 14 часов в сутки без выходных работать не хочу. Ровно год назад я разработала коллекцию двоек и показала свою идею в виде образцов и эскизов на форуме (здесь и здесь). Как правило, если у меня появляется какая-нибудь новая классная идея, я бросаю все и начинаю вязать. Но в тот раз я терпеливо и сжав зубы закончила вязать коллекцию блуз с небольшим отклонением на летнее в начале этого года. Коллекция двоек созревала как вино и сыр, и так прошел целый год с хвостиком. Вернувшись и с новым взглядом на вещи, я пересмотрела эскизы, образцы, и поняла, что очень хочу вязать эту коллекцию, и она почти соответствует моим новым требованиям "вязать для себя", но нужны некоторые изменения. В целом я перевязала шесть образцов из восьми, полностью "перекроила" две модели, поменяла пряжу и цвет для четверых, в некоторых убавила толщину пряжи и спиц, в одной модели удалила ненужную и сложную в исполнении деталь. Но в целом дух коллекции сохранился. Если за целый год у меня не пропал к ней интерес, я думаю, это будет удачная коллекция. I introduced you to what we will be doing for the upcoming year (I promise surprises and all sorts of lyrical deviations), and you can close this post. But, if you're still wondering, I'll go into more detail regarding "before" and "after" and explain why. Who has not seen and does not know yet, the theme of the twinsets collection is favorite pairs from fairy tales, movies, novels, and historical figures. *** Я вас познакомила с тем, чем будем заниматься предстоящий год (обещаю сюрпризы и всякие там лирические отклонения) и вы можете закрыть этот пост. Но, если вам все еще интересно, я расскажу все более подробно в виде "было", "стало" и почему. Кто еще не видел и не знает, тема коллекции двоек – знаменитые пары из сказок, фильмов, романов и исторические фигуры. Bonnie & Clyde In general, very little has changed in this pair over the year. The reason for the change was the picture of the swatches, in which the shades of brown tones differ very sharply and do not match each other. If you look in reality, the colors go well with each other, but in the end, I will represent the finished set in photography. In the picture, the brown color of the vest has a greenish tint that breaks through and spoils the whole impression. *** В целом в этой паре за год изменилось очень мало что. Причиной главного изменения стала фотография образцов, в которой оттенки коричневых тонов очень резко отличаются и не сочетаются друг с другом. Если смотреть наяву, цвета прекрасно идут друг с другом, но представлять их я же буду в фотографированном виде. На фотографии в коричневом цвете жилета пробивается зеленоватый оттенок и портит все впечатление. In general, my idea for twinsets was to make the bottom layer and top layer different in every possible way (I’m not too fond of the same layers of twinsets, although they are very fashionable now). So that the stitch pattern, yarn composition, weight, garment shape, the added or no positive ease, etc., are noticeably different. But still, this is a twinset, and something must unite them to look harmonious when worn together. *** В целом моя идея двоек и была в том, чтобы нижний слой и верхний слой отличался всем, чем только можно (не люблю одинаковые слоя двоек, хотя сейчас это очень модно). Чтобы заметно отличался узор, состав пряжи, толщина, рисунок, форма, степень свободы облегания и т. д. Но все же это двойка, и их что-то должно объединять, чтобы надеты вместе они выглядели гармонично. In the new development, Bonnie turtleneck has picked up a beige base and burgundy bobbles, while Clyde vest has made its choice in favor of burgundy tweed. Both turtleneck yarns contain angora, while the vest yarn contains some cashmere. Both are very soft and gentle to the touch. In addition, I changed the direction of the pocket openings to the vest and picked up the buttons. *** В новой разработке водолазка Bonnie выбрала бежевую основу и бордовые "шишечки", а Clyde жилет будет из бордового твида. В составе обоих видов пряжи водолазки есть ангора, в пряже жилета – немного кашемира. Очень мягкая и нежная на ощупь двойка. В добавок я изменила направление входа в карман жилета и подобрала пуговицы. Kai & Gerda After I presented the collection of twinsets in the form of ideas and sketches a year ago, I already knew that the Gerda vest was the weakest design. And it's not about the style but more about the technical side of the belt that separates the vest into upper and lower parts. I knitted the belt motif (shown in the picture at the top of this article, where swatches lay in a circle), and it seems everything worked out. But there was doubt whether the stiffness of the knitted fabric would be enough for the belt to fit the waist sufficiently – it is possible to stretch it out over time. In addition, there were some open matters about how to finish the area where we would tie the belt. I have already worked with the faux fur stitch pattern. It is pretty amenable to modeling, and after much deliberation, I chose another more complex design: with a turn-down collar, pockets, and buttons. *** После того как я год назад представила коллекцию двоек в виде идей и эскизов, я уже тогда знала, что жилет Gerda – самый слабый дизайн. И дело не в фасоне, а в техническом исполнении пояса, разделяющего жилет на верхнюю и нижнюю части. В фотографии образцов в начале статьи, где образцы лежат разложены в круг, я даже связала мотив этого пояса, и, вроде, все получилось. Но не давало покоя сомнение, хватит ли жесткости вязаного полотна, чтобы пояс прилегал к талии в достаточной степени и со временем не растянулся, а также осталось много открытых вопросов как обработать место завязывания пояса. С узором искусственного меха я уже работала, он в достаточной степени поддается моделированию, и после долгих раздумий я все же выбрала другую модель, более сложную: с отложным воротником, карманами и застежкой. On the Kai turtleneck, I changed the color of the stripes on the sleeves and the color of one of the two main yarns. A turtleneck with this color of stripes will be easier for me to match with other clothes. The two shades of the main yarn are very close and do not create a marble effect, but using them this way makes the turtleneck's combined color match the vest's color. The color is quite complex (very light greyish violet), and finding yarn of different compositions and textures in a similar color is a rare and great success. For the new Kai swatch, I downsized the needles by 0,25 mm, but I began to suspect that I would not have enough yarn in one of the main yarns, and maybe I would leave the size of those old needles. *** В водолазке Kai я изменила цвет полосок на рукавах и цвет одной из двух основных нитей. Водолазку с таким цветом полосок мне лично будет легче вписать в комплекты. Составные цвета основной нити очень близкие и меланж не пробивается, но так он больше приблизился к цвету жилета. Цвет сложный (очень светлый сероватый фиалковый), и найти пряжу разного состава и фактуры очень похожего цвета – это редкая удача. Для Kai я уменьшила размер спиц на 0,25 мм, но начала подозревать, что мне не хватит пряжи одной из основных нитей, и, может быть, я оставлю размер тех старых спиц. Nemo & Nautilus In this pair, too, some changes happened. I like the Preppy style when I look at it worn on others. When I tried to imagine the Nautilus vest on myself, I felt that I would not wear such a vest. And after the vacation, I promised myself that I would not knit a single unwearable thing, even if they were super fashionable or super fascinating in terms of execution technique. And I returned to the very first idea I had even before the Preppy style vest – a cardigan with short sleeves. Even when I was working on the stitch pattern for the Nautilus vest, I was thinking about the wedges technique for the drop shoulder style (I used them in the Fjord and Iceberg designs), which requires a particular stitch pattern. And then, for some reason, I went towards the Preppy style, and soon after I presented the collection, I began to regret it. I added a hood to the cardigan in the new sketch. But a hood will only happen if I have enough yarn. *** В этой паре также не обошлось без изменений. Очень модный фасон жилета Nautilus в стиле Preppy мне очень нравится, когда я его разглядываю на других. Когда попробовала представить его на себе, я почувствовала, что такой жилет носить не буду. А после отпуска дала себе слово, что не буду вязать ни одной неносибельной вещи, даже если она супермодная или супер интересная в смысле техники исполнения. И я вернулась к самой первой идее, которая посетила меня еще до жилета в стиле Preppy – а именно кардиган с короткими рукавами. Еще когда разрабатывала узор для жилета Nautilus, я думала про технику клиньев для спущенного рукава (применено в моделях Fjord и Iceberg), и о том, чтобы в этом узоре было возможно эту технологию применить. А потом почему-то ушла в сторону стиля Preppy и уже скоро после того, как я представила коллекцию, начала об этом жалеть. В новом эскизе к кардигану добавлен капюшон. Но он будет лишь в том случае, если мне хватит пряжи. The design of the Nemo sailor shirt has not changed. I like everything about it, and here I will apply a new technology of darts in narrow strips without breaking the yarn. I even figured out how to improve it for a year, and I already tried it when knitting a new swatch. I re-knitted the swatch since three yarns of cotton held together seemed too thick; I wanted something lighter. I left two threads instead of three and, at the same time, got rid of the scattered transition of colors in the purl columns of the rib. So that nothing distracts from clear graphics. *** Дизайн тельняшки Nemo не изменился. Мне в нем нравится все, и здесь я буду применять новую технологию вытачек в узких полосках без отрывания нити. За год даже придумала, как ее усовершенствовать, и при вязании нового образца уже испробовала. Образец перевязала по причине того, что 3 сложения хлопка показались мне слишком толстым вариантом, а захотелось чего-то более легкого. Оставила два сложения нитей и заодно в резинке избавилась от разбросанного перехода цветов в изнаночных столбиках резинки. Чтобы от четкой графики ничто не отвлекало. Now I am writing and think that most likely, not to sacrifice the hood (it seems to be required for a cardigan that proudly bears the name of a submarine), I will take larger knitting needles. Fortunately, the swatch to the touch allows such a change. *** Теперь пишу и думаю, что, скорее всего, чтобы не жертвовать капюшоном (он как бы просится для кардигана, который гордо носит имя подводной лодки), я возьму более толстые спицы. Благо, образец на ощупь позволяет такое изменение. Holmes & Watson The highlight of the collection was and remained this pair. Thanks to the recently finished Clover, I realized that my choice of angora yarn is not suitable for the Watson polo-neck (the same yarn article as in Clover, only in gray). Even if Holmes plays the premier violin in this pair, Watson cannot become like a fluffy rabbit. Now I have two yarn choices. Knit with the one from which I knitted a new swatch (baby alpaca) and from which I knitted Dahlia. The second option is to unravel Lemon, which I haven’t worn for a long time and in which 100% tweed cashmere lies like a dead load. I still prefer heather alpaca, but it seems that Watson likes a tweed suit. So the matter about yarn is still open. In the final design of the polo-neck, I removed the side fastening. The method of finishing that I was thinking about was not confirmed in the swatch. I left that sore spot only for the fastener at the shoulder and neck, and so far, there is no clear understanding of what to do with different gauges and directions of knitting, with the processing of the wrong side, with the stiffness of the knit fabric, etc. But I hardly want to spend another year on thinking. Sometimes you have to trust your hands. They often know best what to do. *** Гвоздем коллекции была и остается эта пара. Благодаря недавно связанному Клеверу, я поняла, что мною выбрана пряжа из ангоры не подойдет для водолазки Watson (тот же артикул как в Клевере, только серого цвета). Watson не может стать похожим на пушистый кролик, даже если главной скрипкой в этой паре играет Holmes. Теперь у меня есть два выбора пряжи. Вязать из той, из которой я связала новый образец (бэби альпака), а также вязала Dahlia, или же распустить Lemon, которого давно не ношу, а в нем мертвым грузом лежит неиспользуемый стопроцентный твидовый кашемир. Я пока предпочтение отдаю хизер альпака, но почему-то мне кажется, что Watson отдал бы предпочтение твидовому костюму. Так что вопрос о пряже пока открыт. В конечном дизайне водолазки я убрала боковую застежку. Тот метод отделки, о котором я думала, в образце не подтвердился, а обрабатывать "абы как" я не могу. Оставила тот больной вопрос лишь для застежки у ворота, и пока нет ясного понимания, что там делать с разными плотностями и направлениями вязания, с обработкой изнанки, с жесткостью полотен и т. п. Но вряд ли я хочу потратить на это еще один год, пока буду думать. Иногда надо довериться рукам. Они часто лучше знают, что делать. In the old Holmes vest swatch, I used a linen stitch pattern in which we perceive two rows as one. The result is an almost coat fabric, perfect for imitating a man's raincoat cape. But common sense dictates that knitting such a vest can take forever, not only for me but also further, in the future, for those who will knit this vest. I knitted a new swatch using the Seed stitch pattern. I can't say that this pattern is one of the fastest, but the rows gauge has distinguished itself by as much as one and a half times, and there is almost no difference in density and shape stability. *** В старом образце жилета Holmes я применила льняной узор, в котором 2 ряда воспринимается как один. В результате получается почти пальтовая ткань, которая для имитации пелерины мужского плаща подходит как нельзя лучше. Но здравый смысл подсказывает, что вязание жилета может занять вечность. Не только мою вечность, но и далее, в будущем у тех, кто будет этот жилет вязать. Новый образец я связала узором "Рис". Не могу сказать, что этот узор из самых быстрых, но плотность в рядах отличилась аж в полтора раза, а в плотности и формоустойчивости разницы почти нет. Next year, when I finish the collection, I will answer the question for you and myself. I wonder which is better? Knit immediately, under inspiration and excitement from what was thought out, “in one sitting” and “overnight,” or for a whole year to think about the collection, knit swatches, look for yarn, and only then, slowly and savoring every stitch, knit. Which option of the two ensures the absence of re-knitting and warns against failure? The answer is by no means obvious. If you want to continue to follow my work on the collection, I talk about all my torments and victories in this forum thread. *** На следующий год, когда коллекция будет связана, я отвечу вам и себе на вопрос. Интересно, что лучше? Вязать сразу, под вдохновением и азартом от придуманного, "в один присест" и "за ночь", или целый год думать над коллекцией, перевязывать образцы, подыскивать пряжу и только потом, медленно и смакуя каждую петельку, вязать. Который вариант из двух обеспечивает отсутствие перевязов и предостерегает от неудач? Ответ отнюдь не очевиден. Если хотите далее следить за работой над коллекцией, о всех своих муках и победах я рассказываю в этой темке форума.
- Almanac and Latitude
I don't have time for anything. And it's not just words. Many people don't have it, but my case is special: I am drowning in a massive pile of unfinished work, but I seem to enjoy it. Like Stockholm Syndrome, when you begin to sympathize with your tormentor. And now I understand creative people with whom it is difficult to agree on anything specifically, who always live in creative chaos. And they are so not because their head is in the clouds, but because when inspiration comes, you cannot adhere to established deadlines and finish all the work started. The priority is always to catch inspiration, postponing everything else indefinitely. Because it (inspiration) may not come one day, and such empty periods are the worst thing that can happen. It's like hunger or a phobia of heights or confined spaces. So let me have a queue of unfinished business with which I can fill these periods. But the reason I combined the stories of the two designs into one is not a lack of time but a horizontal chain stitch pattern. This pattern first came across to me in the Lemon design of Helga Isager. The very cute and minimalistic pattern had one drawback. If you knit according to the pattern and did not make any corrections, the center panel began to slant, losing one stitch at the beginning of the chain and gaining at the end. My Lemon is made with a slanted insert, but the obliqueness in the final project after washing was not felt. I figured out later what the reason was and slightly corrected the pattern. *** У меня ни на что не хватает времени. И это не просто слова. Многим его не хватает, но мой случай особенный. Я тону в огромной куче недоделанных работ, но, кажется, что я этим наслаждаюсь. Как при стокгольмском синдроме, когда начинаешь сочувствовать своему мучителю. И теперь я понимаю творческих людей, с которыми сложно о чем либо конкретно договориться, у которых всегда творческий хаос. И они такие не потому, что витают в облаках, а потому, что когда приходит вдохновение, ты не можешь придерживаться установленных сроков и доводить все начатые дела до конца. Приоритет всегда стоит в потребности хватать вдохновение за хвост, откладывая все остальное на неопределенное время. Потому что оно (вдохновение) может и не прийти. А такие пустые периоды – это самое ужасное, что может случиться. Это как голод, как фобия высоты или закрытых помещений. Так пусть у меня стоит очередь незавершенных работ, которыми я смогу эти пустоты заполнить. Но причина, по которой я объединила рассказы о двух дизайнах в один, это не нехватка времени, а их общий узор горизонтальной цепочки. Этот узор впервые встретился мне в дизайне Хельги Исагер Lemon. Очень милый и минималистический узор там имел один недостаток. Если вязать по описанию и не делать каких-либо корректировок, полотно начинало косить, теряя одну петлю в начале косички и приобретая в конце. Мой Lemon так и связан с косой вставкой, но косина в конечном изделии после стирки не чувствовалась. Я только уже позже разобралась, в чем причина и немного поправила узор. The stitch pattern, in its essence, is a bit like a binding-off technique, and there are several options for how you can knit it. But, unlike the binding-off, it has the same degree of elasticity as the knit fabric itself. Fans of minimalist patterns and clean lines should pay attention to this pattern. The pattern is easy to model; you can place both short rows and decreases/increases without any problems. It should be taken into account that in the row where you work on chain stitches, neither the short rows nor the decreases or increases should be located. They need to be placed only in areas of the Stockinette. For this reason, the main task of the designer-constructor is to position all constructing techniques between horizontal lines, leaving the lines themselves unaffected. *** Узор по своей сути немного напоминает технику обычного закрытия петель и есть несколько вариантов, как можно его вязать. Но он, в отличие от закрытия петель, имеет ту же степень эластичности, как и гладь. На этот узор должны обратить внимание любители минималистических узоров и чистых линий. Узор легко поддается моделированию; в нем без каких либо проблем можно разместить и укороченные ряды, и убавления/прибавления. При этом нужно учесть, что в ряду, в котором вы будете вязать саму цепочку, ни приемы укороченных рядов, ни убавления или прибавления располагаться не должны. Их нужно размещать лишь на участках глади. По этой причине главной задачей дизайнера-конструктора является разместить все приемы конструирования между горизонтальными линиями, оставляя сами линии незатронутыми. Almanac Cropped pieces in the wardrobe are merely irreplaceable. They suit full skirts and wide pants, any dress. A longer silk blouse can peek out coquettishly from under the jacket. Equally well, any woman can fit such things into her wardrobe because they are suitable for any age and body type. A cropped Almanac jacket with bell sleeves, the length of which is equal to the body's length, will easily complement any outfit and look. The plaid sets here the strict tone, and the playful silhouette responds with ease. Try to knit tighter than usual. Knitted jackets should proudly carry their shape, serve you faithfully and for a long time. *** Укороченные вещи в гардеробе просто незаменимы. Они подходят к пышным юбкам и широким брюкам, к любому платью. Из-под жакета может кокетливо выглядывать более длинная шелковая блуза. Одинаково удачно такие вещи в свой гардероб может вписать любая женщина, ведь они подходят любому возрасту и телосложению. Укороченный жакет Almanac с рукавами "колокольчик", длина которых равна длине корпуса, с легкостью дополнит любой комплект и образ. Клетка здесь задает более строгий тон, а игривый силуэт отвечает непринужденностью. Постарайтесь вязать плотнее, чем привыкли. Вязаные жакеты должны гордо нести свою форму, служить вам верно и долго. Cropped jackets are very much in fashion now. Neither curvy, short, nor any other non-standard types of figures should be afraid of them. The cropped jacket visually lengthens the legs and serves as an optical correction for the figure. Cropped knits are an integral part of the outfits with full skirts and wide trousers. *** Укороченные жакеты сейчас очень в моде. Их не должны бояться ни пышные, ни низкие, ни любые другие нестандартные типы фигур. Укороченный жакет визуально удлиняет ноги и служит верную службу в оптической коррекции. Укороченные вязаные изделия – это неотъемлемая часть образов с пышными юбками и широкими брюками. I caught the inspiration for the textured plaid pattern when I saw one design with textured rhombuses. And I thought to myself, how can I make squares? In the meantime, I was obsessed with a chain stitch and worked on an Electra jumper. In it, I dipped the chain stitch into the prepared path of purl stitches, and the chain stitch merged with the Stockinette. Here, the chain stitch is made on the Stockinette surface and becomes convex. And what is the most similar to a chain stitch if laid horizontally? Of course, a horizontal chain pattern. The idea seemed to be worthy of gold. Then I ran into some problems when it came to technique. Inspiration does not know how to knit and will never tell you how to embody this vision. The problem was that one horizontal chain stitch had the length of the stitch, and one stitch of the vertical chain had the row's height. As we all know, a row is three-quarters of a stitch. And no matter how hard you try, the stitches of the vertical chain stitch will be smaller than their horizontal sisters, and it is almost impossible to beat the difference of a quarter of a unit. In the pattern, I suggested knitting a horizontal chain row with smaller knitting needles and working the vertical chain stitch loosely. It was impossible completely to eradicate that quarter of the difference, but the result was satisfactory. *** Вдохновение узора фактурной клетки я поймала, когда увидела один дизайн с фактурными ромбами. И подумала про себя, а как же сделать квадраты? Тем временем я болела тамбурным швом и вязала джемпер Electra. В нем тамбурный шов я погружала в заранее заготовленную дорожку изнаночных петель, и тамбурный шов сливался с гладью. Здесь же тамбурный шов выполняется на глади и становится выпуклым. А что наиболее похоже на тамбурный шов, если разложить его по горизонтали? Конечно, узор горизонтальной цепочки. Идея показалась мне достойна золота. Потом я столкнулась с некоторыми проблемами, когда дело коснулось техники исполнения. Вдохновение не умеет вязать, и никогда не подскажет, как это видение воплотить. Проблема состоялась в том, что одна горизонтальная петля цепочки имеет длину петли, а одна петля цепочки тамбурного шва имеет высоту ряда. Как мы все знаем, ряд – это три четверти петли. И как не старайся, цепочки тамбурного шва будут мельче своих горизонтальных сестер, и победить разницу в четверть единицы практически невозможно. В описании я предложила вязать ряд с горизонтальной цепочкой более тонкими спицами, а тамбурный шов прокладывать свободно. Ту четверть разницы полностью искоренить не удалось, но конечный результат меня вполне устраивал. In the photo above, on the left, you can see a light gray one underneath the blue piece. There was a lot of re-knitting; even there was a global shortage of yarn because this item has been discontinued for a long time, and I managed to find the last two skeins worldwide (photo above on the right) in one tiny online store. These two skeins saved the design (it's hard to believe, but even the dying batch was the same), and it all ended up being done in the end. I want to tell you why I changed the yarn and what was impossible to foresee. The first version of the jacket was light gray. As is common, I made all the decreases and increases two stitches from the edge – this way, the piece becomes neat, and the edges are framed by selvage stitches, which are then convenient to sew. I knitted the body, seamed it, and my hands, thank God, were itching to try on those vertical lines. Wouldn't they itch, I would also knit the sleeves. When I reached the decreases of the armholes and the neckline with a chain stitch, I realized that the column of stitches along which I was making the chain ended and disappeared in the decrease. And the chain stitch did not know where to go: stop not reaching the edge or jump to the next stitch. It was shock and tragedy. Terrified, I continued to make one vertical line after another, tossing between trying to get used to the messy look and the understanding that an unraveling was coming. I decided to unravel only after I embroidered almost the entire "vest." You will never force me to unravel the chain stitch, I thought – it's easier to look for another yarn. *** На фотографии выше слева вы видите, что под голубой деталью лежит светло-серая. Перевязов было много, даже случилась глобальная нехватка пряжи, потому, что этот артикул давно снят с производства. Последние два мотка во всем земном шаре (фото выше справа) мне удалось найти в одном онлайн магазинчике. Эти два мотка спасли дизайн (сложно поверить, но даже партия покраски совпала), и все в конечном итоге свершилось. Мне только хочется рассказать, почему я поменяла пряжу, и что предвидеть было невозможно. Первая версия жакета была светло-серая. Как и принято, все убавления и прибавления я делала за две петли от края – вид таким образом становится опрятным, а края обрамляются кромочными петлями, которые далее удобно сшивать. Я связала корпус, сшила его, и, слава богу, у меня зачесались руки вышить вертикальные линии. Не зачесались бы, еще и рукава связала. Когда тамбурным швом я дошла до убавлений, формирующих проймы и горловину, поняла, что столбик лицевых петель, по которому я прокладывала шов, заканчивался и исчезал в убавлении. И тамбурный шов не знал, куда ему податься: прерваться, не доходя до края, или перескочить на соседнюю петлю. Это был шок и трагедия. Я в ужасе продолжала прокладывать одну вертикаль за другой, мечась между попыткой свыкнуться с неoпрятным видом и пониманием, что грядет перевяз. Только когда вышила почти всю "жилетку", решилась перевязать. Распускать тамбурный шов вы меня ни за что не заставите, подумала я, – легче подыскать другую пряжу. In the second version, at the same time, I corrected other weak points, and in the end, I transferred all the decreases to the very edge, where the selvage stitch also participates in the decrease. For myself, I slipped back into an outdated knitting school, sewing pieces became more complex, but for that, I kept cleaner edges and clear geometry. Sometimes it's just necessary. *** Во втором варианте я заодно исправила другие слабые места, и в конечном итоге все убавления я перенесла на самый край, где в убавлении участвует и кромочная петля. Для себя я скатилась в устаревшую школу вязания, сшивание деталей стало более сложным, но за то я сохранила более чистые края и четкую геометрию. Иногда так просто необходимо. Latitude The Latitude cardigan does more than you might imagine. It makes us really warm when buttoned and only slightly warm when unbuttoned. The shallow neckline can replace a scarf if worn over a turtleneck. Large pockets can accommodate small items, and slits keep your cardigan from restraining your movements. Their triangular shape will allow the skirt to look flirty. The minimalistic pattern of horizontal lines will not create difficulties when using a cardigan in any, even the most daring looks. Such a reliable friend, only made of yarn. *** Кардиган Latitude выполняет гораздо больше функций, чем вы можете себе представить. Он исправно греет застегнутым и лишь слегка согревает расстегнутым. Неглубокая горловина сможет заменить шарф, если надеть его поверх водолазки. Удобные карманы вместят всякие мелкие вещи, а прорези не дадут кардигану ограничивать движений. Их треугольная форма позволит кокетливо выглядывать юбке. Минималистический узор горизонтальных линий не создаст трудностей, при использовании кардигана в любых, даже самых смелых ансамблях. Такой надежный друг, только сделан из пряжи. The Latitude cardigan has no vertical lines, and the horizontal chain stitch is presented in all its glory. In this case, when there is no comparison with the size of the stitches in the vertical chain, on the contrary, I want to see horizontal chain stitches as expressive as possible, and they are made with the same size of knitting needles as the main fabric. Nearly the same stitch pattern, a similar fastening, and a crew neck, otherwise the Latitude is the opposite of the Almanac jacket. It is long, with pockets, vents, and a "raglan in a round yoke" sweater. *** В кардигане Latitude нет вертикальных линий, и здесь цепочка горизонтальных петель представлена во всей своей красе. В этом случае, когда нет сравнивания с величиной петель в тамбурном шве, наоборот, хочется видеть горизонтальные петли как можно более выразительными, и вяжутся они тем же самым номером спиц, как и основное полотно. Почти тот же узор, похожая застежка и неглубокая круглая горловина, во всем остальном Latitude является антиподом жакету Almanac. Он длинный, с карманами, с прорезями и мягкой формы (реглан в круглой кокетке). The yoke of this cardigan was very difficult for me. When I counted that in my yoke, I would get 14 lines with decreases (8 raglan lines, 2 vertical bust darts, 2 shoulder blade darts, 2 double shoulder darts), I realized that I needed to get rid of a few and simplify the design. I do not know who I wanted to deceive, you or myself, but removing the shoulder darts, I got a too deep armholes. They sank almost to the waist due to the too high shoulder slope, although their measurements were correct. Bust darts were too low also. Who still knits raglan-type yokes without shoulder darts? I decided to unravel only after the finishing. Of course! Only we know how to complicate our lives perfectly. *** Сложно далась мне кокетка этого кардигана. Когда я сосчитала, что у меня в кокетке получится 14 линий с убавлениями (8 регланных, 2 вертикальные вытачки для груди, 2 вытачки для лопаток, 2 двойные вытачки для плеч), я поняла что нужно от нескольких избавляться и упростить конструкцию. Не знаю, кого я хотела обмануть, вас или себя, но убрав плечевые вытачки, я получила слишком глубокие проймы. Проймы из-за достаточно высокого наклона плеч осели почти до талии, хотя их измерения соответствовали всем расчетам. Там же оказались и вытачки для груди. Кто до сих пор вяжет реглан без плечевых вытачек? Перевязать я решилась лишь после финальной отделки. Конечно! Только мы сами себе умеем усложнять жизнь. There is one more point that unites these two designs. I made a photo-tutorial for seaming. If sewn with a regular mattress stitch, the horizontal chain is displaced by one row at the seam. The tutorial takes into account some of the nuances, during the implementation of which, the chains connect at the same level. *** Есть еще один момент, который объединяет эти два дизайна. Я сделала фото урок сшивания деталей. Если сшивать обычным матрасным швом, у шва образуется смещение горизонтальной цепочки на один ряд. В уроке учтены некоторые нюансы, при выполнении которых, цепочки соединяются на одном уровне. Pattern testings of these two designs ended a long time ago. You will find patterns of the jacket and cardigan in my shop, and you can see all the finished projects on Ravelry (Almanac and Latitude). Then I made a small fashion runway. For me, that is the most exciting part of the whole process. Enjoy the show! *** Тестирования описаний этих двух дизайнов закончились давным-давно. Описания жакета и кардигана вы найдете в моем магазинчике описаний, а все воплощения можете посмотреть на Ravelry (Almanac и Latitude). Тут я устроила небольшое дефиле. Для меня – это самая захватывающая часть всего процесса. Приятного просмотра! There are also two test winners in this double story: Oksana and Victoria. Thank you, girls, for the beauty and sincere congratulations! *** В таком двойном рассказе победительницы тестирований также две: это Оксана и Виктория. Спасибо вам, девочки, за красоту и искренние поздравления!
- The Proper Swatch. Правильный образец
The proper swatch is the key to the success of your future project. A swatch specifies the knitting gauge and lets you choose the correct needle size for your yarn. You can feel and touch, match color combinations or see how the stitch pattern looks on your yarn. Even the knitting of any constructive or design element on a reduced scale can become a swatch. The more information your swatch contains, the more clues and confidence in a successful outcome you have. *** Правильный образец – залог успеха вашего будущего проекта. Образец нужен не только для определения плотности вязания, но и для подбора правильного размера спиц для вашей пряжи, возможности пощупать, для подбора цветовых сочетаний или, чтобы увидеть, как выглядит узор на выбранной пряже. Образцом может стать даже вязание какого-либо конструктивного или дизайнерского элемента в уменьшенном масштабе. Чем больше информации заложено в вашем образце, тем больше подсказок и уверенности в удачном исходе. Swatch knitting begins with a small "pre-swatch" in which you select the correct needle size for the chosen yarn. For it, it is enough for you to cast on 10-15 stitches and knit several rows in a Stockinette Stitch. Already in such a small "pre-swatch," you can feel whether this particular needles size suits you or whether you still need to try another one. When your yarn has found its ideal needle size, it's time to knit an actual swatch. Swatches are of two types: when you knit according to the pattern, you just need to check the knitting gauge; the other option is for the designer, who you are when you knit your designed sweater. *** Вязание образцов начинается с маленького «предобразца», в котором вы подбираете правильный размер спиц для выбранной пряжи. Для него вам достаточно набрать 10-15 петель и провязать лицевой гладью несколько рядов. Уже в таком маленьком «предобразце» вы можете почувствовать, устраивает ли вас именно этот размер спиц, или все же нужно взять другой. Когда ваша пряжа нашла свой идеальный размер спиц, пора вязать образец. Образцы бывают двух типов: когда вы вяжете по готовому описанию и вам нужно всего лишь проверить плотность вязания; другой вариант предназначен для дизайнера, кем являетесь вы, когда вяжете свой придуманный свитер. The Gauge Swatch The gauge swatch should be no less than about 20x20 cm in total, and its measured area should be no less than 15x15 cm. You are mistaken if you think it is possible to get the correct gauge in a tiny swatch. The time spent knitting a swatch is inversely proportional to the time spent knitting a project. The more you devote your attention to the swatch, the less likely it is to make a mistake in the size and length, and the more likely it is to guess the behavior of the yarn and learn the features of the stitch pattern. The swatch must be made using the same stitch pattern as your project. Sometimes knitting patterns give the gauge of a Stockinette Stitch when the characteristics of the stitch pattern do not allow to accurately determine its gauge, for example, 3D stitch patterns, patterns with extremely large repeats, or stretchy rib patterns. But this is rare, and most often, we measure the gauge of the main stitch pattern. In a swatch, the stitch pattern to be measured correctly must be framed by another stitch pattern that prevents the edges from curling. For this, Garter Stitch and Rice are most often used, and also in the lower part of the swatch, there is always the opportunity to try the pattern of the lower ribs, bands, trims, or hems, choose the right needle size for them too. The "frame" of the simplified pattern not only resists curling edges but also stretches your sample much like a frame stretches a canvas. Probably, it is not worth proving that it is impossible to correctly measure the gauge of a swatch with stitches curled around the edges. Also, in a swatch without a "frame," the size of the outermost 3-4 stitches and rows is unreliable: they are compressed. The "frame" not only flattens your stitch pattern but also allows you to measure the edge stitches of the main pattern, which cannot be done in a swatch without a "frame." Look at the picture of two swatches below. I knitted them using the same size needles, the same brand of yarn, and the same stitch pattern. The only difference is that I added a "frame" of a Garter Stitch to the first swatch along the sides. As you can see, you can measure the stitch gauge in the first swatch from the first to the last stitch of the main pattern. In the second swatch, it is unclear which stitch to start from and which stitch to finish your measuring. Several edge stitches are stretched out, compressed, or curled. You may ask why I knitted such a worthless swatch? First, I knitted the first one, by which I will measure the gauge. The second I knitted to see other color combinations. And that second one belongs to a number of designer swatches, which I will talk about later. Образец для определения плотности Образец для проверки плотности вязания должен быть не меньше, чем примерно 20х20 см в общем, а его измеряемая площадь – не меньше, чем 15х15 см. Если думаете, что возможно получить правильную плотность вязания в образце меньшего размера, вы сильно ошибаетесь. Время, потраченное на вязание образца, обратно пропорционально времени вязания изделия. Чем больше вы посвятите своего внимания образцу, тем меньше вероятность ошибиться в размере, длине изделия, и тем больше вероятность угадать поведение пряжи и узнать особенности узора. Образец должен быть выполнен тем узором, которым будет связано ваше изделие. Иногда в описаниях дается плотность лицевой глади, когда особенности узора не позволяет точно определить его плотность, например, узоры 3D, узоры с очень крупным раппортом или резинка. Но это встречается редко, и чаще всего мы измеряем плотность основного узора. В образце измеряемый узор должен быть обрамлен другим узором, который препятствует заворачиванию краев. Для этого чаще всего используется платочная вязка, рис, а также в нижней части образца всегда есть возможность испробовать узор нижних резинок, планок или беек, подобрать нужный размер спиц и для них. Такая «рамка» из упрощенного узора не только противостоит заворачиванию краев, но и вытягивает ваш образец примерно как рама вытягивает холст. Наверное, не стоит доказывать, что правильно измерить плотность образца с завернувшимися по краям петлями невозможно. Также в образце без «рамки» величина крайних 3-4 петель и рядов недостоверна: они сжимаются. «Рамка» не только расправляет ваш образец, но и позволяет измерять крайние петли основного узора, чего нельзя делать в образце без «рамки». Посмотрите на фотографию двух образцов ниже. Они связаны используя тот же размер спиц, тот же самый артикул пряжи и тот же самый узор. Единственное отличие – к первому образцу добавлена "рамка" платочной вязки по краям. Как вы видите, измерять плотность петель в первом образце можно от первой до последней петли основного узора. Во втором образце совсем неясно, с какой петли начать и у какой петли закончить измерять. Несколько крайних петель вытянуты, сжаты или заворачиваются. Вы можете спросить, почему я связала такой никчемный образец? Сначала я связала тот первый, по которому я буду мерить плотность. Второй я связала лишь для того, чтобы посмотреть другие цветовые сочетания. И тот второй принадлежит ряду дизайнерских образцов, о которых я расскажу позже. In the case when your swatch uses a stitch pattern that does not curl at edges, it is unnecessary to add any special frame, but in any case, it is better not to measure the edge stitches and start measuring only from the 3rd or 4th stitch (row) from all edges. For the "frame," I use a Garter Stitch pattern. As we know, Garter Stitch is much tighter in rows (there are more of them in 10 cm than in a Stockinette Stitch) and 20% wider in stitches. Of course, this behavior of the Garter must be taken into account so that it does not cause incorrect data. Based on such characteristics, I cast on no more than 3 stitches for it at the edges, including the selvage stitch. More than 3 stitches at the swatch edges will already tighten the sides of the swatch, and less than 3 stitches will not resist curling. And the degree of inelasticity that the three Garter stitches create is an excellent simulation of the side seams in the garment. At the top of the swatch, I also work 6 rows in a Garter Stitch, including the bind-off row. Work the last rows of а Garter Stitch with smaller knitting needles (by 0.25-0.5 mm) to prevent the Garter Stitch from deforming the upper part of the swatch by stretching it out wide-wise. When you have finished the swatch, you need to block it the same as the finished project. Wash using the same detergent; steam and press it if you will steam your garment. Dry the sample as usual – just lay it on a flat surface. You can pin the swatch if it is a swatch for a shawl, and you will dry the shawl in the same way. But if you block the swatch for a garment, it is not recommended to pin it and stretch the swatch in some other way. The swatch is too tiny and malleable; you can stretch and fix it to unusual dimensions. After the sample has dried, let it lie in a free state, sometimes turning it over, touching, and squeezing. You will be surprised, but a swatch of the third day will give you very different numbers than a swatch that has just dried. Recently I did an experiment – I knitted swatches for the upcoming summer collection (see the picture below). The swatches were washed, dried and the gauge measured. All data was recorded. Then the swatches were lying around somewhere; sometimes, I reviewed them or shifted them from place to place. A week passed, and I measured the gauge once again. Only in one swatch out of eleven, the measurements did not change, in the remaining ten, I found completely different data, and in one of the swatches, the row gauge changed up to 4 rows in 10 cm. *** В случае, когда ваш образец связан узором, который не скручивается, какую-то особую рамку добавлять ненужно, но в любом случае крайние петли тогда лучше не измерять, и начать измерения лишь от 3-й или 4-й петли (ряда) со всех краев. Для «рамки» я использую узор платочной вязки. Как мы знаем, платочная вязка значительно плотнее в рядах (их больше в 10 см, чем в лицевой глади), и на 20% шире лицевой глади в петлях. Конечно, такое поведение платочки нужно учесть, чтобы она не стала причиной неправильных данных. Отталкиваясь от таких ее свойств, по краям я набираю для нее не больше, чем по 3 петли, включая кромочную петлю. Больше чем 3 петли платочки по краям уже будут стягивать боковые края образца, а меньше чем 3 петли не будут противостоять заворачиванию. И та степень сдерживания, которую создает тесьма из трех петель платочной вязки очень хорошо имитирует боковые швы в изделии. В конце образца я провязываю 6 рядов платочной вязкой, включая ряд закрытия. Чтобы не позволять платочной вязке деформировать верхнюю часть образца, вытягивая его вширь, последние ряды платочной вязкой нужно выполнять более тонкими спицами (на 0,25-0,5 мм). Когда вы связали образец, далее с ним нужно поступить ровно также, как вы будете поступать с готовым изделием. Стирать, используя такое же средство для стирки, отпаривать, если вы собираетесь отпаривать ваше изделие. Высушивайте образец обычно – просто положите его на плоской поверхности. Образец можно прикалывать булавками лишь тогда, если это образец для шали, и вы будете таким же образом высушивать ее. Но если образец предназначается для одежды, прикалывать булавками и каким-то другим образом вытягивать образец не рекомендуется. Образец слишком маленький и податливый; существует возможность растянуть его и зафиксировать до несвойственных ему измерений. После того как образец высох, обязательно нужно дать ему отлежаться и поваляться в свободном состоянии, иногда переворачивая и другим образом тиская его. Вы удивитесь, но образец третьего дня даст вам совсем другие цифры, чем образец, который только что высох. Недавно я делала эксперимент – вязала образцы для летней коллекции (см. фото ниже). Образцы постирала, высушила и измерила плотность. Все данные записала. Потом образцы где-то валялись, иногда я их пересматривала или перекладывала с места на место. Прошла неделя, и я перемерила плотность. Только в одном образце из одиннадцати измерения не изменились, в остальных десяти я обнаружила совсем другие данные, а в одном из образцов плотность в рядах изменилась аж до 4 рядов в 10 см. Measuring the Gauge The swatch has been blocked and rested. Now it's time to measure the gauge. Gauge is determined by the number of stitches and rows of 10 cm. If you knit according to patterns that are based on an Imperial system, you find the gauge in inches. 10 cm corresponds to 4 inches, and a slight discrepancy of 0.32 cm can be ignored (or paid attention if you like accuracy everywhere). You need to measure in two ways, and for calculations, take the average value. We make the first measurement with a gauge frame, a ruler, or a sewing meter, which we apply to the center of the swatch. Now you need to count how many stitches and rows it takes exactly 10 cm and write down the data obtained (even with the fractions of the stitch and row, if any). If your swatch has a rib or band with a different gauge, measure farther away from it, where the swatch is not subject to contraction or expansion (another reason to knit a large swatch). The second measurement consists of the number of stitches and rows in the entire area between the "frame," also the height and width in centimeters. The number of stitches and rows is divided by centimeters and multiplied by 10. These data also need to be recorded. Next, we find the average value of both measurements and round off to half the stitch/row. *** Измеряем плотность Образец высох и отлежался. Теперь пора измерять плотность. Плотность вязания определяется количеством петель и рядов в 10 см. Если вы вяжете по американским описаниям, плотность там дается в дюймах. 10 см соответствует 4 дюймам, и на маленькое несоответствие в 0,32 см можно не обращать внимание (или обращать, если вы везде любите точность). Измерять нужно двумя способами, и для расчетов брать среднюю величину. Первое измерение делаем рамочкой для установления плотности, линейкой или швейным метром, которые прикладываем к центру образца. Теперь нужно сосчитать, сколько петель и рядов занимает ровно 10 см и записать полученные данные (даже с долями петли и ряда, если такие образовались). Если в вашем образце есть пробная резинка или планочка с другой плотностью, измерять нужно дальше от нее, где полотно не подвержено стягиванию или расширению (еще одна причина вязать большой образец). Второе измерение состоит из количества петель и рядов всей измеряемой площади между «рамкой», а также ее высота и ширина в сантиметрах. Количество петель и рядов делится на измерения в сантиметрах и умножается на 10. Эти данные также нужно записать. Далее находим среднюю величину обоих измерений и закругляем до половины петли/ряда. The first measurement method helps us exclude possible deformation of the edge stitches; the second provides greater accuracy with an enlarged scale. 20 stitches and 28 rows fell into the gauge frame in our swatch. The stitches' measured area was 33 and 16 cm, the rows – 51 rows and 17.4 cm, which allowed us to obtain slightly different data, namely 20.625 stitches and 29.31 rows. The average knitting density will be 20.31 stitches and 28.66 rows, and after rounding, we have a final gauge of 20.5 stitches and 28.5 rows in 10x10 cm. You need to compare the received numbers with those required in the pattern. If the numbers match, everything is in order; you can knit your size and get the expected result. If the knitting gauge you received did not match by more than half a stitch and one row, the size and length of your project would already be significantly different. On average, a gauge mismatch of one stitch gives a difference of exactly one size (the heavier the yarn and the bigger the gauge, the larger the size deviation by only one stitch, and vice versa). That is very easy to prove. Say, the total number of stitches at bust level is 240 stitches (back and front), and the required gauge is 20 stitches in 10 cm, which gives a bust circumference in the finished project of 120 cm. If your gauge is 21 stitches in 10 cm, the bust circumference will be 114 cm with the same number of stitches. The difference of 6 cm is precisely one size. In this case, you need to select different size of knitting needles, another yarn, add or remove one thin thread of yarn. As a knitwear designer, I redefine the gauge once the design prototype has already been finished, washed, and photographed. It has already undergone movements and has become accustomed to the body. I measure the gauge at 30-50 cm of the back since it has the largest untouched area with knitting techniques. And after that, I specify the initial gauge. Such a double method (in a swatch for designing a prototype and in a finished project for clarifications) helps eliminate possible inaccuracies in the size range. *** Первый метод измерения нам помогает исключить возможную деформацию крайних петель, второй обеспечивает большую точность при увеличенном масштабе. В нашем образце в рамочку для установления плотности попало 20 петель и 28 рядов. Измеряемая площадь в петлях составила 33 п. и 16 см, в рядах – 51 р. и 17,4 см, что позволило нам получить немного другие данные, а именно 20,625 п. и 29,31 р. Средняя плотность вязания будет 20,31 п. и 28,66 р., а после закругления мы имеем окончательную плотность 20,5 п. и 28,5 р. в 10х10 см. Теперь нужно сравнить полученные числа с теми, которых требует описание. Если числа совпали, все в порядке, вы можете вязать свой размер, и получить ожидаемый результат. Если полученная вами плотность вязания не совпала больше чем на половину петли и на один ряд, размер и длина вашего изделия уже будет значимо отличаться. В среднем несовпадение плотности в одну петлю дает отличие ровно на один размер (чем толще нить и крупнее плотность, тем отклонение размера лишь на одну петлю будет больше и наоборот). Это очень просто доказать. Скажем, общее количество петель на уровне груди составляет 240 петель (спинка и перед), и требуемая плотность вязания – 20 п. в 10 см, что дает обхват груди в готовом изделии 120 см. Если ваша плотность – 21 п. в 10 см, при таком же количестве петель обхват груди получится 114 см. Разница в 6 см и есть ровно один размер. В таком случае нужно подбирать другой размер спиц, другую пряжу, менять количество ее сложений. В своей работе дизайнера-конструктора вязаной одежды я определяю плотность еще раз, когда прототип дизайна уже связан, постиран и побывал на фотосессии: он подвергся движениям и привык к телу. Я измеряю плотность вязания в 30-50 см спинки, так как на ней находится самая большая вязальными приемами нетронутая площадь. И после этого уточняю изначальную плотность вязания. Такой двойной метод (в начале на образце для построения выкройки прототипа и в конце на готовом изделии для уточнений) помогает исключить возможные неточности в размерной линейке. A Designer Swatch Swatches are slightly different if you knit your designed project and do not use patterns. As for the gauge, everything is clear, we measure it in the same way, and the resulting numbers can even not be rounded, and you may use them in further calculations. They do not need to be compared with anything but taken as a basis. The main thing is that the swatch suits you to the touch, density, degree of extensibility, dimensional stability, how the stitch pattern manifests itself on your yarn, and other aspects. With gauge, everything is clear, but now it's time to find out what "A Designer Swatch" is. A designer swatch determines the gauge and checks how your chosen stitch pattern interacts with pattern shaping techniques, namely short rows, increases, and decreases, to select the needle size and stitch patterns for ribs, hems, and bands. In such a swatch, you can try all the necessary techniques, up to knitting a whole design element, and there should also be enough measured area to determine the gauge. For that, you may need two or more separate swatches. Such a swatch can even predict possible errors and suggest what you can do differently. The swatch in the picture below demonstrates that situation. An attempt to knit a classic tartan was a success. Cells are square; horizontals and verticals in some places are convex; in other areas – they are smooth. But, if you look closely, the horizontal blue and white stripes of a Garter Stitch stick out a little and look wonky. The reason is that they are worked with the same size knitting needles as the main fabric, and for them, the size of the knitting needles needs to be reduced. If not a relatively large sample (here, it is 21x22 cm), such an error could only be detected after you have knitted the whole back and blocked it – after all, you cannot spot that error in a tiny sample. Дизайнерский образец Если вы вяжете свое придуманное изделие и не пользуетесь описаниями, дело с образцами обстоит немного иначе. Насчет плотности все понятно, мы ее измеряем таким же образом, а полученные числа даже можно не округлять и использовать их при дальнейших расчетах. Их не нужно ни с чем сравнивать, а просто взять за основу. Главное, чтобы образец устраивал вас на ощупь, плотность, степень растяжимости, формоустойчивости, как проявляет себя узор на вашей пряже и по другим аспектам. С плотностью все понятно, но теперь пора узнать, что такое «дизайнерский образец». Дизайнерский образец предназначен не только для определения плотности вязания, но и для проверки, как вами выбранный узор взаимодействует с приемами формирования выкройки, а именно с укороченными рядами, прибавлениями и убавлениями, а также для подбора размера спиц и узоров для планок, беек и резинок. В таком образце можно испробовать все нужные приемы, вплоть до вязания какого-либо элемента, детали, а также должно остаться достаточно измеряемой площади для определения плотности. Возможно, что вам понадобится два или несколько отдельных образцов. Такой образец даже может предугадать возможные ошибки и подсказать, что можно сделать по-другому. Такую ситуацию демонстрирует образец на фотографии ниже. Попытка связать классический тартан удалась. Клетки квадратные, горизонтали и вертикали местами выпуклые, местами плоские. Но, если приглядеться, горизонтальные сине-белые полоски, выполненные платочной вязкой, немного выпячивают и выглядят волнистыми. Причина – они связаны спицами основного размера, а для них размер спиц нужно было уменьшить. Если не сравнительно большой образец (здесь он 21х22 см), такую ошибку можно было бы обнаружить лишь после того, как вы связали спинку и ее постирали – ведь на маленьком образце такое и не увидеть. In the following picture below, you can see a selection of designer swatches. I've tried decreasing pattern repeats in a yoke, elements of a yoke, short rows in a Fisherman's Rib and a striped pattern, a back neck shaping in a horizontal type stitch pattern, regular and decorative decreases for raglan, a chain stitch, a decorative shoulder, a fragment of a sewn-in belt. Some of these swatches are suitable for gauge determination; some carry only a pure design function. *** На следующей фотографии ниже вы можете увидеть подбор дизайнерских образцов. В них испробовано убавление раппортов в кокетке, элементы кокетки, укороченные ряды в патентной резинке и в полосатом рисунке, «росток» в узоре горизонтального типа, обычные и декоративные убавления для реглана, тамбурный шов, декоративное плечо, фрагмент вшитого пояса. Некоторые из этих образцов пригодны для определения плотности; некоторые несут лишь чисто дизайнерскую функцию. I'm not getting the correct gauge! I hear very often that you fail to achieve the specified gauge. Yes, it is possible if you choose yarn that is too thin or thick, its composition and characteristics are very different from suggested, or if you knit very loose or very tight. If you have a mismatch in the rows and everything is more or less in order with the stitches, you need to change the size of the needles. The diameter of the needles affects the length of the stitch and the number of rows of 10 cm. If you succeeded with the rows, but not with the stitches, most likely you have chosen too thin or too thick yarn. The yarn weight affects the width of the stitch and their number of 10 cm. But there is no such one-sided dependence only on the needle's size and the yarn weight. By changing the size of the needles, you will affect the rows to a greater extent, but the width of the stitches will also respond to some extent (and vice versa). There are dense yarns like merino wool or cotton, loose and airy yarns like mohair or alpaca, cashmere blends. There are very dense yarns such as linen that cannot be knitted tightly and require a lot of space around each stitch. And even with the same yarn weight and the exact size of needles, a different composition will give you a completely different gauge. The two swatches below use the same needle size (2.5mm), the same stitch pattern and the same yarn weight, although the yarn composition is different. The lighter sample uses very elastic and springy crepe cotton, the second sample uses yarn containing goat angora, cashmere, polyamide, and rayon. Even when washing, it was physically noticeable how the cotton sample shrinks, while the rayon one spreads like water in all directions and expands. And under equal initial conditions (the same size of knitting needles, the same yarn weight and the same stitch pattern), apart from the composition of yarn, we got a completely different gauge: 28 sts x 45 rows in the first sample and 23.5 sts x 37 rows in the second. The difference is impressive! Не попадаю в плотность! Я очень часто слышу, что вам не удается достичь указанной плотности. Да, это возможно, если вы подбираете слишком тонкую или толстую пряжу, ее состав и свойства очень отличается от предложенной, или если вы вяжете очень расслабленно или очень туго. Если у вас слишком большое несовпадение в рядах, а с петлями все более-менее в порядке, нужно менять размер спиц. Диаметр спиц влияет на длину петли, и, соответственно, на количество рядов в 10 см. Если с рядами удалось, а с петлями – нет, скорее всего вы выбрали слишком тонкую или слишком толстую пряжу. Толщина пряжи влияет на ширину петли и на их количество в 10 см. Но такой односторонней зависимости лишь от размера спиц и толщины пряжи нет. Заменив размер спиц, вы в большей степени повлияете на ряды, но в некоторой степени отзовется и ширина петель (и наоборот). Есть плотная пряжа, такая как мериносовая шерсть или хлопок, есть рыхлая и воздушная пряжа, как мохер или альпака, смеси с кашемиром. Есть очень плотная пряжа, такая как лен, которую плотно не свяжешь и она будет требовать много воздуха вокруг каждой петли. И даже с идентичной толщиной пряжи и таким же размером спиц разный состав выдаст вам совсем другую плотность. В двух образцах ниже использован тот же размер спиц (2,5 мм), тот же узор и такая же самая толщина нити (как называют на западе – одинаковый yarn weight), хотя состав пряжи отличается. Более светлый образец связан oчень упругим и пружинистым креповым хлопком, второй образец – микс козьей ангоры, полиамида, кашемира и вискозы. Даже при стирке было физически ощутимо, как хлопковый образец сжимается и уменьшается, а вискозный растекается как вода во все стороны и увеличивается. И в равных начальных условиях (тот же размер спиц, та же толщина нити и тот же узор), помимо состава пряжи, мы получили совсем другую плотность: 28 п. х 45 р. в первом образце и 23,5 п. х 37 р. во втором. Разница впечатляющая! Knowing such nuances, it is possible to consistently achieve any required gauge by replacing the needle size, yarn weight, and the composition. But the main problem is that we are often too lazy to knit swatches. 3-5 swatches for one project (except for rare first-time luck) is the norm. Letting the swatches rest for a week is also expected. And don't make one big mistake: "I'll knit tighter (looser), and I'll be fine" instead of knitting another swatch with different needles' size. You won't, I assure you. It's like maintaining beautiful handwriting at the beginning of a letter. And you know how writing becomes at the end of a letter. So, as usual. I was a very impulsive knitter who wanted the finished sweater here and now, and it always seemed that the swatch was the area where you could save time. After decades of knitting, I only recently realized that there is no way to save time on swatches. They save our time and provide a good mood when there is no need to unravel, and the result meets our expectations. There are plenty of loopholes for mistakes anyway. So why not foresee at least a few of them in such a small piece of your dream? *** Зная такие нюансы, можно с заменой размера спиц, толщины нити и состава пряжи всегда добиться любой заявленной плотности. Но основная проблема в том, что мы часто ленимся вязать образцы. 3-5 образцов для одного изделия (за исключением редких удач с первого раза) – это в норме вещей. Дать неделю образцам отлежаться – это также в норме вещей. И не делайте одной большой ошибки: «я буду вязать плотнее (свободнее), и все у меня получится», вместо того, чтобы связать другой образец с другим размером спиц. Не будете, уверяю. Это как стараться в начале письма выдержать красивый почерк. И вы знаете, каким становится почерк в конце письма. Таким, как обычно. Я сама была очень импульсивной вязальщицей, которой хотелось готового изделия здесь и сейчас, и всегда казалось, что образец – это та область, где можно сэкономить время. После десятков лет вязания я только недавно поняла, что на образцах время экономить никак нельзя. Это они экономят наше время и обеспечивают хорошее настроение, когда ненужно перевязывать, а результат оправдывает ожидания. Для ошибок и так остается масса лазеек, так почему не предвидеть хоть несколько из них в таком маленьком кусочке вашей мечты?
- Fully-Fashioned Shoulder. Японское плечо
I have been going to tell you about the Fully-fashioned shoulder for a long time but did not have enough visual aids for this. Over time, I collected a sufficient number of them, even in different variations. I am very familiar with a Fully-fashioned shoulder. Having already knitted eight samples for knitting patterns with such a shoulder, I think I have gained enough experience. This shape of the shoulder came to hand knitting from machine knitting, where, due to some features, such a shoulder is easier to make. It is unnecessary to overcast the edges with a serger machine, shape a slight slope for the shoulders, and use the sewing tape for reinforcement. Besides that, the Fully-fashioned shoulder is very nice looking and anatomically correct. I've been working on this blog post for a month and a half, and I understand that everything is so simple in knitting, and when I tried to present it as a study guide, everything turned out to be very difficult for me. Wake me up at night, give me the knitting gauge and size, and I'll construct you a Fully-fashioned shoulder in five minutes. But to put it into words – here I got caught. *** Я давно собиралась рассказать вам о так называемом японском плече, но не имела достаточно наглядных пособий для этого. Со временем собралось достаточное их количество, при этом в разных вариациях. С японским плечом я уже давно на "ты". Связав уже восемь образцов для описаний с таким плечом, я думаю, опыта набралось достаточно. Этот крой пришел в ручное вязание из машинного, где из-за некоторых особенностей такое плечо сделать проще. Не надо обрезать и обметать оверлоком края, формируя незначительный наклон для плеч, пришивать тесьму для укрепления. Да и при всем этом японское плечо очень красивое и анатомически правильное. Вот сижу уже полтора месяца у статьи, и понимаю, что все настолько просто в вязании, а когда попробовала это изложить как учебное пособие, у меня получилось все очень сложно. Разбудите меня ночью, дайте мне плотность вязания и размер, и я построю вам японское плечо за пять минут. А вот описать – тут я попалась. Benefits of Fully-fashioned shoulder We often use a Fully-fashioned shoulder for knit garments with a set-in sleeve, but later, I adapted it in garments with a drop shoulder. I would call the Fully-fashioned shoulder a "magic wand." I wonder if you would believe me if I say that a Fully-fashioned shoulder is much simpler than a regular one, where the shoulder seam runs along the shoulder line? And that in most cases only the Fully-fashioned shoulder is possible? Of course, you wouldn't believe me. And I'll try to prove it to you. You just need to get the essence and recall a little geometry. I will list some of the advantages of the Fully-fashioned shoulder, and then we will analyze it in more detail. It is difficult to make a relatively shallow shoulder slope in striped patterns, where more than one color is used. Moreover, it is far from easy to shape the back neck, neither in short rows nor step-by-step bind-off. In this case, to maintain the striped pattern, you need to transfer a different color yarn over relatively long distances. In the Fully-fashioned shoulder, yarns of a different color on the back shoulder slopes are carried over short distances. And you do not have that problem in the front shoulders. In complex stitch patterns, a slight shoulder slope and a back neck are sometimes tricky to shape with short rows (the stitch pattern is distorted, you can lose the required number of stitches if there are decreases and yarn overs in the stitch pattern). You need to attach a new yarn to shape the back neck for a step-by-step bind-off. On the contrary, it is not necessary to shape a back neck with a Fully-fashioned shoulder, and the remaining stitches for it can be bound off in a straight line in one row. The deepening of the back neck is transferred to the front shoulders and is shaped with a very simple technique. The back shoulder slopes, shaped with decreases by some stitches away from the edges, shape a inextensible "sewing tape," providing stability to the shoulders and preventing them from stretching out. Due to the difference in gauge, the resulting "sewing tape" eases in the back shoulder seam, and thus a natural back shoulder darts are obtained. We bind off the front shoulders in one row. This binding-off is not affected by the complexity of the stitch pattern or the use of yarns of different colors. The Fully-fashioned shoulder adorns even the most basic knit garments, providing a polish, a twist, and a sense of sartorial tailoring. At the same time, it does not become a design element that attracts all the attention. A Fully-fashioned shoulder creates a natural shoulder slope in a finished project almost automatically. Its value equals half of the back shoulder slope (approximately 15-20 degrees). We obtain the exact reference points for further construction of the sleeve cap (suitable only for anatomical knitting, when asymmetrical armholes and sleeve caps are used). For further analysis of the Fully-fashioned shoulder, we need to agree on some definitions. The back ease gathers the pre-added width of the upper back, which provides an extra volume of the garment and freedom of movement. It is rarely used in knitting due to the stretchability of knit fabric. Ideal knitting gauge is a standard 3:4 stitch height and width ratio (3 stitches = 4 rows), for example, 20 sts and 26.67 rows = 10x10 cm. "Bottom line" of the back neckline – the lower part of the back neckline, which we bind off in one row. The standard step of decreases is to decrease one stitch at the beginning and at the end in every row for the back shoulder slope. When constructing a Fully-fashioned shoulder, the basic pattern and measurements are not changed. Here, only the shoulder part is transferred from the back to the front: we cut off a part of the back shoulder, turn over cut off trapezium by about 216.87 ° (180 ° + 36.87 °), and attach it to the front shoulder. As you will see further, this 36.87 ° is nothing more than an acute angle of the Pythagorean triangle. *** Преимущества японского плеча Японское плечо мы используем для вязаных изделий с втачным рукавом, но позже я приспособилась применять его и в изделиях со спущенным плечом. Японское плечо я бы назвала "палочкой-выручалочкой". Интересно, поверите ли вы мне, если скажу, что японское плечо гораздо проще обычного, где линия плечевого шва идет посередине плеча? И что для большинства случаев только японское плечо возможно? Конечно, не поверите. А я вам попробую доказать. Надо только понять суть и немного вспомнить геометрию. Я перечислю некоторые преимущества японского плеча, а далее будем разбирать все более подробно. В полосатых рисунках, где используется больше, чем одна нить, сложно выполнить сравнительно небольшой скос обычного плеча и сформировать углубление горловины спинки укороченными рядами или пошаговым закрытием: нужен перенос нити другого цвета на сравнительно большие расстояния. В японском плече нити другого цвета на спинке переносятся на небольшие расстояния, а на плечах переда такой вопрос даже и не существует. В сложных узорах небольшой скос плеча и углубление горловины спинки иногда непросто сформировать укороченными рядами (искажается рисунок, можно потерять нужное количество петель, если в узоре присутствуют убавления и накиды), а для пошагового закрытия нужно присоединять новую нить для углубления горловины на спинке. При японском плече, наоборот, не надо формировать углубление для горловины спинки, и оставшиеся петли можно закрыть по прямой за один ряд. Углубление горловины спинки переносится на плечевую зону переда и формируется очень простым приемом. Скос плеча на спинке, выполнен убавлениями, отдаленными от краев, формирует нерастяжимую "тесьму", обеспечивая стабильность плеча и препятствуя растяжению. Из-за разницы в плотности, образовавшаяся "тесьма" и краев скосов присбаривает спинку, и таким образом получается натуральная папоротка. Плечи переда закрываются по прямой, за один ряд. На такое закрытие не влияет ни сложность узора, ни использование нитей разных цветов. Японское плечо украшает даже самое обычное вязаное базовое изделие, придает ему лоска, изюминку и чувство ухоженности. При этом не становится той деталью дизайна, которое собирает на себя все внимание. В готовом изделии с японским плечом натуральный скос плеча образуется почти автоматически, и его величина равна половине скоса плеча на спинке (примерно 15-20 градусов). Получаются очень точные точки отсчета для дальнейшего построения оката рукава (подходит только для анатомического вязания, где используются асимметричные проймы и окаты). Для дальнейшего разбора японского плеча нам нужно договориться о некоторых определениях. Папоротка – это место сбора (припосадка) заранее заложенной дополнительной ширины на спинке, которая обеспечивает объем изделия в его верхней части для свободы движения. В вязании используется редко по причине растяжимости трикотажа. Идеальная плотность вязания соответствует стандартному соотношению ширины и высоты петли как 3:4 (3 петли = 4 ряда), например. 20 п. и 26,67 р. = 10x10 см. "Донышко" горловины спинки – нижняя часть выреза горловины спинки, которая закрывается по прямой за один ряд. Стандартный шаг убавлений – когда для скоса плеча мы убавляем по одной петле в начале и конце ряда в каждом ряду. При конструировании японского плеча базовая выкройка и измерения не меняются. Здесь только делается перенос зоны плеча со спинки на перед: часть плеча спинки отрезается, отрезанная трапеция переворачивается на примерно 216,87° (180°+36,87°) и прикрепляется к плечу переда. Как вы далее увидите, эти 36,87° – ничто иное, как острый угол Пифагорского треугольника. In some online tutorials on the Fully-fashioned shoulder, you may find that a triangle is "cut off" from the back (not a trapezium. The difference is marked with a blue line in the diagram below). This maneuver leaves us with the need to shape a back neckline (marked in red in the diagram below). We need to attach a new yarn here to knit such a small piece on the opposite side of the back neck. Although everything in such a pattern is correct, why complicate our life when, choosing a Fully-fashioned shoulder, we are trying to make our life easier. We can transfer the back neck shaping to the front shoulders and free ourselves from attaching a new yarn. And in the pictures next to the diagram, you can clearly see where the back neck shaping comes from. *** В некоторых онлайн-уроках о японском плече вы можете найти, что со спинки "отрезается" треугольник (не трапеция. Разница отмечена голубой линией на схеме ниже). Такой маневр оставляет нам потребность выполнять углубление горловины на спинке (отмечено красным на схеме ниже). Для вязания такого маленького кусочка здесь нам потребуется присоединить новую нить на противоположной стороне горловины. Хоть все в такой выкройке правильно, зачем осложнять себе жизнь, когда, выбирая японское плечо, мы пытаемся эту жизнь себе облегчить, и можем выполнить углубление горловины спинки на детали переда неотрывной нитью. И на фотографиях рядом со схемой очень хорошо видно, откуда появляется углубление горловины спинки. Pythagorean triangle. Треугольник Пифагора This is not the first time I have said that Pythagoras was a passionate knitter. Where did he get the idea for the classic 3:4:5 triangle, if not from knitting? As we all know, a stitch is a rectangle made up of two traditional Pythagorean triangles. The width and height of the stitch of the Stockinette correspond to 3:4, like the catheti of the Pythagorean triangle. *** Я уже не первый раз твержу, что Пифагор был страстным вязальщиком. Откуда у него появилась идея о классическом треугольнике 3:4:5, если не из вязания. Как мы все знаем, петля – это прямоугольник, который составлен из двух классических треугольников Пифагора, потому, что ширина и высота петли лицевой глади соответствует 3:4, как и катеты треугольника Пифагора. You need to understand how to use the Pythagorean triangle to build the Fully-fashioned shoulder. Suppose our knitting gauge more or less corresponds to the ratio of the stitch and the row as 3:4. Decreasing one stitch for the shoulder slope at the beginning and at the end of each row (or 2 sts in double decreases in each RS row, as is more accepted), we get a hypotenuse with a length that is 5, and the angle of such a triangle is 36.87 degrees. As you will see later, this angle splits into 2 halves when folded, and from here, we get the shoulders angle, which is approximately 18.5°. The natural slope of the shoulders for each individual person is different and depends on the shoulders anatomy, height, gender, constitution. The average shoulder angle for men is 18-24°, for women - 15-21°. The permissible error in knitted garments is about 5-8°. The diagram below shows how the back shoulder slope will look with different stitch patterns and knitting gauges if you decrease or bind off one stitch in every row at each edge. We are interested in the lower one acute angle – between cathetus c and hypotenuse a, or more precisely, we are interested in half of this angle. *** Теперь нужно понять, как использовать треугольник Пифагора для построения японского плеча. И если у нас плотность вязания более-менее соответствует соотношению петли и ряда как 3:4, убавляя по одной петле для скоса плеча в начале и в конце каждого ряда (или по 2 петли двойными убавлениями в каждом 2-м (в каждом лицевом) ряду, как больше принято), мы получим гипотенузу с длиной, которая равна 5, а угол наклона – 36,87 градуса. Этот угол наклона, как вы далее увидите, согнутым делится на 2 половинки, и отсюда мы получаем наклон плеч, который равен примерно 18,5°. Родной наклон плеч у каждого индивидуального человека отличается и зависит от формы плеч, роста, пола, конституции. Средняя величина угла наклона плеча у мужчин составляет 18-24°, у женщин — 15-21°. Допустимая погрешность в вязаном изделии – около 5-8°. На рисунках ниже представлено, как будет выглядеть наклон плеч спинки при разных узорах и плотностях вязания, если убавлять/закрывать по одной петле в каждом ряду у каждого края. Нас интересующий острый угол – нижний, между катетом с и гипотенузой a, а если еще точнее – нас интересует половина этого угла. Any other gauge other than ideal (3:4; upper triangle on the left) will end up with a slightly different shoulder slope, for example, the usual dense Stockinette (2:3; lower triangle on the left) or some simple stitch patterns, only somewhat different from the ideal density. In such garments, you can ignore the changed angle of back shoulders, and the resulting angle in degrees and the hypotenuse а length can be taken as starting points for further calculations. Suppose you are interested in accurately calculating the slope angle, if you will decrease with a standard step, and you already have the knitting gauge in the swatch (for example, in the sample presented below, the knitting gauge is 24 sts and 34 rows in 10x10 cm). In that case, the technique will be as follows. Catheti c will always be 10, catheti b will be equal to the height of the number of rows knitted, equivalent to the number of stitches of 10 cm (in this case, we knit 24 rows because we have 24 stitches in 10 cm in our sample). The hypotenuse a and the slope angle we need are calculated according to these formulas. Having all three sides of the triangle, we can easily calculate the angle we need using online calculators. *** Любая другая плотность, отличающаяся от идеальной (3:4; верхний треугольник слева), даст вам в итоге немного другой наклон плеча, например, обычная плотная лицевая гладь (2:3; нижний треугольник слева) или какие-либо незамысловатые узоры, только немного отличающееся от идеальной плотности. В таких изделиях можно не обращать внимание на изменившийся угол наклона плеч спинки, и получившийся угол наклона в градусах и длину гипотенузы а принять как отправные точки для дальнейших расчетов. Если вас интересует, как точно посчитать угол наклона, если вы будете убавлять стандартным шагом, и у вас уже имеется плотность вязания в образце (например, в ниже представленном образце плотность вязания – 24 п. и 34 р. в 10х10 см), методика будет такова. Катет c всегда будет равен 10, катет b будет равен высоте количеству провязанных рядов, который равен количеству петель в 10 см (в этом случае провязываем 24 ряда, потому, что у нас в образце 24 п. в 10 см). Гипотенуза а и нужный нам угол наклона рассчитывается по данным формулам. Имея все три стороны треугольника, нужный нам угол можно очень легко посчитать и в онлайн калькуляторах. Extremes such as Garter stitch (1:2; upper triangle on the right), different ribs or patterns using double yarn overs, or chunky knitting needles to lengthen the stitches (1:1; lower triangle on the right) will give you a relatively large margin of error. In the diagram above, you will find examples of such "non-standard" gauges, and the angle we are interested in ends up being 45° or 26.6°. You need to adjust the standard step of decreases for such extremes to obtain the desired slope. The decrease step for the back shoulder slope can be adjusted by decreasing more stitches more frequent or fewer stitches less often. But in knitting, where we work with stretchable knit fabric, and we don't want to complicate our life, decreasing one stitch at each end of the row every row will be the constant that will not let you down in any case. I gave all these formulas and explanations only to understand how the calculations are made, or you still want to find very accurate data for yourself. The slope for the Fully-fashioned shoulder on the back piece is shaped by decreasing one stitch at the beginning and end of each row (or two stitches in double decreases in every 2nd (most often in every RS) row). *** Такие крайности, как платочная вязка (1:2; верхний треугольник справа), разные резинки или узоры, где используются двойные растянутые накиды или более толстые спицы для удлинения петель (1:1; нижний треугольник справа) даст вам достаточно большую погрешность, и нас интересующий угол в итоге получается 45° или 26,6°. Для таких крайностей нужна корректировка стандартного шага убавлений для получения желаемого наклона. Шаг убавлений для скоса плеча на спинке можно скорректоривать, убавляя больше и чаще или меньше и реже. Но в вязании, где мы работаем с растяжимым трикотажем, и не хотим себе усложнять жизнь, убавление по одной петле в обоих концах ряда в каждом ряду будет той константой, которая вас не подведет при любом раскладе. Все эти формулы и объяснение я дала лишь для того, чтобы вы поняли, каким образом делаются расчеты или вы все же хотите найти для себя очень точные данные. Скос японского плеча на спинке формируется, убавляя по одной петле в начале и конце каждого ряда (или по две петли двойными убавлениями в каждом 2-м (чаще всего – в каждом лицевом) ряду). Mixing apples and oranges? Yes, you can! Смешивать яблоки и апельсины? Да, можно! In school, we are taught that apples (stitches) and oranges (rows) are different things, and you cannot put them together. But in this case, the number of stitches will tell us the number of rows, and at one point, we will place an equal sign between them. Now it's time to tackle a specific example and knit the back. For instance, we take size L and agree that our knitting gauge is ideal – 3:4; 20 sts and 26.67 rows = 10x10 cm. Also, for further work, we need the following measurements (individual or from a basic pattern) and some data: x – the height of the upper back (between the seventh cervical vertebra and the beginning of the armholes) in cm and in rows (the length in cm is calculated by the knitting gauge) (25 cm; 68 rows); z – "bottom line" of the back neckline in cm and sts. Here we take into account that we will obtain part of the back neckline width from the front shoulders. I can tell right away that z=2/5y (in our example, the width of the neckline band is not taken into account. If the band is present, it adjusts the width z in its favor) (15 cm; 30 rows); y – the width of the upper back in sts (38 cm; 78 sts; added 2 selvage sts); bah – back armhole height from the basic pattern before correction in cm and in rows (22 cm, 60 rows); fah – front armhole height from the basic pattern before correction in cm and in rows; (20 cm, 54 rows). *** В школе нас учат, что яблоки (петли) и апельсины (ряды) – это разные вещи, и сложить их в одно целое нельзя. Но в этом случае количество петель нам подскажет количество рядов, и в один момент между ними мы поставим знак равенства. Теперь пора взяться за конкретный пример и связать спинку. Для примера мы возьмем размер L, и договоримся, что плотность вязания у нас идеальная – 3:4; 20 п. и 26,67 р. = 10x10 см. Также для дальнейшей работы нам понадобятся следующие измерения (индивидуальные или из базовой выкройки) и некоторые данные: x – высота лифа спинки (между седьмым шейным позвонком и началом пройм) в см и в рядах (длину в см рассчитываем по плотности вязания) (25 см; 68 р.); z – ширина "донышка" горловины спинки в см и петлях. Здесь учитывается то, что часть ширины горловины спинки мы позаимствуем из плеч переда. Могу сразу сказать, что z=2/5y (в нашем разбираемом примере не учитывается ширина бейки. Если бейка намечается, она корректирует ширину z в ее пользу). (15 см; 30 п.); y – ширина верхней части спинки в петлях (38 см; 78 п.; добавлены кромочные петли); впс – высота проймы спинки из базовой выкройки до коррекции в см и в рядах (22 см, 60 р.); впп – высота проймы переда из базовой выкройки до коррекции в см и в рядах; (20 см, 54 р.). Based on these data and measurements, we will calculate the rest. Shoulder width c in its horizontal projection: c=(y-z)/2; c=(78-30)/2; c=24. For the shoulder slope, we will decrease 24 sts. Your remaining number of stitches for the shoulder slope should be a multiple of the number and step of decreases you need to make. We will decrease in the standard way, which means we will decrease 24 stitches in 24 rows, and then c (sts)=b (rows)=24. As you can see, apples=oranges. Our further equation looks like this: w=x-b; w=68-24; w=44. (Warning: if you chose a different step of decreasing for back shoulder slopes than one stitch in each row, then c will not be equal b, and you will have to calculate in how many rows you will decrease the required number of stitches for the shoulder slopes.) w – the height of the back armhole up to the beginning of the shoulder slopes in rows (44 rows, 16.5 cm). We knit 44 rows of armholes; from here, we start to decrease for the back shoulder slopes; we make 24 decreases in each row at each shoulder; the height of the slope is 24 rows; at the very end, we bind off 30 stitches for the "bottom line" of the back neckline. It's as simple as that. We obtained new data from here that we need to modify the front shoulders. And, as you might have guessed, the number of apples (stitches to be decreased) is equal to the number of oranges (in how many rows the required number of stitches has been decreased), although their geometric length is different. b – the height of the back shoulder slopes in rows, in other words, in how many rows we completed the shoulder slope; further, we recalculate in cm by the knitting gauge (24 rows, 9 cm); c – horizontal projection of the shoulder width or the number of stitches decreased in the back shoulder slope (24 sts, 12 cm). It remains to calculate the length of the shoulder slope using the Pythagorean theorem for a right triangle. a is the length of the shoulder slope in cm (15 cm). *** Опираясь на эти данные и измерения, далее рассчитаем остальное. Горизонтальная проекция ширины плеча: c=(y-z)/2; c=(78-30)/2; c=24. Для скоса плеча будем убавлять 24 п. Желательно, чтобы ваше остаточное число петель для скоса плеча было кратным выбранному вами количеству и шагу убавлений. Мы будем убавлять стандартным способом, значит, 24 петли мы убавим за 24 ряда, и тогда c (в петлях)=b (в рядах)=24. Как видите, яблоки = апельсины. Наше дальнейшее уравнение выглядит так: w=x-b; w=68-24; w=44. (Предупреждение: если вы выбрали другой шаг убавлений для скосов плеч спинки, чем по одной петле в каждом ряду, тогда c не будет равна b, и вам придется самим посчитать, за сколько рядов вы убавите нужное количество петель для скосов плеч.) w – высота проймы спинки до начала скосов плеч в рядах (44 р., 16,5 см). Провязав 44 ряда пройм, мы начинаем скос плеч спинки; выполняем по 24 убавления в каждом ряду у каждого плеча; получаем высоту скоса в 24 р.; в самом конце закрываем 30 петель для "донышка" горловины спинки. Просто, как две копейки. Отсюда у нас появляются новые данные, которые нам понадобятся для модификации плеч переда. И, как вы уже догадались, количество яблок (убавляемых петель) равно количеству апельсин (за сколько рядов убавили нужное количество петель), хотя геометрическая их длина отличается. b – высота скосов плеч спинки в рядах, другими словами, за сколько рядов мы выполнили скос плеча; далее по плотности пересчитываем в см (24 р., 9 см); c – горизонтальная проекция ширины плеча или количество убавляемых петель в скосе плеча спинки (24 п. 12 см). Осталось расчитать геометрическую длину скоса плеча по пифагорской теореме прямого треугольника. a – длина наклонной плеча в см (15 см). The arrangement of decreases. Расположение убавлений To your (and my) great happiness, let's leave geometry for a while and talk about knitting. Everything is clear and correct as long as we cut out our patterns from paper and count everything according to the formulas. Knitting doesn't always heed the given measurements. Depending on how far from the edge you place your decreases, you will or may not have an inelastic edge that works as a seam tape or interfacing fabric that reinforces the shoulder line or even creates back ease. The further from the edge you place your decreases, the stronger your shoulder line will be. But for various reasons, it is not always possible to choose the most durable option – it all depends on the stitch pattern you choose. Then the lack of reinforcement must be compensated for by a tighter seam, bound-off stitches of the front shoulders, or a gathering for the back ease. Let's take a look at how it all looks. 1. Decreases for the back shoulder slopes can be located at the very edge of the back shoulders, knitting together the first two and the last two stitches of every row, including the selvage stitches in every single decrease. Thus, the elasticity of the shoulder line on the back will correspond to the entire knit fabric and will not have any resistance. The resistance of the shoulder line here will be provided by tightly bound-off front shoulder stitches and a tight seam. We can create back ease here and gather the back shoulder line a little, making it a little longer than the front shoulder line in advance, but only until the difference in length begins to deform the plane. The back ease can be created with pre-provided shoulder darts or simply rely on the stretchability of the knit fabric. This type of decrease does not change your preliminary calculations. *** К вашему (и моему) великому счастью, на время оставим геометрию и поговорим о вязании. Все очень понятно и правильно, пока мы вырезаем выкройки из бумаги и считаем все по формулам. Но вязание не всегда прислушивается к заданным измерениям. В зависимости от того, как далеко от края вы расположите свои убавления, у вас сформируется или не сформируется неэластичный край, выполняющий функцию долевика, флизелина, укрепляющий линию плеч или даже создающий папоротку. Чем дальше от края размещены ваши убавления, тем прочнее будет ваша линия плеч. Но по разным причинам не всегда удается выбрать самый прочный вариант (все зависит от выбранного вами узора), и тогда отсутствие прочности компенсируется более крепким швом, закрытыми петлями плеч переда или припосадкой для папоротки. Давайте, рассмотрим, как это все выглядит. 1. Убавления для скосов плеч спинки можно расположить на самом краю детали спинки, провязывая вместе две первые и две последние петли каждого ряда, в убавление включая кромочные петли. Таким образом эластичность плечевой линии на спинке будет соответствовать всему полотну и не будет иметь сопротивления. Прочность линии плеч здесь обеспечит туго закрытые петли плеч переда и твердый шов. Мы можем здесь создать папоротку и немного присборить линию плеча спинки, сделав ее немного длиннее, чем линия плеча переда, но лишь до тех пор, пока разница в длине не начнет деформировать плоскость. Папоротку можно создать заранее предусмотренными плечевыми вытачками или просто положиться на растяжимость трикотажа. Такое расположение убавлений не меняет ваших предварительных расчетов. 2. Decreases for back shoulder slopes can be positioned immediately after and before the selvage stitch. Thus, the responsibility for the strength of the edge rests only on a thin chain of diagonally running selvage stitches. The selvage stitches in the diagonals stretch significantly and become longer than in the verticals, creating only slight resistance. For this reason, the seam itself and the bound-off stitches of the front shoulders remain responsible for the shoulder line reinforcement. This decrease method can be chosen in complex stitch patterns and only slightly changes your preliminary calculations. *** 2. Убавления для скосов плеч спинки можно расположить непосредственно после и до кромочной петли. Таким образом ответственность за прочность края ложится лишь на тонкую цепочку по диагонали идущих кромочных петель. Кромочные петли в диагоналях значительно вытягиваются и становятся длиннее, чем в вертикалях, создают лишь небольшое сопротивление. По этой причине ответственность за прочность плечевой линии по-прежнему несет сам шов и закрытые петли плеч переда. Такой способ расположения убавлений скосов плеч можно выбирать в сложных узорах и он почти не меняет ваших предварительных расчетов. 3. If your project is not restricted by the complexity of the stitch pattern, then you can already take all the advantages that the Fully-fashioned shoulder gives us and place the decreases 2-3 stitches away from the edges. When the decreases are located 2, 3, or even more stitches from the edge (including the selvage stitch), these outermost stitches lie diagonally during the decreases. As we know from geometry, the diagonal (or the hypotenuse) of a triangle is always longer than its straight sides (catheti). Suppose, in the previous case, we could effortlessly stretch one single selvage stitch to frame the diagonal. In that case, the more stitches are left before and after the decrease, the more it becomes impossible to stretch them to frame a diagonal until they fully correspond to the height of the stitches of the main piece. And such an edge begins to pucker the shoulders. On the one hand, such decreases make back ease, which is one of the advantages of the Fully-fashioned shoulder. On the other hand, such a tightening deviates from the initial measurements of the basic pattern, and the shoulder line may become too short. To compensate for the shortening of the shoulder line, you must remember to pre-add some width for the upper part of the back and then slightly adjust the width of the sleeve caps. *** 3. Если ваше изделие не ограничено сложностью узора, тут уже можно воспользоваться всеми преимуществами, которое нам дает японское плечо, и расположить убавления за 2-3 петли от краев. Когда убавления располагаются за 2, 3 а то и больше петель от края (включая кромочную петлю), эти крайние петли во время убавлений ложатся по диагонали. Диагональ (или гипотенуза треугольника), как мы знаем из геометрии, всегда длиннее своих прямых сторон (катетов). Если в предыдущем случае мы смогли без усилий растянуть одну единственную кромочную петлю для обрамления диагонали, то, чем больше оставлено крайних петель до и после убавлений, тем их растяжение для образования диагонали становится все больше невозможным вплоть до полного их соответствия высоте петель основного полотна. И такой край начинает стягивать плечевые зоны. С одной стороны, стягивание образует папоротку, и это одно из преимуществ японского плеча. С другой стороны, такое стягивание отклоняется от измерений базовой выкройки, и линия плеч может стать слишком короткой. Чтобы компенсировать стягивание и укорачивание плечевой линии, нужно не забыть заранее заложить дополнительную ширину для верхней части спинки и далее немного скорректировать ширину окатов рукавов. The front and the transferred trapezium. Перед и перенесенная трапеция Let's get back to geometry because we still need to deal with the front shoulders. Before that, we shaped the back shoulder slope and obtained some necessary data for the construction of the front shoulders. As you remember from the beginning, we cut off the trapezium from the back shoulder (see diagram below) and turned it over by 216.87°. Let's disassemble this trapezium into its component parts, where we already have some data calculated, and all that remains is to insert it: a – the length of the back shoulder slope (in cm on the back and then in stitches on the front shoulder, calculated by the gauge; 15 cm, 30 sts, or 32 sts, if you add selvage stitches); b – the height of the back shoulder slope (in rows) (9 cm, 24 rows); c – horizontal projection of the back shoulder slope (12 cm, 24 sts); blue dotted line – imaginary shoulder line. Above it, a part of the trapezium belongs to the back; below it, to the front. And just the fold along this line divides the angle of inclination of ~36.87° into two halves of ~18.5° each. The length of the shoulder is obtained automatically in Fully-fashioned shoulder; d (green dotted line) forms a new triangle. The length of d is equal to the width of the front shoulder before the beginning of knitting of the transferred trapezium (or horizontal projection of the cathetus c) (in cm and in sts). If c (the hypotenuse of the new triangle) = 12 cm, and the acute angle of the triangle inclination is equal to half the angle of the back shoulder slope (18.5 °), and we also have a right angle of 90 °, then the long straight cathetus of such a triangle will be 11.5 cm (use online calculators). As you can see, the difference is insignificant, but it is imperative to pay attention to it. It will always be less than the anatomical length of the shoulder (11.5 cm, 25 sts, taking into account the selvage sts); gray dotted lines – comparison of the front shoulder width d with the side of the trapezium a. Considering that d=11.5 cm, and a=15 cm, we find out that in the Fully-fashioned shoulder trapezium, we need to add 3.5 cm or increase 7 stitches. We divide the increases into two parts: increases (1) – the shaping of the back neckline (in stitches, most often 1-2 sts). We make these increases in the last rows of the trapezium. increases (2) – increases to compensate for the difference in length between d and a (in stitches, the remaining 5-6 sts of 7). Distribute the increases at even steps over the entire height of b. As a result, we finish the front shoulder with 32 stitches on needles. They can be bound off tightly if we need to reinforce the shoulder seam or left as live stitches if you already have a resistant "sewing tape" on the back shoulder slopes. (If you knit your project according to anatomical knitting principles, you need to add Fully-fashioned shoulder increases to the increases that equalize the upper front and back width.) *** Вернемся к геометрии, ведь нам еще нужно разобраться с плечами переда. До этого мы сформировали скос плеча на спинке и получили некоторые нужные данные для конструирования плеч переда. Как вы помните из начала, мы срезали с плеча спинки трапецию (см. схему ниже) и перевернули ее на 216,87°. Давайте разберем эту трапецию на составляющие части, где некоторые данные у нас уже есть рассчитаны и остается лишь вставить их: a – длина наклонной скоса плеча на спинке (в см на спинке и далее в петлях на плече переда, рассчитывается по плотности вязания; 15 см, 30 п., или 32 п., если добавить кромочные п.); b – высота скоса плеча на спинке (в рядах) (9 см, 24 р.); c – горизонтальная проекция скоса плеча на спинке (12 см, 24 п.); голубой пунктир – мнимая линия плеча. Поверх нее часть трапеции принадлежит спинке, внизу ее часть трапеции принадлежит переду. И как раз сгиб по этой линии делит угол наклона в ~36,87° на две половинки по ~18,5°. В японском плече длина плеча получается автоматически; d (зеленый пунктир) образует новый треугольник. Длина d равна ширине плеча переда до начала вязания перенесенной трапеции (или горизонтальная проекция катета c) (в см и в петлях). Если c (гипотенуза нового треугольника)=12 см, а острый угол наклона треугольника приравнивается половине угла скоса плеча на спинке (18,5°), а также у нас имеется прямой угол в 90° то прямой длинный катет такого треугольника будет 11,5 см (воспользуйтесь онлайн калькуляторами). Разница, как видите, незначительная, но обратить на нее внимание нужно обязательно. Она всегда будет меньше анатомической длины плеча (11,5 см, 25 п., учитывая кромочные п.); серый пунктир – сравнение горизонтальной проекции ширины плеча переда d со стороной трапеции а. Учитывая, что d=11,5 см, а а=15 см, мы получаем, что в трапеции японского плеча нам нужно прибавить 3,5 см, или 7 петель. Прибавления делим на две части: прибавления (1) – формирование углубления горловины на спинке (в петлях, чаще всего 1-2 петли). Прибавления выполняем в последних рядах трапеции. прибавления (2) – прибавления для компенсации разницы длины между d и a (в петлях, остальные 5-6 петель из 7). Прибавления распределяем ровными промежутками по всей высоте b. В итоге мы заканчиваем плечо переда, имея на спицах 32 петли. Их можно туго закрыть, если нам нужно укрепление плечевого шва, или оставить открытыми, если у вас уже образовалась неэластичная тесьма на скосах плеч спинки. (Если вы вяжете свое изделие по анатомическим принципам, к прибавлениям для японского плеча по высоте b нужно добавить те прибавления, которые выравнивают ширину лифа переда и спинки.) Here I want to draw your attention to one more point. Look at lines a and c, laid out horizontally at the bottom of the same diagram on their present scale. Line a is longer than line c by 1/4, or 25%. Line a is about a third longer than line d (15 cm/11,5 cm=1.3). To find out how many stitches to add to the Fully-fashioned shoulder trapezium and not to clutter yourself with such frightening calculations, you need to multiply the number of front shoulder stitches before modifying by 1.25-1.3 and divide them between the back neck shaping and the trapezium increasing. The last question remains, at what height to start to shape the trapezium in the front armholes. In a design with a Fully-fashioned shoulder, the front armhole will be much higher than the back armhole (see pictures below). Here we need the data that we took from the basic pattern at the very beginning and the data we calculated along the way: bah – the back armhole height from the basic pattern before correction in cm and in rows (22 cm, 60 rows); fah – the front armhole height from the basic pattern before correction in cm and in rows; (20 cm, 54 rows); b – the back shoulder slope height in rows (9 cm, 24 rows); w – the height of the back armhole to the beginning of the shoulder slope in the rows (16.5 cm, 44 rows). bah+ fah-b-w = 60+54-24-44=46 Having knitted 46 rows of the front armhole, you will begin to knit the transferred trapezium. (If you knit your project according to anatomical knitting principles, you need to add Fully-fashioned shoulder increases to the increases that equalize the upper front and back width. In that case, your increases begin much earlier (lower).) *** Здесь я хочу обратить внимание на еще один момент. Посмотрите на линии а и c, которые разложены внизу той же схемы горизонтально в своем настоящем масштабе. Линия а длиннее линии c на 1/4, или на 25%. Линия a длиннее линии d примерно на треть (15 см/11,5 см=1,3). Чтобы узнать, сколько петель прибавить в трапеции японского плеча, и не загромождать себя такими пугающими расчетами, нужно количество петель плеча переда до манипуляцуй умножить на 1,25-1,3 и разделить между формированием горловины спинки и расширением плеча. Остался последний вопрос, на какой высоте начать прибавления в трапеции в проймах переда, ведь в этой конструкции пройма переда будет значительно выше проймы спинки (см. картинки ниже). Здесь нам понадобятся данные, которые мы взяли из базовой выкройки в самом начале и те, которые рассчитали по ходу: впс – высота проймы спинки из базовой выкройки до коррекции в см и в рядах (22 см, 60 р.); впп – высота проймы переда из базовой выкройки до коррекции в см и в рядах; (20 см, 54 р.); b – высота скоса плеча на спинке (в рядах) (9 см, 24 р.); w – высота проймы спинки до начала скосов плеч в рядах (16,5 см, 44 р.). впс+впп-b-w=60+54-24-44=46 Провязав 46 рядов проймы переда вы начнете вязать перенесенную трапецию. (Если вы вяжете свое изделие по анатомическим принципам и к прибавлениям для японского плеча по высоте b добавляете еще и те прибавления, которые выравнивают ширину лифа переда и спинки, и тогда прибавления начнутся гораздо раньше (ниже).) Shoulder seaming. Сшивание плеча The sewing of the Fully-fashioned shoulder is not subject to the principles of sewing knit projects, where we are accustomed to sewing stitch to stitch, or selvage to selvage, or at least having some sewing step set. Here, the joining of the pieces should be viewed as pieces of fabric that have the exact geometric length. The edges can be different: diagonal edging or decreased stitches at the very edge on the back shoulders; bound-off or live stitches on the front shoulders. You need to sew with a Kitchener stitch if you have left the front stitches live; otherwise, you use a Mattress stitch. If you do not have a reinforcing "sewing tape" on the back shoulder slopes, you may consider making a slight gathering of the back shoulders for some ease, taking care in advance that the back shoulder slopes are slightly longer than the shoulders in front. The main thing is that the seam should be strong and tight (after all, the weight of the project will hang on it) and flat (no puckering). *** Сшивание японского плеча не подлежит принципам сшивания вязаных изделий, где мы привыкли сшивать петлю к петле, или кромочную к кромочной, или же иметь хоть какой-то ритм. Здесь на соединение полотен нужно смотреть как на отрезки ткани, имеющие одинаковую геометрическую длину. Края могут быть разные: с диагональными кромочными или закрытыми петлями на самом краю на плечах спинки; закрытые или открытые петли на плечах переда. Сшивать нужно матрасным или трикотажным швом, если петли переда оставили открытыми. Если у вас не образовалась стягивающая тесьма на скосах плеч спинки, может вы задумаете сделать небольшую припосадку плеч спинки, заранее позаботившись о том, чтобы скос плеч на спинке был чуть более длинным, чем плечи переда. Главное, чтобы шов был прочным (ведь на нем будет висеть собственный вес изделия) и плоским (нераздутым). Fully-fashioned drop shoulder. Спущенное японское плечо I'm not going to torment you further with formulas and diagrams; I will leave this dirty work for myself. It would be necessary to re-draw all the diagrams and formulas to illustrate how we construct the Fully-fashioned drop shoulder. There would be twice as many of them here because, in such a shoulder, there are two slope speeds: in the area of the anatomical shoulder, it is lower, and in the area of the drop shoulder, greater. I will just show some samples where you will clearly see that it is also possible to drop the Fully-fashioned shoulder. And even turn it over! *** Я не собираюсь дальше вас мучить формулами и схемами, оставлю эту грязную работу для себя. Для расчетов спущенного японского плеча пришлось бы заново рисовать все схемы и формулы, а их тут было бы в два раза больше, потому, что в таком плече есть две скорости наклона: в зоне анатомического плеча меньшая, а в зоне спущенного плеча – большая. Я лишь покажу некоторые примеры, где вы наглядно увидите, что спустить японское плечо также возможно. И даже перевернуть его! You probably think that I have not proved the simplicity of the structure of the Fully-fashioned shoulder. But if, nevertheless, you take the risk and knit it at least a couple of times (it doesn't matter, according to the ready-made pattern, or construct it yourself), I will have to beg you to come back. There is something mysteriously-geometrically-Pythagorean in it... *** Вам, наверное, кажется, что я не доказала простоты строения японского плеча. Но если все же вы рискнете и хоть пару раз его свяжете (неважно, по описанию, или сами построите), мне придется вас уговаривать вернуться обратно. Есть в нем что-то загадочно-геометрически-пифагорское...
- Fjord and its secrets. Fjord и его секреты
This bulky yarn jumper breaks all the basic principles of cable knitting. The regular repetitiveness of cables continues only to the armholes. Then their rhythm and monotony, which we are used to seeing in cable sweaters, is interrupted by small patches of the smooth purl surface and another simplified cable pattern. So the design becomes more impressive – we lose its direct purpose to be only "foraging," "hiking," "fishing," or "skiing" sweater. In the dispute between the three stitch patterns and using the modular origami technique, constructive elements shape the drop shoulder and improve the fit. So the bust darts (side horizontal darts and shoulder darts), shoulder slopes, and the increase of the armholes use a combination of short rows, simple cables, and different widths of the purl surface wedges. Moreover, those elements shift from their usual place at the edges to the middle of the piece. A narrow, smooth surface between armhole cables and sleeve cables makes the look lighter and visually reduces the volume of the dropped shoulder. You can already purchase the Fjord jumper pattern in my shop. *** В этом джемпере из толстой пряжи нарушены все базовые принципы вязания узором из кос. Установленный ритм аранов продолжается лишь до пройм, а далее их ритмичность и монотонность, которые мы привыкли видеть в изделиях с косами, прерывается небольшими островками изнаночной глади и другим упрощенным узором. Так джемпер становится более интересным – теряется его прямое предназначение быть лишь "грибным", "походным", "рыбацким" или "лыжным". В споре между тремя узорами, используя технику модульного оригами, размещены конструктивные элементы, формирующие выкройку спущенного плеча и улучшающие посадку. Вытачки для груди (боковые горизонтальные и вертикальные, уходящие в плечо), скосы плеч, а также расширение пройм выполнены комбинацией укороченных рядов, узора упрощенных косичек и разной шириной клиньев изнаночной глади, которые из привычного их места у краев выкройки смещены в середину полотна. Небольшое пространство глади между косами пройм и рукавов облегчает вид и визуально уменьшает объем спущенного плеча. Описание джемпера Fjord вы уже можете приобрести в моем магазинчике. It all started in the spring of 2019. At that time, I was working on a summer collection, and more specifically, the Stratus design. Initially, the Stratus looked very different. A two-tone striped pattern in sideways knitting where expanding wedges on the drop shoulder shaped a sleeve. The widening of the wedges is here done with short rows. Such expansion, if not done at a certain angle, would form a fold at the underarms. To avoid this problem, I made darts with increases on one side of the piece and decreases on the opposite. I can't remember why I didn't like this version of the Stratus. Then I picked up another yarn, replaced the sideways knitting with the usual one from bottom to top, replaced the increases with short rows and short rows with increases. But the very idea of such a few-degree-rotated shoulder in Stratus remained and then forgotten for two years. *** Все началось весной 2019 года. Я в то время работала над летней коллекцией, а если конкретно, то над моделью Stratus. Изначально Stratus выглядел совсем по-другому. Двухцветный полосатый рисунок поперечным вязанием, где расширяющиеся клинья на спущенном плече формировали рукавчик. Расширение клиньев здесь выполнено укороченными рядами. Такое расширение, если не сделать его под неким углом, образовало бы складку у подмышек. Чтобы избежать грядущей проблемы, я сделала небольшие вытачки прибавлениями на одной стороне детали и убавлениями на противоположной. Никак не могу вспомнить, почему мне этот вариант Stratus не понравился. Потом я подобрала другую пряжу, заменила поперечное вязание обычным вязанием снизу вверх, прибавления заменила укороченными рядами, а укороченные ряды – прибавлениями. Но сама идея такого повернутого на несколько градусов плеча в Stratus осталась, а потом на два года позабылась. This spring, 2021, I was still working on a collection of cardigans, and something didn't work out for me. The dopamine hunger demanded quick results. And something happened that happens very often to me. If I put a worthwhile idea in my head, I can easily forget it. The idea will emerge itself "at the appointed time at the appointed place." I remembered one unfinished project from the year 2015. It was one of the Brooklyn Tweed designs. I quickly unraveled it, found a pattern chart (this was a stitch pattern from the Barbara Walker collections), and, suspecting nothing, began to knit feverishly. Only then did I realize how lucky I was. Not every stitch pattern lends itself to such modifications that I needed for a rotated shoulder. *** Весной этого, 2021 года я еще работала над коллекцией кардиганов, и у меня что-то жутко не получалось. Голод дофамина требовал быстрого результата. И произошло то, что очень часто у меня происходит. Если я откладываю в голове стоящую идею, я могу спокойно ее позабыть. Она сама всплывет "в назначенное время в назначенном месте". Я вспомнила один недовяз еще со времен Осинки, наверное, год 2015. Это был недовяз одного из дизайнов Brooklyn Tweed. Я быстро его распустила, нашла схему узора (это узор из сборников Barbara Walker), и, ничего не подозревая, начала лихорадочно вязать. Только потом я поняла, как мне повезло. Далеко не каждый узор поддается таким модификациям, которые мне были нужны для повернутого плеча. Now let me tell you the very idea of the rotated shoulder. The first two schematics of the three below show the back, the third one – the front. The triangle marked with the number 1 is the armhole shaping for the drop shoulder; the triangle marked with the number 2 is the shoulder slope. If the shoulder slope can still be done using short rows without distorting a stitch pattern too much, then the armhole shaping in cables implies the step-by-step inclusion of the increased stitches in the pattern at the edges. You understand that this means incomplete, "moth-eaten" fragments of cables, which do not necessarily complete the whole pattern repeat. We work the increased stitches in the background reverse Stockinette without including them in the cable pattern; in this case, you get such a bald wedge: narrow at the bottom of the armhole and wide at the top. Here, a shoulder seam and an armhole seam will join, and it will be the ugliest design area. *** Теперь позвольте мне рассказать саму идею повернутого плеча. На первых двух картинках из трех ниже отображена выкройка спинки, на третьем – выкройка переда. Треугольник, отмеченный числом 1 – это расширение проймы для спущенного плеча; треугольник, отмеченный числом 2 – это скос плеча. Если скос плеча еще можно выполнить с помощью укороченных рядов, не слишком уродуя узор, то расширение проймы в узоре из кос подразумевает частичное включение прибавленных петель у края детали в раппорт узора. Вы сами понимаете, что это означает неполные, "молью обкусанные" фрагменты кос, которые совсем необязательно сформирует полный и завершенный раппорт узора. А если прибавленные петли вязать фоновыми изнаночными петлями, не включая их в основной узор, то получится такой лысый клин: узкий внизу проймы и широкий вверху проймы. Здесь прибавится плечевой шов и шов пройма-окат, и это на это место будет самой ужасной частью всего дизайна. And then I remembered Stratus. If we rotate the blue rectangle by a few degrees, the shoulder slope and the armhole shaping turn out by themselves. You do not need to make any increases that disfigure the pattern, and for the shoulder slope, only a minor adjustment is required, which will remain invisible. Of course, triangles 1 and 2 do not disappear anywhere; we transfer them from the edges to the middle of the piece. And here the most exciting thing begins – how to incorporate them into the design, breaking the monotony of the cables. If you look at the layout of the ready-made Fjord jumper, triangle 1 is made with the usual background purl stitch, and triangle 2 – with the motif of the main pattern, with ordinary 4x4 cables. That explains why not every stitch pattern is suitable for such an occasion: it must be easily splittable, both vertically and horizontally, with motifs that can be taken out and used separately. The blue rectangle remained here unharmed with the full pattern repeats. The jumper immediately begins to breathe and attracts interest. *** И тут я вспомнила Stratus. Если голубой прямоугольник повернуть на несколько градусов, плечевой скос и расширение проймы образуются сами собой. Для края проймы не нужно делать никаких прибавлений, уродующих узор, а для плечевого скоса потребуется лишь небольшая корректировка, которая останется незаметной. Конечно, треугольники 1 и 2 никуда не исчезает, они переносятся с краев на середину детали, и тут начинается самое интересное – как их обыграть, разбивая монотонность аранового узора. Если посмотрите на расклад уже готового джемпера Fjord, треугольник 1 здесь выполнен обычной фоновой изнаночной гладью, а треугольник 2 – мотивом основного узора, обычными косичками. Вот почему не каждый узор подходит для такого случая: он должен быть легко разделяемый как вертикально, так и горизонтально, и в нем должны быть мотивы, которых можно взять и использовать отдельно. Синий прямоугольник остался здесь целым и невредимым; в нем спокойно помещаются полные раппорты. Джемпер сразу начинает дышать и притягивает интерес. If you choose the correct height of the catheti and the length of the hypotenuses of triangles 1 and 2, the piece remains flat. Here we are helped by the passionate knitter Pythagoras and his formulas. Things are a little different with the front – here, you need to create room for the bust. Looking at the third picture with schematics above, a slightly enlarged triangle 1 and a narrower triangle 2 create room for the bust – the piece shapes in the right place. I fell so in love with this technique that I will use it until I get tired of it in the future when I knit cables and a drop shoulder. The next bulky yarn design – the lace hoodie – replicates this technology in a slightly simplified version. The background purl surface is also not alien here – the same islets of the purl surface we found in the hood and the sleeve shaping. *** Если правильно подобрать высоту катетов и длину гипотенуз треугольников 1 и 2, полотно остается плоским. Тут нам в помощь страстный вязальщик Пифагор и его формулы. С передом дело обстоит немного иначе – здесь нужно создать пространство для груди. Если посмотрите на третью картинку с выкройками выше, немного увеличенный треугольник 1 и более узкий треугольник 2 как раз создаст пространство для груди – деталь раздуется на нужном месте. Я настолько влюбилась в этот прием, что пока он мне не надоест, буду использовать его и в дальнейшем, когда буду вязать араны и спущенное плечо. Следующий дизайн из толстой пряжи – ажурная толстовка с капюшоном – копирует эту технологию в немного упрощенном варианте. Фоновая изнаночная гладь здесь также не является чужеродной – такие же островки глади встречаются в капюшоне и в расширении рукавов. The Fjord jumper is the fifth piece of the bulky yarn collection, which I have been working on for the third year, and I hope to finish this season. We finished testing a Fjord jumper a long time ago, but the amount of work I have no longer allows me to keep up with the pace, for which I apologize. But I think the pattern of such a thick winter jumper came out just on time. With the permission of Larisa, my favorite Early Bird, the pattern includes a Fjord with a turtleneck picture and instructions on how to make it. Let me show you a few works of our Early Birds, and you can see all the other finished projects on Ravelry. *** Джемпер Fjord является пятым экземпляром коллекции из толстой пряжи, над которой работаю уже третий год, и очень надеюсь в этом сезоне закончить. Тестирование джемпера Fjord мы закончили давным-давно, но количество работы мне уже не позволяет идти в ногу со временем, за что прошу прощения. Но, думаю, описание такого толстого зимнего джемпера вышло очень вовремя. С разрешения Ларисы, моей любимой ласточки, в описание включена ее фотография джемпера Fjord с высоким воротом и инструкция, как сделать такую модификацию. Позволю себе показать несколько работ наших ласточек, а все остальные воплощения вы сможете увидеть на Ravelry. I haven't summed up the testing results for a long time; how many of them have already accumulated in the queue is impossible to count. And I haven't chosen a test winner for a long time. And although Galina's project was a little late for justified reasons, her work, presented on her daughter Sophia, embodied everything that the Fjord jumper wanted to tell. Congratulations to both of you! *** Давно я не подводила итогов тестирований; сколько их уже накопилось в очереди, сложно и сосчитать. И давно я не выбирала победителя тестирования. Хоть отчет Галины немного опозадал по уважительным причинам, ее работа, представлена на дочке Софье воплотила все, о чем хотел рассказать джемпер Fjord. Поздравляю вас обеих!
- Saddler's Diary. Дневник Saddler
As you all already know, my design of the Saddler pullover was published on Brooklyn Tweed (hereinafter - BT). That is a significant event in my knitting life, and five years ago, when I just started working in this area, I could only dream about that (I clearly remember that late evening five years ago, when I told my husband about my dream to join BT team one day. Of course, you had to grow first). I decided to open the backstage a bit and write about everything step-by-step in the form of a diary. And why not - after all, it took almost a year and a half. 15-06-2020. I received an invitation to participate in the competition of three following BT collections - School's In, Frames, and gifts for winter holidays. The invitation included some albums with lovely pictures for inspiration to keep different designers in tune and collections as coherent as possible. In the rules, one application is expected from each participant, but more can be sent. Of course more! And I prepared seven to be sure (because they say "knock, and they will open to you". And it means knock several times, not just one). One application consisted of a large swatch picture, gauge, a sketch(-es), source of inspiration, which BT yarn suits the most, color, technical data, measurements. I spent exactly two weeks on all this. *** Как вы все уже знаете, мой дизайн джемпера Saddler опубликован на Brooklyn Tweed (далее – БТ). Это значимое событие в моей вязальной жизни, и пять лет назад, когда я только начала работать в этой сфере, я могла лишь об этом помечтать (я хорошо помню тот поздний вечер пять лет назад, когда рассказала мужу о своей мечте однажды присоединиться к команде BT. Конечно, сначала нужно было вырасти). Решила приоткрыть закулисье и написать обо всем в форме дневника. И почему бы и нет – ведь все заняло почти полтора года. 15-06-2020. Я получила приглашение поучаствовать в конкурсе трех очередных коллекций БТ– School's In, Frames и подарки малой формы к зимним праздникам. В приложении были альбомы с фотографиями для вдохновения, чтобы разные дизайнеры попадали в унисон, и коллекции были как можно более последовательными. В правилах было написано, что от каждого участника ожидается по одной заявке, но можно прислать и больше. Конечно больше! И я приготовила семь, чтобы уже наверняка (ведь говорится "стучи, и тебе откроют", а не "стукни, и тебе откроют"). Заявка требовала связать большой образец, определить плотность, нарисовать эскиз (-ы), описать источник вдохновения, какая БТ пряжа подошла бы лучше всего, технические данные, измерения. Я потратила ровно 2 недели на все это. There was one more wish from BT. If possible, the design should have been unisex – suitable for both genders. After reading this requirement, I went about in doubt for several days – whether I should participate. Knitting unisex directly eliminates anything to do with fit, and that directly means flat, simplified knitting, and ultimately doesn't fit anyone. And it's not about the design at all. Creating unisex is fun, challenging, addictive. It's about constructing patterns for different body types. But then I resigned myself, hoping that I would think of something. The desire to participate prevailed. The requirements for the application did not include a condition to knit swatches exceptionally from BT yarn. But how not take advantage of the opportunity when BT Shelter and Loft yarn still take pride of place in the yarn closet in my house, which I purchased back in 2014, while visiting my mom in Chicago. I have already used a bit, but there is still a lot left! A swatch for the winner I knitted from Shelter (Snowbound, Long Johns, Button Jar). Coincidence? I don't think. *** Было еще одно пожелание со стороны БТ. Если это возможно, дизайн должен был быть унисекс – подходить как для мужчин, так и для женщин. После прочтения этого требования я несколько дней ходила в сомнениях, стоит ли мне участвовать. Унисекс в вязании элиминирует все, что связано с посадкой, и это напрямую означает плоское упрощенное вязание, и в конечном итоге не подходит никому. И дело совсем не в дизайне. Создавать унисекс – это очень прикольно, и это вызов, это затягивает. Дело в построении выкроек для совершенно разных телосложений. Но потом смирилась с надеждой на то, что я что-нибудь да и придумаю. Желание участвовать взяло верх. В требованиях подачи заявки было упомянуто, что образцы для будущих дизайнов можно вязать из любой пряжи, необязательно из БТ. Но как не воспользоваться возможностью, когда у меня дома до сих пор почетное место в шкафу пряжи занимает БТ Shelter и Loft, которую я закупила еще в 2014 году, будучи в гостях у мамы в Чикаго. Часть я уже извязала, но еще немало осталось. И как раз образец победителя я связала из Shelter (Snowbound, Long Johns, Button Jar). Совпадение? Не думаю. Here are all my contenders. Some of them have already found their place in other collections. *** Вот все мои претенденты. Некоторые из них уже нашли свое место в других коллекциях. The idea and vision, as well as a small doodle-sketch for the future Saddler, came to me in 2018. Saddler was supposed to be a part of my fall collection "Alpaca Riddles". But the sporty stripes did not fit into the theme of the collection about autumn gifts and forces of nature in any way, and I postponed the idea indefinitely. Its place was taken by another sporty jumper Rye. But when I saw pictures of a young man in sportswear and a college gym in the inspiration album that BT sent to me, that was a eureka moment! The time has come! Further, I will talk about the selected design only because everything is already known. From the very beginning, I knew that BT would name the design. But we had to use any name for everyday communication. In my application, I used the name Volley (hail, hit, hence volleyball). And this is how the cover of that one application looked like, with an accompanying description. What does tweed suggest? Comfort, nature, countryside, cables, gansey patterns, fishermen hut, foraging in the forest, misty morning, and a cup of coffee on the porch. I still wanted to find other aspects of this sort of yarn. Can tweed be different? For example, youth and sports? Trendy athleisure? Rustic tweed here is combined with the sporty contrast stripes, giving us an unexpected fresh view to the classy yarn. Contrast vertical stripes here are laid along the previously prepared tracks of the purl stitches, using the chain stitch and a crochet hook. Saddle shoulder echoes here the raglan-type sportswear letting the stripes to run right to the neckline band but still remains in the territory of classy hand knitwear. *** Идея и видение дизайна, а также небольшой набросок эскиза для будущего Saddler появились у меня в 2018 году. Saddler должен был стать одним из экземпляров моей осенней коллекции «Загадки Альпаки» (“Alpaca Riddles”). Но спортивные полоски никак не вписывались в тему коллекции об осенних дарах и явлениях природы, и идею я отложила на неопределенное время. Его место тогда занял другой спортивный джемпер Rye. Но когда в альбоме для вдохновения, который был прислан мне БТ, я увидела фотографии молодых людей в спортивной одежде и спортивный зал в колледже, в голове зазвенел колокольчик! Вот оно, время то! Далее я уже буду рассказывать только об отобранном дизайне, потому что все уже известно. С самого начала я знала, что название дизайну даст БТ. Но нам нужно было для повседневного общения использовать хоть что-нибудь. В своей заявке я применила название Volley (град, удар, отсюда – волейбол). И вот так выглядела обложка той одной заявки с сопутствующим описанием. Что подразумевает твид? Комфорт, природа, сельская местность, араны, узоры Гансей, рыбацкая хижина, хождение за грибами, туманное утро и чашка кофе на крыльце. Я же хочу найти другие аспекты этой пряжи. Может ли твид быть другим? Например, молодежным и спортивным? Модным спорт-шик? Рустикальный твид здесь сочетается со спортивными контрастными полосками, открывая нам неожиданный свежий взгляд на классическую пряжу. Контрастные вертикальные полосы здесь прокладываются по заранее подготовленным дорожкам изнаночных петель тамбурным швом с помощью крючка. Плечо-погон перекликается со спортивной одеждой и регланом, позволяя полоскам перетекать с рукавов к воротнику, но при этом остается на территории классического трикотажа ручного вязания. 10-08-2020. The allotted time for receiving a response from BT has passed. I did not receive anything (it was written in the conditions that we do not answer those who have not been chosen). On August 10th, I did not speak to anyone, thinking that I was doing something wrong in my life. The next day we had theater tickets and it helped me distract myself a little. 12-08-2020, 5.30 a.m. I receive a letter from BT, and, having a hard time figuring out what is happening, I open it. There are congratulations and the news that they liked all my designs, but they can choose only one. My husband and all my friends are still asleep, but I am bursting inside. The only way is to call mommy. She lives in America and has a decent time of day. Mommy answers, and I scream, not being able to say anything legibly. Mom gets scared, thinks I'm dying in convulsions. For the next three days, I walked with the feeling that in my elder age, I entered Harvard. I think there were no fewer applications for one place. Then the real work begins. If I had already known how much time and effort this project would take, I would have weighed my decision to participate well. Of course, if I think about trying again, many things don't have to be done twice. 13-08-2020. I am signing a contract. 04-09-2020. I receive a request by October 2nd to draw patterns and make a table with measurements for all 11 sizes. I have not yet understood the meaning of this requirement; the original patterns and measurements don't mean anything until the piece crawls onto the knitting needles. So it later turned out that both the schematics and the measurements were refined more than once. Much time has been wasted on all this. I initially knew that there would be two measurement systems: metric and imperial. Of course, I used the metric system and then converted it to the imperial system. Needless to say, that there were slight deviations due to rounding. Everything turned out badly. Initially, I had to use imperial and only then convert to metric — complex and not feasible requirement. I have a metric system in my blood and sensations, and inches or feet have no echo in my brain. The final pattern contains 440 measurements in centimeters and inches, converted from the gauge in rows and stitches. And all this changed a dozen more times. 14-10-2020 I received a letter with information that BT had sent me yarn. Every day I watch the tracker, I count the days before I receive the package. The letter indicated which yarn color they chose for the future Saddler: Woodsmoke as the main yarn, Old World, and Almanac for the stripes. I looked at the colors in their yarn store, and the yarn for the stripes was no different to me, although I meant the contrast between them. I hoped it was just the inaccuracy of the color reproduction in the computer. In the same letter, I receive confirmation from BT that they want me to make a female version with bust darts, and they will knit a second sample for a male-type body. You can't even imagine what joy this letter gave me. It's like moving a mountain. At least a couple of millimeters, but still! So many years have been given to studios for a good fit of knitwear, and someone on the other side of the world thought it made sense! Remember, I wrote that I would think of something with these darts. And so it resolved by itself! I was asked to knit a third size, a cropped version. I just lost a little weight by that time, and the third size was almost precisely mine. I realized that I could take pictures of the finished pullover on myself. *** 10-08-2020. Прошло отведенное время для получения ответа из БТ. Я ничего не получила (в условиях так было и написано, что не попавшим не отвечаем). Десятого августа я ни с кем не разговаривала, размышляя над тем, что я в жизни не тем занимаюсь. На следующий день у нас были билеты в театр, и это помогло мне немного отвлечься. 12-08-2020, 5.30 утра. Я получаю письмо от БТ, и, сложно соображая, что происходит, открываю его. Там поздравления и известие о том, что все мои дизайны им понравились, но могут выбрать лишь один. Муж и все знакомые еще спят, а меня распирает изнутри. Единственная возможность – звонить маме. Она живет в Америке, и у нее приличное время суток. Мама отвечает, а я визжу, не могу ничего сказать. Мама пугается, думает, что я умираю в конвульсиях. Следующие три дня хожу с чувством, что я на старости лет поступила в Гарвард. Думаю, что заявок на одно место было не меньше. Дальше начинается уже конкретная работа. Если бы я изначально знала, сколько времени и сил заберет у меня этот проект, я бы хорошо взвесила свое решение участвовать. Конечно, если я задумаю попробовать еще раз, многое что не придется делать дважды. 13-08-2020. Я подписываю контракт. 04-09-2020. Я получаю требование до 2-го октября нарисовать выкройки и сделать табличку с измерениями для всех 11-и размеров. До сих пор не поняла смысл этого требования; изначальные выкройки и измерения ничего не значат, пока изделие не залезает на спицы. Так потом и оказалось, что и сами выкройки, и измерения уточнялись не раз. Потрачено очень много времени на все это впустую. Я изначально знала, что системы измерений будут две: метрическая и имперская. Конечно, что я использовала метрическую систему и далее конвертировала ее в имперскую. Понятно, что получались небольшие отклонения из-за округления. Все оказалось плохо. Изначально я должна была использовать имперскую, и только потом превращать в метрическую. Сложное и не выполнимое требование. У меня метрическая система в крови и в ощущениях, а дюймы или футы не имеют никакого отголоска в моем мозгу. В окончательном описании – 440 разных измерений в сантиметрах и дюймах, конвертированные из плотности в рядах и петлях. И все это менялось еще с десяток раз. 14-10-2020 Получаю письмо с информацией, что БТ выслали мне пряжу. Каждый день наблюдаю за трекером, считаю дни до получения посылки. В письме было указано, какой цвет пряжи они выбрали для будущего Saddler: это Woodsmoke для основы, а Old World и Almanac – для полосок. Я посмотрела на цвета в ихнем магазине пряжи, и пряжа для полосок мне ничем не отличалась, хотя я подразумевала контраст между ними. Надеялась, что это только неточность передачи цветов в компьютере. В том же письме я получаю подтверждение от БТ, что они хотят, чтобы я все же сделала женский вариант с вытачками для груди, и мало того, они сами будут вязать второй прототип для мужчин. Вы даже не представляете, какую радость доставило мне это письмо. Это как сдвинуть гору с места. Хоть на пару миллиметров, но все же! Столько лет отдано студиям хорошей посадке вязаных изделий, и кто-то на другом конце света подумал, что в этом есть смысл! Помните, я писала, что я что-нибудь да и придумаю с этими вытачками. И вот оно само собой решилось! Мне заказали вязать третий размер, укороченную версию. Как раз я немного сбросила, и третий размер был почти точно моим. Я поняла, что смогу сфотографировать готовый джемпер на себе. 22-10-2020 I received the notification, that the yarn is already in the Vilnius Post Office and must go through customs clearance. Customs requires me to provide proof of payment and an invoice, but I, for obvious reasons, do not have such documents. I had to get yarn for free. It turned out that BT quite by accident marked the parcel as a purchase and not as a gift. After lengthy correspondence and my consent to pay the duty and VAT for the "gift," I hoped to receive the yarn soon. But it did not happen. The package got lost in the post. Time passed, before the start of the announced testing, there was less and less time, and there was no way to postpone testing. A requirement from BT told to finish the testing before January 15th. 06-11-2020. I finally took the yarn from the post office. Lithuanian Post owes me 16 wasted days and several million burned nerve cells. When I opened the package, the hope that the blue shades for the stripes would be more different than on the monitor screen was dashed. They were almost the same – like adjacent rectangles in a paint pallet at a hardware store. I wrote a letter asking if they were confident in choosing "contrast" stripes; if anything, I had the opportunity to replace them with something more contrasting from my stash. As it turned out later, everything with these color shades was OK there, and I liked them a lot. Here, you know, there was increased nervousness and super-mega-responsibility for my brainchild. *** 22-10-2020 Получила оповещение, что пряжа уже находится в Вильнюсской почте и должна пройти таможенный осмотр. Таможня требует от меня доказательства оплаты и счет-фактуру, а у меня, по понятным причинам, таких документов нет. Пряжу я должна была получить бесплатно. Оказалось, что в БТ совсем случайно отметили посылку как покупку, а не как подарок. После длинных переписок и согласия с моей стороны оплатить пошлину и НДС за "подарок", я надеялась в скором времени посылку получить. Но не тут-то было. В почте посылку потеряли. Время шло, до начала объявленного тестирования оставалось все меньше и меньше времени, а откладывать тестирование возможности не было. Со стороны БТ было требование закончить тестирование до 15-го января. 06-11-2020. Я забрала пряжу из почтового отделения. Почта мне должна пожизненно за впустую потраченные 16 дней и за несколько миллионов сожженных нервных клеток. Когда я открыла посылку, надежда, что синие оттенки для полосок будут отличаться больше, чем на экране монитора, рухнула. Они были почти одинаковыми. Как соседние прямоугольники в палитре красок в магазине строительных материалов. Я написала письмо с вопросом, уверенны ли они в выборе "контрастных" полосок; если что, у меня есть возможность заменить их на что-либо более отличающееся из моих запасов. Как оказалось позже, все с этими цветами там в порядке, и мне все очень понравилось. Тут знаете, была повышенная нервозность и супер-мега-ответственность за свое детище. That evening, at the speed of a hurricane, I unwound the yarn and began to knit. I knitted my sample in 9 days. There were no big re-knitting; I remember I slightly changed the height of the armhole, and as if I re-knitted one sleeve cap. It seems that I had to lengthen the sleeve. But that doesn't count if compared to my mega-re-knitting that happened this summer. *** В тот же вечер я со скоростью урагана размотала пряжу и начала вязать. Свой прототип я связала за 9 дней. Больших перевязов не возникло; я, кажется, немного меняла высоту проймы, и точно перевязывала один окат. Кажется, еще рукав удлиняла. Но такое не считается, если сравнивать с моими мега-перевязами, которые случились этим летом. 11-15-2020 I sit down to write a pattern. Two of the worst weeks of my life. Three pattern options, 11 sizes, two languages, two measurement systems. Initially, only the English version of the pattern was required, but not all of my Early Birds team are fluent enough in this language, and I decided that the pattern for testing should be bilingual. My husband eats chocolates; I don’t understand what I eat, the apartment is not cleaned, I sleep in home clothes. Why undress if you need to get dressed again in the morning? I had a few moments when I physically felt the boundaries of my mind, and my brain shut down. While working on the pattern, I received a perfect comment from our beloved Larissa @lama that shoulder measurements for the male version are still not suitable; they will be too narrow. The comment was so on time, and I managed to make minor changes in the male-type version. 20-11-2020 I sent BT pictures of the finished pullover. They liked it. *** 15-11-2020 Я сажусь за описание. Две самые ужасные недели в моей жизни. Три варианта кроя, 11 размеров, два языка, две системы измерений. Изначально, конечно, требовалась лишь английская версия описания, но не все ласточки достаточно хорошо владеют этим языком, и я решила, что описание для тестирования должно быть будет двуязычным. Муж питается шоколадками, я – не пойми чем, квартира не убирается, я сплю в домашней одежде. Зачем раздеваться, если утром опять нужно будет одеваться? Было у меня несколько мгновений, когда я физически почувствовала границы мышления, и меня просто вырубало. Во время работы над описанием, получила очень хорошее замечание от нашей ласточки Ларисы @lama, что измерения плеч для мужского варианта все же не подойдут; будет слишком узко. Во время спохватились, и я успела внести изменения в мужском варианте. 20-11-2020 Я отослала БТ фотографии готового джемпера. Им он понравился. 23-11-2020 The testing team already receives a partial pattern, and they can begin to knit the back. The girls helped me with the measurement tables, and we digitized the row / stitch / cm / inch recalculations a little. By the way, Natasha @Pangasius, this table in a slightly modified way and with even more formulas survived until my last reports to BT. So, millions of bows, Natasha. Testing took place in my forum, in a closed thread. There was a clause in the contract that no one could see either the finished projects or the work process before releasing the pattern. Thanks to all my favorite team members that we managed to keep everything secret. It's hard to believe, but 34 of them participated in the testing; every single one finished to the end, and we had a volley mania born: some managed to finish two, three, or even five projects and dressed the whole family. The high spirits, support, and devotion of my Early Birds team served as a vitamin that I needed so badly at that time. Of course, it wasn't easy with the largest sizes, but we managed to cover some of them and still test them. *** 23-11-2020 Участницы тестирования уже получают частичное описание и спинку могут начать вязать. Девочки мне здорово помогли с табличками измерений, и мы немного оцифровали пересчеты ряды/петли/см/дюймы. Кстати, Наташа @Pangasius, эта табличка в немного видоизмененном и еще в более формулами оснащенном виде, выжила до последних моих отчетов БТ. Так что, низкий поклон. Тестирование происходило на моем форуме, в закрытой темке. В контракте было условие, что до выхода описания никто не может видеть ни готовые воплощения, ни процесс работы. Спасибо всем моим любимым ласточкам, что мы сумели все сохранить в тайне. Сложно поверить, но в тестировании участвовали 34 ласточки; все до единой связали до конца, и под конец у нас образовалась "волеймания": некоторые связали по два, три и даже пять экземпляров и одели всю семью. Приподнятое настроение, поддержка и преданность ласточек послужили тем витамином, в котором я так нуждалась в то время. С самыми большими размерами, конечно, было сложно, но мы сумели некоторые из них прикрыть и все же протестировать. 11-30-2021 I am sending BT a draft of the pattern for knitting the male-type version. Here I can add that it took a long time for me to realize that I had designed my first male sweater. That does not mean that I will now be engaged in men's designs, but I realized what I will need to pay attention to if someday I still get to this. 04-01-2021 I sent my pullover with all the leftover yarn to BT. This time the package arrived without incident, and I could breathe out. 13-01-2021 I am sending BT a ready-made pattern in two languages. As it turned out later, the Russian version had to be translated again from the beginning to the end. *** 30-11-2021 Отсылаю БТ черновик описания для вязания мужского варианта. Здесь я могу добавить, что до меня долго не доходило, что я сделала свой первый дизайн для мужчин. Это совсем не значит, что я теперь займусь мужскими дизайнами. Я лишь поняла, во что нужно будет обращать внимание, если когда-нибудь я все же до этого дойду. 04-01-2021 Я отослала свой джемпер со всеми остатками пряжи в БТ. В этот раз посылка прибыла без происшествий. Можно было выдохнуть. 13-01-2021 Отсылаю БТ готовое описание на двух языках. Как оказалось позже, русский вариант пришлось переделать заново с первой буквы. 15-01-2021 Testing is over. We found several errors, but they were related more to calculations than to the construction. There are no words to describe how well everything turned out. And again, I was bursting to show this beauty to the whole world, but no. The terms of the contract did not allow that. Well, nothing, we will be patient, especially knowing how quickly time passes. You can see almost all finished projects on Ravelry. Young people and teenagers, adult men and women of all sizes, families, and even children! You can't even imagine what's going on inside me when I'm reviewing them again and again. I will not post finished projects in this diary. It is impossible to select something because I like everything, just as it is impossible to show everything because of the quantity. I give you a link to Ravelry, and you can also find some of them on Instagram under the #saddlerpullover tag. 25-03-2021 I receive back the first revision of the pattern from the technical editor. If you evaluate the work with her, this is a person who knows knitting like the back of his hand, and it was effortless to communicate; she understood me perfectly. And when they politely put me in my place a couple of times, I was even more delighted. It means everything will be all right. Nothing remained of my pattern's original text and style, except for the number of stitches on the needles and a saddle shoulder. Although I initially relied on the style of BT patterns and had several samples of texts specially sent to me. In the end, everything is understandable; a company that has been publishing knitting patterns for many years must maintain its well-established style of presenting the information. Most of the changes did not directly impact the design, and I agreed with them. Even I managed to get something back. But with one change, the hardest thing for me to agree with was converting the given number of rows to inches/cm. We cannot measure height in centimeters in anatomical knitting because all techniques must be strictly in their place. And the height, measured in inches or centimeters on the needles, will never correspond to reality because the piece has not yet been washed and blocked, even if your gauge meets the specified one (especially the bust darts and where the sleeve cap fits into the armhole). For this reason, I opened a thread in a forum where we can discuss Saddler. If you need any more accurate row numbers, write to me. It took almost a month to work with the technical editor. We corresponded back and forth; I redrew the pattern's schematics a couple of times and spent long evenings with the measurement tables, looking for inaccuracies between the three versions of the stitches/rows/centimeters/inches. At that time, I hated my decision to apply to the competition. 21-06-2021 I confirm that I will do a Russian translation. As you already know, the pattern has changed beyond recognition, and I had to start the Russian translation anew. Until the last days, I didn't realize that BT would not put the Russian translation in a layout with pictures and schematics, so forgive me for that. All that was required of me was a flow of letters. I am glad that I at least managed to divide it into pages and highlight something in recent days. 21-07-2021 I received a pattern layout with pictures and found out BT had given a name to my design. From the first second, I fell in love with it. How short and right up to a point! In my opinion, besides the real meaning, Saddler is a shortcut of "saddle shoulder." I admire the pictures and models with the local college in the background. Running track stripes echo the stripes on sleeves, and that is a good photographer's find. The only caveat is that the entire collection looks a bit small on the female model. If I knitted the fourth size, everything would look spic and span. But I don't see any problems; there are pictures where the third size looks like it should (I mean myself :) ). *** 15-01-2021 Тестирование закончилось. Мы нашли несколько важных ошибок, но они касались больше расчетов, чем конструктива. Слов нет описать, как же все хорошо получилось. И опять распирало показать эту красоту всему миру, но нет. Условия контракта не позволяли. Ну ничего, мы же потерпим, особенно зная, как быстро течет время. Почти все воплощения вы можете увидеть на Ravelry. Молодые люди и подростки, взрослые мужчины и женщины разных телосложений, семьи и даже дети! Вы даже не можете представить, что у меня творится внутри, когда я пересматриваю их уже некоторый раз. Я не буду постить воплощения ласточек в этом дневнике. Что-то отобрать невозможно, потому, что нравится все, как и невозможно показать все из-за количества. Я даю ссылку на Ravelry, а также некоторые из них вы можете найти в Инстаграме по тегу #saddlerpullover. 25-03-2021 Я получаю обратно первую редакцию описания от технического редактора. Если оценить работу с ней, то это человек, который знает вязание как свои пять пальцев, и общаться было очень легко, меня понимали с полуслова. И когда меня пару раз вежливо поставили на место, я обрадовалась еще больше. Значит, все будет в порядке. Из оригинального текста и построения описания не осталось ничего, кроме количества петель на спицах и описание "погона". Хотя я изначально опиралась на стиль описаний БТ, и имела несколько специально присланных мне образцов текстов. Да и все понятно; компания, занимающаяся вязальными описаниями много лет, должна выдержать свой отработанный стиль подачи информации. Большинство изменений не имело прямого влияния на конструкцию, и на все это можно было согласиться. Что-то даже мне удалось вернуть. Но с одним изменением мне согласиться было сложнее всего – это превращение количества рядов в дюймы/см. В анатомическом вязании высота не может быть измеряема сантиметрами, потому, что все приемы должны быть строго на своих местах. А высота, измеряемая сантиметрами на спицах, никогда не будет соответствовать реальности, потому, что деталь еще не стирана. Даже если ваша плотность четко соответствует заданной. Особенно вытачки и там, где мы вставляем окат в пройму. По этой причине я открыла темку, где мы можем обсуждать Saddler. Если вам понадобится какие-либо более точные числа в рядах, пишите. Работа с техническим редактором заняла почти месяц. Мы переписывались туда и обратно, я пару раз перерисовывала выкройки, и проводила длинные вечера с таблицами измерений, выискивая неточности между петлями/рядами/сантиметрами/дюймами в трех версиях. В то время я жутко ненавидела свое решение отослать заявку на конкурс. 21-06-2021 Я подтверждаю, что я буду делать русский перевод. Как понимаете, описание изменилось до неузнаваемости, и русский перевод мне пришлось начать заново. Я до последних дней не знала, что русский перевод не будет укладываться в макет, так что простите меня за это. От меня лишь требовался поток букв. Я рада, что в последние дни я хотя бы успела разделить на страницы и что-то хоть немного выделить. 21-07-2021 Я получаю макет описания с фотографиями на моделях и узнаю, что моему дизайну присвоили название. С первой секунды я влюбилась в него. Как же коротко и точно! Saddler означает верховую лошадь или шорника, но на мой взгляд, это сокращение от словосочетания "saddle shoulder" (плечо-погон). Фотографии моделей на фоне местного колледжа мне очень нравятся. Полоски беговой дорожки и полоски на рукавах – это находка фотографа. Единственное замечание, что на модели женского пола вся коллекция выглядит немного маловатой. Если я бы связала четвертый размер, все выглядело бы как с иголочки. Но проблем я не вижу; есть фотографии на мне, где третий размер выглядит, как должен. To my pleasant surprise, BT made and included a photo tutorial of the chain stitch in the pattern. The technology, old as life, maybe a little forgotten, returned to a knitting world with a bang. At first glance, it may seem that the vertical stripes are made with the Intarsia technique, which implies an insane amount of skeins in different colors, and, frankly, immediately frightening knitters. BT’s recent Instagram post proved the opposite, and I’m immensely grateful to BT for that. *** К моему приятному удивлению, БТ сделали и включили в описание фото-урок тамбурного шва. Старая как жизнь технология, может немного позабытая, вернулась с треском в вязальный мир. На первый взгляд может показаться, что вертикальные полоски выполнены Интарсией, подразумевающей безумное количество мотков нитей разных цветов, и, честно, сразу пугающей вязальщиц. Недавний пост БТ в Инстаграм доказал всем обратное, и я безумно благодарна БТ за него. 15-09-2021 Saddler was released. Due to the spike in dopamine, I can't sleep for three nights in a row. My husband brings me a bouquet; relatives, friends call and congratulate me. Not only that, my Saddler ended up on the cover of the collection. One after another, finished projects of my Early Birds team appear on Ravelry; I even get a letter from BT that they are stunned by their work. *** 15-09-2021 Saddler вышел в свет. Из-за всплеска дофамина я не могу спать три ночи подряд. Муж дарит мне букет цветов; звонят родные, знакомые и поздравляют. Мало того, мой Saddler оказался на обложке коллекции. Один за другим на Ravelry появляются проекты моих любимых ласточек, даже получаю письмо от БТ, что они ошеломлены их работами. I want to remind you that there are three versions of the pullover in the pattern. The first two differ in length; they have added width for the bust, side and neck darts, narrower shoulders, and shorter sleeves. The third version offers a longer torso, broader shoulders, and a longer sleeve; there are no bust darts in this version. All versions have a deeper front armhole, an elongated upper back, and one small trick in the saddle shoulder. 17-09-2021, 2 a.m. I am taking part in a zoom conference with the BT team. Jarred Flood meets me and waves at me across the screen. I am trying to teach them to pronounce my name correctly, and they all are good at that. I am talking about the anatomical fit and the chain stitch. Natasha @Pangasius is joining the conference and showing her Almanac jacket, which she wears on that day. The chain stitch is gaining even more interest. I am showing a shelf in my closet stuffed with Shelter yarn. *** Хочу напомнить, что в описании есть три версии джемпера: две первые отличаются длиной; в них есть расширение для груди, боковые вытачки для груди и вытачки в горловину; более узкие плечи и более короткий рукав. Третья версия предлагает длинный торс, более широкие плечи и более длинный рукав; в этой версии отсутствуют вытачки для груди. Во всех версиях есть более глубокая передняя пройма, удлиненная верхняя часть спинки и одна небольшая хитрость в плече-погоне. 17-09-2021, 2 часа ночи. Я принимаю участие в zoom-конференции с командой БТ. Со мной знакомится Jarred Flood и машет мне через экран рукой. Я пытаюсь выучить их произнести правильно мое имя, и у всех это хорошо получается. Я рассказываю об анатомической посадке и о тамбурном шве. К конференции подключилась Наташа @Pangasius и показывает свой жакет Almanac, который она как раз в тот день надела. Тамбурный шов обретает еще больший интерес. Я показываю полку своего шкафа, набитую Shelter пряжей. It was impossible to tell everything; I skipped on much less significant. Thanks to everyone who supported me throughout this period. Thanks to those who support me in the present and will do so in the future. You can buy the Saddler pattern on the Brooklyn Tweed website and Ravelry. Good luck to everyone in knitting! *** Невозможно было описать все. Многое, менее значительное, я пропустила. Спасибо всем, кто меня поддерживал весь этот период. Спасибо тем, кто поддерживает меня в настоящем и будет это делать в будущем. Описание Saddler вы можете купить на сайте Brooklyn Tweed и на Ravelry. Всем удачи в вязании!
- Patch Pockets. Накладные карманы
Pockets are indispensable elements of knitted cardigans and coats. They not only perform many functions but also add life to your knitwear. Patch pockets are the simplest and most comprehensible ones of all types of pockets. We attach a patch pocket to an already knitted front piece, and the area that hides under the pocket becomes the pocket lining. The pocket is knitted separately, then partially sewn and partially joined with knitting techniques. It would seem what else you can talk about patch pockets? Everything seems to be very easy and straightforward. But there are many nuances that you need to know to end up with a beautiful, neat, and comfortable pocket that does not adversely affect the appearance. Just because of the latter, many are afraid of pockets and try to avoid them. But if you learn some secrets, pockets have a chance to become the most beloved part of the entire knit project. This article is divided into two parts. The first one tells you about the technique itself, the second one – about what else you need to pay attention to. *** Карманы – незаменимые элементы вязаных кардиганов и пальто. Они не только выполняют много функций, но и оживляют вязаное изделие. Накладные карманы – самые простые и самые понятные в исполнении. Накладной карман выполняется на уже связанной готовой полочке, и та зона, которая далее прячется под карманом, становится мешковиной. Карман вяжется отдельно, далее частично пришивается и частично привязывается. Казалось бы, что можно рассказывать о накладных карманах? Вроде все просто и понятно. Но есть очень много нюансов, которые нужно знать, чтобы в итоге получился красивый, опрятный и удобный карман, не портящий внешний вид. Как раз из-за последнего многие боятся карманов и стараются их избегать. Но если узнать некоторые секреты, карманы имеют шанс стать самой любимой частью всего вязаного проекта. Далее эта статья разделится на две части. Первая расскажет о самой технологии исполнения, вторая – о том, на что еще стоит обратить внимание. Mark the pocket outline with pins and find the outermost stitch of the lower-left corner of the lining. With a crochet hook, pull the yarn down (from RS to WS) between this stitch and the adjacent stitch on the left. The yarn end behind your front piece should be long enough to be sufficient for picking-up stitches and sewing on the right side of the pocket. *** Отметить булавками контур будущего кармана и найти самую крайнюю петлю нижнего левого угла мешковины. Между этой петлей и соседней петлей слева с помощью крючка протянуть нить вниз. Протянутая нить должна быть достаточно длинная, чтобы ее хватило для поднятия петель и для пришивания правого края кармана. Next, find the outermost stitch of the lower-right corner of the lining. You need to be extremely careful and make sure that both corner stitches belong to the same row of the front piece. With the knitting needle, which you will use to knit the pocket further, pick up the first stitch between the right corner stitch and the adjacent stitch on the right. That is the first selvage stitch of the pocket. Next, pick up stitches along the corresponding row to the point, where the yarn has been pulled down. Before turning the work and starting to work on a WS row, make a simple or twisted yarn over for the pocket's opposite selvage stitch. If you use any other stitch pattern, except for the Stockinette Stitch, the stitches must be picked up from the row of the pattern knitted from WS (even rows of the stitch pattern). The row of picked-up stitches will coincide with the RS (odd) row of the stitch pattern. *** Далее найти самую крайнюю петлю нижнего правого угла мешковины. Здесь нужно быть предельно внимательными, чтобы обе угловые петли принадлежали одному и тому же ряду полочки. Спицей, которой дальше будете вязать карман, поднять первую петлю между правой угловой петлей и соседней петлей справа. Это будет первая кромочная петля кармана. Далее поднимать петли по соответствующему ряду до точки, где находится нить, протянутая вниз. Перед тем, как повернуть работу и начать вязать изнаночный ряд, сделать накид или воздушную петлю для противоположной кромочной петли кармана. Если вы используете любой другой узор, кроме глади, петли нужно поднимать из того ряда узора, который был провязан с изнаночной стороны (четные ряды узора). Поднятые петли будут соответствовать лицевому (нечетному) ряду узора. Continue the pocket in the main pattern to the desired height, then knit the hem or rib. Bind off all stitches. Make sure that after you bind off the stitches, the yarn end remains on the opposite side of the pocket than the yarn end at the very beginning. This way, you do not have to attach the new yarn for seaming, and the number of yarn ends will be kept to a minimum. If you use yarn/yarns of different colors, weave in all ends before sewing on the pocket. *** Продолжить вязать карман основным узором до желаемой высоты, далее связать планку или резинку. Закрыть все петли. Перед тем, как закрывать петли, удостовериться, что конец нити после закрытия останется на противоположной стороне кармана, чем конец нити в начале. Таким образом вам не придется присоединять новую нить для шва и количество концов нитей будет доведено до минимума. Если используется нить/нити другого цвета, перед тем, как начать пришивать бока кармана, заправить ее/их концы. Sew the pocket to a lining with a Mattress Stitch. Start stitching from the right side, from bottom to top. If the same stitch pattern and the same gauge have been used for the pocket as for its lining, sew each selvage stitch of the pocket to two rows of the lining (or 2 rows of the pocket to 2 rows of the lining). It may be that the pocket hem or rib had been knitted more tightly, then you need to find another stitching ratio to sew on the hem (rib). After the right side of the pocket has been sewn on, trace the row in which the last stitch was made, and from there, begin to sew the left side of the pocket from top to bottom. Weave in yarn ends. *** Пришить карман матрасным швом. Начать сшивать с правой стороны, по направлению снизу вверх. Если для кармана был использован тот же самый узор и та же самая плотность, как и для его мешковины, каждую кромочную петлю кармана пришивать к двум рядам мешковины (или 2 ряда кармана к 2-ум рядам мешковины). Может так быть, что планка кармана будет связана плотнее, тогда для пришивания планки придется найти другой шаг стежков. После того, как правая сторона кармана будет пришита, отследить ряд, в котором был сделан последний стежок, и с него начать пришивать левый бок кармана по направлению сверху вниз. Заправить концы нитей. Until now, I have told you about the case when the pocket is knitted from the bottom up. But there may be situations when you need to knit a patch pocket in the opposite direction – from top to bottom. This situation happened to me when I was working on a Horizon cardigan. First, the pocket meant to be with rounded corners, and decreases look better here than increases. Second, I wanted the pocket rib to begin with the cast-on row and not be finished with the bind-off row. For this, the pocket had been made separately, and at the end, the live stitches had been sewn to the lining with a Kitchener Stitch. A Kitchener Stitch in a "top to bottom" pocket is consistent with a pick-up row in a "bottom to top" pocket. All other steps – selvage stitches, sewing sides with a Mattress Stitch, leaving yarn ends in proper sides – remain the same. *** До сих пор я вам рассказала о случае, когда карман вяжется снизу вверх. Но могут быть такие ситуации, когда вам придется вязать накладной карман в противоположном направлении – сверху вниз. Такая ситуация произошла со мной, когда я вязала кардиган "Горизонт". Первое, карман должен был быть с закругленными уголками, и убавления для этого выглядят лучше, чем прибавления. Второе, хотелось, чтобы планка кармана начиналась с наборного ряда, а не заканчивалась рядом закрытия. Для этого карман был связан отдельно, и в конце открытые петли пришиты к мешковине трикотажным швом. Трикотажный шов в кармане "сверху вниз" повторяет ряд поднятия петель в кармане "снизу вверх". Все остальные шаги – кромочные петли, пришивание боков кармана матрасным швом, оставление концов нитей с нужных сторон – остаются такими же. What else is worth paying attention to? I will try to list the most important points. 1. The average and most comfortable size of the pocket, in which we put our hands and the most necessary things, is 17x17 or 18x18 cm. Smaller pockets are suitable for decorative purposes only. But you always can make much larger and more capacious pockets, which can become part of an interesting design. Pockets can also be not only square but also rectangular, have diagonal openings or rounded corners. 2. Knit the pockets with the same gauge, using the exact size of knitting needles and the same stitch pattern as for the lining. Even the stitch pattern repeat should precisely match what is under the pocket. The pocket should be the perfect replica of the lining. Then it will not sag nor shrink, and both side seams will be even and merge with the main knit fabric. Nevertheless, if the lining for some reasons should be worked in a different stitch pattern (interfering bobbles, long hanging loops, a very sparse lace), then it's better to choose a welt pocket, where not a pocket is knitted separately, but a lining. 3. The pocket should be located approximately in the center of the front piece if the garment has a medium or significant positive ease. If the garment has a minimal or no positive ease, the pocket moves slightly from the center towards the side seam. 4. The placement of the pocket heightwise has a crucial role in its usability. Before you begin your pockets, put on a garment and mark with pins where it is most comfortable for your hand to slide into the pocket. The shorter the garment, the more limited is the choice of the pockets' proper location, until the main purpose of the pockets, except for being decorative, disappears. 5. It is essential to select the correct density and tightness of the pocket hem (rib). Most often, the same gauge, stitch pattern, and size of the knitting needles will be used for the pocket hems as for the rest of the bands, hems and ribs in the garment. But here, it is very easy to make a mistake. The pocket hem should not gather the lining underneath and, at the same time, be sufficiently resilient so as not to stretch from frequent use. The first picture below shows a rib that gathers the lining underneath, and the opening itself is restricted by the bind-off edge; also, there is no enough reserve of elasticity to put the hand into the pocket. The rib is worked using the same number of stitches as for the pocket. In the second picture, more stitches have been added for the rib, although it is still sufficiently stable and resistant not to stretch over time. *** На что еще стоит обратить внимание? Попробую перечислить самые важные моменты. 1. Средние и наиболее удобные измерения карманов, в которые помещается рука или самые нужные вещи – это 17х17 или 18х18 см. Более маленькие карманы будут лишь декоративными. Но всегда можно сделать гораздо более крупные и вместительные карманы, которые станут частью интересного дизайна. Карманы также могут быть не только квадратные, но и прямоугольные, иметь диагональное отверстие или закругленные уголки. 2. Старайтесь вязать карманы с той же плотностью, используя тот же самый размер спиц и тот же узор, как и их мешковина. Даже раппорт узора или рисунка должен четко соответствовать тому, что находится под карманом. Карман должен стать идеальной копией мешковины. Тогда он не будет висеть мешком, не будет стягивать, боковые швы будут ровными, а карман сольется с основным полотном. Если все же мешковина должна быть связана другим узором (мешают шишечки, длинные висящие петли или использован очень редкий ажур), лучше тогда выбирать прорезной карман, где отдельно вяжется не карман, а мешковина. 3. Карман располагается примерно посередине полочки, если изделие имеет среднюю или большую свободу облегания. Если изделие прилегающее, карман немного отодвигается от центра в сторону бокового шва. 4. Высота расположения кармана имеет очень важное значение в удобстве его использования. Перед тем, как приступить к карманам, наденьте изделие и отметьте булавками, где вашей руке удобнее всего влезть в карман. Чем вязаное изделие короче, тем выбор удобного расположения кармана все больше ограничивается до тех пор, пока смысл карманов, кроме декоративного, исчезает. 5. Очень важно подобрать правильную плотность планки или резинки кармана. Чаще всего для планки кармана будет использована та же плотность, узор и размер спиц, как и у остальных планок, беек и резинок изделия. Но тут можно очень легко ошибиться. Планка кармана не должна стягивать под собой мешковину и одновременно быть достаточно упругой, чтобы не растянуться от частого использования. На первой картинке ниже показана планка, которая стягивает под собой мешковину, а само отверстие ограничено краем закрытия и неимением запаса упругости для влезания руки. Планка связана на том же количестве петель, что и карман. На второй картинке для планки прибавлено больше петель, чем для первой, хотя она по-прежнему остается достаточно упругая и формоустойчивая, чтобы со временем не растянуться. Here, the pocket rib before wet blocking also significantly gathered the lining under it. But judging on the rib's degree of elasticity and the fact that the rib had been made using more stitches than the pocket itself, it was clear that the moisture would do its job and loosen the rib to the desired degree. *** Здесь планка кармана перед тем, как была произведена стирка, также ощутимо стягивала под собой мешковину. Но по степени упругости резинки и по тому, что планка была связана на большем количестве петель, чем сам карман, было понятно, что влага сделает свою работу и расслабит резинку до нужной степени. Thanks for reading. The last thing is to wish everyone comfortable pockets! *** Спасибо, что читали. Остается пожелать всем удобных карманов!
- Striped Passion. Полосатая страсть
I have noticed one regularity in my work for a long time. Suppose I came up with some new knitting technique or penetrated into an existing one to the extent of molecules, and they justified themselves. In that case, I want to exhaust all their possibilities to the bottom. One such example is a striped Garter Stitch and what you can turn it into. My striped passion began long ago, in 2017, and continues to this day. And it all started not at all with a Garter Stitch. I remember I just got obsessed when I saw one intricate sleeve shape. I came to my tailor and asked her to show me a pattern for such a sleeve. She quickly sewed the sleeve with a sewing machine using some leftovers of fabric. I took it and returned home to study. Then I found out that this shape of the sleeve came to us from the Middle Ages when clothes were sewn from a rigid, untreated hide, and without any manipulation, it was impossible to bend the arm in such a sleeve. And also, such a "cut" was used in the Knight's armor. It became even more interesting for me, and I was lost in thinking about how I can correctly knit all this and beautifully present it. Just at that moment, I was working with a collection of knitted outerwear, and the piece of clothing that is closest in purpose to antique fur clothing and armor is a coat. I realized that I can only make such a bend with a short rows technique, but the difference in the length of the inner fold and the outer bend is so small that it will certainly look like a mistake or an imperfection in knitting. Or a situation when a monster moth pulled out a piece of a sleeve with its teeth, and we had to sew up this hole. From my practice of knitwear design, I learned one rule: if it is impossible to hide, you need to emphasize. Of course, I had to rephrase a little: if the manipulations are so small that they may look like a mistake, they need to be emphasized and accentuated. Somehow to show that something has been done here. And the question hung in the air. Then the yarn resolved everything. For a coat with thin knitting needles, you need about 3300 yards of yarn. I did not obtain one variety in such quantity; we did the renovation at home then, and I did not have time to search for yarn. I picked up yarn from the available stash: boucle with mint speckles and mint-colored merino wool. And they stuck to each other like lovers. *** Я уже давно заметила в своем творчестве одну закономерность. Если я придумала какую-нибудь новую вязальную технологию или прониклась до молекул в уже существующую, и они оправдали себя, хочется исчерпать все их возможности до дна. Один из таких примеров – полосатая платочная вязка и то, во что можно ее превратить. Моя полосатая страсть началась давно, в 2017-м году, и продолжается по сей день. А все началось совсем не с платочки. Я, помню, просто заболела, когда увидела одну интересную форму рукава. Поехала к знакомой швее, чтобы она показала мне выкройку такого рукава. Она быстро сшила на машинке этот рукав из остатков тканей, я его забрала и поехала домой изучать. Потом я узнала, что такая форма рукава пришла к нам из средневековья, когда одежда шилась из твердой необработанной шкуры, и без каких-либо манипуляций руку в таком рукаве было невозможно согнуть. А также такой "крой" использовался в рыцарских доспехах. Мне стало еще интереснее, и я пропала в размышлениях, как мне все это грамотно связать и красиво преподнести. Как раз в этот момент я работала с коллекцией верхней вязаной одежды, и наиболее близкий по предназначению старинным шубам и доспехам предмет одежды – это пальто. Я поняла, что такой изгиб я смогу сделать лишь укороченными рядами, но разница в длине внутреннего сгиба и внешнего изгиба настолько небольшая, что в вязании это обязательно будет выглядеть как ошибка или недоделка. Или ситуация, когда моль-монстр вырвала зубами кусок рукава, а нам пришлось эту дырку зашить. Из своей практики дизайна вязаной одежды я вынесла одно правило: если невозможно скрыть, нужно подчеркнуть. Тут, конечно, пришлось немного перефразировать: если манипуляции настолько небольшие, что могут выглядеть как ошибка, нужно их подчеркнуть, акцентировать. Каким-то образом показать, что здесь что-то было сделано. И вопрос повис в воздухе. Все потом решила пряжа. Для пальто тонкими спицами нужно примерно 3000 м пряжи. Одного сорта в таком количестве у меня не обнаружилось, мы дома тогда делали ремонт, и на поиск пряжи у меня времени не было. Подобрала пряжу из имеющихся запасов: букле с мятными вкраплениями и меринос цвета мяты. И они прилипли друг к другу как влюбленные. I made a swatch and immediately saw my whole knight's armor sleeve: a clear picture with all the details. Inspiration descended from heaven, and such moments are remembered for a lifetime. But there is one catch: inspiration does not know how to knit and does not know knitting techniques. It sends a vision from heaven, and you should figure out how to materialize it. Of course, I started my coat from the sleeve. With great enthusiasm, I knitted it up to the famous bend, suspecting nothing. I even performed the first turn of the short row on the left side of the piece and worked a WS row. And then lightning struck me. A yarn tail of a different color was hanging at the edge of the piece, and I must make a short row turn without knitting to the very edge. My life was ruined, and I was probably in the wrong business. *** Связала образец и увидела свой рыцарский рукав целиком: ясную картинку со всеми подробностями. Вдохновение снизошло с небес, и такие моменты запоминаются на всю жизнь. Но во всем этом есть одна загвоздка: вдохновение совершенно не умеет вязать и не знает вязальных технологий. Спускает с небес картинку, а ты сиди и придумывай, каким образом это материализовать. Свое пальто я, конечно, начала с рукава. С большим энтузиазмом связала до знаменитого места сгиба, ничего не подозревая. Даже выполнила первый поворот укороченного ряда на левой стороне детали и провязала изнаночный ряд. И тут меня ударила молния. Нить другого цвета висела у края детали, а я должна сделать поворот укороченного ряда, не довязав до него. Я поняла, что моя жизнь разрушена, и я, наверное, не тем в жизни занимаюсь. My passion for a striped Garter Stitch sparked even more, when you liked the April coat, and this pattern is still a bestseller. I realized how beautiful and unusual it is, that it can be used to construct and shape three-dimensional objects, and at the same time turn the pattern, shape, and a cut into an accent, graphic design, and decorative elements. This is a symbiosis of design and technique, which, as you will see, keeps me involved until now and, apparently, will not let me go shortly. *** Страсть к полосатой платочке зажглась еще ярче, когда пальто April вам понравилось, и это описание до сих пор является бестселлером. Я поняла, насколько это красиво и необычно, что это можно использовать для конструкции и формирования трехмерных объектов, и при этом крой, форму и конструкцию превратить в акцент, графический рисунок и украшающие элементы. Это симбиоз дизайна и технологий, который, как вы увидите, не отпускает меня до сих пор, и, видимо, не отпустит меня в ближайшем будущем. The year 2019. I started working with the summer collection. My mother came to me from the United States, and we together examined the April coat. And I had been inspired again – the shoulder! How is the bend of the elbow in knitting different from the bend of the shoulder? Not much. Another design soon came out with the same technology, where the short rows were lifted up to the shoulder. Let me remind you of the Milky Way summer top, which has become one of the brightest summer collection representatives and was loved by you also. *** Год 2019. Я начала работать с летней коллекцией. Ко мне из штатов приехала мама, и мы рассматривали пальто Апрель. И меня опять стукнуло – плечо. Чем изгиб локтя в вязании отличается от изгиба плеча? Мало чем. Скоро родился еще один дизайн с той же технологией, где укороченные ряды переместились на плечо. Разрешите вам напомнить о летнем топе Milky Way, который стал одним из ярких представителей летней коллекции и также вам полюбился. The year 2020. Striped passion shifted into a higher gear. One by one, two designs were published: the Dream jumper and the Marshmallow jacket. I wrote about the Dream jumper in detail before, and you can read about the fact that I had seen it in a nightdream. In the Dream jumper, I used the same technique as in its predecessors, and, apparently, it's time to tell a little about it. A few days after I put aside the sleeve of "April," all my dreams and beliefs, I began to get angry with myself. Sometimes anger is the engine of progress for me. What are you, I thought, who had knitted more than two hundred sweaters in her life, whose both grandmothers knitted, mom and great-grandmother sewed, and dad is an inventor in the field of ultrasound, won't you be able to conquer the humble yarn? Then I decomposed the problem into its constituent parts and found out for myself that in a strict pattern with repetition in two rows, a short row introduces an offset by one row, which means that it is necessary to outrun this offset. Get around, run ahead. So that the different color yarn waits each time at the short row turning point on the right side (as the opposite of the left side) of the piece. And here, a Garter Stitch pattern played into the hands. Its textured ribs hid the yarn transfer, and for me, a Garter Stitch is still the only pattern in which this technique is possible. Two-color striped Garter Stitch, all dartsin it, horizontal expansion of the knit fabric, right side of the piece, preliminary transfer of the yarn. Resolved. Period. *** Год 2020. Полосатая страсть увеличила скорость. Один за другим свет увидели два дизайна: джемпер Dream и жакет Marshmallow. О джемпере Dream я рассказывала подробно раньше, и о том, что я увидела его во сне, вы можете почитать. В джемпере Dream я использовала ту же самую технологию, что и в его предшественниках, и, видимо, пришло время о ней немного рассказать. Несколько дней после того, как я отложила рукав "Апреля", все свои мечты и веру в себя, я начала на себя злиться. Иногда злость для меня является двигателем прогресса. Ты же связала за жизнь больше двух сотен свитеров, думала я, у тебя обе бабушки вязали, мама и прабабушка шили, а папа является изобретателем в области ультразвука, и ты не сумеешь побороть нить? Стала раскладывать проблему на составляющие части, и выяснила для себя, что в строгом рисунке с повторением в два ряда, укороченный ряд вносит смещение на один ряд, значит, надо это смещение обогнать. Обойти, забежать вперед. Чтобы нить другого цвета каждый раз ждала в нужной точке укороченного ряда на правой стороне детали. И тут узор платочки сыграл на руку. Ее фактурные пупырышки скрыли перенос нити, и для меня платочка до сих пор является единственным узором, в котором эта технология возможна. Двухцветная полосатая платочка, все вытачки в ней, горизонтальное расширение полотна, правая сторона детали, предварительный перенос нити. Все решено. Точка. Inspiration, frustration, anger, and laziness. This is the evolution of my creativity. Considering that the technique of mirrored short rows in a striped Garter Stitch is quite complicated in execution and in understanding, considering that I have not yet tried it in long rows (another type of short rows), laziness awakens. How to get around all this? Or maybe you can not bother? Is there a loophole? All these are words of laziness, and, as it turned out, laziness is also a pretty strong engine of progress. *** Вдохновение, разочарование, злость и лень. Вот такая эволюция моего творчества. С учетом того, что технология зеркальных укороченных рядов в полосатой платочной вязке достаточно сложная в исполнении и в понимании, и мною пока неиспробованная в удлиненных рядах (другой вид укороченных рядов), пробуждается лень. А как все это обойти? А может можно не заморачиваться? Может есть лазейка? Все это – слова лени, и, как оказалось, она не менее сильна в движении прогрессом. The Marshmallow jacket is proof of this. Here, only the short rows on the left side of the piece (a peplum) are used, with which there are no problems. I never tried the mirror short rows technique in the long rows, which I needed for such a bust dart on the right side of the piece. And then laziness gave me a golden idea. The right side of the piece becomes the left side if you turn it over. Eureka! Here the bust dart on the right front is made from a WS. Just a piece of cake. *** Жакет Marshmallow тому подтверждение. Здесь используются лишь укороченные ряды на левой стороне детали (баска), с которыми нет никаких проблем. А зеркальную технологию в удлиненных рядах, которая мне была нужна для такой вытачки для груди на правой стороне детали, я так и не опробовала. И тут лень подала золотую идею. Правая сторона детали становится левой стороной, если ее перевернуть. Эврика! Здесь вытачка для груди на правой полочке выполнена с изнаночной стороны. Просто как две копейки. The year 2021. Laziness does not give up yet and suggests new ideas: "Look at the Marshmallow's peplum, you knitted it in a day, it couldn't be easier. One and done. There are no short rows on the right side! What does it remind you of, and where are numerous such darts needed?" I have plans of knitting a jacket sideways for a long time, where the yoke would be made with short rows. I was tormented with the last piece of the collection of cardigans, which was supposed to be a summer knit and necessarily in a nautical theme. As well as remembering my desire for a sideways yoke and obeying laziness, I visually lifted the Marshmallow's peplum to shoulder level and knitted Sails jacket in ten days. This is my last and most recent design, the fifth in a striped Garter Stitch series, and I really hope it will not be the last. Sails jacket is currently being tested and will be released in late summer. And so will complete the collection "All Year Round Cardigans." *** Год 2021. Лень пока не сдается и подсказывает новые идеи: "посмотри на баску "зефирки", ты ее за день связала, проще не бывает. Раз и готово. Там нет укороченных рядов на правой стороне! Что она тебе напоминает и где нужны такие многочисленные вытачки?" Я давно мечтала связать жакетик поперечным вязанием, где кокетка была бы выполнена укороченными рядами. И мучаясь с последним экземпляром коллекции кардиганов, который должен был быть летним и обязательно в морской тематике, а также вспоминая свое желание о поперечной кокетке, я прислушалась к лени. Визуально подняв баску Marshmallow до уровня плеч, за десять дней связала жакет Sails. Это последний и самый свежий мой дизайн, пятый в серии полосатой платочной вязки, и очень надеюсь, что не последний. Жакет Sails ("Паруса") сейчас тестируется и выйдет в свет в конце лета. И тем завершит коллекцию "Кардиганы круглый год". There is one quite important warning for those who are going to knit something in the future using a striped Garter Stitch pattern with darts in it. It is very important to choose the right yarn A (main yarn). Yarn A is the one that will draw the graphic lines. It should be darker, richer, brighter and more vivid than yarn B. The color of yarn B, on the contrary, should be lighter, muted and bland. Of course, I cannot forbid you to invert colors, but I saw some finished projects made in a such manner, and, for me personally, they lose a certain "zing". The graphics are outlined, but not so clear, and it takes some time and effort to understand the idea. If you chose black and white for your future stripy project, then everything is self-explanatory. But what to do if you have chosen two colors that are very similar in brightness and intensity, and you yourself cannot determine which of them will become yarn A. Make a test. I learned about this test when I was learning post-production in photography, and it seemed to me very useful in this particular area. Take as color-accurate photographs of your swatch as possible using natural daylight. And then on your computer or phone, turn your photo into black and white. The color whose gray shade is darker will become your main yarn A. For an illustrative example, I chose two samples of such borderline cases where it is impossible to correctly determine yarn A without the help of a test. The first one uses equally bright and intense colors, the second one uses equally muted colors. I used photographs of our favorite Early Birds Elena and Victoria. In the first sample, nevertheless, the pink yarn appears darker, and it should become yarn A. The second sample brought a surprise. Both colors in black and white were painted in almost the same gray. But nevertheless, thread A here should be a gray-blue thread, being more expressive due to the presence of metallic yarn in the composition. And it is the metallic yarn that catches more dark shadows here than the beige yarn. On the other hand, it would not be a big mistake if a different color was chosen as yarn A with such close shades of gray in black and white photography. But I hope you get the idea. Thanks for reading! *** Есть одно важное предупреждение для тех, кто в будущем собирается вязать что-либо, используя рисунок полосатой платочки и выполняя вытачки в нем. Очень важно правильно выбрать нить А (главную нить). Нить А – та, которая будет чертить графические линии. Она должна быть более темной, более яркой, насыщенной и более выразительной, чем нить Б. Цвет нити Б, наоборот, должен быть более светлый, приглушенный и спокойный. Я, конечно, не могу вам запретить поменять все местами. Но я видела воплощения наоборот, и, лично для меня, они теряют некий "смак". Графика вырисовывается, но не так четко, и нужны усилия, чтобы понять мысль. Если для своего будущего полосатика вы выбрали черный и белый, то все само собой понятно. Но что делать, если вы выбрали два цвета, очень похожие по яркости и интенсивности, и сами не можете определить, который из них станет нитью А. Сделайте тест. Про этот тест я узнала, когда училась работе с фотографиями, и он показался мне очень полезным именно в этой области. Сделайте как можно более правильные в цветовом понимании фотографии вашего образца, используя натуральный дневной цвет. И далее в компьютере или телефоне превратите вашу фотографию в черно-белую. Тот цвет, серое отражение которого будет более темным, станет вашей главной нитью А. Для наглядного примера я выбрала два образца таких пограничных случаев, где без помощи теста невозможно правильно определить нить А. Первый из них использует одинаково яркие и интенсивные цвета, второй из них – одинаково приглушенные цвета. Я использовала фотографии наших любимых ласточек Елены и Виктории. В первом образце все же розовая нить кажется более темной, и она должна стать нитью А. Второй образец преподнес сюрприз. Оба цвета в черно-белом варианте окрасились в почти одинаковый серый. Но все же нитью А здесь должна стать серо-голубая нить, будучи более выразительной по причине присутствия люрекса в составе. И именно люрекс здесь ловит больше темных теней, чем бежевая нить. С другой стороны, при таких очень близких оттенках серого на черно-белой фотографии, не будет большой ошибкой, если нитью А будет выбран другой цвет. Но идею, я надеюсь, вы поняли. Спасибо, что читали!
- The Perfect Buttonhole. Идеальная петля для пуговицы
I always looked in envy at buttonholes in clothing and dreamed of similar ones in knitted projects. Everything offered in the books, on the Internet, and patterns did not meet my standards. Several years ago, I introduced invisible buttonholes that are great for garter stitches and large buttons. But such buttonholes have one drawback. The edges of the hole are distinguished by their degree of elasticity. One edge is very elastic; the other, on the contrary, is firm. For lack of anything better, I used them in my designs and patterns. For small buttons, the familiar "two stitches together, yarn over" method works even worse. The hole stretches indefinitely, deforming adjacent stitches, and at the end the unbuttoned bands look like they have been shot. After some time, buttons begin to slip out of their holes. And this is understandable – after all, there is nothing in them that can withstand stretching. *** Я всегда с завистью смотрела на петли для пуговиц в шитых изделиях и мечтала о похожих в вязаном. Все, что предлагалось в книгах, в интернете и в описаниях меня не устраивало. Несколько лет назад я предложила вам невидимые петли для пуговиц, которые прекрасно подходят для планок, выполненных платочной вязкой, а также для больших пуговиц. Но такие петли имеют один недостаток. Края отверстия отличаются своей степенью растяжимости. Один край очень эластичный, другой, наоборот, крепкий. За неимением лучшего я пользовалась ими и предлагала их в своих описаниях. Для маленьких пуговиц всем нам знакомый прием "две вместе, накид" работает еще хуже. Петля растягивается до бесконечности, деформируя соседние петли, а расстегнутые планки выглядят как после расстрела. Под конец пуговицы начинают выскальзывать из петель. И это объяснимо – ведь в них нет ничего, что может противостоять растяжению. If anyone is engaged in meditation, know that one of the types of meditation involves concentration on an object. For example, on a candle flame. For a long time, I meditated on buttonholes in clothing. Aren't they perfect? Of course, if you staring and meditate for months, the answer will surely come. The non-stretchable underside of the invisible buttonhole must have somehow been mirrored on the opposite side, but the yarn must remain continuous. The worst thing to do here is to break the yarn at the most frictional and most frequently used place. I am currently working on a collection of cardigans, and to be honest, the desire to find the very perfect buttonhole prompted me to create buttoned designs. Calling the buttonhole perfect is a daring act, but being a perfectionist for whom basically always goes wrong, this time, I'm confident in my assessment. They really are. *** Если кто занимается медитацией, знает, что один из видов медитации подразумевает концентрацию на объект. Например, на пламя свечи. Я же долгое время медитировала над петлями в шитых изделиях. Ну разве они не идеальны? Конечно, если месяцами смотреть и медитировать, ответ обязательно придет. Нерастяжимая нижняя сторона невидимой петли должна была каким-то образом отзеркалиться в верхней части, но при этом нить должна была остаться непрерывной. Самое плохое, что можно здесь сделать – это прервать нить в самом подвижном и наиболее часто используемом месте. Я сейчас работаю над коллекцией кардиганов, и честно скажу, именно желание найти ту самую идеальную петлю сподвигла меня на создание застегиваемых дизайнов. Назвать петли идеальными – дерзкий поступок, но будучи перфекционистом, у которого по сути все всегда не так, в этот раз я уверена в своей оценке. Они действительно такие. The essence and distinguishment of these buttonholes are that both the left and right sides of the hole (or top and bottom, if you like) are identical. They are the same not only how they appear, but also have the same degree of resilience, which in the buttonholes should be as tight as possible in knitting. They are strong and dimensionally stable. Let me share with you an analogy. In one comedy movie, a house exploded, and the toilet was still standing. You will wear away your cardigan down to tatters, and the buttonholes still remain. I'm sorry for such a rude comparison, but it is the most accurate in this case. These are buttonholes for the most commonly used ribs: 1x1, 2x2, 2x1. They are symmetrical to the rib stitch pattern, and the beginning, as well as the end of the buttonhole, coincides with the purl stitches of the rib. I didn't have time to test them on a garter stitch. When I do, I will return to this post and complete it, or write a new one. It may seem that this method is suitable exclusively for ribs, and our old invisible buttonholes will still remain for the garter. Anything possible. In the sideways (horizontal) button bands, the buttonhole opening will be vertical. In vertical bands that are worked together with fronts or sewn on lately, the buttonhole will be horizontal. The perfect buttonholes involve four more rib stitches than the hole opening itself, which means the vertical bands should be wide enough. *** Суть и отличие этих петель для пуговиц заключается в том, что как левая, так и правая сторона отверстия (или верх и низ, если хотите) являются идентичными. Они одинаковые не только по виду, но и степенью растяжимости, которая в петлях должна быть наименьшая, на сколько это возможно в вязании. Они крепкие и формоустойчивые. Проведу одну аналогию. В каком-то комедийном фильме взорвался дом, а туалет остался стоять, как стоял. Так и здесь. Вы сносите свой кардиган до дыр, а петли останутся. Прошу прощения за такое грубое сравнение, но в данном случае оно наиболее точное. Здесь я предлагаю петли для пуговиц для самых популярных резинок: 1х1, 2х2, 2х1. Они симметричны узору резинок, а начинается и закачивается петля на изнаночных петлях резинки. Я не успела их проверить на платочной вязке. Когда я это сделаю, я пополню этот пост, или напишу новый. Может так оказаться, что этот метод подходит исключительно для резинок, а для платочки останутся наши старые невидимые петли. Все может быть. В поперечных (горизонтальных) планках застежки отверстие петель для пуговиц будет вертикальным. В вертикальных планках, которые вяжутся вместе с полочками или пришиваются, отверстие будет горизонтальным. Идеальные петли для пуговиц используют на четыре петли резинки больше, чем само отверстие, значит, вертикальные планки должны быть достаточно широкие. Perfect buttonholes in a 1x1 rib Actual buttonhole width: 3 (5) stitches; 7 (9) stitches involved. The first option is suitable for buttons with a diameter of 1,5-1,7 cm, the second is intended for larger or coat buttons with a diameter of about 2,5 cm. Buttonholes are symmetrical to the rib pattern, so the only possible step for changing the hole width is 2 stitches. But you likely don't want to change the suggested width. The buttonholes are going to be way too wide or too small. Идеальная петля для пуговицы в резинке 1х1 Настоящая ширина отверстия: 3 (5) петли. Задействовано 7 (9) петель. Первый вариант подходит для пуговиц с диаметром 1,5-1,7 см, второй предназначен для больших или пальтовых пуговиц с диаметром около 2,5 см. Петли для пуговиц симметричны узору резинки, так что единственный возможный шаг измемения ширины отверстия – 2 п. Но вы вряд ли захотите менять предложенную ширину. Петли станут или очень широкими, или слишком маленькими. Begin with a purl stitch of the rib. Bind off 6 (8) sts with a crochet hook binding off the sts themselves and not using the working yarn. Temporarily place the last st onto the left-hand needle. Return to the beginning of the buttonhole and with working yarn pick up and knit 2 sts into the first 2 bound-off sts, inserting the needle right below the chain stitch; with a crochet hook pick up a stitch from the first available closest chain st and make a chain of 5 (7) sts using a crochet hook. Pull the temporarily placed st on the left-hand needle through the last chain st. Place the st onto the right-hand needle. In the next WS row work to the buttonhole, pick up 4 (6) sts into each back bump of the chain st in rib pattern: *1 st purlwise, 1 st knitwise, rep from * 1 (2) more times. *** Начав с изнаночной п. резинки, с помощью крючка закрыть следующие 6 (8) п., провязывая открытые петли одну через другую (рабочая нить в процессе не участвует, провязать только сами петли). Последнюю петлю с крючка временно перенести на левую спицу. Вернуться в начало петли для пуговицы и рабочей нитью поднять 2 п. лицевыми п. в первые две закрытые петли под цепочкой. С помощью крючка поднять петлю из ближайшей доступной петли цепочки и провязать крючком 5 (7) воздушных петель. Протянуть временно размещенную петлю на левой спице через последнюю воздушную п. на крючке и поместить на правую спицу. В следующем изн. р. вязать до петли для пуговицы. Из тыльной дуги каждой воздушной п. цепочки поднять спицей по одной п., всего 4 (6) п.: *1 п. изнаночной п., 1 п. лицевой п.*, повторить между * еще 1 (2) раз(а). The perfect buttonhole in 2x2 and 2x1 ribs Actual buttonhole width: 4 stitches in 2x2 ribs and 5 stitches in 2x1 ribs. 8 and 9 rib stitches are involved, respectively. The first option is suitable for buttons with a diameter of 1,6-1,8 cm, the second for buttons with a diameter of 1,8-2,0 cm. Buttonholes are symmetrical to the rib pattern so that the only possible step for changing the buttonhole width is 4 and 3 stitches, respectively. But again, you probably are not going to change the suggested width. Buttonholes will become too wide if you lengthen them, and there is probably nowhere to shorten. Идеальная петля для пуговицы в резинке 2х2 и 2х1 Настоящая ширина отверстия: 4 петли в резинке 2х2 и 5 петель в резинке 2х1. Задействованы 8 и 9 петель резинки соответственно. Первый вариант подходит для пуговиц с диаметром 1,6-1,8 см, второй – для пуговиц 1,8-2,0 см. Петли для пуговиц симметричны узору резинки, так что единственный возможный шаг изменения ширины отверстия – 4 п. и 3 п. соответственно. Но опять же, вы вряд ли захотите менять предложенную ширину. Петли для пуговиц станут очень широкими, а уменьшать, наверное, уже негде. Begin with the first knit stitch of two of the rib. Bind off 7 sts with a crochet hook binding off the sts themselves and not using the working yarn. Temporarily place the last st onto the left-hand needle. Return to the beginning of the buttonhole and with working yarn pick up and knit 2 sts into the first 2 bound-off sts, inserting the needle right below the chain stitch; with a crochet hook pick up a stitch from the first available closest chain st and make a chain of 6 sts using a crochet hook. Pull the temporarily placed st on the left-hand needle through the last chain st. Place the st onto the right-hand needle. In the next WS row work to the buttonhole, pick up 5 sts into each back bump of the chain st in rib pattern: *1 st knitwise, 2 sts purlwise, 2 sts knitwise. *** Начав с первой из двух лицевых п. резинки, с помощью крючка закрыть следующие 7 п., провязывая открытые петли одну через другую (рабочая нить в процессе не участвует, провязать только сами петли). Последнюю петлю с крючка временно перенести на левую спицу. Вернуться в начало петли для пуговицы и рабочей нитью поднять 2 п. лицевыми п. в первые две закрытые петли под цепочкой. С помощью крючка поднять петлю из ближайшей доступной петли цепочки и провязать крючком 6 воздушных петель. Протянуть временно размещенную петлю на левой спице через последнюю воздушную п. на крючке и поместить на правую спицу. В следующем изн. р. вязать до петли для пуговицы. Из тыльной дуги каждой воздушной п. цепочки поднять спицей по одной п. по рисунку узора, всего 5 п.: 1 п. лицевой п., 2 п. изнаночными п., 2 п. лицевыми п. The buttonhole on a 2x1 rib is made exactly like on a 2x2 rib, only the number of stitches involved differs, and the buttonhole itself is wider by one stitch. Begin with the first knit stitch of two of the rib. Bind off 8 sts with a crochet hook binding off the sts themselves and not using the working yarn. Temporarily place the last st onto the left-hand needle. Return to the beginning of the buttonhole and with working yarn pick up and knit 2 sts into the first 2 bound-off sts, inserting the needle right below the chain stitch; with a crochet hook pick up a stitch from the first available closest chain st and make a chain of 7 sts using a crochet hook. Pull the temporarily placed st on the left-hand needle through the last chain st. Place the st onto the right-hand needle. In the next WS row work to the buttonhole, pick up 5 sts into each back bump of the chain st in rib pattern: *1 st knitwise, 2 sts purlwise, rep from * one more time. *** Петля для пуговицы на резинке 2х1 выполняется ровно, как и на резинке 2х2, отличается лишь количество задействованных петель, а сама петля для пуговицы получается шире на одну петлю. Начав с первой из двух лицевых п. резинки, с помощью крючка закрыть следующие 8 п., провязывая открытые петли одну через другую (рабочая нить в процессе не участвует, провязать только сами петли). Последнюю петлю с крючка временно перенести на левую спицу. Вернуться в начало петли для пуговицы и рабочей нитью поднять 2 п. лицевыми п. в первые две закрытые петли под цепочкой. С помощью крючка поднять петлю из ближайшей доступной петли цепочки и провязать крючком 7 воздушных петель. Протянуть временно размещенную петлю на левой спице через последнюю воздушную п. на крючке и поместить на правую спицу. В следующем изн. р. вязать до петли для пуговицы. Из тыльной дуги каждой воздушной п. цепочки поднять спицей по одной п. по рисунку узора, всего 6 п.: *1 п. лицевой п., 2 п. изнаночными п.*, повторить между * еще один раз. For other kinds of rib patterns, make the perfect buttonholes by analogy. Most importantly, find the symmetry between the hole itself and the rib pattern. Also, and the beginning and end of the buttonhole should coincide with the purl stitches of the rib. *** В других узорах резинки идеальные петли для пуговиц делайте по аналогии. Главное, найдите симметрию между отверстием петли и узором резинки, а начало и конец отверстия петли должны опираться на изнаночные петли резинки.
- The Rule of Three. Правило трех
I will begin this article by quoting one proverb: "beauty is in the eye of the beholder." It's useless to argue with this. Тhe only way to stop evaluating another choice is to accept it. And the more you take other views for granted, the deeper your inner world becomes. Each person who creates at least something has his signature, distinctive taste, system, and performance style. And the reasons why he sees the world that way. I will dig a little into the design field, but it is not necessary to agree with my point of view. For an idea to materialize and not stay drifting in space, it needs to be grounded. First, you need to visualize it. The clearer you envision an object or phenomenon, the more likely it is to be embodied. Next, you should break everything down into steps: find the time, outline the stages, write a project or draw a sketch, evaluate your skills, select the necessary technologies, tools, and gather materials. I rarely have a whole vision of future design. More often than not, I see separate parts, separate elements record them in my memory and pack them in boxes of ideas. I am utterly confident in my warehouse of ideas – nothing loses in it. If something seems to be forgotten, after a few years, it pops out as if from nowhere. And only when these separate elements combine, the whole picture pops up, and I understand that I am entirely ready for embodiment. Then I knit the project in one take, it is done very quickly, and then I don't even really remember the whole process. You seem to be sucked in by something and then spit out with a ready-made design on your knees. It also happens that I start working on another design without having a complete vision. Most often, these are situations when I do not know what technologies to use for this or that structural element, and then I can only rely on my hands: they will find a solution along the way. There is one trap in creativity: you may never start, waiting for decades for ready-made solutions on a silver platter. For me, the environment is an irreplaceable assistant in knitwear design. For this reason, I spend a lot of time naming the design. We can say that the name fills in almost all the gaps in the vision of design and suggests such essential components as the yarn composition, color, stitch pattern, shape, form, and purpose. Any object or phenomenon has some unique qualities, considering which, you can get answers to open questions and tips for unsolved problems. And this is the most exciting part of the whole process. What could be more fun than to see the rain, a pine cone, clouds, a wildflower, or the entire planet through knitting needles and yarn? *** Начну эту статью с цитирования одной пословицы: "на вкус и цвет товарищей нет". С этим спорить бесполезно. Единственная возможность перестать оценивать другой выбор – это его принять. Ведь чем больше принимать за должное другие взгляды, тем богаче становится твой внутренний мир. У каждого человека, который хоть что-то создает, есть свой почерк, свой отличительный знак, вкус, система и стиль исполнения. И причины, почему он видит мир именно так. Я здесь немного покопаюсь в области дизайна, но совершенно необязательно соглашаться с моей точкой зрения. Чтобы любая идея материализовалась, а не оставалась витать в космосе, ей нужно заземлиться. Сначала нужна визуализация. Чем четче вы видите объект или явление, тем больше шансов ему воплотиться. Далее следует разбить все на составляющие части: найти время, обозначить этапы, сделать проект или нарисовать эскиз, оценить свои умения, подобрать нужные технологии, инструменты и материалы. Лично у меня редко когда видение будущего дизайна приходит целиком. Чаще я вижу отдельные части, отдельные элементы, которые фиксируются в памяти и складываются в коробках идей. Я за свой склад идей совершенно спокойна – в нем ничего не теряется. Если что-то, казалось бы, позабылось, через несколько лет выскакивает как бы ниоткуда. И лишь тогда, когда эти отдельные частички соединяются, всплывает полная картинка, и я понимаю, что к воплощению полностью готова. Я тогда вяжу изделие за один присест, это делается очень быстро, и потом я даже не очень-то помню весь процесс. Тебя вроде что-то втягивает и потом выплевывает уже с готовым дизайном на коленях. Бывает и так, что я начинаю работать над очередным дизайном, не имея полного видения. Чаще всего это бывают ситуации, когда я не знаю, какими технологиями мне выполнить тот или иной элемент конструкции, и тогда остается положиться лишь на свои руки: они по ходу найдут решение. В творчестве есть одна ловушка: ты можешь никогда не начать, десятилетиями ожидая готовых решений на блюдечке. Незаменимым помощником в дизайнерстве вязаных изделий для меня лично является окружающая среда. По этой причине я уделяю очень много времени названию дизайна. Можно сказать, что название заполняет почти все пробелы в видении дизайна и подсказывает такие важные составляющие, как состав пряжи, цвет, узор, форму и предназначение. Любой объект или явление обладает какими-то только ему свойственными качествами, рассмотрев которых, ты можешь получить ответы на открытые вопросы и подсказки для нерешенных задач. И это – самая захватывающая часть всего процесса. Увидеть дождь, обыкновенную шишку, облака, полевой цветок или всю планету сквозь спицы и пряжу? Что может быть еще увлекательнее? Next, I ask myself the following questions: Availability of yarn or the ability to pick up a substitute. How will the finished project look in different sizes? Is it possible to systematize and write the pattern? Is the complexity going through the roof, including how long it will take to knit? Reduce knitting time if possible, reduce complexity if possible. Will it be interesting to knit? Is it possible for a knitter to change something according to her/his preferences, height, skills? What new will I present in my design and what will people learn? The last question is crucial. Every knitter knows how to take a simplified pattern or shape as a basis and apply a stitch pattern to it. You can called it as a design too, but for me, the design is new solutions to basic tasks. The tasks are always the same: to make it fashionable, cozy, comfortable, and beautiful. Solutions, on the other hand, must be creative, unexpected, new, and educational. If the design lacks even a small part of these components, the designer is not needed. After all, we already know how to knit ordinary. *** Далее я задаю себе следующие вопросы: Доступность пряжи или возможность подобрать замену. Как готовое изделие будет смотреться на разных размерах. Можно ли систематизировать и написать инструкцию. Не зашкаливает ли сложность, включая то, сколько это займет времени. Время вязания по возможности сократить, сложность по возможности убавить. Будет ли это интересно вязать. Есть ли возможность вязальщице что-то изменить по своему вкусу, росту, умениям. Что нового я преподнесу в своем дизайне и чему люди научатся? Последний вопрос очень важный. Взять за основу упрощенную выкройку и наложить на нее узор умеет каждая вязальщица. И такое можно назвать дизайном, но для меня дизайн – это совсем другое. Для меня дизайн – это новые решения основных задач. Задачи всегда одни и те же: чтобы было модно, уютно, удобно и красиво. Решения, с другой стороны, должны быть изобретательные, неожиданные, новые и обучающие. Если в дизайне нет хоть малой части этих составляющих, дизайнер не нужен. Ведь обыкновенное мы и так умеем вязать. It is vital to separate two concepts: design and construction. Anatomical patterns and technologies that shape these patterns, also different assembly and finishing methods are a construction. Color, stitch pattern, texture, shape, and the correct handling of structural elements are a design. Construction and design are often inseparable. Sometimes it all starts with a basic structure, and then there is a pondering of how to play it all out with design elements or how to cover it skillfully. The pictures below show just such a situation – constructive techniques are played up with design elements. The constructive task is side bust darts. The design solution is to scatter the short rows and create the wave pattern. The constructive task is arranging decreases to shape a yoke. The design solution is to gradually eliminate the motifs of the pattern that expand the knit fabric. The constructive task is side bust darts. The design solution is to scatter the short rows so that the gradient yarn's changing shade does not emphasize (does not draw) the dart line. Constructive task – shoulder darts in raglan. The design solution is to emphasize the short rows with graphic contrasting lines. *** Важно разделить два понятия: дизайн и конструкция. Анатомические выкройки и технологии, которыми формируются эти выкройки, также разные методы сборки и отделки – это конструкция. Цвет, узор, фактура, форма и правильное обыгрывание конструктивных элементов – это дизайн. Конструкция и дизайн часто неотделимы друг от друга. Иногда все начинается с голой конструкции, и далее происходит обдумывание, как это все обыграть дизайнерскими элементами или как умело скрыть. Конструктивная задача – боковая вытачка для груди. Дизайнерское решение – разбросать укороченные ряды в узоре в виде волн. Конструктивная задача – убавления для формирования кокетки. Дизайнерское решение – постепенно избавиться от мотивов узора, расширяющих полотно. Конструктивная задача – боковая вытачка для груди. Дизайнерское решение – разбросать укороченные ряды, чтобы изменившийся оттенок градиента не подчеркнул (не начертил) линию вытачки. Конструктивная задача – плечевые вытачки в реглане. Дизайнерское решение – подчеркнуть укороченные ряды графическими контрастными линиями. Sometimes, on the contrary, everything starts with design ideas, and then you need to think long and hard about how to fit them into the design. Below are just such situations. Design idea – raglan without traditional raglan lines. Constructive task: where to transfer and arrange the decreases without compromising the fit. Design idea – ruffles or frills. Constructive task: how to fit a drastic reduction in the number of stitches into the main stitch pattern. The design idea is a yoke inverted around the central axis. Constructive task: how to build a comfortable hand opening (a kind of sleeve). The design idea is an intricate stitch pattern which is not amenable to the modeling. Constructive task: where and how to position bust darts. *** Иногда, наоборот, все начинается с дизайнерских задумок, а далее нужно долго и упорно думать, как вписать их в конструкцию. Ниже представлены как раз такие ситуации. Дизайнерская задумка – реглан без классических линий реглана. Конструктивная задача: где перенести и расположить убавления не в ущерб посадке. Дизайнерская задумка – рюши или оборка. Конструктивная задача: как вписать резкое изменение количества петель в основной узор. Дизайнерская задумка – перевернутая вокруг центральной оси кокетка. Конструктивная задача: как сконструировать удобное отверстие для рук (своеобразный рукав). Дизайнерская задумка – сложный, интересный, но неподдающийся моделированию узор. Конструктивная задача: где и как расположить вытачку для груди. As you can see, the design and the construction walk together holding hands, and one cannot live without the other. And here I want to reveal my weak point. The design would be more powerful, if not my chosen path of anatomical knitting. Sometimes Design turns to Madame Construction and starts serenade, promising a bright future. And Madame shakes her head from side to side, showing her disagreement. In anatomical knitting, a lot is impossible. Multicolor stitch patterns, intricate cable patterns, jacquards, checkerboard-type or striped patterns, knitting in different directions, some intarsia cases, and various old knitting techniques require a flat knit fabric, simplified shapes. Sometimes I look with envy at the designs of other masters, where the flight of imagination is unlimited, and literally, I bite my nails. I can't do that. On the other hand, everyone has their specialty, their signature. Moreover, no matter how extravagant the design is, everything deteriorates if such a knitted project does not fit well. The introduction is over, and now I will begin to develop the main topic of the article – the "rule of three." Let's leave Madame Construction alone for a while; further, we will focus exclusively on Design. I am a self-taught designer with an innate color memory, acquired skills to sew, craving to dress beautifully from a very early age, and extensive knitting experience. I wrote my design textbook myself. One chapter in it talks about the rule of "no more than three design elements in one piece of the garment," where the fourth element would either turn everything into a bad taste example or a gem of avant-garde or high fashion. The risk is significant. On the other hand, the fewer design elements, the more the knit piece belongs to the basic wardrobe. Exceptions are possible, but when I pull ideas out of the warehouse, I try to take no more than three boxes. What is a "design element" for me? The story that the design tells, what catches the eye at first glance, and what attributes convey the design idea. In simpler terms, it is an assemblage of yarn, color, stitch patterns, shape, finishing, volumes, embellishments, and functional details: how they distinguish alone and how they interact with each other. And it can be considered a victory if only one or two elements convey the design idea; the design becomes engaging, not dull, and deserves that you spend a hundred hours of your life knitting it. I suggest doing some searching of these elements in my designs; maybe in specific samples, it will become clearer what is at stake. And perhaps you will enjoy this analysis of the design when you create something of your own or when you want to make some adjustments. You will maybe get answers to the questions, which buttons to choose: simple or eye-catching, which yarn would be better suited: smooth or with some texture. And with what further to match the finished knit garment. *** Как видите, конструкция сцепилась ручками с дизайном, и один не может без другого. И тут хочу раскрыть одно свое слабое место. Дизайн был бы более могучим, если не мною выбранный путь анатомического вязания. Иногда Дизайн поворачивается к мадам Конструкция и начинает петь серенады, обещать розовое будущее. А мадам покачивает головой из стороны в сторону, показывая свое несогласие. В анатомическом вязании очень многое невозможно. Многоцветные узоры, сложные узоры из кос, жаккарды, узоры шахматного или полосатого характера, вязание по разным направлениям, некоторые случаи интарсии, разные старинные технологии – все это требует плоского полотна, упрощенных выкроек. Я иногда с завистью смотрю на работы других мастеров, где полет фантазии ничем не ограничен, и в буквальном смысле кусаю себе ногти. Я такое сделать не могу. А может и не надо – у каждого есть свой конек, свой почерк. Тем более, каким бы экстравагантным не был бы дизайн, все портится, если такое вязаное изделие не сидит. Вступление закончено, и теперь я начну развивать основную тему статьи – "правило трех". Оставим на время мадам Конструкцию в покое; далее речь пойдет исключительно о Дизайне. Я – дизайнер-самоучка, с врожденной цветовой памятью, с приобретенными умениями шить, тяге красиво одеваться с очень ранних лет и с немалым опытом в вязании. Свой учебник по дизайну я написала себе сама, и как раз один раздел в нем рассказывает о правиле "не больше трех элементов дизайна в одном изделии", где четвертый элемент или превратил бы все в безвкусицу, или же в жемчужину авангардной или высокой моды. Риск большой. С другой стороны, чем меньше элементов дизайна, тем ближе трикотажное изделие к базовому гардеробу. Исключения возможны, но когда я вытаскиваю идеи из склада, стараюсь брать не больше трех коробок. Что для меня является "элементом дизайна"? Это то, какую историю рассказывает дизайн, что бросается в глаза с первого взгляда, и какими атрибутами передалась дизайнерская мысль. Если проще, то это совокупность пряжи, цвета, узоров, формы, отделки, объемов, украшающих и функциональных деталей: как они проявляются в дизайне по-отдельности, и как взаимодействуют между собой. И можно считать победой, если только одним или двумя элементами передается дизайнерская мысль; изделие становится интересным, нескучным и заслуживает того, чтобы вы потратили сто часов своей жизни на его вязание. Предлагаю поискать эти элементы в моих дизайнах; может в конкретных примерах станет яснее, о чем идет речь. И может вам понравится такой разбор дизайна, когда будете создавать что-то свое, или же захотите сделать какие-либо изменения. А может вы получите ответы на вопросы, какие пуговицы подобрать: простые или притягивающие внимание, какая пряжа лучше подошла бы: гладкая или фасонная. И с чем дальше сочетать уже связанное изделие. One of my most recent designs, the Horizon cardigan, could be an excellent first example. Based on the classic shape of the cardigan, which is a white canvas, the horizon is drawn here in a long gradient, and this is the first thing that catches your eye. The second element is a beautiful shoulder (imitation of set-in sleeves in a round yoke). The button band here merges with the main fabric and visually disappears, and the buttons have been selected so that they remain as less noticeable as possible. Those choices made room for the third design element – the rounded corners of the pockets. If the button band were one-color (contrasting), and the buttons would attract more attention, most likely, I would make the pockets square, as less noticeable as possible, not standing out. *** Один из самых последних моих дизайнов, кардиган "Горизонт", может стать очень хорошим первым примером. На основе классической формы базового кардигана, которая является белым холстом, нанесен рисунок горизонта длинным градиентом, и это первое, что бросается в глаза. Вторым элементом является красивое плечо (имитация втачного рукава в круглой кокетке). Планка застежки здесь сливается с основным полотном с целью ее скрыть, а пуговицы были подобраны такие, чтобы оставались как можно менее заметны. Так освободилось место для третьего элемента дизайна – закругленных уголков карманов. Если бы планка была бы одноцветная (контрастирующая), а пуговицы притягивали бы внимание, скорее всего, карманы я бы сделала квадратными, как можно менее заметными, не выделяющимися. The Solaris summer top also has three distinct design elements that you can quickly figure out for yourself. The first is an openwork insert, which immediately catches the eye; the second is the radial darts for the shoulders, continuing the story about the sun or a star. And the third element is a combination of two "different" ones: yarn (smooth and bouclé) and knitting techniques (knitting needles and a crochet hook). There are quite a lot of elements, but everything is muted down by the absence of color and the basic shape. *** Летний топ Solaris также имеет явные три элемента дизайна, и вы сами их можете легко вычислить. Первый – это ажурная вставка, которая сразу бросается в глаза, второй – это лучевидные вытачки для плеч, продолжающие рассказ о солнце, о звезде. И третий элемент – это сочетание двух "разных": пряжи (гладкая и букле) и техник вязания (спицы и крючок). Элементов немало, но все приглушено отсутствием цвета и абсолютно базовой формой. It is even easier to solve the funky berry jumper "Cranberry." All three elements are apparent: berry color, "berry" pattern, and fabric gathering for ruffles and puffed sleeves. The jumper saturated with bright and noticeable features conveys a clear design idea: this is a berry! *** Разгадать веселенький ягодный джемпер "Клюква" еще проще. Все три элемента очевидны: ягодный цвет, "ягодный" узор и сборка полотна, формирующая рюши и рукав-фонарик. Насыщенный яркими и заметными элементами джемпер передает четкую дизайнерскую мысль: это ягода! Another easy-to-read jumper is the Dahlia. Three design elements: volume (puffy sleeves and ample positive ease) and a bicolored expressive stitch pattern is counterbalanced by blocks of simple one-color patches. *** Еще один легко читаемый джемпер – это "Георгин". Три элемента дизайна: объем (пышные рукава и большая свобода облегания), двухцветный выразительный узор и его противопоставление блокам простого одноцветного узора. An interesting example of the "rule of three" is the "Drop" cardigan. Let's take it apart piece by piece. For the base, I used a pattern of mirrored twisted stitches in the rib (the first element), followed by trickles of rain flowing down the shoulders (the second element that catches the eye the most). There was room for one more element, and the choice was between "gold" (metallic yarn and "gold" buttons) and large patch pockets. I knitted my pocket, put it onto the cardigan, and realized that the pocket was beginning to compete with the shoulders and draw attention to itself. I did not want such a fight, and the place of the third element remained with "gold." I always vote for function and comfort, but design sometimes says "no" loudly. *** Интересный пример "правила трех" – кардиган "Капля". Давайте, разберем его по частям. Для основы был взят узор зеркальных скрещенных петель в резинке (первый элемент дизайна), далее последовали стекающие струйки дождя по плечам (второй элемент, который больше всех бросается глаза). Осталось место для еще одного элемента и выбор стоял между золотом (люрекс и золотые пуговицы) и большими накладными карманами. Я связала карман, приложила его к кардигану, и поняла, что он начинает конкурировать с плечами и стягивать на себя внимание. Такой борьбы мне совсем не хотелось, и место третьего элемента все же осталось за золотом. Я всегда голосую за функцию и удобство, но дизайн иногда громко говорит "нет". Jumper "Fall": a multicolored plaid pattern, a noticeable detail of the belt, puffed sleeves. Note that all three are very weighty; all of them are loud and defend their right to attention. For this reason, the other components of the look should fade into the background: be smooth, without any details. Exactly fall into one of the colors of the jumper, or be of a neutral color. *** Джемпер "Осень": пестрый клетчатый рисунок, яркая заметная деталь пояска, рукава-фонарики. Обратите внимание, что все три элемента очень весомые; все они громкие и отстаивают свое право на внимание. По этой причине остальные составляющие образа должны уйти на второй план: быть гладкими, без деталей, и точно попадать в один из цветов рисунка, или же, быть нейтрального цвета. Summer top "Cumulus:" eyelets and an unusual rounded sleeve. It seems like there are only two design elements, or even one if you look at the sleeve as a single whole piece. Color plays a critical role here, supporting and reinforcing the transmission of cumulus clouds' picture in the sky. The color can already be counted as an independent design element: it is essential to continue the story. *** Летний топ Cumulus: ажур и необычный закругленный рукав. Вроде всего лишь два элемента дизайна, или даже один, если смотреть на рукав как на цельную деталь. Нот тут очень важную роль играет цвет, поддерживающий и усиливающий передачу мысли о кучевых облаках в небе. И тогда цвет уже можно засчитать за самостоятельный элемент дизайна: он нужен для продолжения истории. In the summer top "Milky Way," sleeves accumulated all three elements. The first one, which immediately catches your eye, is that the sleeves are entirely different from the body. They are striped and knitted in a different pattern. Then two more elements are added: playful darts for the shoulders and ample width for the sleeves. For this reason, there was nothing left for the body but to be dark and plain background, made in one of the sleeves' colors. If I knit the body with a third color, you can probably already guess: it would be the fourth design element. But, if you still want to knit the body in a third color, make room for it by removing one element: knit a narrow fitted sleeve. *** В летнем топе "Млечный путь" все три элемента забрали рукава. Первый из них, который сразу бросается в глаза – рукава отличаются от корпуса. Они полосатые и связаны другим узором. Далее добавлены еще два элемента: игривые вытачки для плеч и значительная ширина рукавов. По этой причине для корпуса не осталось ничего, кроме как быть темным, гладким и безликим, выполненным одним из цветов рукавов. Если бы корпус был связан третьим цветом, вы, наверное, уже догадываетесь: он был бы четвертым элементом дизайна. Но, если вам все же хочется вязать корпус третьим цветом, освободите для него место, убрав один элемент: свяжите узкий рукав. The next three designs appear to have only two outstanding and easy-to-read design elements. The first, "Electra" – a plaid pattern of the body and plain sleeves for a counterweight; the second, "Marshmallow" – graphic lines and a peplum; the third, "Almanac" – textured plaid and bell sleeves. I knew that I still have one more untaken place to add interest. And, although the third element in each of them is less obvious, it is undoubtedly there: the A-line shape, the raised waistline, and the cropped length, respectively. *** Следующие три дизайна, казалось бы, имеют лишь по два ярких и легко читаемых элементов дизайна. Первый, "Электра" – клетчатый рисунок и гладкие рукава на противовес; второй, "Зефир" – графичный рисунок и баску; третий, "Альманах" – фактурную клетку и рукава-колокольчики. Я знала, что у меня есть еще есть по одному свободному месту для добавления интереса. И, хоть третий элемент в каждом из них менее очевиден, но он несомненно есть: силуэт "А", приподнятая талия и короткость соответственно. I could probably go on and on, but I hope you get the idea. If you choose a complicated stitch pattern, choose a smooth yarn, but you may add a large volume; if your design is full of details, it may be better to mute down the color. If the project is of any intricate non-standard shape, maybe then knit it in a Stockinette Stitch. Feel free to sew decorative buttons on a regular, basic, classic cardigan. Well, if you want both, and this and even more, let your design express a clear idea and tell its easily guessed and readable story. *** Я, наверное, могла бы продолжать бесконечно, но надеюсь, что идею вы поняли. Если выбираете сложный узор, подбирайте гладкую пряжу, но может вам захочется большого объема; если в вашем вязаном изделии полно деталей, может лучше тогда убавить в цвете. Если изделие какой-нибудь усложненной нестандартной формы, может тогда вяжите его просто гладью. На обычном классическом кардигане без излишеств смело пришивайте выразительные пуговицы. Ну а если вы хотите и того, и этого и еще поверх намазать, пусть ваш дизайн несет четкую мысль и расскажет свою легко угадываемую и читаемую историю.
- Part 2. The Midpoint of the Collection. Часть 2. Середина коллекции
You can find about the beginning of the collection here (Part 1). Last year, on the 26th of April, I started knitting the collection "All year round cardigans" and wished myself a good journey in the forum post. It took exactly ten months, and today I decided to report on the results. Looking back, I realize that my progress is entirely unimpressive. Very little has been done, although the reasons are clear to me. Firstly, at the end of last summer, I got to my burnout point and had to take a break. I entered a Brooklyntweed contest, and it took a lot of time. Lastly, cardigans are large garments that take a long time to knit, and there have also happened numerous re-knitting. On the other hand, I've already done some work. I can say I overcome well over half of the collection. While traveling across seas and countries, the collection has undergone changes, which I expect. New ideas are coming for such a long time; I buy new yarn, developing new techniques. And the changes are just an indicator that I am not standing still, that things are happening in my knitting life. In the beginning, I presented nine sketches, and it was immediately apparent that one design would have to be abandoned: a collection consists only of eight designs. And that backup player was "Seashell." "Seashell" has been successfully knitted, and then "Pacific" dropped out. "Sails" replaced "Sailor" because there was a lack of a summer design for the "All year round cardigans" collection. "Horizon" took over "Beach" for one hilarious reason, which I talked about in the forum. It just fell on my head from the closet in a bag as a two-year-old unfinished and forgotten project. This way, it loudly declared, "take me, I insist!" *** Первую часть о начале работы над коллекцией найдете тут. 26-го апреля прошлого года я начала вязать коллекцию "Кардиганы круглый год" и пожелала себе доброго пути на форуме. Прошло ровно 10 месяцев, и сегодня я решила отчитаться о результатах. Смотрю назад, и понимаю, что мой прогресс совсем невпечатляющий. Сделано очень мало, хотя причины мне понятны. Первое, в конце прошлого лета я дошла до точки перегорания и должна была взять перерыв. Второе – я участвовала в конкурсе Бруклинтвида, и выпал большой кусок времени. Третье, кардиганы – большие изделия, требующие много времени для их вязания, а также случались многочисленные перевязы. С другой стороны, некоторая работа уже проделана, и можно сказать, что я подошла к жирной середине коллекции. Во время путешествия по морям и странам, коллекция потерпела изменения, и этого стоило ожидать. За продолжительное время приходят новые идеи, покупается новая пряжа, разрабатываются новые технологии. И изменения – это лишь показатель того, что я не стою на месте, что вязальная жизнь бурлит и совершенствуется. В начале я представила девять эскизов, и сразу было понятно, что от одного придется отказаться: в коллекции помещается лишь восемь дизайнов. И этим запасным игроком был Seashell ("Ракушка"). Seashell удачно связался, а выпал Pacific. Sailor был заменен на Sails, потому, что для коллекции "Кардиганы круглый год" не хватало летней модели. Beach заменен "Горизонтом" по одной очень смешной причине, о которой я рассказывала на форуме. Он просто выпрыгнул мне на голову из шкафа в пакете в виде забытого недовяза двухлетней давности. Таким образом громко заявил "возьми меня, настоятельно требую!" The patterns of two cardigans have already been published. Two more are being tested, and both testings are coming to an end. We are already preparing for the next three testings, and the last one is still on the needles. And now I am happy and excited like a child. I have been waiting for this opportunity all these ten months: to compare the sketches with finished garments. I assure you that such a comparative analysis will be a surprise to me; I've hadn't done it before. I also want to warn you that finished garments in pictures are much thicker, wider, and fuller than their sketches. And not only because I draw sketches for sizes S or M, and I knit size L. The sketch shows the cardigan, which we put on a 3D body, and the cardigan in the picture is flat. The flat garment obtains both sides and arms' volume, which disappears from view on the three-dimensional body. *** Описания двух кардиганов уже опубликовано. Еще два тестируются и их тестирования подходят к концу. К трем тестированиям уже готовимся, а последний все еще на спицах. А теперь я радуюсь и волнуюсь, как ребенок. Возможности сравнить эскизы с тем, что получилось в реальности, я ждала все эти десять месяцев. Уверяю, что такой сравнительный анализ будет для меня сюрпризом. Также хочется предупредить, что все готовые изделия будут гораздо толще, шире и полнее своего эскиза. И не только потому, что эскизы я рисую на размеры S или M, а вяжу размер L, но и потому, что эскиз отображает изделие, одетое на 3D тело, а расклад кардигана плоский. Расклад пополняется объемами боков и рук, которые исчезают из вида на трехмерном теле. 1. Vagabond I am elated! It is difficult to believe - one hundred percent hit. The yarn remained the same, the only difference was that I decided to use large coat buttons, and there were one fewer of them. The pattern of the cardigan "Vagabond" has already been published. I also summed up the results of the testing in the blog. *** Я ликую! Смотрю, и самой сложно поверить – стопроцентное попадание. Пряжа осталась та же, единственное отличие – я решила использовать большие пальтовые пуговицы, и их стало на одну меньше. Описание кардигана "Бродяга" уже опубликовано, также я подвела итоги тестирования в блоге. 2. Sakura Again one hundred percent hit. The vision and idea came true without change; even the picked-up yarn remains the same. I'm very glad. Testing of the "Sakura" cardigan is coming to an end; the pattern should be published in mid-March. *** Снова стопроцентное попадание. Видение и идея воплотились без изменений. Пряжа осталась та же. Я очень рада. Тестирование кардигана "Сакура" подходит к концу, описание должно выйти в свет в середине марта. 3. Almanac With "Almanac," everything is a little more complicated. I had to replace the yarn, respectively, the color changed, and, one might say, I knitted it twice. I'll tell you about that in the following post, but if you compare the sketches, I think I succeeded! The pattern of the "Almanac" jacket has already been published. *** С "Альманахом" все немного сложнее. Пришлось заменить пряжу, соответственно, поменялся цвет, и, можно сказать, я его перевязала дважды. Об этом расскажу отдельным постом, а если сравнить эскизы, думаю, у меня получилось! Описание жакета "Альманах" уже опубликовано. 4. Longitude Yes, I'm still lucky. Again one hundred percent hit if you ignore the fact that I buttoned "Longitude" to the very bottom. The yarn has not changed, and even though, at the very end of knitting, I realized that I'm short of 20 grams of yarn for the button band. Because of that, almost the entire cardigan had to be unraveled and re-knitted. "Longitude" testing has reached its middle; the pattern will be published at the end of March. *** Да, пока мне везет. Опять стопроцентное попадание, если не обращать внимание на то, что я застегнула "Долготу" до самого низа. Пряжа не изменилась, и хоть во время вязания я поняла, что мне не хватит 20 граммов пряжи для планки застежки. Из-за этого пришлось перевязать почти весь кардиган. Тестирование Longitude достигло середины, описание выйдет в конце марта. 5. Latitude I replaced the yarn with a thicker one. For this reason, the lines are more scattered. Patch pockets have replaced slit pockets, and "Latitude" is now buttoned to the very bottom. Otherwise, everything is very, very similar. I'm glad! Testing of the "Latitude" cardigan will begin soon. *** Произошла замена пряжи на более толстую. По этой причине линии стали шире. Прорезные карманы заменены накладными, а застегивается "Широта" теперь до низа. В остальном все очень и очень похоже. Я довольна! Тестирование кардигана Latitude скоро начнется. 6. Seashell "Seashell," an outsider of the collection, showed character and was one of the first to get finished. I can't add anything – again, I hit the bull's-eye (why am I buttoning everything to the very bottom?), although I replaced the yarn. "Seashell" testing will begin in late April or early May. *** "Ракушка", аутсайдер коллекции, показала характер и связалась одной из первых. Ничего не могу добавить – опять я попала в яблочко (почему я все застегиваю до низа?), хотя произошла замена пряжи. Тестирование Seashell начнется в конце апреля или в начале мая. 7. Horizon A new piece of the collection, which not only found its well-deserved place but also served as a platform for me to experiment. The first time I designed a set-in seamless sleeve in a circular yoke. "Horizon" testing will begin in April. *** Новый экземпляр коллекции, который не только нашел свое заслуженное место, но и послужил мне площадкой для экспериментов. Я впервые сконструировала втачной бесшовный рукав в кокетке. Тестирование "Горизонта" начнется в апреле. 8. Sails With "Sails," the situation is much sadder. The comparative analysis will be incomplete. I have not finished it yet, although I should have. As always, I made every possible mistake that could be made, and there was only one way to fix them: start all over again. It's hard to get together, hands don't lift, but because of that, there is time to write all sorts of exciting and not very exciting knitting stories! *** С "Парусами" дела обстоят гораздо печальнее. Сравнительный анализ будет неполноценным, я пока его не связала, хотя должна была. Как всегда, я сделала все возможные ошибки, которые только было можно сделать, а их исправить можно было лишь одним способом: начать все заново. Морально собраться тяжело, руки не поднимаются, но зато есть время писать всякие интересные и не очень интересные вязальные истории! After publishing all eight patterns and the e-book, there will be the final, third part of the trilogy. I think it will take me another 7-8 months. See you soon! *** После выхода всех восьми описаний и электронной книги будет заключительная, третья часть трилогии. Я думаю, мне для этого понадобится еще 7-8 месяцев. До скорой встречи!
- Anatomical yoke formula. Формула анатомической кокетки
Having knit several designs with an anatomical yoke and similar raglans, I felt confident to share with you a new formula of the yoke decreases. I do not want to prove anything; you are always free to choose how to knit your project. In the end – you wear it. This article was inspired by a woman I saw in the town. She was dressed in an incredibly beautiful hand-knit jumper with a round yoke made of a gentle gradient from top to bottom, where the increases were made with yarn overs. My eyes followed her enviously until she turned her back. Of course, there was no back neck shaping in the yoke, and the back was deeply naked. It is probably acceptable, cause it is midsummer time. But is it comfortable? For a very long time for me, an anatomical yoke was something mystical, incomprehensible, I just worked on it intuitively, for example, here you need to decrease less to decrease more later, and, oddly enough, everything worked out. But I love numbers, and intuition will fail someday. Insight in this field came when I had been designing a Cumulus top. There was also some kind of a weird yoke, only it was unusual and inverted, worked from the center to the edges. I wrote a letter to our Early Birds team member Maryana and asked her for one very particular measurement. Maryana is size XS, and I needed to compare her number with the same one in my size L. Further, relying on some calculations of the set-in sleeve, everything came together. Then I tested this formula in subsequent yokes, and everything worked flawlessly. A year and a half of testing, I think it's time to open up. I suppose one more explanation is needed. Round (circular) yokes are inherently little different from raglan-type designs. The only difference is that we place the decreases in apparent raglan lines and some supporting darts: shoulder, shoulder blades, and vertical for the bust. In a round yoke, decreases are performed in even steps in a round/row. In fact, if we need to perform the specified number of decreases for a certain number of rounds/rows, it makes no difference where we place them – in raglan slopes or evenly in rounds. I will allow myself not to distinguish them further. Before continuing reading, I strongly recommend that you read my previous articles, as I will continue to rely on them and will not repeat myself. Anatomical knitting, chapter 3. Explains extra room for shoulders. My yokes. Explains the back neck shaping. Further, we will agree that knitting of yokes, it does not matter, round or those that follow the principles of raglan can be performed both from top to bottom, by increasing, and from bottom to top, by decreasing. Next, I will thoroughly examine the second case. If the first case is the one you used to, turn everything upside down in your mind. I will compare Elizabeth Zimmerman's classic yoke formula with the one I have worked out myself. I will name the first "classic," the second – "anatomical" (see below). *** Связав несколько моделей с анатомической кокеткой и несколько таких же регланов, ощутила себя уверенной поделиться с вами новой формулой убавлений. Ничего не хочу доказывать, вы всегда вольны выбирать, как вязать ваше изделие, в конце концов – вам его носить. На эту статью меня сподвигла одна женщина, которую я увидела в городе. Она была одета в невероятной красоты руками связанный джемпер с круглой кокеткой из нежного градиента сверху вниз, где прибавления были выполнены накидами. Завистливо проводила ее глазами, пока она не повернулась спиной. Конечно, в кокетке отсутствовал росток, и спина была глубоко голая. Сейчас лето, наверное, это позволительно. Но удобно ли? Очень долго для меня анатомическая кокетка являлась чем-то мистическим, непонятным, я ее вязала просто интуитивно, например, здесь нужно убавить меньше, чтобы позже убавить больше, и, как ни странно, все получалось. Но я люблю цифры, и интуиция когда-нибудь все равно подведет. Просветление в этой области пришло когда я вязала топ Cumulus. Там также присутствует кокетка, только она очень странная и перевернутая, выполненная из центра к краям. Я написала письмо нашей ласточке Марьяне и попросила у нее одно очень странное измерение. Марьяна является представительницей размера XS, и мне было необходимо сопоставить ее измерение с таким же измерением в моем размере L. Далее, опираясь на некие расчеты втачного рукава, у меня все сошлось. Далее я уже вязала и проверяла эту формулу в последующих кокетках, и все работало безупречно. Полтора года проверок, думаю, пришла пора раскрыться. Я думаю, нужно еще одно объяснение. Круглые кокетки по своей сути мало отличаются от моделей с регланом. Разница состоит лишь в том, что убавления в регланах мы закладываем в четкие регланные линии и вспомогательные вытачки: плечевые, лопаточные и вертикальные для груди. В круглой кокетке убавления идут равномерными шагами по кругу. По сути, если нам нужно за какое-то определенное количество кругов/рядов выполнить указанное количество убавлений, нет никакой разницы, где мы их разместим – в регланных скосах или же равномерно по кругу. Я позволю себе далее их не различать. Перед тем, как продолжить чтение, я настойчиво рекомендую прочитать мои прежние статьи, так как далее буду опираться на них и не буду повторяться. Анатомическое вязание, пункт 3. Объясняет пространство для плеч. Мои кокетки. Объясняет росток. Далее условимся, что вязание кокеток, неважно, круглых или тех, которые следуют законам реглана, может быть выполнены как сверху вниз прибавлениями, так и снизу вверх, убавлениями. Далее я буду разбирать второй случай. Если вам более близок первый вариант, вы мысленно переверните все вверх ногами. Я буду сопоставлять классическую формулу кокеток Элизабет Циммерман с той, что удалось выработать мне самой. Первую я буду называть классической, вторую – анатомической. We agree that after bounding off and joining the underarm stitches, we have 300 stitches left on the needles, the knitting gauge is 20 stitches in 10 cm, the yoke height is 22 cm. The formula for decreases in a classic yoke is: Zone 1, between the red and blue lines, you must decrease 25% of the stitches, distributing them evenly, or, until the blue line, knit straight, at the level of the blue line, decrease 25% of all stitches or every fourth stitch. The level of the blue line is half the height of the entire yoke (11 cm). There are 225 sts left on the needles. Zone 2, between the blue and green lines, you must decrease 33% of the remaining stitches or every third stitch. The green line marks half of the second half of the yoke or 3/4 of the height from its beginning (16,5 cm). There are 150 stitches left on the needles. You can knit straight up to the green line, and perform all the decreases at once, or distribute them evenly. Zone 3, between the green line and the neckline, you must decrease 35-40% more of the remaining stitches or about two out of five stitches. The third zone makes up the last quarter of the total height of the yoke (another 5,5 cm). There are 90-100 stitches left on the needles. The third zone can be shortened, and fewer stitches can be decreased if the neckline is more open style. Let's consider the anatomical yoke "by Aiste" under the same conditions. There is a back neck shaping (lengthening the back neck and a deepening of the front neck) and room for the shoulders included. We agree that the depth of the back neck shaping is 10 cm, the height of the back yoke is 26,5 cm, respectively, the height of the front yoke is 16,5 cm. You will find where the number of 10 cm comes from in early articles. Zone 1, between the red and blue lines, you must decrease 16,67% of the stitches, distributing them evenly, or, until the blue line, knit straight, at the level of the blue line, decrease 16,67% of all stitches at once. In other words, every sixth stitch. The level of the blue line is half the height of the yoke to the front neckline (8,25 cm). There are 250 stitches left on the needles. Zone 2, between the blue and green lines, you must decrease another 20% of the remaining stitches or every fifth stitch. The level of the green line is the level of the beginning of the front neckline, and it coincides with the beginning of the shoulders (16,5 cm. This number didn't come out of thin air. Remember the average height of the set-in sleeve cap). There are 200 stitches left on the needles. You can knit straight up to the green line, and perform all the decreases at once; or, distribute them evenly. Zone 3 is the back neck shaping zone. In it, between the green line and the beginning of the back neck, you must decrease 50% of the remaining stitches. The third zone is equal to the height of the back neck (another 10 cm). There are 100 stitches left on the needles. Here, the neck style (open or closed) can be adjusted not in the 3rd, but the 1st and 2nd zones, lengthening or shortening them, keeping the height of the back neck shaping height (3rd zone) unchanged. For clarity, I will show a table and later explain the difference between these two yoke formulas (see below). *** Договоримся, что после закрытия подрезов подмышек, у нас на спицах осталось 300 петель, плотность вязания 20 петель в 10 см, высота кокетки – 22 см. Формула убавлений в классической кокетке гласит: Зона 1, между красной и голубой линией вы должны убавить 25% петель, распределяя их равномерно или же, до голубой линии вяжете прямо, на уровне голубой линии убавляете 25% всех петель. Или же, каждую четвертую петлю. Уровень голубой линии – половина высоты всей кокетки (11 см). На спицах осталось 225 п. Зона 2, между голубой и зеленой линией вы должны убавить еще 33% оставшихся петель, или же, каждую третью петлю. Уровень зеленой линии – это половина второй половинки кокетки, или 3/4 высоты от ее начала (16,5 см). На спицах осталось 150 п. Вы можете до зеленой линии вязать прямо, и выполнить все убавления на ее уровне, или же, распределить равномерно. Зона 3, между зеленой линией и горловиной вы должны убавить еще 35-40% оставшихся петель, или же, примерно две петли из пяти. Третья зона составляет последнюю четверть всей высоты кокетки (еще 5,5 см). На спицах осталось 90-100 п. Третью зону можно укоротить и убавить меньше петель, если горловина более открытая. На тех же условиях рассмотрим анатомическую кокетку "от Айсте". Здесь предусмотрены росток (удлинение задней части и углубление передней горловины) и пространство для плеч. Договоримся, что глубина ростка – 10 см, высота кокетки в задней части – 26,5 см, соответственно, высота кокетки в передней части – 16,5 см. Откуда берется цифра 10 см, вы найдете в ранних статьях. Зона 1, между красной и голубой линией вы должны убавить 16,67% петель, распределяя их равномерно, или же, до голубой линии вяжете прямо, на уровне голубой линии убавляете 16,67% всех петель. Другими словами, каждую шестую петлю. Уровень голубой линии – половина высоты кокетки до передней горловины (8,25 см). На спицах осталось 250 п. Зона 2, между голубой и зеленой линией вы должны убавить еще 20% оставшихся петель, или же, каждую пятую петлю. Уровень зеленой линии – это уровень начала передней горловины, и он совпадает с началом плеч (16,5 см. Эта цифра не взялась из ниоткуда. Вспомните среднюю высоту оката втачного рукава). На спицах осталось 200 п. Вы можете до зеленой линии вязать прямо, и выполнить все убавления на ее уровне; или же, распределить равномерно. Зона 3 – это зона ростка. В ней, между зеленой линией и началом горловины спинки вы должны убавить 50% оставшихся петель. Третья зона ровна высоте ростка (еще 10 см). На спицах осталось 100 п. Здесь открытость или закрытость горловины регулируется не в 3-ей, а в 1-ой и 2-ой зоне, удлиняя или укорачивая их, сохраняя высоту ростка (3-ю зону) неизменной. Для наглядности покажу табличку и дале объясню разницу между этими двумя формулами кокеток. So what's the difference? The first thing that immediately catches your eye is the absence and presence of the back neck shaping. But that's not all. Notice the difference in percentages in the first and second zones. In the anatomical yoke, in these zones, we decrease much fewer stitches. And if the difference at the blue line is not so significant since it finds itself being higher in the classic yoke, the anatomical yoke still can catch up somehow, then in the second zone, the green line for both yokes coincides. And here, we obtain a very significant difference of 50 stitches or 25 cm if we count according to the given gauge. Here is the main answer why the classic yoke gets folds and wrinkles – we did not leave any room (sufficient width) for the shoulders. Further, in the 3rd zone, the number of stitches to the neckline equalizes. Only in the anatomical yoke, decreases occur at a much higher rate (we need to get rid of those 50 previously "saved" stitches), and here shoulder and shoulder blades darts come to the rescue. Or, we just decrease the stitches evenly at a much faster pace. Do not forget that in the 3rd zone, we are simultaneously shaping a back neck, and we have already begun the front neck – the area in which we no longer have the opportunity to perform decreases. A load of decreases in the back neck gets heavier even more. *** Так в чем же состоит разница? Первое, что сразу бросается в глаза – это отсутствие и присутствие ростка. Но это не все. Обратите внимание на разницу убавлений в процентах в первой и второй зонах. В анатомической кокетке в этих зонах мы убавляем гораздо меньше петель, и, если у голубой линии разница не столь велика, так как в классической кокетке она размещена выше, и этот уровень анатомическая кокетка может догнать, то во второй зоне зеленая линия у обеих кокеток совпадает. И здесь у нас получается очень значимая разница в 50 петель или в 25 см, если считать по заданной плотности вязания. Вот главный ответ, почему у классической кокетки получаются заломы – мы не оставили места (достаточной ширины) для плеч. Далее, в 3-ей зоне количество петель до горловины сравнивается, только в анатомической кокетке убавления происходят в гораздо большем темпе (нам надо избавиться от тех 50-ти ранее "сбереженных" петель), и здесь в помощь приходят плечевые и лопаточные вытачки. Или же мы просто убавляем петли равномерно в гораздо быстром темпе. Не забудьте, что в 3-ей зоне мы одновременно формируем росток, и у нас уже началась горловина переда, в области которой мы больше не имеем возможности совершать убавления. Нагрузка убавлений в ростке еще увеличивается. I want to warn you that this formula and all numbers are only approximate. You must adjust them by yourself based on the chosen design (stranded knitting, cables, Stockinette, the character of the selected stitch pattern). Whether it is raglan or a round yoke, the shape of the neck (for example, a V-neck will dictate other rules), also, take into account your size (acceleration of the pace of decreases in large sizes and slowing down in small ones. The neck circumference, which we are approaching, differs much less in different sizes than the circumference of the rest of the body), your height (determines the yoke height), back neck height, intended positive ease. Until now, everything seemed clear, straightforward, and understandable. But I wouldn't be myself if I hadn't put a rotten apple in the barrel. If you have added extra width to the front piece for the bust, or if your chest width is less than the back width at the blue line (see the diagram above), the front decreases in the first two zones should occur at a much faster pace than the corresponding decreases on the back of the yoke. At the same time, one must not forget that in the 3rd zone (the back neck shaping), you have practically no opportunity to continue decreasing due to the front neckline; at the same time, the intermediate control numbers and percentages should remain unchanged. Now, it seems, that's all, and with peace of mind, I can wish you success in your experiments! *** Хочу предупредить, что данная формула и цифры лишь приблизительные. Вы сами должны скорректировать их, опираясь на выбранный дизайн (жаккарды, араны, гладь, свойства выбранного узора), реглан ли это или круглая кокетка, форма горловины (например, V-образная горловина продиктует другие условия), ваш размер (ускорение темпа убавлений в больших размерах и замедление в маленьких, потому, что обхват шеи, к которой мы приближаемся, у разных размеров отличается гораздо в меньшей степени, чем обхват остальных частей тела), рост (высота кокетки), высота ростка, заложенная свобода облегания. До сих пор все казалось четко, просто и понятно. Но я не была бы собой, если не попортила бы бочку меда ложкой дегтя. Если вы заложили дополнительную ширину на детали переда или полочках для груди или же ваша ширина груди меньше ширины спинки на уровне голубой линии (см. рисунок выше), убавления передней части в первых двух зонах должны происходить в гораздо большем темпе, чем соответствующие убавления на задней части кокетки. При этом нужно не забывать, что в третьей зоне ростка у вас уже практически нет возможности продолжать убавления из-за передней горловины, а промежуточные контрольные цифры и проценты должны оставаться неизменными. Теперь, кажется, все, и я со спокойной душой могу пожелать вам удачных экспериментов!
- Tender Graphics. Нежная графика
Every time I publish a new book, which took about a year of my life, I feel a kind of inner uplift. That is probably a spike in dopamine that is released when we feel proud of the work done. But this time, it was different. The collection was created for a very long time and stretched a little bit over two years. Why is that? I knitted the Ozone jumper in December 2018, and it was supposed to be part of the summer collection. Then the summer collection turned towards exceptionally on short sleeves, and Ozone stayed aside. Then I took up a collection of bulky yarn, which is now on pause, and only then I returned to "Ozone" again – I began to think about what to do with it next. And it was the one who suggested the direction of the collection – "Tender graphics." Graphics is a type of visual art in which the surface features (usually a white sheet of paper) and the tonal relationship of lines, strokes, and spots are the primary means of visual images or designs, in other words, graphics. Of course, there is no paper in the knitted design, but the lines and strokes are in abundance, although they are made not with a quill pen but with knitting needles and yarn. *** Каждый раз, когда я публикую новую книгу, создание которой заняло примерно год моей жизни, я чувствую какой-то внутренний подъем. Это, наверное, всплеск дофамина, который выделяется, когда мы чувствуем гордость за проделанную работу. Но в этот раз все было иначе. Коллекция создавалась очень долго и растянулась на два года с хвостиком. Почему так? Джемпер Ozone я начала вязать в декабре 2018 года и он должен был стать частью летней коллекции. Потом летняя коллекция повернула в сторону коротких рукавов, и Ozone остался в стороне. Далее я занялась коллекцией из толстой пряжи, которая сейчас поставлена на паузу, и лишь потом я опять вернулась к "Озону" – начала размышлять, что с ним делать дальше. И именно он подсказал направление коллекции – "Нежная графика". Графика — вид изобразительного искусства, в котором в качестве основных изобразительных средств, называемых графическими, используются свойства изобразительной поверхности (чаще белого листа бумаги) и тональные отношения линий, штрихов и пятен. Конечно, никакой бумаги в вязаном изделии нет, но линии и штрихи точно найдутся, хоть выполнены они не пером, а спицами и нитями. The collection contains designs for all occasions in life. Marshmallow is perfect for celebrations or the office, with Smoky you can go to drama theater, Ozone can be worn on vacation, Sound is good for picnics, Dream is a sporty piece, Electra, Cirrus, and Foam are meant to be worn daily. Patterns, both individually and in e-book form, can be purchased from the pattern store. To not buy a pig in a poke, I, as always, make a lookbook. You can look at it. In the lookbook, you will find all 8 designs and all the necessary information about yarn, sizes, etc. At the end of the album, you will see several finished projects of our super-mega-talented Early Birds. After some time, everything was a little forgotten, but having revisited the Early Birds' work, I fell in love with the collection again. To be honest, some of their knits are better than mine, so to speak, the original ones. I really hope that they will also inspire you. *** В коллекции собраны дизайны для всех случаев в жизни. Marshmallow подойдет для торжеств или офиса, в Smoky можно идти в драматический театр, Ozone носить в отпуске, Sound надеть для поездок на природу, Dream выполнен в спортивном стиле, Electra, Cirrus и Foam – для каждого дня. Описания, как по-отдельности, так и в виде книги, вы можете приобрести в магазине описаний. Чтобы не покупать кота в мешке, я, как всегда, делаю альбом для предварительного просмотра. Вы можете его полистать. В альбоме вы найдете не только все 8 дизайнов, но и всю нужную информацию о пряже, размерах и т. п. В конце альбома увидите по несколько воплощений наших супер-мега-талантливых ласточек. После некоторого времени, все немного позабылось, но заново пересмотрев работы ласточек, я опять влюбилась в коллекцию. Что греха таить, некоторые их работы на голову лучше моих, так сказать, оригинальных. Очень надеюсь, что вы ими также вдохновитесь. The e-book "Tender Graphics" should have been published half a year ago. But a miracle happened to me: Volley burst into my life and crushed all the established routine. If you do not follow the forums, I will briefly describe the situation. I participated in an open design competition from the well-known Brooklytweed company, and one of my proposed designs was selected for the Fall 2021 collection. I submitted my application last June and in August received the smashing news: my design was selected. It is clear that everything was set aside, and my attention was directed only to this task. At the moment, the jumper has been knitted and sent to BT; the pattern has been tested in a closed forum (it was stunning!) and sent for technical editing. According to the rules, none of us can show anything before publication but compared to June last year and this February, there is very little left to wait until autumn. The "Volley" has subsided, and I am quietly making up for a lost time and paying back my debts. I have heard that my designs and patterns are very complex, and few people decide to knit on them. The "Tender Graphics" collection is no exception. Absolutely each design has its own specific moments. And although with my complexity of patterns, I cut the branch on which I sit and lose, perhaps, three-quarters of the market, do I want to be a part of hundreds of thousands of simplified patterns? They are already a dime a dozen. But, as I always protect myself, if you know all the basic knitting techniques, only one thing is required of you – attentiveness. In fact, complexity consists of more decreases, increases, and short rows in the proper places. And where to place them correctly – that's what the pattern is for. Another notable difference is that I changed the cover style as I started a new series of books. One day, I remember, a bizarre thought came to me. Why wouldn't I be on the cover of a magazine being 47 years old plus-size model? Why not create this opportunity for myself? So what if it's not "Cosmopolitan." The fact remains: I am on the cover of a magazine! I played with some clever, intelligent software and created the cover of the upcoming book series. And, as you just found out, one of them came out, on others we are intensively working. I promise the next e-books will be published much faster unless some "Typhoon" breaks into my life again. *** Книга "Нежная графика" должна была выйти в свет еще пол года назад. Но со мной случилось чудо: в мою жизнь ворвался Volley ("Град", "Удар"), и сокрушил всю устоявшуюся рутину. Кто не следит за форумами, я коротко опишу. Я участвовала в открытом конкурсе дизайнеров хорошо известной компании Brooklytweed, и один из моих предложенных дизайнов был отобран для коллекции Осень 2021. Заявку я отослала в июне прошлого года, а известие о том, что меня выбрали, я получила в августе. Понятно, что все было отложено в сторону, а мое внимание направлено только на это задание. На сегодняшний момент джемпер связан и отослан в БТ, описание протестировано в закрытом форуме (прошло ошеломительно!), и отослано для технической редактуры. По правилам до публикации ни я, ни другие участники ничего показывать не можем, но по сравнению с июнем прошлого года и февралем этого, подождать до осени осталось совсем немного. "Град" утих, и я по-тихоньку наверстываю упущенное – отдаю долги. Я много раз слышала, что мои дизайны и описания очень сложные, и мало кто решается по ним вязать. Коллекция "Нежная графика" – не исключение. Абсолютно в каждой модели есть свои специфические моменты. И хоть своей сложностью описаний я рублю сук, на котором сижу, и теряю, наверное, три четверти рынка, если так можно выразиться, хочу ли я быть частью сотен тысяч упрощенных описаний? Их и так пруд пруди. Но, как я всегда себя защищаю, если вы знаете все базовые вязальные технологии, от вас требуется лишь одно – внимательность. Вся сложность, по сути, заключается лишь в большем количестве убавлений, прибавлений и укороченных рядов в нужных местах. А где их правильно разместить – на то и есть описание. Еще одно заметное изменение – я поменяла стиль обложки, так как начала новую серию книг. Сидела я, когда-то, помню, и посетила меня одна очень странная мысль. А почему бы мне в 47 лет, будучи моделью плюс-сайз, не залезть на обложку журнала? Почему бы самой себе не создать эту возможность? Ну и что, что это не "Cosmopolitan". Факт остается фактом! Поигралась я с некими умными-разумными программами, и создала стиль обложки предстоящей серии книг. И, как вы только-что узнали, одна из них вышла, над другими мы интенсивно работаем. Обещаю, следующие книги выйдут гораздо оперативнее, если только в мою жизнь опять не ворвется какой-нибудь "Тайфун".
- Vagabond and Optical Illusion. "Бродяга" и оптическая иллюзия
As you all know, I am currently working on a cardigans' collection. For me personally, cardigans are the most versatile pieces of all knitted clothing. It can be worn buttoned and unbuttoned, and we can add pockets — a lot of functionality in one piece of clothing. When I show my designs to my mommy, she is, like all mothers, enthusiastic and happy. But then the remark always follows: "there are no pockets here; it will not work." Or: "this one with pockets is perfect!" And also: "I'll take this, just add the pockets for me." The "Vagabond" cardigan became the first in the collection (the pattern came out a long time ago, you can buy it here, but due to my endless and over-the-top busyness, the summing up is very much behind). A strange name of the design, it would seem. Everyone wants to be a "Princess," and then someone forces you to become "Vagabond." Or "Yeti." Or "Shepherd." Well, this is my view of design. I have said many times that I am very much into a compound of "ugly beautiful," or the pie turns out much more delicious if you add a pinch of salt to the dough. Salt in "Vagabond" is wide stripes, which are more characteristic of menswear, bouclé yarn, and washed-out colors, hinting of wear and tear. There is nothing else out of the ordinary in "Vagabond." Stripes, a classic deep V-neck, drop and fully-fashioned shoulders, and the pockets with a diagonal opening. The design is quite simple, it includes all the necessary attributes that improve the fit, and with that, it seems, I could end the presentation. But wait – there is one exciting feature in "Vagabond"! There is a myth that horizontal stripes increase us in volume and size. I do not argue with this, but if you start sorting through everything, it means that full-body-type people are contraindicated to wear knitted clothes. The stripes add width, the short sleeve reveals the fat on the arms, the cables make us bigger, the lace is see-through, the colorwork, like a double knit, makes us look fat, the thick yarn increases us in size, the cropped length does not cover our belly, the minimal positive ease emphasizes the fat on the back. That's it. The knitting needles can be thrown away, and the yarn can be gifted to the skinny ladies. We can go fishing since knitting is not meant to be our hobby anymore. I know all these complaints very well, and every time, before starting to work on the particular design, I list them in my head, trying to conquer them or get around them. Or bust these long-term myths. Stripes do not make us look fuller or bigger if they are framed! Next, I'm going to explain what a "frame" is in knitting. It is already arranged in our perception of colors that white and light colors will seem larger than black and dark ones. White is an emitting color; black is an absorbing color. How to use such an optical illusion in knitting a striped project? Take a look at the Vagabond cardigan layout. *** Как вы все знаете, сейчас я работаю над коллекцией кардиганов. Лично для меня кардиган – самая нужная вещь из все вязаных. Его можно носить застегнутым и расстегнутым, а также на кардиганах мы можем добавлять карманы – много функционала в одном предмете одежды. Я когда маме показываю свои дизайны, она как мама, восторгается и радуется. Но потом всегда следует замечание: "тут нет карманов, не годится". Или: "вот это вещь – с карманами!" И еще: "это я заберу, только довяжи карманы". Кардиган "Бродяга" стал самым первым в коллекции (описание вышло давно, его можете приобрести тут. Но из-за вечной занятости подведение итогов очень опаздывает). Странное название для дизайна, казалось бы. Все хотят быть "Принцессами", а тут кто-то заставляет вас стать "Бродягой". Или "Йети". Или "Пастухом". Ну вот такой у меня взгляд на дизайн. Я много раз рассказывала о том, что мне нравится сочетание "ugly beautiful", некрасивое в красивом, или пирог станет намного вкуснее, если в тесто добавить щепотку соли. Соль в "Бродяге" – это широкие полосы, которые свойственны больше мужской одежде, пряжа букле и застиранные цвета, намекающие на изношенность. Больше в "Бродяге" нет ничего необычного. Полосы, классическая глубокая V-горловина, спущенное "японское" плечо и, конечно, карманы с диагональным отверстием. Конструкция несложная, в ней включены все нужные атрибуты, улучшающие посадку, и этим, вроде, можно было бы представление закончить. Но не тут-то было. В "Бродяге" кроется одна очень интересная идея! Бытует миф, что горизонтальные полосы увеличивают в объемах и в размере. С этим я не спорю, но если начать перебирать все, значит, полным людям вязаное носить противопоказано. Полосатое расширяет, короткий рукав открывает жирок на руках, Араны полнят, ажуры просвечиваются, жаккард, как двойная вязка, полнит, толстая пряжа увеличивает, короткое не закрывает живот, прилегающее подчеркивает жирок на спине. Все, спицы можно выбросить, пряжу раздарить худышкам и пойти рыбачить, раз уж вязать не суждено. Я все эти жалобы знаю наизусть, и каждый раз, перед тем, как начать работать над дизайном, перечисляю у себя в голове, и пытаюсь их обыграть или обойти. Или просто взять и разрушить эти устоявшиеся мифы. Полосатое не полнит, если полосы разместить в раме! Что такое "рама" в вязании, попытаюсь объяснить. Так уже устроено в нашем восприятии цветов, что белое и светлое будет казаться больше, чем черное и темное. Белый – цвет излучающий, черный – поглощающий. Как же использовать такую оптическую иллюзию в вязании полосатого изделия? Посмотрите на расклад кардигана Vagabond. The darker dusty rose color is arranged along all the cardigan edges, where it was possible to place it technically. Bottom ribs of the body and sleeves, sleeve caps at the armholes, shoulders, button band, and even pocket openings. Thus, the lighter "emitting" stripes are curbed by a darker "absorbing" frame, which does not allow them to spread out in all directions, visually increasing. Look at a few more pictures. The following one has identical in size rectangles in it. The one with a darker frame looks a little smaller. How to use such an optical illusion in a striped design? Take a look at the Vagabond cardigan layout. *** Более темный пыльно-розовый размещен по всем краям изделия, где это только было возможно выполнить технически. Нижние резинки корпуса и рукавов, верхние части рукавов у проймы, плечи, планка застежки и даже планочки карманов. Таким образом, более светлые "излучающие" полосы здесь обузданы более темной "поглощающей" рамой, которая не позволяет им растекаться во все стороны и визуально увеличиваться. Посмотрите еще на несколько изображений. Совершенно одинаковые по измерениям прямоугольники, но тот, который в раме более темного цвета, выглядит немного меньше. Next, you can compare how stubbornly the lighter color is trying to break out and leak from the armhole and sleeve cap area and how it shrank back when framed with a darker color. *** Далее можете сравнить, как настырно более светлый цвет пытается вырваться и расплыться из узла пройма-окат, и как он сжался, когда его обрамили более темным цветом. You can draw your own conclusions, but I hope your beliefs about stripes shоke at least a little. *** Выводы можете сделать сами, но я надеюсь, что ваши убеждения насчет полосок хоть немного, но пошатнулись. Testing ended long ago. After a short break at the end of the summer, many of us returned, and everything went as well as possible. I want to show only a few finished projects of "Vagabond" cardi, all of them you will find on Ravelry. As you can see, any yarn is suitable for the cardigan; it is not necessary to look for the boucle yarn only. Color combinations can be limited only by your imagination and what you just learned about the frame! *** Тестирование давно завершилось. После небольшого перерыва в конце лета нас собралось немало, и все прошло как нельзя лучше. Хочу показать лишь несколько воплощений "Бродяги", a все остальные воплощения сможете найти на Ravelry. Как видите, для кардигана подойдет любая пряжа, совсем необязательно выбирать букле, а цветовые комбинации могут ограничиться лишь вашей фантазией и тем, что вы только-что узнали про раму! At the very end, a testing winner is chosen, who receives a symbolic prize – one pattern to choose from. The winners' selection criteria are very different, and this time the choice fell on "the find of the year,” so to speak. The winner is Marina, our newcomer, who joined our group without a hitch, and all the time it seemed that she had been with us a long time ago. Moreover, Marina managed to finish two cardigans in a row. Congratulations from the bottom of my heart! *** В самом конце выбирается победительница тестирования, которая получает символический приз – одно описание на выбор. Критерии отбора победительницы – самые разные, и в этот раз выбор пал на "находку года", если так можно выразиться. Ей стала Марина, наш новичок, которая влилась в наши ряды без сучка без задоринки, и все время казалось, что она у нас уже давным давно и стала своей с первого дня. Мало того, Марина еще сумела связать два кардигана. Поздравляю от всей души!
- The Legacy of Eighties. Наследие восьмидесятых
That is going to be a kind of emotional post, for which I have been preparing since 2014 when I decided to share my knitting with a wider audience online. But then I knew that the time for it had not come yet. Now I think it's the right moment. The time spiral coincided, and I accumulated enough material to illustrate the story. I want to tell you about who and what influenced me as a hand-knitting designer. I sang many praises to my idol, Norah Gaughan, about her ability to transcend knitting conventions and that I even received a couple of letters from her. It was a bright event in my knitting life, which gave me confidence, but this is a different story. I shall try to dig much deeper, get close to the very origins — history, which is 38 years old. *** Это будет немного эмоциональная история, к которой я готовилась с 2014 года, когда решила свое вязание показать более широкой аудитории и вышла в интернет. Но тогда еще понимала, что время для нее не пришло. Сейчас, думаю, уже пора. Спираль времени совпала, да и материала у меня для иллюстраций набралось достаточно. Хочу рассказать о том, кто и что меня сформировали как дизайнера вязаной одежды. Я много раз пела дифирамбы моему кумиру Norah Gaughan, о ее способности выходить за рамки устоявшихся канонов вязания, и что я даже получила от нее пару писем. Это, конечно, яркое событие в моей вязальной жизни, придавшее мне уверенности, но сейчас не об этом. Я попробую копнуть гораздо глубже, подобраться к самим истокам. История, которой 38 лет. The year 1983. I am 10 years old. My grandmother (the one who taught me to knit) is getting permission to go to the United States to visit her brother and sister. Then, back in the USSR, such permits were needed. On her return, she brings with her yarn, which had color! As I remember now - burgundy, wormwood, a short gradient of blue and gray, and neon pink, rather, the color of bubble gum. With a meager selection of Soviet yarn in gray-brown shades of those years, this American yarn seemed somehow magical or from another world. I remember sitting and watching for hours as my grandmother knits all sorts of beautiful things for my sister and me. Later I realized that it was just a semi-cheap yarn, wool with acrylic, which were impossible to wear-out, and those sweaters grew with us. The meaning was then in a nice cover... *** Год 1983. Мне – 10 лет. Моя бабушка (именно та, которая научила меня вязать) получает разрешение поехать в США к своему брату и сестре. Тогда, еще в СССР, такие разрешения были нужны. По возвращению она привозит с собой пряжу, у которой был цвет! Как сейчас помню – цвет бургунди, цвет полыни, короткий градиент голубого и серого, а также неоновый розовый, скорее, цвета bubble gum. При скудном выборе советской пряжи серо-коричневых оттенков тех годов, эта американская пряжа казалась какой-то волшебной и из другого мира. Я, помню, сидела и смотрела часами, как бабука из нее вяжет мне и сестре всякие красивые вещи. Потом оказалось, что это была всего лишь полудешевая полушерсть и акрилан, которых сносить и убить было невозможно, а свитера, связанные из нее, росли вместе с нами. Смысл тогда был в обертке... My grandmother gave me the color of wormwood, and it was the first yarn with which I learned to knit. At the age of 11, I knitted the first jumper in my life. Rather, I knitted just the front piece, the rest was finished by my grandmother, and I got an A in art classes by tricking a teacher. I remember a skein of "wormwood" before my eyes, large 5,0 mm needles, and a huge knit piece, which seems to have no end. Everything is accompanied by my constant grumbling, why the needles do not have a hook end, and how impossible it is to pull the stitch with straight sticks! These knitters of the whole world do not understand anything at all, they have not grown up to crocheted knitting needles, and they all entered into a conspiracy to make my life unbearable. *** Цвет полыни бабушка отдала мне, и именно с этой американской пряжей я училась вязать. В 11 лет связала первый в жизни джемпер. Скорее, я связала только перед, остальное закончила бабушка, а я обманом сдала законченный джемпер на уроках труда и получила пятерку. Так и стоит перед глазами моток "полыни", толстые спицы 5,0 мм и огромное полотно, которой, кажется, нет конца. Все сопровождается моим постоянным бурчанием, почему спицы не имеют окончания крючка, и как же невозможно прямыми палочками протянуть петлю! Эти вязальщицы всего мира совсем ничего не понимают, не доросли еще до спиц с крючком, и все вступили в заговор специально усложнить мне жизнь. But this article is not about that. Along with a huge suitcase of gifts, my grandmother also brought a Vogue Knitting magazine, SS 1983. The magazine was glossy, thick, written in incomprehensible English, with gorgeous models, and it cost $ 4. I honestly don’t remember that my grandmother knitted something specific from it; apparently, it was originally intended for me. It is still very well preserved. I hold it in my hands, and in terms of the quality and brightness of photographs, it is no different from today's, although almost 38 years have passed. Models in the magazine look a bit like the heroines from the series "Santa Barbara" and "Dynasty," but everything else has become very relevant. Of course, the patterns are short, laconic, full of "guess yourself," not even every pattern has schematics. Only 2-4 sizes are presented, where the largest is 96,5 cm, and this is size M. In those years, there was still no body-positive movement fighting for sizes for an average woman. *** Но эта история не об этом. Вместе с огромным чемоданом подарков бабушка еще привезла вязальный журнал Vogue Knitting, весна-лето 1983. Журнал был глянцевым, толстым, на непонятном английском языке, с моделями невероятной красоты и стоил он 4$. Я, честно, не помню, чтобы бабушка что-то конкретное по нему вязала, видимо, он изначально был предназначен для меня. Он очень хорошо сохранился до сих пор. Я держу его в руках, и по качеству и яркости фотографий он ничем не отличается от сегодняшних, хотя прошло почти 38 лет. Модели журнала внешним видом немного напоминают героинь из сериала "Санта Барбара" и "Династия", но все остальное сейчас стало очень актуальным. Описания, конечно, короткие, немногословные, полно "догадайся сам", даже не везде есть рисунок выкройки. Предлагаются всего лишь 2-4 размера, где самый большой – это 96,5 см, и это М-ка. В те годы еще не было бодипозитивного движения за размеры для среднестатистических женщин. That's how I grew up leafing through this magazine. And again, I did not knit anything specific from it, except for a couple of a bit like original ones. In the eighties, I still, I might say, did not knit at all. I knitted a lot in the early nineties, but then this magazine seemed to be hopelessly outdated. Then began the period of Sandra and Verena magazines, the same later Vogue Knitting, at the end of the 2000s - Norah's and Ravelry's time. *** Так я и выросла, листая этот журнал. И опять же, ничего конкретного из него я не связала, кроме парочки приблизительных моделей. В восьмидесятые я еще, можно сказать, не вязала, в ранние девяностые я вязала очень много, но тогда этот журнал казался мне безнадежно устаревшим. Потом начался период Сандры и Верены, того же более позднего Vogue Knitting, в конце нулевых – период Норы и Ravelry. But that’s not the point. For a teenage girl who sewed doll clothing up to 16 years old, hiding from her dates, such beauty could not but leave an imprint in the formation of taste and worldview in the field of fashion. Recently, I have been inspired by the designs of this magazine for several years in a row. And there is something: how much is in common between the 1983 fashion and the fashion of 2017-2021! Cropped, oversized, puffed and lush sleeves, vintage laces, belts, geometry, dropped shoulder, bobbles, novelty yarn and bouclé yarn, sport-chic style, lady-like look, emphasis on the shoulders, crochet. Pay attention not only to the knitted piece itself but also to the looks overall. Banana pants, hats, full and pleated skirts, emphasized jewelry, and even some hairstyles! Everything is very now. *** Но дело не в этом. Для девочки-подростка, которая шила куклам до 16 лет, спрятавшись от кавалеров, такая красота не могла не оставить отпечатка в формировании вкуса и мировоззрения в области моды. В последнее время я уже который год подряд вдохновляюсь дизайнами этого журнала. И есть чем: сколько общего между модой 1983 и модой 2017-2021! Короткость, оверсайз, пышные рукава, винтажные ажуры, пояса, геометрия, рукава-фонарики, спущенное плечо, "шишечки", фасонная пряжа и пряжа букле, стиль спорт-шик, lady-like образ, акцент на плечи, вязание крючком. Обратите внимание не только на само вязаное изделие, но и на составленные в журнале образы. Брюки-бананы, шляпы, пышные юбки и юбки в складку, яркая бижутерия и даже некоторые прически! Все очень даже актуально. Each designer or any creative person has his own signature, his own style. It does not appear out of nowhere, but it shapes throughout life, especially at a young age. For some, these are the people around them and role models. Someone grows in a special environment. And someone just has a very special knitting magazine that planted а seed. You can better judge from the outside whether all this has left an imprint on my work. I think it did. *** У каждого дизайнера или любого творческого человека есть свой почерк, свой стиль. Он не появляется ниоткуда, а формируется на протяжении жизни, и особенно в молодые годы. У кого-то это близкие люди и примеры для подражания. У кого-то среда, окружение. А у кого-то просто журнал вязаной моды, посеявший семя. Со стороны вам лучше видно, оставило ли все это свой отпечаток в моем творчестве. Я думаю, что оставило. It all started with something completely different. I'm working on a new collection, which I talked about on the forum (here and here). Many noted the design named Moss. And now, I think you will not be surprised where the roots of this future design come from. For me, at a young age, it was an exceptional one, some kind of angelic, beautiful to tears. I dreamed about it all my early youth, and it was the one that encouraged me to ask my grandmother to teach me how to knit. As soon as I learn, I thought, I’ll knit him right away. I learned to knit, and after exactly 38 years, I will make it. *** А началось все совсем с другого. Я готовлюсь к новой коллекции, о которой рассказывала на форуме (тут и тут). Многие отметили дизайн под названием Мох. И теперь, думаю, вы не удивитесь, откуда берутся корни этого будущего дизайна. Для меня маленькой он был тем самым самым, каким-то ангельским, красивым до слез. Я всю свою раннюю молодость о таком мечтала, и именно он сподвиг меня попросить бабушку научить вязать. Как только научусь, думала, сразу его свяжу. Вязать научилась, и ровно через 38 лет я это сделаю.
- A Secret of Even Stitches. Секрет ровных петелек
We often wish each other even stitches or smooth knitting — a kind and friendly wish. But no matter how hard we try, hand knitting does not always come out as smooth as machine knitting or as we would like. Is it possible to achieve perfect and even hand knitting? Here I will disappoint you — no. Can it be improved? Yes. So what does smooth knitting depend on? Let's consider it. The stitches get even if each consumes the same yarn length. If one stitch received 1 cm of yarn and the adjacent one — 1,2 cm, it's evident that those stitches are never going to be even. There is a possibility that after washing, they will share, and each of them will get 1,1 cm of yarn, but this very much depends on the composition of the yarn, and that does not necessarily happen. And if another pair of adjacent stitches, sharing among themselves, used only 0,9 cm of yarn each, the row is going to be wonky and uneven. In machine knitting, the yarn tension is always ideally the same. For this reason, machine knitting turns out to be even and smooth. So one of the challenges in hand knitting is to try to maintain the same ideal yarn tension. Is it possible? No. You can only strive for this. Firstly, the more you practice, the smoother the knitting and the smoother the stitches. Hands learn to feel the degree of tension and try to distribute the same length of yarn for each stitch. Secondly, it is picking up quite slippery knitting needles. If the yarn does not get stuck on the needle, the likelihood of identical stitches increases. Thirdly, is your wellbeing and mood. If you are tense, someone or something is continuously distracting you or your hands get tired — the stitches get bumpy. If you are relaxed, focused on knitting, the stitches get more even. Fourthly, is the supply of unwound yarn from a skein or ball. When all of the unwound yarn has already been consumed, do not knit that last tightly leashed stitch until you unwind the next sufficient amount of yarn. All of these tips help but work only to a certain extent. Hands may be moist or sweaty, and the yarn will slide with increased resistance. Dry hands, on the contrary, can feed more yarn than they should. Our mood changes and something constantly distracts us. Sometimes we need a specific size of knitting needles, and the available ones turn out to be not slippery enough. And even the most experienced knitter takes breaks from knitting, and after a few months, trained hands again feel like newbies. It is also known that some of us work purl stitches more tightly than knit stitches, and as a result, we find ourselves in a situation where stitches in every second row are longer. Here you need to retrain yourself and feed more yarn when purl. In some cases, for the purl row, grab a 0,25 mm larger knitting needle. Is there any "life hack" for hand knitting to be perfectly even? Yes and no. We are not robots or machines. We can compare knitting to handwriting. Write a letter and try to find two perfectly identical letters "a." You are unlikely to succeed, even if you are a writer who still writes novels with a ballpoint pen. So it is possible and necessary to strive for perfection, but we are unlikely to achieve it. But 80% of quality is already a good indicator. Soon we are going to figure out what the secret is. Before continuing reading, I highly recommend reading the post "Density is the key to success." It will help you understand some of the points that we are going to need further. I also want to note that in this older post, I already wrote about all this, but why I repeat myself, you understand if you continue reading. Fortunately, I was able to do an experiment that longed for almost six years finally to put together three testing mice. The test was carried out according to all the rules — the same conditions for all subjects with a change in only one component for comparison. Below you will find three samples using the same type of yarn, and the same number of strands held together; having the same level of knitting experience, since I knitted a lot and continuously both six years ago and to this day. All the presented samples were washed and steamed with an iron. The only different component is the radically different size of the needles. *** Мы часто желаем друг другу ровных петелек. Хорошее и приветливое пожелание. Но как бы мы не старались, ручное вязание далеко не всегда выходит таким ровным, как машинное или как нам хотелось бы. Возможно ли достичь идеально ровного вязания руками? Здесь я вас разочарую — нет. Можно ли его усовершенствовать? Да. Так от чего зависит ровное вязание? Давайте разберемся. Петли будут ровные, когда каждая из них получит одинаковую длину нити. Если одна петля получила 1 см нити, а соседняя — 1,2 см, очевидно, что петли ровными не будет. Есть возможность, что после стирки они поделятся между собой, и у каждой из них будет по 1,1 см, но это очень зависит от состава пряжи, и необязательно это произойдет. И если другая пара соседних петель, поделившись между собой, употребили только по 0,9 см нити, такой ряд будет волнистым и неровным. В машинном вязании натяжение нити всегда идеально одинаковое, по этой причине машинное вязание получается ровным и гладким. Значит, одна из задач в ручном вязании — попробовать выдержать такое же идеальное натяжение нити. Возможно ли это? Нет. Можно только к этому стремиться. Первое. Чем вы больше практикуетесь, тем вязание становится более гладким, а петли — более ровными. Руки учатся чувствовать степень натяжения и стараются выделить каждой петельке одинаковую длину нити. Второе — достаточно скользкие спицы. Когда нить на спице не застревает, вероятность одинаковых петель вырастает. Третье — ваше состояние, настроение. Если вы нервны, вас кто-то или что-то постоянно отвлекает, у вас уставшие руки — петли будут скакать. Если вы расслаблены, сосредоточены на вязание, петли будут более ровными. Четвертое — подача свободной нити из мотка или бобинки. Когда всю размотанную нить уже связали, не вяжите ту последнюю натянутую петлю до следующей подачи свободной нити. Все эти советы помогают, но работают только частично. Руки могут быть влажными или потными, и нить будет скользить с повышенным сопротивлением. Сухие руки могут, наоборот, пропускать больше нити, чем полагается. Настроение бывает разное, и нас постоянно что-то отвлекает. Иногда нам нужен конкретный размер спиц, а тот, что имеется, оказывается нескользким. И даже самая опытная вязальщица берет перерывы в вязании и после нескольких месяцев натренированные руки опять чувствуют себя новичками. Также известен факт, что некоторые из нас изнаночный ряд вяжет более туго, и в итоге получает рядность, где в каждом втором ряду петельки более длинные. Здесь нужно переучивать себя и в изнаночном ряду подавать больше нити. В крайнем случае для изнаночного ряда взять на 0,25 мм более толстые спицы. Существует ли какой-нибудь "лайфхак", чтобы ручное вязание было идеально ровным? И да, и нет. Мы не роботы и не машины. Вязание можно сравнить с письмом. Напишите письмо и попробуйте отыскать две идеально одинаковые буквы "а". Вам вряд ли это получится, даже если вы являетесь писателем, который до сих пор пишет романы шариковой ручкой. Так что к совершенству стремиться можно и нужно, но вряд ли мы его достигнем. Но 80% качества — это уже хороший показатель. И мы попробуем разобраться, в чем же секрет. Перед тем, как продолжить чтение, я настоятельно рекомендую почитать пост "Плотность – залог успеха". Он поможет понять некоторые моменты, о которых будем говорить далее. Также хочу предупредить, что в этом раннем посту я уже про все это писала, но почему я повторяюсь, вы поймете, если продолжите чтение. К счастью, мне удалось провести эксперимент, который длился почти шесть лет, для того, чтобы собрать воедино три испытуемые мыши. Эксперимент проводился по всем правилам. Одинаковые условия для всех испытуемых с изменением одного лишь критерия для сравнения. Я вам покажу три образца, выполненные из одного и того же сорта пряжи, в одинаковое количество сложений, с тем же опытом вязания, так как я вязала много и постоянно как шесть лет назад, так и по сей день. Все показываемые образцы прошли стирку и отпаривание. Единственное отличие — кардинально другой размер спиц. Yarn: SMC Select Highland Alpaca Fino, 500 m/100 g, 50% Alpaca, 50% Wool, two strands held together, final yardage — 250 m/100 g. *** Пряжа: SMC Select Highland Alpaca Fino, 500 м в 100 гр., 50% альпака, 50% шерсть, в два сложения, окончательный метраж — 250 м в 100 гр. The first sample (green) is worked with US5 (3,75 mm) needles for the rib and US6 (4,0 mm) for a Stockinette Stitch. The second sample (pink) is worked with US6 (4,0 mm) needles for the rib and US7 (4,5 mm) for a textured stitch pattern. The third sample (light blue) is worked with US1,5 (2,5 mm) needles for the rib and US3 (3,25 mm) for a checkered pattern, where the Stockinette Stitch dominates. *** Первый образец (зеленый) связан спицами 3,75 мм для резинок и 4,0 мм для лицевой глади. Второй образец (розовый) связан спицами 4,0 мм для резинок и 4,5 мм для фактурного узора. Третий образец (голубой) связан спицами 2,5 мм для резинки и 3,25 мм для клетчатого узора, где доминирует лицевая гладь. Note the very significant difference between the size of the needles of the first two and the third sample, bearing in mind that the same brand, sort, and weight of yarn were used in all three cases. In my opinion, the difference is obvious, and this is especially noticeable on the ribs. The first two samples speak loudly about hand knitting, and there is nothing wrong with that, but the last one still makes you doubt a little. Of course, this is hand knitting, but who doesn't dream of smoother stitches? How does reducing the size of the needles for the particular yarn affect the evenness of the stitches? The size of the needle regulates the length of yarn that is allowed to create one stitch. The shorter the yarn for the stitch, the fewer possibilities for deviations in different directions. The stitches fit tightly to each other; they do not have the opportunity to wobble, steal some yarn from neighboring stitches, or share their excess. Imagine a soldier squad that hears drill commands "Attention!" and "At ease!" That is precisely the case with your stitches. There is a conviction that dense knitting thickens the garment. It makes it heavier — yes, it gets denser — yes, but in no way thickens it — quite the opposite. Tight stitches get compressed from all directions, and only in a looser knit, they become puffier. Also, your garment never gets thicker than the thickness of your yarn and the characteristics of the stitch pattern, which determines how many layers of yarn strands one motif requires. The garment only becomes more windproof; it requires more yarn; accordingly, it gets heavier, but these features, on the other hand, ensure the longevity and the stability of the initial measurements of your project. And don't get me wrong. Each yarn weight has its own needle size. I do not suggest knitting yarn with a yardage of 120 m/100 g using US2,5 (3,0 mm) needles. But maybe US10 (6,0 or 7,0 mm) is a better choice than US15 (10,0 mm)? There is another right way to help you decide if the size of the knitting needles is right for a particular yarn weight. If you could, with confidence, wear a project right away, after it has been finished, without washing and steaming it, and go places, you know that you did everything right. If all hopes of improving the look of your garment lay on the upcoming wash, you were probably a little mistaken this time. The washing is not intended to fix your wonky stitches — it aims only to soften the yarn and polish your masterpiece. I could wear this one right away (see the picture below), everything pleases me. And the fact that the cardigan is still unwashed is reminded only by the yet missing sleeve (work still in progress). *** Обратите внимание на очень значительную разницу между размером спиц первых двух и третьего образца, имея в виду, что был использован тот же самый артикул пряжи в два сложения во всех случаях. По моему, разница очевидная, и особенно это заметно на резинках. Первые два образца громко говорят о ручном вязании, и в этом нет ничего плохого, но последний все же заставляет засомневаться. Конечно, это — ручная работа, но кто не мечтает о более ровных петельках? Как уменьшение размера спиц для той же самой пряжи влияет на ровность петелек? Размер спиц влияет на длину нити, которая выделяется для образования петли. Чем нить для петли короче, тем возможность отклониться в разные стороны меньше. Петельки ложатся плотно прилегая друг к другу, не имеют возможности шалить, воровать нить у соседок, или делиться своим избытком. Представьте солдатский отряд, который слышит команды "Смирно!" и "Вольно!" Ровно так происходит и с петлями. Бытует мнение, что плотное вязание утолщает изделие. Утяжеляет — да, уплотняет — да, но никоим образом не утолщает. Даже наоборот. Сжатые петельки сжимаются со всех сторон, а в более рыхлом вязании они становятся более пухлыми. Также ваше вязаное изделие от более плотного вязания не станет более толстым, чем толщина вашей пряжи и особенность выбранного узора, который влияет на то, сколько слоев пряжи ляжет в одном мотиве. Изделие станет лишь менее продуваемым ветром, оно потребует больше пряжи, соответственно, станет тяжелее, но эти свойства с другой стороны обеспечивают долговечность и формоустойчивость (сохранение первичной формы и измерений) вашему изделию. И поймите меня правильно. У каждой толщины пряжи — свой размер спиц. Я не предлагаю вязать пряжу с метражом 120 м в 100 гр. спицами третьего размера. Но может вместо десяточки лучше подойдет 6,0 или 7,0 мм? Есть еще один хороший способ, который помогает определиться, правильно ли подобран размер спиц для вашей пряжи. Если вы смогли бы со спокойной душой надеть пока нестиранное и неотпаренное вязаное изделие и пойти с ним в люди, знайте, вы все сделали правильно. Если вся надежда об улучшении вида вашего изделия возложена на предстоящую стирку, наверное, вы в этот раз немного ошиблись. Стирка не предназначена для разглаживания кривых петель. Стирка предназначена только для того, чтобы смягчить пряжу и окончательно отполировать ваш шедевр. Я бы точно могла такое уже надеть, меня все устраивает. И о том, что кардиган еще нестиранный, напоминает лишь недостающий рукав. I often receive compliments from you about smooth knitting. Thank you for that. I am delighted. But my hands are no different from yours; the main difference is — I know the secret. Now you discovered it too. I wish you smooth stitches! *** Я часто получаю от вас комплименты насчет ровного вязания, спасибо вам за это, мне очень приятно. Но мои руки ничем не отличаются от ваших, я только знаю секрет. Теперь его узнали и вы. Всем ровных петелек!
- Kitchener Stitch Encyclopedia. Энциклопедия трикотажного шва
This article does not focus on knitting, mainly on how to fix mistakes, failures, and shortcomings after your project is already finished, or give it a second life. I want to tell you everything that is possible about a Kitchener Stitch. A Kitchener Stitch joins live stitches. It is invisible and creates one row, as if we knitted it with knitting needles, only in the middle of the knit fabric. With a Kitchener Stitch, we can join the shoulders when a reinforced and inextensible seam is not required; to set in sleeves in projects with a drop shoulder; lengthen or shorten the sleeves or body without unraveling the entire piece; change, lengthen and shorten ribs or hems; also fix the error in a stitch pattern if we notice it after the piece is finished. For a Kitchener Stitch, you need to prepare two edges with live stitches (they can be worked in the same direction or, on the contrary, in the counter direction), a yarn tail of about 3,5 lengths of the joined edge and a tapestry needle. In some cases, you may need a seam ripper, a crochet hook for runaway stitches, knitting needles, an iron or steamer, scissors. When grafting with a Kitchener Stitch, be very careful. If any of the stitches we graft get twisted, it means that you inserted the tapestry needle in the wrong direction. An exception is permissible only in the penultimate chapter, where we are going to focus on twisted stitches. *** В этой статье речь пойдет не о вязании, а о том, как исправлять ошибки, неудачи и недочеты после того, как ваше изделие уже связано, и, может быть, даже вернуть ему вторую жизнь. Здесь расскажу все, что возможно, о трикотажном шве. Трикотажный шов соединяет открытые петли, является невидимым, и создает один ряд, как бы мы вязали его спицами, только в середине полотна. Трикотажным швом мы можем соединять плечи, когда не требуется укрепленный и нерастяжимый шов; пришить рукава в изделиях со спущенным плечом; удлинять, укорачивать рукава или корпус, не перевязывая всю деталь; менять, удлинять и укорачивать резинки или планки; также исправить сбившийся узор, если мы заметили ошибку после того, как деталь завершена. Для трикотажного шва нужно подготовить два края с открытыми петлями (они могут быть связаны в том же самом или, наоборот, встречном направлении), нить, длиною примерно в 3,5 длины соединяемого края и гобеленовую иглу. В некоторых случаях может понадобиться вспарыватель, крючок для убежавших петель, спицы, утюг или отпариватель, ножницы. Сшивая трикотажным швом, будьте очень внимательными. Если любая из петель, которую мы прошили, легла скрещенной, значит, вы ввели иглу в неправильном направлении. Исключение допустимо только в предпоследнем разделе, где речь пойдет как раз о скрещенных петлях. Changing the Ribs. Меняем резинки Let's examine one of the cases when I decided to change the ribs. 1. The rib was too loose. I decided to knit a denser rib with thinner knitting needles. The number of stitches of the old and the new rib came out differently. For this reason, I knitted two rows with a Stockinette Stitch in which I equalized the number of stitches with the back piece. 2. Since two rows of a Stockinette Stitch were already made on a new rib, it was the third row of a Stockinette Stitch that was chosen for unraveling. Cut the yarn of one stitch in the third row from the rib for a few stitches from the edge with a seam ripper. 3. Very carefully, unravel the yarn of the third row to the edge of the piece stitch by stitch. 4. Cut the stitch through 5-12 cm from the first cut point. Release the yarn ends. 5-6. Pull the yarn out. The distance between the ripping points depends on how tangled is the stitch pattern itself and how strong or slippery the yarn is. Sometimes you can pull the yarn in one take over the entire width of the piece, and sometimes you have to unravel it in short steps or only one stitch at a time. 7. Make the same cut on the opposite side of the piece. Unravel the yarn to the edge. This short yarn tail needs to be saved – you will need to weave in it later. 8-9. Pull out the yarn in the last step. The rib is separated. 10. Before breaking the yarn on a new rib, leave the tail, which is 3,5-4 times longer than the horizontal length of the upcoming seam (the joining edge), and thread it into a tapestry needle. 11. Start to join live stitches with a Kitchener Stitch. Live stitches can be placed onto the knitting needle slipping one at a time while grafting them, or you can keep them unstrung if the pieces have been pressed, steamed, or washed before. Stitches after the blocking (with contact with water and heat) are fixed and do not run away. If a random stitch nevertheless unravels, it can be fixed with a crochet hook. 12. The last picture compares the new and the old one rib. The new rib (at the bottom) is denser, the goal has been achieved, and the joining row is almost invisible. After the final wash, the Kitchener Stitch smoothes out and merges with the knit fabric. A Kitchener Stitch restored the unraveled third row. *** Предлагаю разобрать один из случаев, когда я решила поменять резинки. 1. Резинка оказалась слишком рыхлая. Было принято решение связать более плотную резинку более тонкими спицами. Количество петель старой и новой резинки отличалось. По этой причине было провязано 2 ряда лицевой гладью, чтобы в них выйти на нужное количество петель на спинке. 2. По причине того, что 2 ряда гладью уже были выполнены на новой резинке, именно третий ряд гладью был выбран для отсоединения. Отрезать вспарывателем нить петли в третьем ряду за несколько петель от края. 3. Осторожно, петелька за петелькой распустить нить третьего ряда до самого края. 4. Отрезать петлю через 5-12 см от первой точки. Распустить кончики. 5-6. Вытянуть нить. Расстояние между точками разреза нити зависит от узора и насколько крепкая или скользкая нить. Иногда можно вытащить нить сразу по всей ширине детали, а иногда приходится распускать короткими отрезками или всего по одной петельке. 7. Сделать такой же самый разрез на противоположной стороне детали. Распустить нить. Этот кончик нужно сохранить – он понадобится, чтобы далее вплести его и закрепить. 8-9. Вытянуть нить в последнем отрезке. Резинка отделилась. 10. Перед тем, как отрывать нить на новой резинке, оставить конец нити длиною в 3,5-4 раза больше горизонтальной длины предстоящего шва (соединяемого края) и продеть его в гобеленовую иглу. 11. Начать соединять открытые петли трикотажным швом. Открытые петли можно переместить на спицы и снимать петли, постепенно их прошивая, а можно держать открытыми, если до этого деталь была отпарена или постирана. Петли после ВТО фиксируются и не убегают. Если случайная петелька все же убежит, ее можно поймать и вернуть крючком. 12. На последней фотографии – сравнение. Новая резинка (внизу) более плотная, цель достигнута, а место соединения почти невидимое. После финальной стирки трикотажный шов разглаживается и сливается. Трикотажный шов также вернул распущенный третий ряд. A Kitchener Stitch at the Beginning of the Row. Трикотажный шов в начале ряда How to start a Kitchener Stitch? It seems that everything is quite simple, just begin to graft, and that's it. But if you misplace the first stitch, in the end, you get the tiny shift of the joined pieces by half the stitch. After the piece is sewn with a mattress (or any other) stitch, a shift of half the stitch at the seam is going to be very noticeable. And if your project uses any, even the simplest stitch pattern, the half-stitch displacement becomes noticeable right away after grafting just a few stitches. 1. Thread the yarn tail of the bottom piece into the tapestry needle. 2. The top row. Insert the needle from the bottom up into the edge (selvage) stitch of the first row of the top piece and into the half of the selvage stitch, which is slightly higher. Pull the yarn. 3. The bottom row. Insert the needle into the selvage stitch of the lower piece from top to bottom and through the second (next) stitch from the bottom up. Pull the yarn. 4. The top row. Insert the needle into the selvage stitch of the upper piece from top to bottom (do not stitch the previously sewn half of the upper selvage stitch, just leave it as is) and through the second (next) stitch from the bottom up. 5-6. Continue grafting with a Kitchener Stitch (see below). *** Как начать трикотажный шов? Казалось бы все просто, начали сшивать, и дело с концом. Но если начать не с той петли, в итоге несложно получить смещение соединяемых полотен на половину петли. После того, как деталь будет сшита матрасным (или любым другим) швом, смещение на половину петли у шва будет очень бросаться в глаза. А если ваши соединяемые полотна имеют любой, хоть самый простейший узор, смещение станет заметно сразу, как будет прошито всего лишь несколько петель. 1. Вдеть нить нижнего полотна в гобеленовую иглу. 2. Верхний ряд. Ввести иглу снизу вверх в кромочную петлю первого ряда верхнего полотна и в половинку кромочной петли, которая находится немного выше. Вытянуть нить. 3. Нижний ряд. Ввести иглу в кромочную петлю нижнего полотна сверху вниз, вывести через вторую (следующую) петлю снизу вверх. Вытянуть нить. 4. Верхний ряд. Ввести иглу в кромочную петлю верхнего полотна сверху вниз (ранее прошитую половинку кромочной больше не прошивать), вывести через вторую (следующую) петлю снизу вверх. 5-6. Продолжить сшивать трикотажным швом (см. ниже). A Basic Kitchener Stitch in а Stockinette Stitch. "Down-up, down-up" Трикотажный шов в лицевой глади. "Вниз-вверх, вниз-вверх" Let's dive into the basic Kitchener Stitch in a Stockinette Stitch, then analyze individual cases in simple and most often used stitch patterns. Also, what to do if the number of stitches in the joined pieces is different, and at the very end to touch on the features of the counter knitting. The basic principle of a Kitchener Stitch is that each stitch (with a few exceptions) should be sewn (or grafted) twice. *** Теперь предлагаю рассмотреть самый обычный трикотажный шов в лицевой глади, а далее разобрать отдельные случаи в простых и часто встречаемых узорах, также, что делать, если количество петель отличается, и в самом конце коснуться особенностей встречного вязания. Главный принцип трикотажного шва – каждая петля (с небольшими исключениями) должна быть прошита два раза. 1. The bottom row. Insert the needle into the first, previously grafted once stitch from top to bottom, and pull through the second (next) stitch from the bottom up. 2. The top row. Insert the needle into the first, previously grafted once stitch from top to bottom, and pull through the second (next) stitch from the bottom up. 3. The stitch is created. Repeat steps 1-2 until you have grafted all the stitches together. Do not overtighten the yarn. A row created with a Kitchener Stitch should correspond to the friability or density of the rest of the knit fabric. *** 1. Нижний ряд. Ввести иглу в первую, ранее один раз прошитую петлю сверху вниз, вывести через вторую (следующую) петлю снизу вверх. 2. Верхний ряд. Ввести иглу в первую, ранее один раз прошитую петлю сверху вниз, вывести через вторую (следующую) петлю снизу вверх. 3. Петля сформирована. Повторять пункты 1-2, пока не будут прошиты все петли. Нить сильно не затягивать. Ряд, сформированный трикотажным швом, должен соответствовать рыхлости или плотности всего остального полотна. A Kitchener Stitch that Changes the Number of Stitches. Трикотажный шов, меняющий количество петель Sometimes it may happen that in the pieces you need to join, the number of stitches does not match. Let's say, you shorten the sleeve, and the lower piece has two stitches less than the upper piece, and you need to increase while grafting. Or it could be the other way round. You need to graft a rib that has more stitches than, say, the back piece, to which you need to attach the rib. Here you have to decrease. The task of a Kitchener Stitch here is to equalize the number of stitches by increasing or decreasing. Left-leaning decrease 1. The bottom row. Insert the needle into the first, previously grafted once stitch from top to bottom and pull through the next two stitches from the bottom up. Pull the yarn. In the top row, graft the two stitches with a basic Kitchener Stitch. 2. With the next stitch in a bottom row, graft both stitches to be decreased at once, inserting the needle from top to bottom, and pull the needle through the next (third) stitch from the bottom up. Pull the yarn. 3. In the top row, graft stitches with a basic Kitchener Stitch. *** Иногда может случиться так, что в нижней или в верхней части полотна количество петель не совпадает. Скажем, вы укорачиваете рукав, и нижняя часть имеет на две петли меньше, чем верхняя часть. Здесь вам будет нужно сшивая прибавить. Может быть и наоборот. Вы пришиваете резинку, на которой больше петель, чем, скажем, на спинке. Здесь вам придется сшивая убавить. Задача трикотажного шва – сравнять количество петель прибавляя или убавляя. Убавление с наклоном влево 1. Нижний ряд. Ввести иглу в первую, ранее один раз прошитую петлю сверху вниз, вывести через две следующие петли снизу вверх. Вытянуть нить. В верхнем ряду прошить две петли лицевым трикотажным швом. 2. Следующим стежком в нижнем ряду прошить обе убавляемые петли, вводя иглу сверху вниз, и вывести иглу через следующую (третью) петлю снизу вверх. Вытянуть нить. 3. В верхнем ряду прошить две петли лицевым трикотажным швом. Right-leaning decrease 1-2. Bottom row. Insert the needle into the first, previously grafted once stitch from top to bottom; pull through the next two stitches from the bottom up – first through the third, then through the second stitch (swap). Pull the yarn. In the top row, graft two stitches with a basic Kitchener Stitch. 3. With the next stitch in a bottom row, graft both stitches to be decreased at once, inserting the needle from top to bottom. Then pull the needle through the next stitch from the bottom up. Pull the yarn. In the top row, graft two stitches with a basic Kitchener Stitch. *** Убавление с наклоном вправо 1-2. Нижний ряд. Ввести иглу в первую, ранее один раз прошитую петлю сверху вниз; вывести через две следующие петли снизу вверх – сначала через третью, потом через вторую (поменять местами). Вытянуть нить. В верхнем ряду прошить петли лицевым трикотажным швом. 3. Следующим стежком в нижнем ряду прошить обе убавляемые петли, вводя иглу сверху вниз, и вывести иглу через следующую петлю снизу вверх. Вытянуть нить. В верхнем ряду прошить петли лицевым трикотажным швом. Left-leaning increase 1. The top row. Insert the needle into the first, previously grafted once stitch from top to bottom, and pull through the next two stitches from the bottom up. 2. Pull the yarn and graft two stitches in the bottom row with a basic Kitchener Stitch. 3. With the next stitch in a bottom row, graft both stitches to be increased at once, inserting the needle from top to bottom, and pull it through the next (third) stitch from the bottom up. *** Прибавление влево 1. Верхний ряд. Ввести иглу в первую, ранее один раз прошитую петлю сверху вниз, вывести через две следующие петли снизу вверх. 2. Вытянуть нить и прошить две петли в нижнем ряду лицевым трикотажным швом. 3. Следующим стежком в верхнем ряду прошить обе прибавляемые петли, вводя иглу сверху вниз, и вывести через следующую (третью) петлю снизу вверх. Right-leaning increase 1. The top row. Insert the needle into the first, previously grafted once stitch from top to bottom; pull through the next two stitches from the bottom up – first through the third, then through the second stitch (swap). Further – as in the left-leaning increase. 2. The second picture illustrates decreases and increases, made with a Kitchener Stitch. *** Прибавление вправо 1. Верхний ряд. Ввести иглу в первую. ранее один раз прошитую петлю сверху вниз; вывести через две следующие петли снизу вверх – сначала через третью, потом через вторую (поменять местами). Далее – как в прибавлении влево. 2. На второй фото изображены убавления и прибавления, выполненные трикотажным швом. A Reverse Kitchener Stitch. "Up-down, up-down" Трикотажный шов в изнаночной глади. "Вверх-вниз, вверх-вниз" If the reverse Stockinette Stitch is grafted with the basic Kitchener Stitch from the wrong side, the Reverse Kitchener Stitch turns out by itself. But what if there is the only opportunity to graft on the right side, and you want to get the Reverse Kitchener Stitch? Let's consider it. Understanding the Reverse Kitchener Stitch is also necessary to learn how to graft more complex stitch patterns further. *** Если изнаночную гладь сшивать с изнаночной стороны полотна обычным лицевым трикотажным швом, изнаночный трикотажный шов получится сам собой. Но что делать, если есть единственная возможность сшивать с лицевой стороны, а требуется получить изнаночный трикотажный шов? Давайте, рассмотрим. Понять изнаночный трикотажный шов также необходимо для того, чтобы далее научиться сшивать более сложные узоры. The Reverse Kitchener Stitch is obtained by inserting the needle in the opposite direction to the basic Kitchener Stitch, and as a result, it creates purl stitches. 1-3. Bottom row. Insert the needle into the first, previously grafted once stitch from the bottom up, and pull through the second (next) stitch from top to bottom. Pull the yarn. 4-6. Top row. Insert the needle into the first, previously grafted once stitch from the bottom up, and pull through the second (next) stitch from top to bottom. Pull the yarn. Repeat steps 1-6 until you have grafted all the stitches together. *** Изнаночный трикотажный шов получается, если вводить иглу противоположно лицевому трикотажному шву. В итоге создаются изнаночные рубчики. 1-3. Нижний ряд. Ввести иглу в первую, ранее один раз прошитую петлю снизу вверх, вывести через вторую (следующую) петлю сверху вниз. Вытянуть нить. 4-6. Верхний ряд. Ввести иглу в первую, ранее один раз прошитую петлю снизу вверх, вывести через вторую (следующую) петлю сверху вниз. Вытянуть нить. Повторять пункты 1-6, пока не будут прошиты все петли. A Garter Kitchener Stitch. "Up-down, down-up" Трикотажный шов в платочной вязке. "Вверх-вниз, вниз-вверх" A Garter Kitchener Stitch is a combination of the two previous ones: the basic and the reverse Kitchener Stitch, where one side creates a purl stitch, the other side shapes a knit stitch. We make Garter Stitch by knitting on both sides, but if you look only on one side, the Garter Stitch, in fact, consists of a series of knit and purl rows: one knit row, one purl row, etc. That is how we knit a Garter Stitch in the round knitting. And the task of the Garter Kitchener Stitch here is to recreate this situation. We recently used this stitch in the testing of the Dream pullover. In it, we grafted shoulders and sleeves just by this technique. If you are going to knit Dream pullover, this chapter is going to be very useful to you. Before you begin, make sure in which – top or bottom – row you need to get the purl stitch, and in which - the knit stitch. Move the needle up and down to create the first, move down and up – the second. *** Трикотажный шов в платочной вязке – это гибрид двух предыдущих: лицевого и изнаночного, где одна его сторона создает рубчик изнаночной глади, другая сторона формирует лицевую гладь. Платочку мы вяжем только лицевыми петлями с обеих сторон вязания, но если посмотреть только с одной стороны, платочная вязка, по сути, состоит из череды лицевых и изнаночных рядов: один лицевой ряд, один изнаночный ряд и т. д. Именно так мы вяжем платочку по кругу. И задача трикотажного шва здесь воссоздать эту ситуацию. Mы недавно использовали этот шов в тестировании джемпера Dream. В нем мы сшивали плечи и рукава как раз таким методом. Если вы будете его вязать, этот раздел вам очень пригодится. Перед началом убедитесь, в каком – верхнем или нижнем – ряду вам нужнен рубчик изнаночной глади, а в каком – лицевая петля. Движение иглой "вверх-вниз" создаст первый, движение "вниз-вверх" – вторую. 1-2. Bottom row. Insert the needle into the first, previously grafted once stitch from the bottom up, and pull through the second (next) stitch from top to bottom. Pull the yarn. 3-4. Top row. Insert the needle into the first, previously grafted once stitch from top to bottom, and pull through the second (next) stitch from the bottom up. Pull the yarn. Repeat steps 1-4 until you have grafted all the stitches together. *** 1-2. Нижний ряд. Ввести иглу в первую, ранее один раз прошитую петлю снизу вверх, вывести через вторую (следующую) петлю сверху вниз. Вытянуть нить. 3-4. Верхний ряд. Ввести иглу в первую, ранее один раз прошитую петлю сверху вниз, вывести через вторую (следующую) петлю снизу вверх. Вытянуть нить. Повторять пункты 1-4, пока не будут прошиты все петли. A Kitchener Stitch in Lace. How to Make Eyelets (Yarn Overs) Трикотажный шов в ажуре. Как "вышить" накиды Yarn Over (with right-leaning decrease) 1. The bottom row. Insert the needle into the first, previously grafted once stitch from top to bottom, and pull through the next two stitches from the bottom up. Pull the yarn. 2. The top row. Insert the needle into the first, previously grafted once stitch from top to bottom, and pull through the second (next) stitch from the bottom up. 3. The bottom row. Insert the needle into two previously grafted together stitches top to bottom. Pull the yarn. 4. The top row. Insert the needle into the first, previously grafted once stitch from top to bottom, and pull through the second (next) stitch from the bottom up. 5. Bottom row. Insert the needle into the next stitch from the bottom up and pull the yarn. 6. The top row. Insert the needle into the first, previously grafted once stitch from top to bottom, and pull through the second (next) stitch from the bottom up. 7. The bottom row. Insert the needle into the first, previously grafted once stitch from top to bottom, and pull through the second (next) stitch from the bottom up. 8. Continue grafting with a basic Kitchener Stitch until the next eyelet. *** Накид (убавление с наклоном вправо) 1. Нижний ряд. Ввести иглу в первую, ранее один раз прошитую петлю сверху вниз, вывести через две следующие петли снизу вверх. Вытянуть нить. 2. Верхний ряд. Ввести иглу в первую, ранее один раз прошитую петлю сверху вниз, вывести через вторую (следующую) петлю снизу вверх. 3. Нижний ряд. Ввести иглу в две ранее вместе прошитые петли сверху вниз. Вытянуть нить. 4. Верхний ряд. Ввести иглу в первую, ранее один раз прошитую петлю сверху вниз, вывести через вторую (следующую) петлю снизу вверх. 5. Нижний ряд. Ввести иглу в следующую петлю снизу вверх и вытянуть нить. 6. Верхний ряд. Ввести иглу в первую, ранее один раз прошитую петлю сверху вниз, вывести через вторую (следующую) петлю снизу вверх. 7. Нижний ряд. Ввести иглу в первую, ранее один раз прошитую петлю сверху вниз, вывести через вторую (следующую) петлю снизу вверх. 8. Продолжить сшивать лицевым трикотажным швом до следующего накида. Yarn Over (with left-leaning decrease) 1. The bottom row. Insert the needle into first, previously grafted once stitch of two from top to bottom. Pull the yarn. 2. The top row. Insert the needle into the first, previously grafted once stitch of two from top to bottom, and pull through the second (next) stitch from the bottom up. 3. The bottom row. Insert the needle into the third, then into the second stitch from the bottom up (swap). Skip the first, previously grafted once stitch. Pull the yarn. 4. The top row. Insert the needle into the first, previously grafted once stitch of two from top to bottom, and pull through the second (next) stitch from the bottom up. 5. With the next stitch in a bottom row, graft both stitches to be decreased at once, inserting the needle from top to bottom and pulling it through the next stitch from the bottom up. 6. Continue grafting with the basic Kitchener Stitch until the next eyelet. *** Накид (убавление с наклоном влево) 1. Нижний ряд. Ввести иглу в один раз прошитую петлю сверху вниз. Вытянуть нить. 2. Верхний ряд. Ввести иглу в первую, ранее один раз прошитую петлю сверху вниз, вывести через вторую (следующую) петлю снизу вверх. 3. Нижний ряд. Ввести иглу в третью, потом во вторую петлю снизу вверх (поменять местами). Первую ранее один раз прошитую петлю пропустить. Вытянуть нить. 4. Верхний ряд. Ввести иглу в первую, ранее один раз прошитую петлю сверху вниз, вывести через вторую (следующую) петлю снизу вверх. 5. Следующим стежком в нижнем ряду прошить обе убавляемые петли, вводя иглу сверху вниз и вывести через следующую петлю снизу вверх. 6. Продолжить сшивать лицевым трикотажным швом до следующего накида. Eyelets made with a Kitchener Stitch look no different from ones created with knitting needles. The lean of the decrease before and after the yarn over can be adjusted by yourself by analogy. *** Накиды, вышитые трикотажным швом, ничем не отличаются от накидов спицами. Наклон убавлений перед и после накидов можете регулировать сами по аналогии. From the previous chapters, we realized that if we need to create a knit stitch, the tapestry needle moves down then up; if we need to create a purl stitch, the needle moves up then down. Further, a Kitchener Stitch becomes much more complicated. We have to insert the needle into the transition stitches, "down-down" and "up-up", from under the stitch, and even in the opposite direction. The following chapters are devoted to the grafting of the stitch patterns such as “Seed”, simple 1x1 and 2x2 ribs, and mirrored twisted stitches. If you learn the essence of the Kitchener Stitch in these patterns, you can graft much more complex patterns, including cables and Japanese lace. *** Из предыдущих разделов мы поняли, что, если нам нужно создать лицевую петлю, игла двигается вниз-вверх; если нам нужно создать изнаночную петлю, игла двигается вверх-вниз. Далее трикотажный шов становится гораздо более сложным. Нам придется вводить иглу в переходные петли, "вниз-вниз" и "вверх-вверх", из под петли, и даже в противоположном направлении. Следующие разделы посвящены сшиванию таких узоров, как "Рис", простые резинки 1х1 и 2х2 и зеркальная скрещенная резинка. Если вы поймете суть трикотажного шва в этих узорах, вы сможете сшивать трикотажным швом гораздо более сложные узоры, включая араны и японский ажур. A Kitchener Stitch in a Simple 1x1 Rib. "Up-up, up-down, down-down, down-up" Трикотажный шов в резинке 1х1. "Вверх-вверх, вверх-вниз, вниз-вниз, вниз-вверх" Let's say you considered to lengthen the rib. The most seemingly simple solution is to separate the old shorter rib, knit the longer one, and graft it with a Kitchener Stitch, as was already presented at the beginning of this article. But in this case (see below), the main yarn is not suitable for the grafting – fluff can easily get shed away. Even more common are situations where the main stitch pattern is very complex, and then it is easier to lengthen the rib itself without removing it completely. And the very meaning of this chapter is to acquaint you with the transition stitches, running from the knit stitch to the purl stitch and vice versa, which are found in any rib, as well as in cables and other similar stitch patterns where the knit and purl stitches predominate. First, you separate a piece of the rib by pulling out the yarn; then knit a longer rib. Before pulling out the knitting needle, it is recommended to steam and press the rib still on the knitting needle to fix the stitches. The knitting needle can also be left and stitches removed one by one as we graft them. *** Скажем, вы задумали удлинить резинки. Самое, казалось бы, простое решение, это отделить короткие резинки, связать более длинные и пришить трикотажным швом, как было показано в начале этой статьи. Но в этом случае (см. ниже) основная пряжа не подходит для сшивания – может слезть весь пух. Еще чаще встречаются ситуации, когда основной узор очень сложный, и тогда легче удлинить резинку, не снимая ее полностью. И сам смысл этого подраздела ознакомить вас с переходящими петлями с лицевой петли на изнаночную и наоборот, которые встречаются в любой резинке, а также в аранах и других похожих узорах, где используются лицевые и изнаночные петли. Сначала вы отделяете часть резинки, вытаскивая нить; далее вяжете более длинную резинку. Перед тем, как вытащить спицу, рекомендовано резинку на спице отпарить, чтобы зафиксировать петли. Спицу также можно оставить, и снимать петли по мере их прошивания. A Kitchener Stitch in 1x1 rib is a combination of a basic, reverse, and a Transition Kitchener Stitch. The bottom row of the rib consists of knit and purl stitches; the top row is a little different. One leg of the stitch belongs to the knit stitch, the other leg belongs to the purl stitch and vice versa. Such stitches are named as transition stitches further. 1. The bottom row. Insert the needle into the first, previously grafted once knit stitch from top to bottom and pull through the second (next) purl stitch from top to bottom. Pull the yarn. 2. The top row. Insert the needle into the first, previously grafted once transition stitch from the bottom up and through the second (next) transition stitch from top to bottom. Both grafted legs here belong to the purl stitch of the top row. Pull the yarn. 3. The bottom row. Insert the needle into the first (or previously grafted once) purl stitch from the bottom up, and pull through the second (next) knit stitch from the bottom up. Pull the yarn. 4. The top row. Insert the needle into the first (or previously grafted once) transition stitch from top to bottom and pull through the second (next) stitch from bottom up. Both grafted legs here belong to the knit stitch of the top row. Pull the yarn. Repeat steps 1-4 until you have grafted all the stitches together. *** Трикотажный шов в резинке 1х1 – это гибрид лицевого, изнаночного и переходного трикотажного шва. Нижний ряд резинки состоит из лицевых и изнаночных петель; верхний ряд здесь немного отличается. Одна стенка петли принадлежит лицевой петле, вторая стенка – изнаночной петле и наоборот. Такие петли далее будем называть переходными. 1. Нижний ряд. Ввести иглу в первую, ранее один раз прошитую лицевую петлю сверху вниз, вывести через вторую (следующую) изнаночную петлю сверху вниз. Вытянуть нить. 2. Верхний ряд. Ввести иглу в первую, ранее один раз прошитую переходную петлю снизу вверх, вывести через вторую (следующую) переходную петлю сверху вниз. Обе прошитые стенки здесь принадлежат изнаночной петле верхнего ряда. Вытянуть нить. 3. Нижний ряд. Ввести иглу в первую, ранее один раз прошитую изнаночную петлю снизу вверх, вывести через вторую (следующую) лицевую петлю снизу вверх. Вытянуть нить. 4. Верхний ряд. Ввести иглу в первую, ранее один раз прошитую переходную петлю сверху вниз, вывести через вторую (следующую) петлю снизу вверх. Обе прошитые стенки здесь принадлежат лицевой петле верхнего ряда. Вытянуть нить. Повторять пункты 1-4, пока не будут прошиты все петли. A Kitchener Stitch in a Seed Stitch. "Up-up, up-down, down-down, down-up" Трикотажный шов в узоре "Рис". "Вверх-вверх, вверх-вниз, вниз-вниз, вниз-вверх" A Kitchener Stitch in a "seed" stitch pattern is a combination of a basic, reverse, and a Transition Kitchener Stitch. At its core, it is no different from a Kitchener Stitch for a 1x1 rib. 1. The bottom row. Insert the needle into the first, or previously grafted once knit stitch from the bottom up, and through the second (next) purl stitch from the bottom up. Pull the yarn. 2. The top row. Insert the needle into the first, or previously grafted once transition stitch from the bottom up and through the second (next) transition stitch from top to bottom. Pull the yarn. 3. The bottom row. Insert the needle into the first, or previously grafted once purl stitch from top to bottom, and pull through the second (next) stitch from top to bottom. Pull the yarn. 4. The top row. Insert the needle into the first, or previously grafted once transition stitch from top to bottom, and pull through the second (next) transition stitch from the bottom up. Pull the yarn. Repeat steps 1-4 until you have grafted all the stitches together. *** Трикотажный шов в узоре "рис" – это гибрид лицевого, изнаночного и переходного трикотажного шва. По своей сути он ничем не отличается от трикотажного шва для резинки 1х1. 1. Нижний ряд. Ввести иглу в первую, ранее один раз прошитую лицевую петлю снизу вверх, вывести через вторую (следующую) изнаночную петлю снизу вверх. Вытянуть нить. 2. Верхний ряд. Ввести иглу в первую, ранее один раз прошитую переходную петлю снизу вверх, вывести через вторую (следующую) переходную петлю сверху вниз. Вытянуть нить. 3. Нижний ряд. Ввести иглу в первую, ранее один раз прошитую изнаночную петлю сверху вниз, вывести через вторую (следующую) петлю сверху вниз. Вытянуть нить. 4. Верхний ряд. Ввести иглу в первую, ранее один раз прошитую переходную петлю сверху вниз, вывести через вторую (следующую) петлю снизу вверх. Вытянуть нить. Повторять пункты 1-4, пока не будут прошиты все петли. A Kitchener Stitch in a 2x2 Rib Трикотажный шов в резинке 2х2 A Kitchener Stitch in 2x2 rib is a combination of a basic, reverse, and a Transition Kitchener Stitch. The bottom row of the rib consists of knit and purl stitches; the top row here consists of knit and purl stitches, as well as of transition stitches, where one leg of the stitch belongs to the knit stitch, the other leg belongs to the purl stitch and vice versa. 1. The bottom row. Insert the needle into the first, previously grafted once knit stitch from top to bottom, and pull through the second (next) purl stitch from top to bottom. Pull the yarn. 2. The top row. Insert the needle into the first, or previously grafted once transition stitch from the bottom up and through the second (next) purl stitch from top to bottom. Pull the yarn. 3. The bottom row. Insert the needle into the first (or previously grafted once) purl stitch from the bottom up, pull through the second (next) purl stitch from top to bottom. Pull the yarn. 4. The top row. Insert the needle into the first, previously grafted once purl stitch from the bottom up and through the second (next) transition stitch from top to bottom. Pull the yarn. 5. The bottom row. Insert the needle into the first, previously grafted once purl stitch from the bottom up and through the second (next) knit stitch from the bottom up. Pull the yarn. 6. The top row. Insert the needle into the first, previously grafted once transition stitch from top to bottom and through the second (next) knit stitch from the bottom up. Pull the yarn. 7. The bottom row. Insert the needle into the first, previously grafted once knit stitch from top to bottom and through the second (next) knit stitch from the bottom up. Pull the yarn. 8. The top row. Insert the needle into the first, previously grafted once knit stitch from top to bottom and through the second (next) transition stitch from the bottom up. Pull the yarn. Repeat steps 1-8 until you have grafted all the stitches together. *** Трикотажный шов в резинке 2х2 – это гибрид лицевого, изнаночного и переходного трикотажного шва. Нижный ряд резинки состоит из лицевых и изнаночных петель; верхний ряд здесь состоит из лицевых и изнаночных петель, а также из переходных, в которых одна стенка петли принадлежит лицевой петле, вторая – изнаночной петле и наоборот. 1. Нижний ряд. Ввести иглу в первую, ранее один раз прошитую лицевую петлю сверху вниз, вывести через вторую (следующую) изнаночную петлю сверху вниз. Вытянуть нить. 2. Верхний ряд. Ввести иглу в первую, ранее один раз прошитую переходную петлю снизу вверх, вывести через вторую (следующую) изнаночную петлю сверху вниз. Вытянуть нить. 3. Нижний ряд. Ввести иглу в первую, ранее один раз прошитую изнаночную петлю снизу вверх, вывести через вторую (следующую) изнаночную петлю сверху вниз. Вытянуть нить. 4. Верхний ряд. Ввести иглу в первую, ранее один раз прошитую изнаночную петлю снизу вверх, вывести через вторую (следующую) переходную петлю сверху вниз. Вытянуть нить. 5. Нижний ряд. Ввести иглу в первую, ранее один раз прошитую изнаночную петлю снизу вверх, вывести через вторую (следующую) лицевую петлю снизу вверх. Вытянуть нить. 6. Верхний ряд. Ввести иглу в первую, ранее один раз прошитую переходную петлю сверху вниз, вывести через вторую (следующую) лицевую петлю снизу вверх. Вытянуть нить. 7. Нижний ряд. Ввести иглу в первую, ранее один раз прошитую лицевую петлю сверху вниз, вывести через вторую (следующую) лицевую петлю снизу вверх. Вытянуть нить. 8. Верхний ряд. Ввести иглу в первую, ранее один раз прошитую лицевую петлю сверху вниз, вывести через вторую (следующую) переходную петлю снизу вверх. Вытянуть нить. Повторять пункты 1-8, пока не будут прошиты все петли. A Kitchener Stitch in a Mirrored Twisted Stitches Трикотажный шов в зеркальных скрещенных петлях I also want to demonstrate a Kitchener Stitch in my stitch pattern of mirrored twisted stitches "Mini-Cables." The pattern is one-sided – on the wrong side, the purl stitches are not twisted. I think you can easily adapt this stitch for a regular one-sided twisted stitch rib by combining this chapter with the chapter on grafting a simple 1x1 rib. 1. The top row. Insert the needle from left to right behind both legs of the first twisted stitch of two. Pull the yarn. 2. The bottom row. Insert the needle into the first, previously grafted once twisted stitch from top to bottom, and through the second (next) twisted stitch from the bottom up. Both grafted stitches remain twisted. 3. The top row. Insert the needle from left to right behind both legs of the second twisted stitch. Pull the yarn. 4-5. Bottom row. Insert the needle into the first, previously grafted once stitch from top to bottom from under the left leg of a newly created twisted stitch and pull through the second (next) purl stitch from top to bottom. 6. The top row. Insert the needle into the first, previously grafted once transition stitch from the bottom up and through the second (next) transition stitch from top to bottom. Both grafted legs here belong to the purl stitch of the top row, and the stitch here creates the purl stitch. Pull the yarn. 7. The bottom row. Insert the needle into the first, previously grafted once purl stitch from the bottom up and pull through the second (next) twisted stitch from the bottom up. The second grafted stitch remains twisted. Pull the yarn. Repeat steps 1-8 until you have grafted all the stitches together. *** Хочу также показать трикотажный шов в моем узоре зеркальных скрещенных петель "Mini-Cables". Узор односторонний – на изнаночной стороне изнаночные петли обычные, нескрещенные. Думаю, этот шов вы легко приспособите для обычной скрещенной односторонней резинки, объединив этот раздел с разделом о сшивании резинки 1х1. 1. Верхний ряд. Ввести иглу слева направо за обе стенки первой скрещенной петли из двух. Вытянуть нить. 2. Нижний ряд. Ввести иглу в первую, ранее один раз прошитую скрещенную петлю сверху вниз, вывести через вторую (следующую) скрещенную петлю снизу вверх. Обе прошиваемые петли остаются скрещенными. 3. Верхний ряд. Ввести иглу слева направо за обе стенки второй скрещенной петли. Вытянуть нить. 4-5. Нижний ряд. Ввести иглу в первую, ранее один раз прошитую петлю сверху вниз из под только что проложенной нити (левая стенка новой скрещенной петли), вывести через вторую (следующую) изнаночную петлю сверху вниз. 6. Верхний ряд. Ввести иглу в первую, ранее один раз прошитую переходную петлю снизу вверх, вывести через вторую (следующую) переходную петлю сверху вниз. Обе прошитые стенки здесь принадлежат изнаночной петле верхнего ряда, а стежок формирует изнаночную петлю. Вытянуть нить. 7. Нижний ряд. Ввести иглу в первую, ранее один раз прошитую изнаночную петлю снизу вверх, вывести через вторую (следующую) скрещенную петлю снизу вверх. Вторая прошиваемая петля остается скрещенной. Вытянуть нить. Повторять пункты 1-8, пока не будут прошиты все петли. A Kitchener Stitch in a Counter Knitting Трикотажный шов во встречном вязании Until now, we have been analyzing cases when the knitting of both pieces ran in the same direction: from the bottom up (or top to bottom). A Kitchener Stitch is also possible in counter knitting when knitting from the bottom up meets knitting from top to bottom or knitting from left to right meets the knitting from right to left. I can give you two examples. 1. Еxtensions of the collar joins at the back neck. 2. We knit sideways, where both parts start from the sleeves and meet in the middle of the back. The Stockinette Stitch, the Garter Stitch, and the reverse Stockinette Stitch here could be grafted according to the same techniques. But there is a catch. The stitches here do not coincide by half the stitch, and as a result, we have a tiny shift. It is impossible to avoid it in any stitch pattern. While in the basic stitch patterns listed above, the shift is noticeable only at the edges, in any other more complex stitch pattern, the shift is far more detectable. It looks like this (see below), although the grafting techniques here remain the same. You need to accept that or choose other joining methods, for instance, the Three Needle Bind Off technique. *** До сих пор мы разбирали случаи, когда вязание обоих соединяемых полотен шло по одному направлению: снизу вверх (или сверху вниз). Трикотажный шов возможен и во встречном вязании, когда вязание "снизу вверх" соединяется с вязанием "сверху вниз" или вязание "слева направо" встречается с вязанием "справа налево". Могу привести два примера. 1. Продолжение воротника встречается на задней шее. 2. Мы вяжем поперечным вязанием, где обе части начинаются с рукавов и встречаются в середине спинки. Лицевая гладь, платочная вязка и изнаночная гладь сшивается по тем же принципам. Но есть одна загвоздка. Соединяемые петли здесь не совпадают на половину петли и в итоге мы имеем смещение. Избежать смещения невозможно, и, при любом узоре оно будет. В вышеперечисленных самых простых узорах смещение заметно лишь у краев; в любом другом более сложном узоре смещение заметно и выглядит примерно так (см. ниже), хотя принципы сшивания остаются такими же. С этим нужно свыкнуться или искать другие методы соединения, например, метод трех спиц. What was the purpose of all this long article? Now you can fix all too long, and too short hand made knitwear, including sleeves, with the length of which we most often get wrong. Now you can fix knitwear of which your children have already grown out and also change stretched out and lose ribs or hems to more dense and elastic ones. We have full closets of such projects in which "something is wrong," – I am sure of this. And no matter what stitch pattern you used there, now you have all the necessary knowledge. *** Какова была цель всей этой длинной статьи? Сейчас узнаете. Теперь вы сможете починить все слишком длинные и слишком короткие вязаные изделия, включая рукава, с длиной которых мы чаще всего ошибаемся. Починить вещи, из которых ваши дети уже выросли, а также поменять растянувшиеся рыхлые резинки на более плотные и упругие. Таких вязалок у нас, в которых "что то не так", есть полные шкафы – я в этом уверена. И неважно, какой узор был использован – теперь у вас есть все нужные знания.